KTC H27P6
KTC 27 Inch 4K Gaming Monitor H27P6 User Manual
Model: H27P6
1. Introduction
Thank you for choosing the KTC 27 Inch 4K Gaming Monitor H27P6. This manual provides essential information for setting up, operating, and maintaining your monitor. Please read this manual thoroughly before use to ensure proper functionality and to prevent damage.
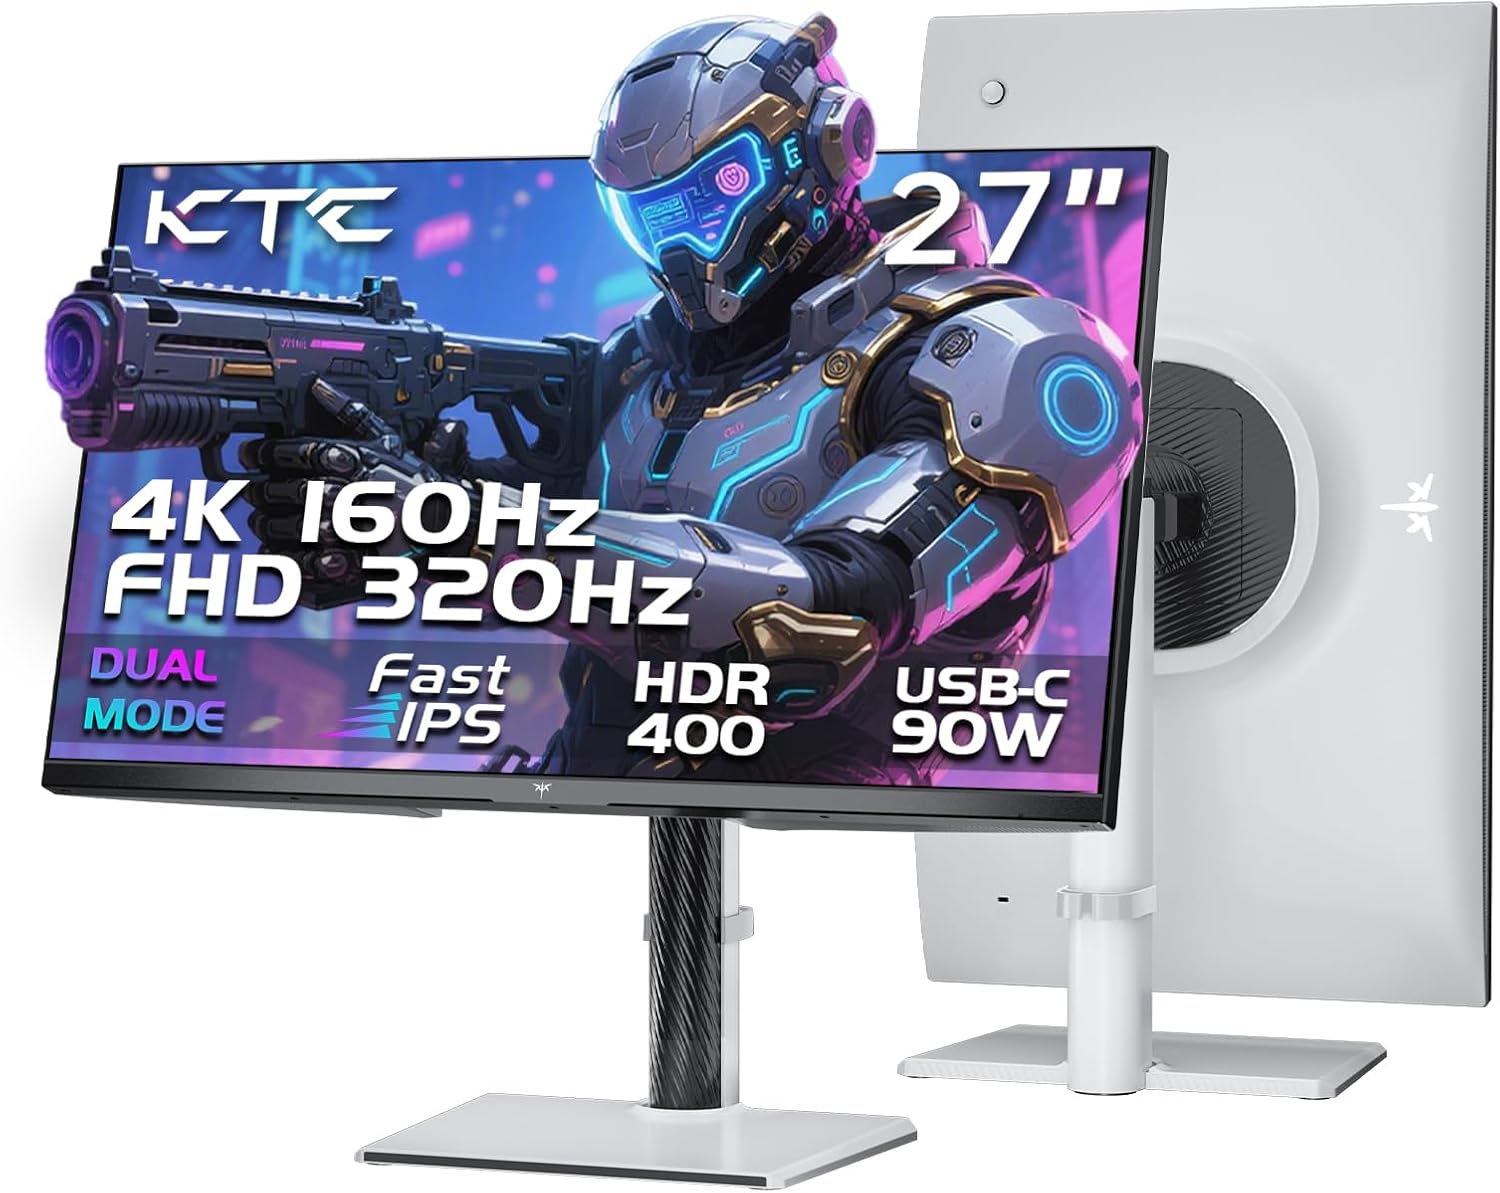
Image 1.1: Front and back view of the KTC 27 Inch 4K Gaming Monitor H27P6.
2. Safety Information
- Do not expose the monitor to rain or moisture to avoid fire or shock hazards.
- Do not open the monitor casing. There are no user-serviceable parts inside. Refer all servicing to qualified personnel.
- Place the monitor on a stable, flat surface.
- Ensure proper ventilation around the monitor. Do not block ventilation openings.
- Use only the power adapter and cables provided by the manufacturer.
- Unplug the monitor from the power outlet during lightning storms or when unused for extended periods.
3. Package Contents
Verify that all items are present in the package:
- 27" Dual Mode Monitor (1 unit)
- Monitor Stand (1 unit)
- Quick Start Guide (QSG) (1 unit)
- DP Cable (1 unit)
- Adapter (1 unit)
- Power Cord (1 unit)
4. Assembly and Setup
4.1. Monitor Stand Assembly
Follow the instructions in the Quick Start Guide to attach the monitor stand to the display panel. Ensure all screws are securely fastened.
4.2. VESA Mounting
The monitor supports 100x100mm VESA mounting for alternative mounting solutions (e.g., wall mounts, monitor arms). Remove the stand before attaching a VESA-compatible mount.
4.3. Ergonomic Adjustments
The monitor stand allows for various adjustments to optimize viewing comfort:
- Height Adjustment: Adjust the monitor height by up to 130mm.
- Pivot: Rotate the screen 90° (portrait mode).
- Swivel: Rotate the screen horizontally by ±45°.
- Tilt: Adjust the screen angle from -5° to 20°.

Image 4.1: Multi-angle adjustment capabilities and VESA mounting points.
4.4. Connecting Cables
Connect the necessary cables to the monitor and your computer or other devices. Ensure the monitor is powered off before connecting or disconnecting cables.
- Power: Connect the power adapter to the monitor's DC input and then to a power outlet.
- DisplayPort (DP 1.4): For high refresh rate and resolution, connect the provided DP cable to the monitor's DP port and your graphics card's DP port.
- HDMI (HDMI 2.1): Connect an HDMI cable to one of the monitor's HDMI 2.1 ports and your device's HDMI port.
- USB Type-C (90W PD 3.1): Connect a USB-C cable for video, data transfer, and up to 90W power delivery to compatible laptops.
- USB 3.0 Hub: Connect the USB-B (upstream) cable from the monitor to your computer to enable the monitor's USB 3.0 (downstream) ports.
- Earphone: Connect headphones or external speakers to the earphone jack.

Image 4.2: Overview of the monitor's various input and output interfaces.
5. Operating Instructions
5.1. Power On/Off and OSD Navigation
The monitor features a single joystick control located on the back for power and On-Screen Display (OSD) navigation. Push the joystick in to power on/off the monitor. Move the joystick up, down, left, or right to navigate the OSD menu and adjust settings.
5.2. Dual Mode Switching
The monitor supports dual display modes:
- 4K UHD (3840x2160) at 160Hz: Provides high resolution for detailed visuals.
- FHD (1920x1080) at 320Hz: Offers a higher refresh rate for competitive gaming.
Switch between these modes via the monitor's OSD settings or your graphics card control panel.

Image 5.1: Visual representation of the monitor's dual mode display capabilities.
5.3. Adaptive-Sync Technology
Adaptive-Sync technology synchronizes the monitor's refresh rate with your graphics card's frame rate, reducing screen tearing and stuttering for smoother gameplay. Enable this feature in the monitor's OSD and your graphics card settings.
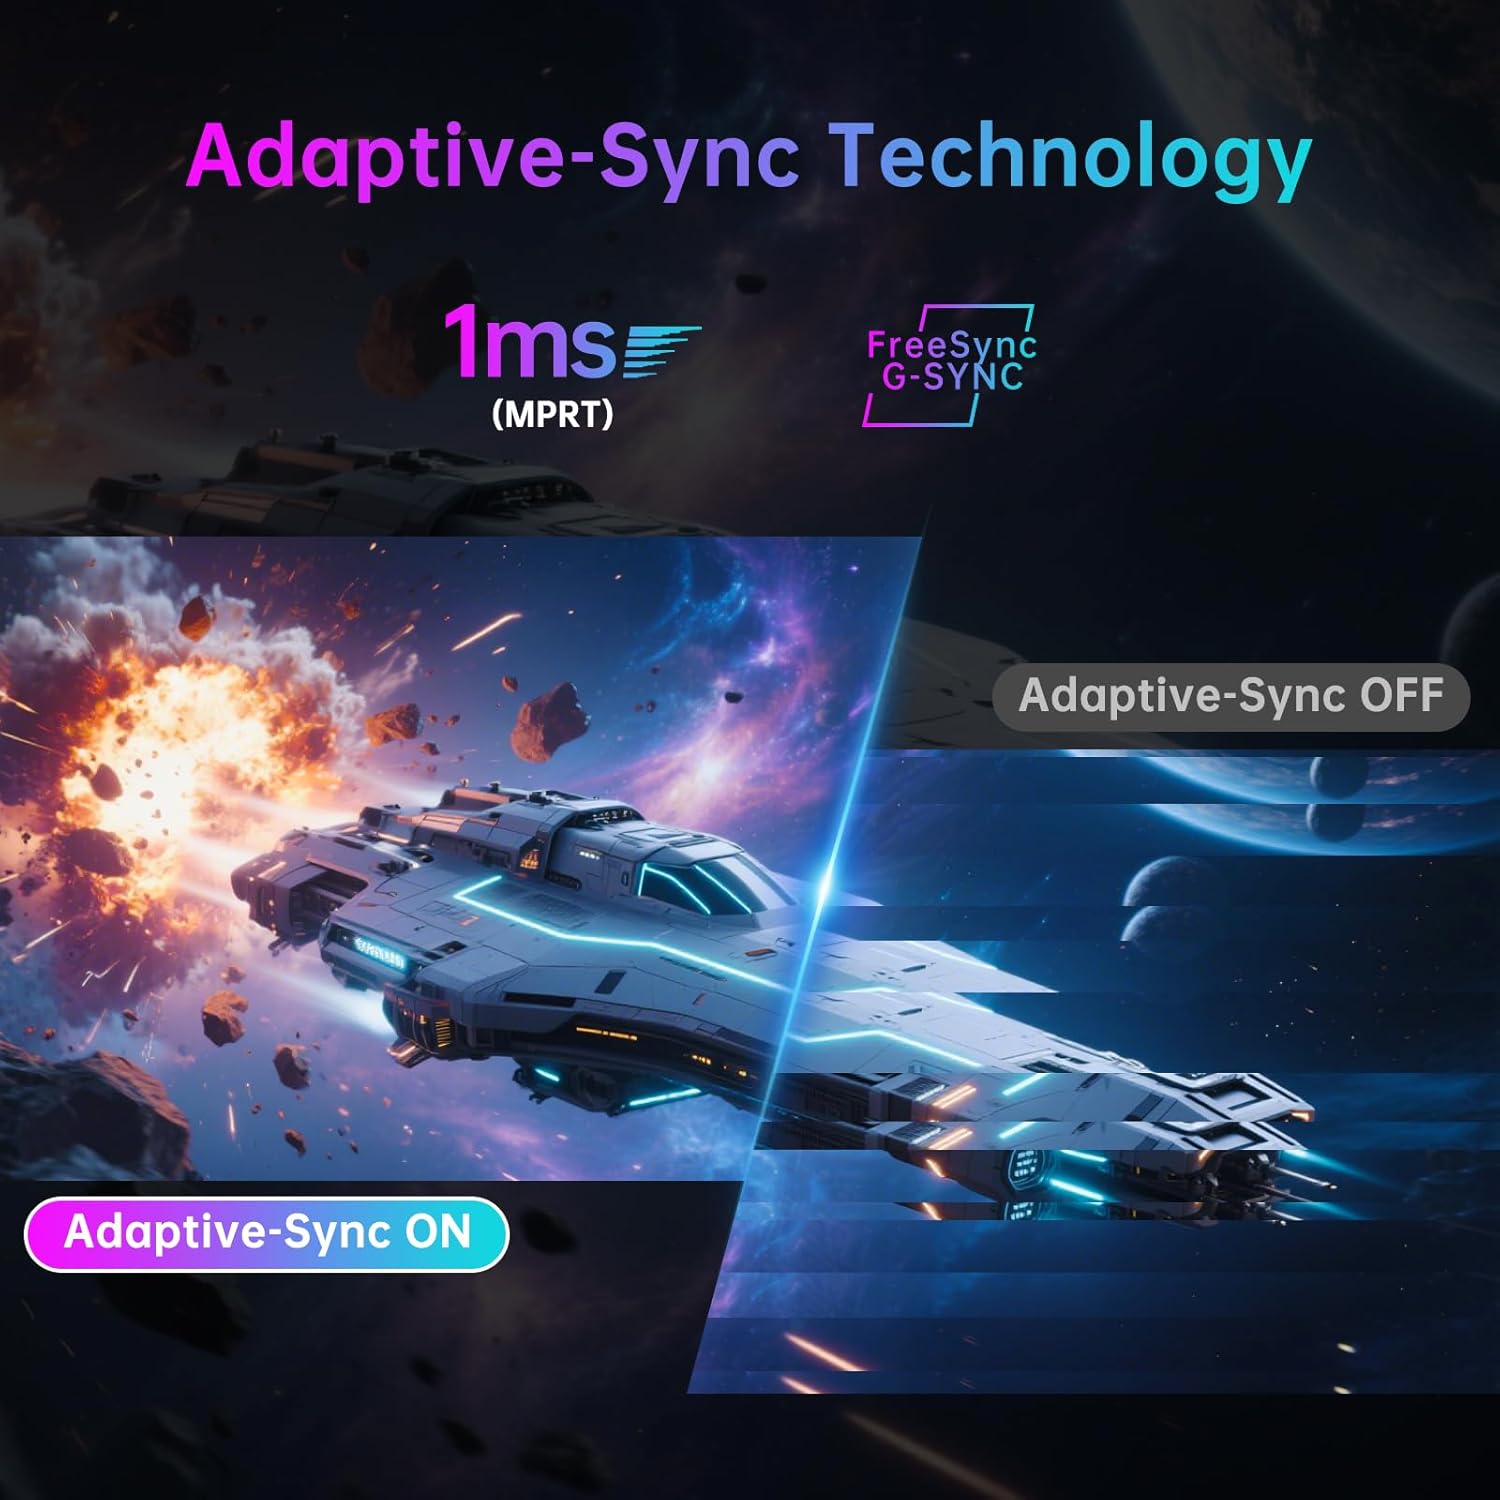
Image 5.2: Demonstration of Adaptive-Sync technology reducing screen tearing.
5.4. Display and Color Settings
The monitor features a Fast IPS panel and supports HDR400, providing accurate colors and contrast.
- Color Accuracy: Factory-calibrated with ΔE<2 for 97% DCI-P3 and 99% sRGB coverage.
- HDR400: Enhances contrast and color depth in compatible content.
- Brightness: 400 cd/m² (typical).
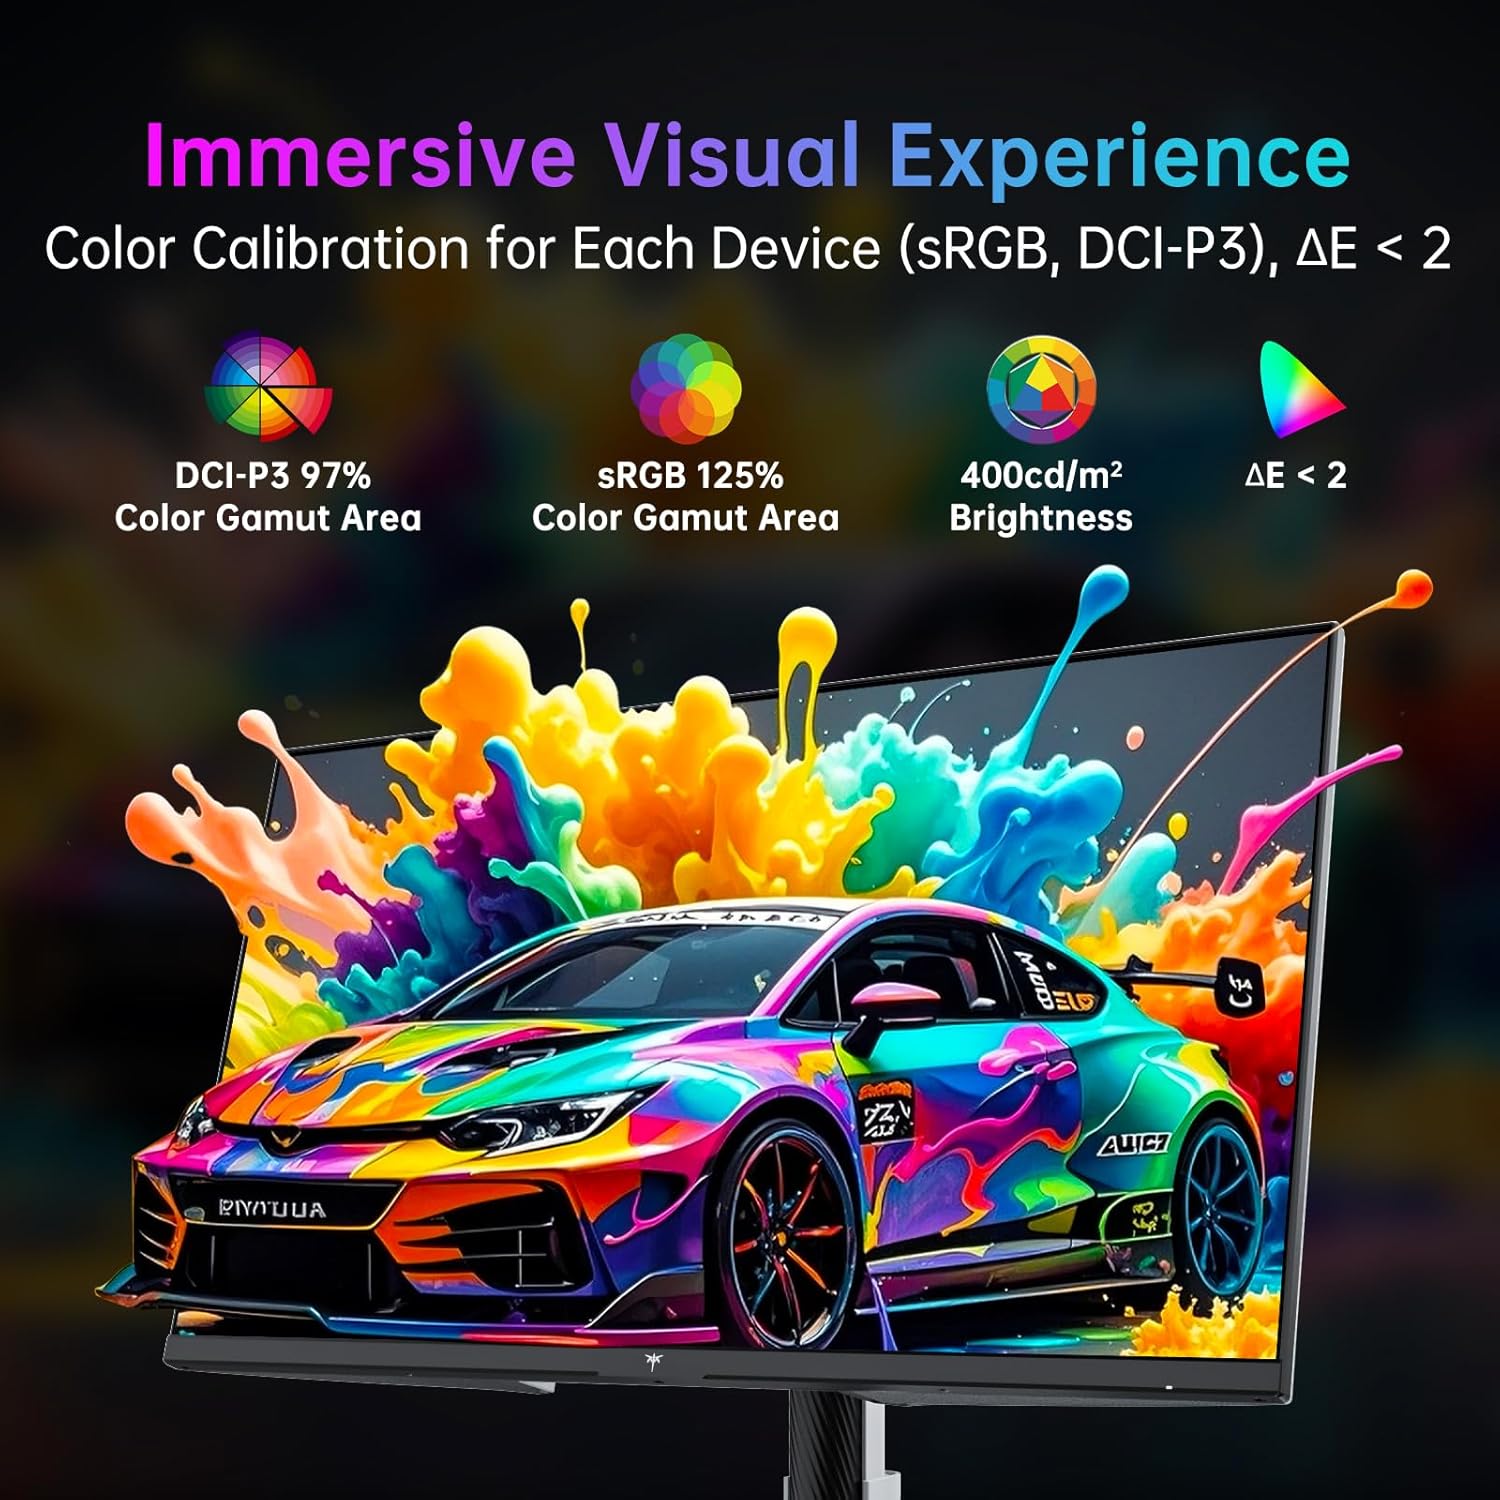
Image 5.3: Details on color calibration and display specifications.

Image 5.4: Visual difference with HDR400 enabled.
5.5. Game Plus Features
Access various gaming-specific features through the OSD:
- Timer: An on-screen timer for tracking in-game events.
- Crosshair: Customizable on-screen crosshairs for improved aiming.
- FPS Counter: Displays the current frames per second.

Image 5.5: Game Plus features for enhanced gaming experience.
5.6. KVM Support
The monitor includes KVM (Keyboard, Video, Mouse) switch functionality, allowing you to control multiple computers with a single set of keyboard and mouse connected to the monitor's USB ports. Switch between connected computers via the OSD.
5.7. Low Blue Light Mode
Activate the Low Blue Light mode in the OSD to reduce blue light emissions, which can help minimize eye strain during prolonged use.

Image 5.6: Visual explanation of hardware low blue light technology.
6. Maintenance
6.1. Cleaning the Monitor
- Always unplug the monitor before cleaning.
- Use a soft, lint-free cloth lightly dampened with water or a mild, non-abrasive screen cleaner.
- Do not spray cleaner directly onto the screen.
- Avoid using benzene, thinner, ammonia-based cleaners, or abrasive materials.
6.2. Storage
If storing the monitor for an extended period, disconnect all cables, pack it in its original packaging, and store it in a cool, dry place away from direct sunlight and extreme temperatures.
7. Troubleshooting
| Problem | Possible Cause | Solution |
|---|---|---|
| No power | Power cable not connected; Power outlet faulty; Monitor off. | Ensure power cable is securely connected. Test power outlet. Press joystick to power on. |
| No signal | Video cable not connected; Incorrect input source selected; Computer not outputting signal. | Check video cable connections. Select correct input source via OSD. Ensure computer is on and outputting video. |
| Image flickering or distortion | Loose video cable; Graphics card driver issue; Interference. | Secure video cable. Update graphics drivers. Check for nearby electronic devices causing interference. |
| Colors appear incorrect | Color settings misconfigured; Cable issue. | Reset color settings in OSD. Check video cable. |
| USB ports not working | USB upstream cable not connected. | Connect the USB-B (upstream) cable from the monitor to your computer. |
8. Specifications
| Feature | Detail |
|---|---|
| Brand | KTC |
| Model Number | H27P6 |
| Screen Size | 27 Inches |
| Resolution | 4K UHD 2160p (3840 x 2160 Pixels) |
| Refresh Rate | 160Hz (4K UHD), 320Hz (FHD) |
| Panel Type | Fast IPS |
| HDR Support | HDR400 |
| Color Gamut | 97% DCI-P3, 99% sRGB |
| Brightness | 400 Candela (cd/m²) |
| Aspect Ratio | 16:9 |
| Screen Surface | Matte |
| Connectivity | 2x HDMI 2.1, 1x DP 1.4, 1x USB Type-C (90W PD 3.1), 1x USB 3.0 (upstream), 2x USB 3.0 (downstream), Earphone Jack |
| VESA Compatibility | 100x100mm |
| Ergonomics | Height Adjustment (±130mm), Pivot (±90°), Swivel (±45°), Tilt (-5° to 20°) |
| Product Dimensions | 8 x 24 x 21 inches |
| Item Weight | 19.56 pounds |
9. Warranty and Support
For warranty information and technical support, please refer to the warranty card included with your product or visit the official KTC website. Keep your purchase receipt as proof of purchase for warranty claims.
You can also visit the KTC Store on Amazon for additional product information and support resources.
10. Product Videos
No official seller videos in the specified m3u8 format were found for embedding in this manual.
Related Documents - H27P6
 |
KTC H27P6 27-inch LCD Monitor User Guide and Specifications Comprehensive user guide for the KTC H27P6 27-inch LCD monitor, covering installation, setup, controls, technical specifications, and troubleshooting. Features high performance, multiple frequency scanning, and USB KVM functionality. |
 |
KTC M32P10 Display User Guide User guide for the KTC M32P10 display, covering safety precautions, installation, connection, operation, troubleshooting, and technical specifications. This 32-inch 4K UHD MiniLED gaming monitor features 144Hz refresh rate, 1ms response time, HDR1000, and multiple connectivity options including HDMI, DP, USB, and Type-C. |
 |
KTC H27P22S LCD Monitor User Guide User guide for the KTC H27P22S LCD Monitor, detailing installation, features, technical specifications, and troubleshooting. |
 |
KTC G27P6 OLED Monitor User Guide User guide for the KTC G27P6 OLED Monitor, detailing safety precautions, installation, connection, operation, troubleshooting, and technical specifications. |
 |
KTC M27P20 Pro Quick Start Guide - Setup and Operation Quick start guide for the KTC M27P20 Pro monitor, covering assembly, screen adjustments, port identification, and key functions. |
 |
KTC M27P20P Firmware Upgrade Tutorial A step-by-step guide for upgrading the firmware on the KTC M27P20P monitor. Includes instructions on preparing the USB drive, performing the upgrade, and resetting the monitor. |
Ask a question about this manual
Ask about setup, troubleshooting, compatibility, parts, safety, or missing instructions. Manuals+ will review the question and use this page’s manual context to help answer it.