1. Introduction
Thank you for choosing the AWithZ 9000W Battery Spot Welder. This portable and powerful spot welder is designed for making DIY battery packs, offering precise control and versatile operation. With its rotary knob, 100 adjustable gears, and dual pulse output, it provides efficient and reliable welding for various battery types and thicknesses. Please read this manual thoroughly before operation to ensure safe and optimal use of the device.
2. Safety Instructions
WARNING: Always follow these safety precautions to prevent injury or damage to the equipment.
- Ensure proper ventilation in your workspace to avoid inhaling fumes.
- Wear appropriate personal protective equipment (PPE), including safety glasses and gloves, to protect against sparks and heat.
- Do not touch the welding pens or the workpiece immediately after welding, as they will be hot.
- Keep the device away from flammable materials.
- Do not operate the welder with wet hands or in damp conditions.
- Always disconnect the power source before cleaning or performing maintenance.
- Keep out of reach of children.
- The device features intelligent thermal protection. If overheating is detected, the welding function will automatically halt. Allow the unit to cool down before resuming operation.
3. Package Contents
Verify that all items listed below are included in your package:
- UK1 Spot Welder Unit
- Spot Welding Pens (WP110)
- Foot Switch
- Nickel-plated Sheet Metal (sample roll)
- Charging Cable (USB)
- Spare Soldering Pins (1 pair)
- Sandpaper
- Instruction Manual

This image presents a comprehensive view of all items included in the product package, ensuring users have everything needed to start. It features the UK1 spot welder, WP110 pens, foot pedal, nickel coil, charging cable, a pair of spare soldering pins, sandpaper, and the instruction manual.
4. Product Overview
4.1 Components
- Main Unit: The core of the spot welder, housing the power supply, control circuitry, and digital display.
- Spot Welding Pens: Used to deliver the welding current to the workpiece. These are modular and replaceable.
- Foot Pedal: Provides hands-free operation for triggering welds, enhancing safety and precision.

This image displays the AWithZ 9000W Battery Spot Welder unit along with all the components provided in the package, including the main welding machine, the foot pedal for operation, the two spot welding pens, a roll of nickel-plated sheet metal, a USB charging cable, and a pair of spare soldering pins.
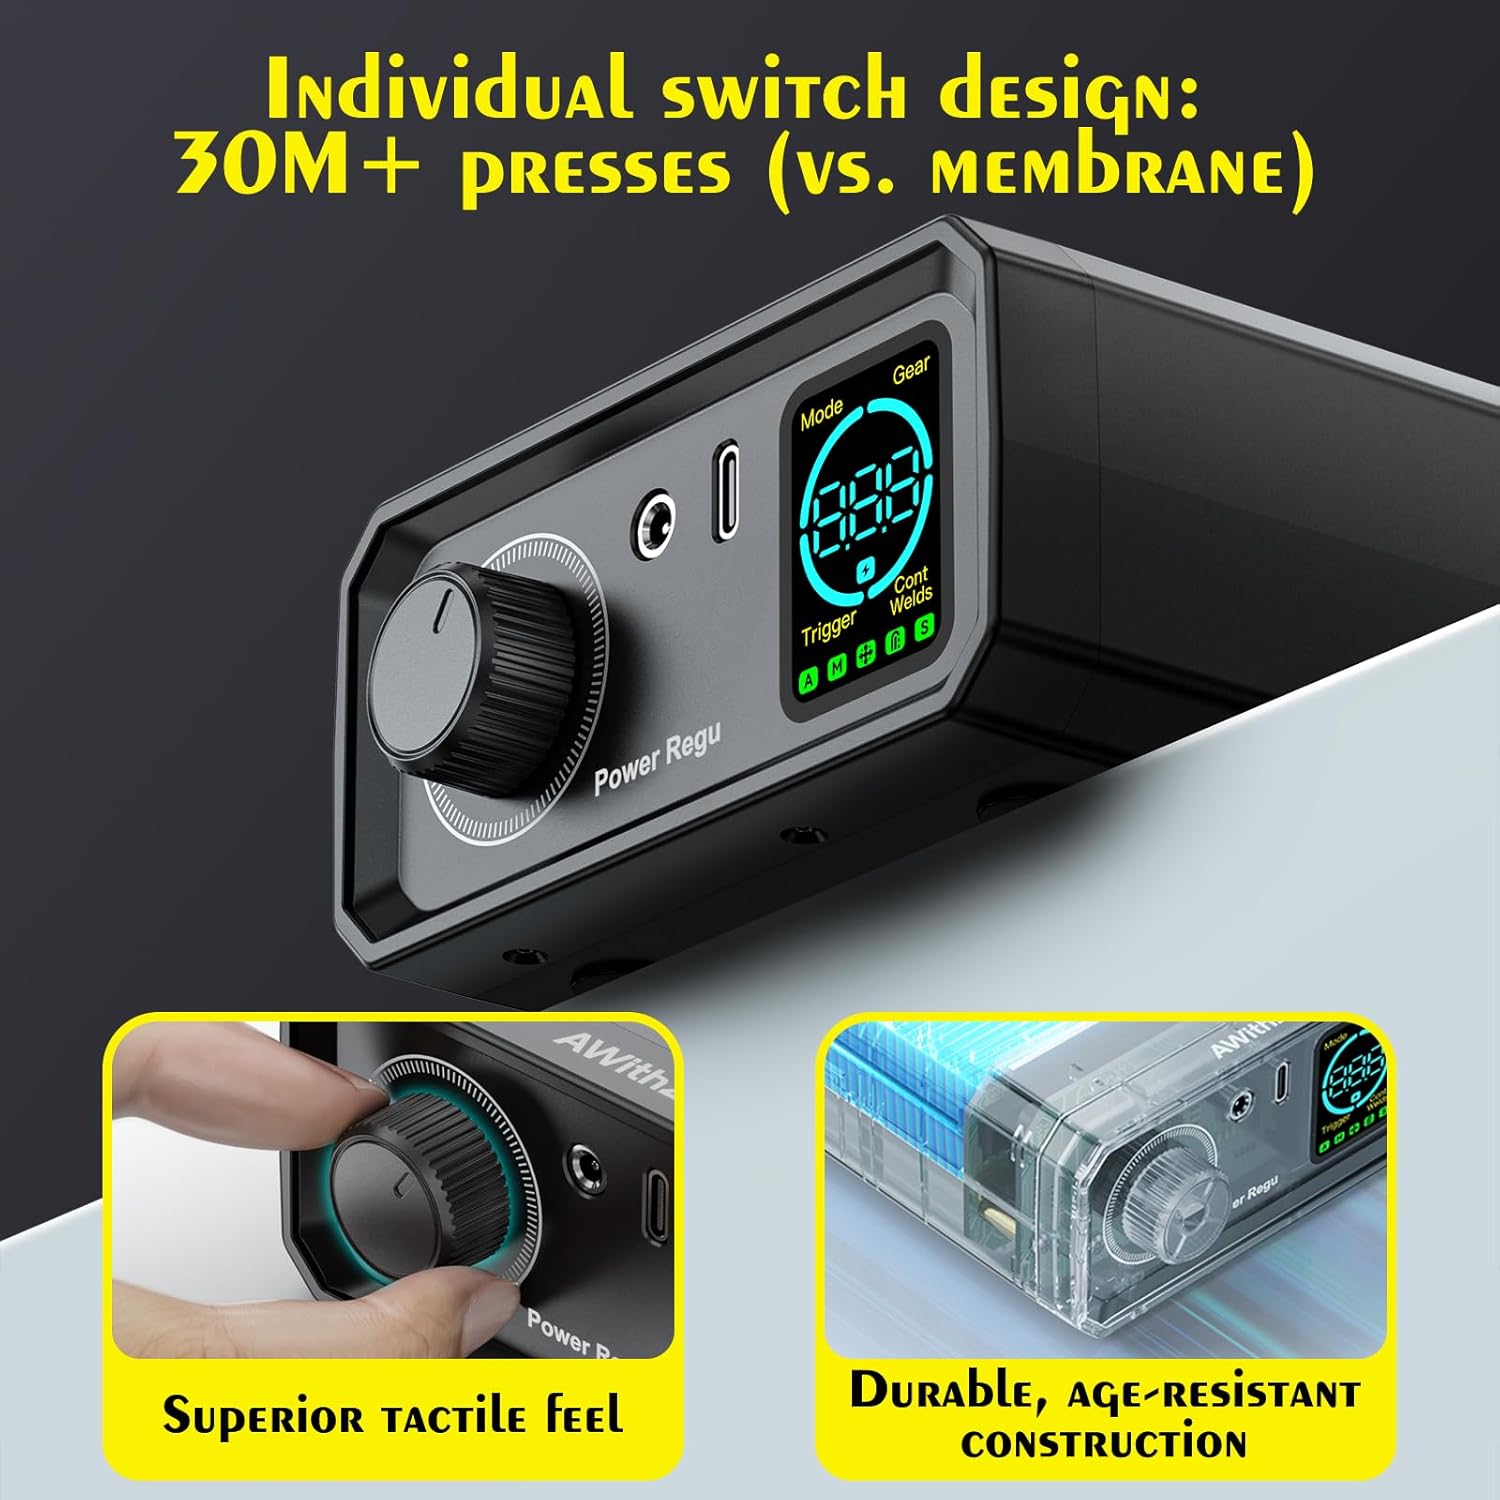
4.2 Controls and Display
- Rotary Knob: Used to adjust welding parameters such as Gear (power level), Trigger Time, Mode, and Number of continuous spot welds. Offers 100 levels of precision control.
- Digital Display: Shows the current welding settings and status indicators.
- Input/Output Ports: Connections for welding pens, foot pedal, and charging cable.

This image provides a detailed view of the spot welder's control panel, featuring the large rotary knob for precise adjustments and the clear digital display. The display shows current settings for Mode, Gear, Trigger status, and the number of continuous spot welds, allowing for intuitive operation.
5. Setup
- Charge the Unit: Before first use, connect the spot welder to a power source using the provided USB charging cable. Ensure the unit is fully charged for optimal performance.
- Connect Welding Pens: Insert the two spot welding pens into their respective ports on the front of the main unit. Ensure they are securely connected. The modular design allows for easy replacement of pens and pins if needed.
- Connect Foot Pedal (Optional): If using foot pedal operation, plug the foot switch into its designated port on the unit.
- Prepare Workpiece: Ensure the surfaces to be welded are clean and free of rust, oil, or other contaminants. Use the included sandpaper if necessary.

This diagram highlights the 'scientific interface location design' of the AWithZ spot welder. It shows how the front-opening design for the welding pens provides greater flexibility and prevents the machine from being dragged during use, compared to side-hole designs which can restrict movement and pull the unit.

This image illustrates the modular design of the UK1 spot welder, emphasizing that its welding pens and soldering pins are easily disassembled and replaced, enhancing durability and serviceability. It contrasts this with other typical spot welders that often have fixed components, making repairs or replacements difficult.
6. Operating Instructions
6.1 Power On/Off
To power on the device, press and hold the power button until the display illuminates. To power off, press and hold the power button again. The unit will automatically shut down if there is no operation for 8 minutes to conserve power.
6.2 Adjusting Welding Parameters
Use the rotary knob to navigate and adjust the following settings displayed on the screen:
- Gear (Power Level): Fine-tune the welding strength from 1 to 100. Lower settings are suitable for delicate tasks (e.g., phone/Bluetooth batteries), while higher settings are for robust jobs (e.g., cylindrical power cells).
- Trigger Time: Adjust the duration of the welding pulse.
- Mode: Select the appropriate welding mode for different battery types (e.g., cylindrical power batteries, mobile phone batteries, Bluetooth batteries).
- Number of Continuous Spot Welds: Set the number of pulses for each weld. The dual pulse output ensures clean and strong welds.
6.3 Welding Operation
- Select Trigger Method: The welder supports two types of trigger flexibility: hands-free foot pedal operation or precise hand control (manual trigger). Select your preferred method.
- Position Workpiece: Place the nickel strip or material to be welded onto the battery terminal.
- Apply Welding Pens: Firmly press the tips of both welding pens onto the nickel strip, ensuring good contact with the battery terminal underneath. Maintain even pressure.
- Initiate Weld:
- Foot Pedal Operation: Press the foot pedal to trigger the weld.
- Manual Trigger: The welder may have an automatic trigger feature when good contact is made, or a button on the pen/unit to initiate.
- Inspect Weld: After each weld, visually inspect the joint to ensure a strong and clean connection. Adjust settings as needed for optimal results.

This diagram provides a reference for the maximum thickness of various materials that can be spot welded, including copper, steel, iron, nickel-plated, and pure nickel sheets. It also features a graph demonstrating the dual pulse output, highlighting the deoxygenation pulse and the main welding pulse for strong, clean welds.
This visual demonstrates the wide applicability of the spot welder across different battery types and welding scenarios. It shows the welding of button-shaped battery assemblies, cylindrical battery packs, model aircraft battery packs, and the repair and assembly of electric tool battery packs, highlighting its versatility.
7. Maintenance
- Cleaning: Regularly clean the welding pen tips to remove any residue. Use a soft, dry cloth to wipe down the main unit. Do not use abrasive cleaners or solvents.
- Storage: Store the spot welder in a cool, dry place away from direct sunlight and moisture. Ensure all components are disconnected and neatly stored.
- Replaceable Parts: The welding pens and soldering pins are designed to be replaceable. If they become worn or damaged, replace them with genuine AWithZ spare parts to maintain optimal performance.
8. Troubleshooting
| Problem | Possible Cause | Solution |
|---|---|---|
| Welder not turning on | Low battery; Power button not held long enough | Charge the unit fully; Press and hold the power button for a few seconds. |
| Weak or inconsistent welds | Incorrect power setting (Gear); Poor contact with workpiece; Dirty welding tips; Material too thick | Increase the Gear setting; Ensure firm and even pressure on welding pens; Clean welding tips; Refer to material thickness guide. |
| Overheating warning / Unit shuts down | Intelligent thermal protection activated due to prolonged use or high power setting | Allow the unit to cool down completely before resuming operation. Reduce continuous welding cycles. |
| Foot pedal not working | Foot pedal not properly connected; Unit not in foot pedal mode | Ensure foot pedal is securely plugged in; Check display to confirm correct trigger mode is selected. |
9. Specifications
- Model: UK1
- Manufacturer: AWithZ
- Item Weight: 1.5 pounds
- Package Dimensions: 9.69 x 5.71 x 3.98 inches
- Power Source: Battery Powered
- Batteries: 2 Lithium Polymer batteries (included)
- Battery Cell Type: Lithium Polymer
- Adjustable Gears: 100 levels
- Weldable Thickness: 0.1-0.3mm (depending on material)
- Output: Dual Pulse
10. Warranty and Support
For warranty information and technical support, please refer to the product packaging or contact AWithZ customer service directly. Keep your purchase receipt as proof of purchase.


