1. Introduction
The TABWEE 10.1 Inch WiFi Digital Calendar, Model P10, is an interactive touchscreen display designed to streamline family organization. It integrates calendars, task management, meal planning, and digital photo frame capabilities into a single device. This manual provides detailed instructions to help you set up and utilize all features of your new digital calendar.

Image 1.1: The TABWEE Digital Calendar in use, showcasing its calendar interface and mobile app synchronization.
2. Safety Information
- Ensure the device is placed on a stable, flat surface to prevent accidental falls.
- Use only the provided power adapter. Using unauthorized adapters may damage the device and void the warranty.
- Keep the device away from water, moisture, and extreme temperatures.
- Do not attempt to open or repair the device yourself. Refer to qualified service personnel for any maintenance or repair needs.
- Keep out of reach of small children to prevent accidental ingestion of small parts or damage to the device.
3. Package Contents
Verify that all items are present in the package:
- TABWEE 10.1 Inch WiFi Digital Calendar (Model P10)
- Power Adapter
- User Manual (this document)
4. Product Overview
Familiarize yourself with the physical components of your TABWEE Digital Calendar.

Image 4.1: Technical details and component layout of the TABWEE Digital Calendar.
- Power On/Off Button: Located on the side for turning the device on or off.
- Volume Up/Down Buttons: Adjust the device's audio output.
- Light Sensor: Automatically adjusts screen brightness based on ambient light.
- Support Stand: Integrated stand for desk placement.
5. Setup
5.1 Initial Power-On
- Connect the provided power adapter to the device's power port.
- Plug the adapter into a standard electrical outlet. The device will automatically power on.
- Follow the on-screen prompts to select your language and region.
5.2 Network Connection
- On the initial setup screen, select your Wi-Fi network from the list.
- Enter your Wi-Fi password and tap 'Connect'.
- Ensure the device is connected to a stable internet connection for full functionality.
5.3 App Installation and Account Creation
To fully utilize the calendar's features, download and set up the companion 'eCalendar' app on your smartphone (iOS or Android).

Image 5.1: Steps for downloading and creating an account on the eCalendar app.
- Scan the QR code displayed on the calendar screen or search for 'eCalendar' in your device's app store (Google Play Store for Android, Apple App Store for iOS).
- Download and install the app.
- Open the eCalendar app and follow the prompts to create a new account or log in if you already have one.
- Agree to the User Agreement and Privacy Policy.
5.4 Device Linking
Link your TABWEE Digital Calendar to your eCalendar app account.

Image 5.2: Linking the calendar device to the eCalendar app and setting up your unique calendar email.
- In the eCalendar app, select the option to 'Add Device' or 'Activate a new eCalendar Frame'.
- Follow the on-screen instructions to pair your device. This may involve scanning a QR code displayed on the calendar or entering a pairing code.
- Once linked, you can set up your unique calendar email address within the app.
6. Operation
6.1 Basic Navigation
The TABWEE Digital Calendar features a responsive touchscreen. Navigate through menus and features by tapping, swiping, and pinching as you would on a tablet device.
6.2 Calendar Management
The core function of your device is calendar management, allowing for seamless synchronization and event organization.
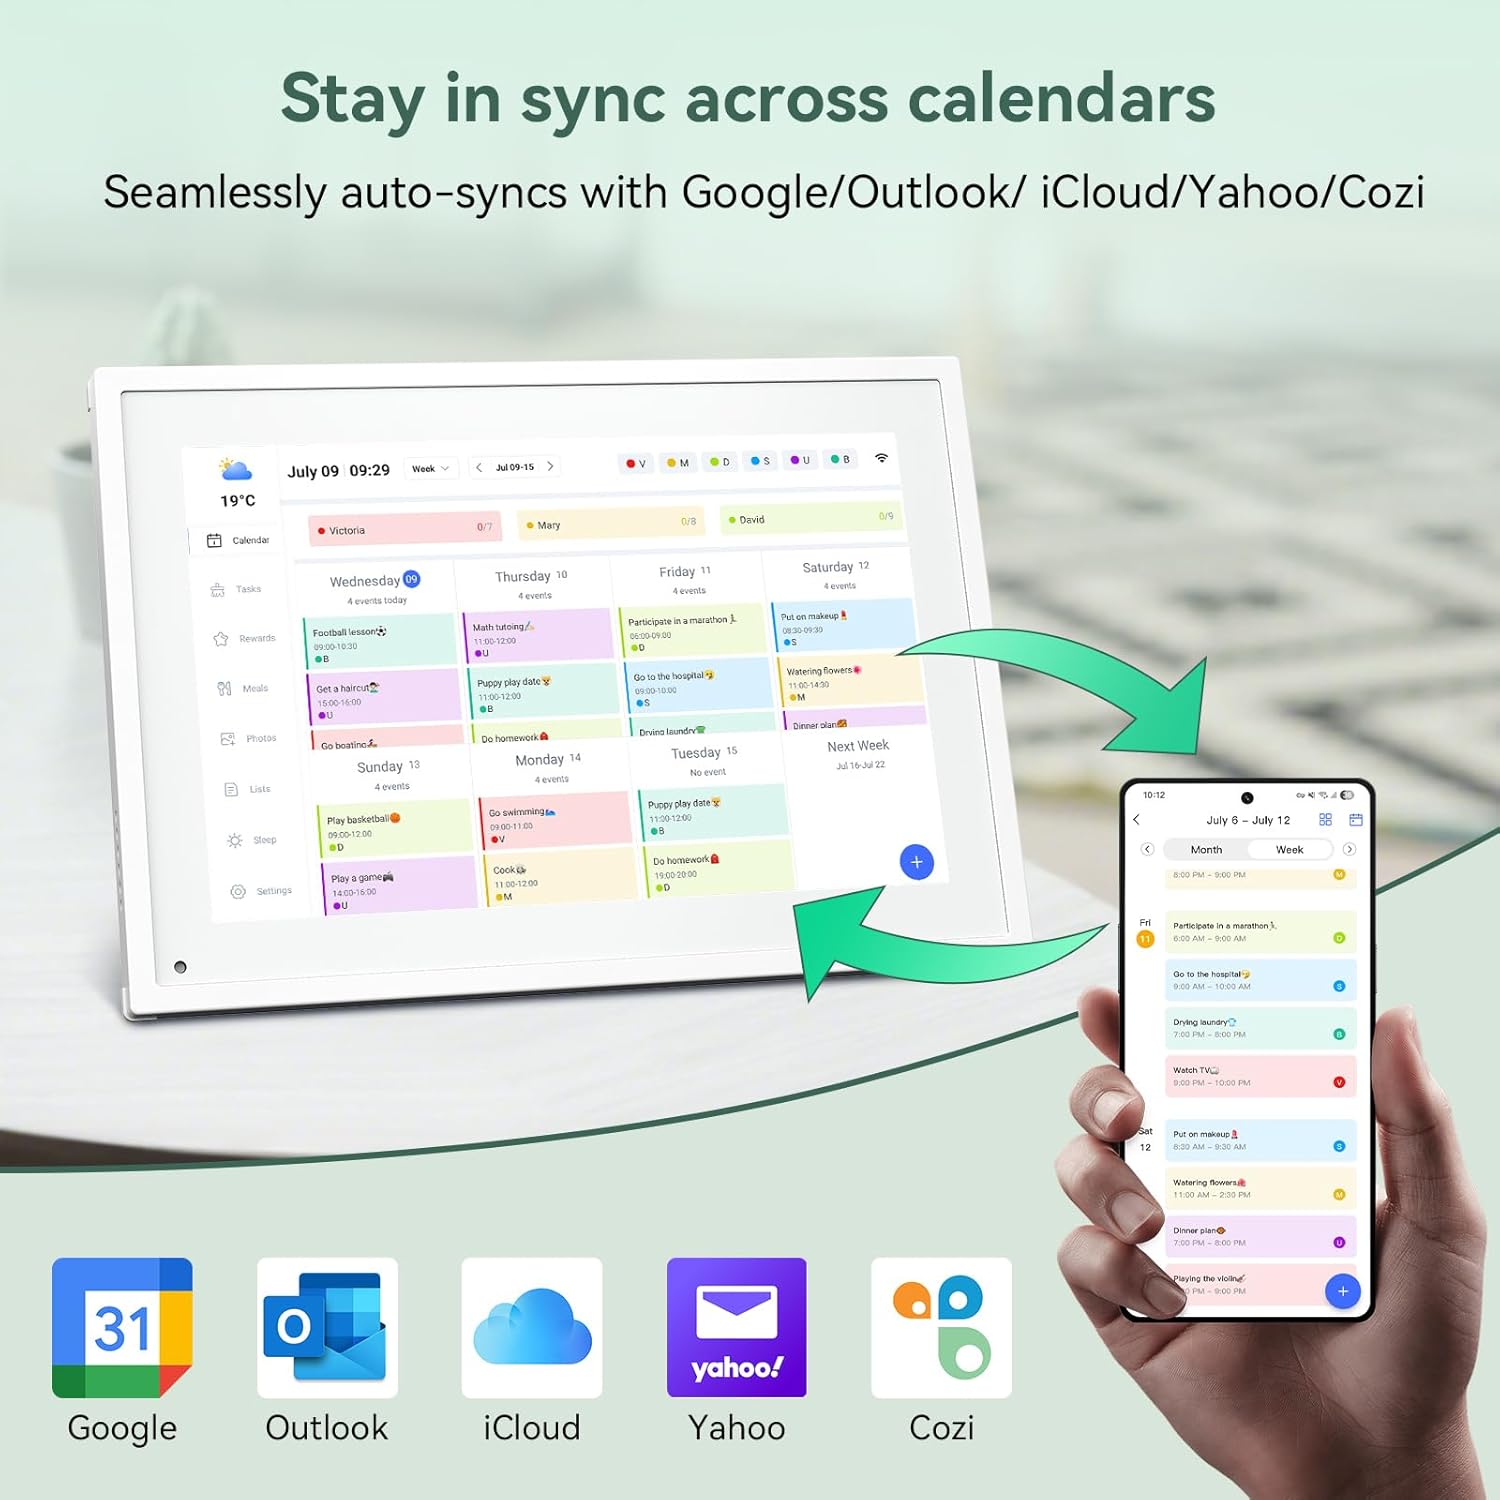
Image 6.1: Seamless synchronization of the digital calendar with various external calendar services.
- Syncing External Calendars: Within the eCalendar app settings, you can link your Google, Apple, Outlook, Yahoo, or Cozi calendars. Events from these linked accounts will automatically appear on your TABWEE Digital Calendar.
- Adding/Editing Events: Tap on a date or time slot on the calendar display or use the eCalendar app to add new events. You can specify event details, set reminders, and assign participants.
- Customized Views: Switch between day, week, or month views directly on the device or through the app.
6.3 Task Management (Chore Chart)
Organize tasks and chores for family members with a built-in reward system.
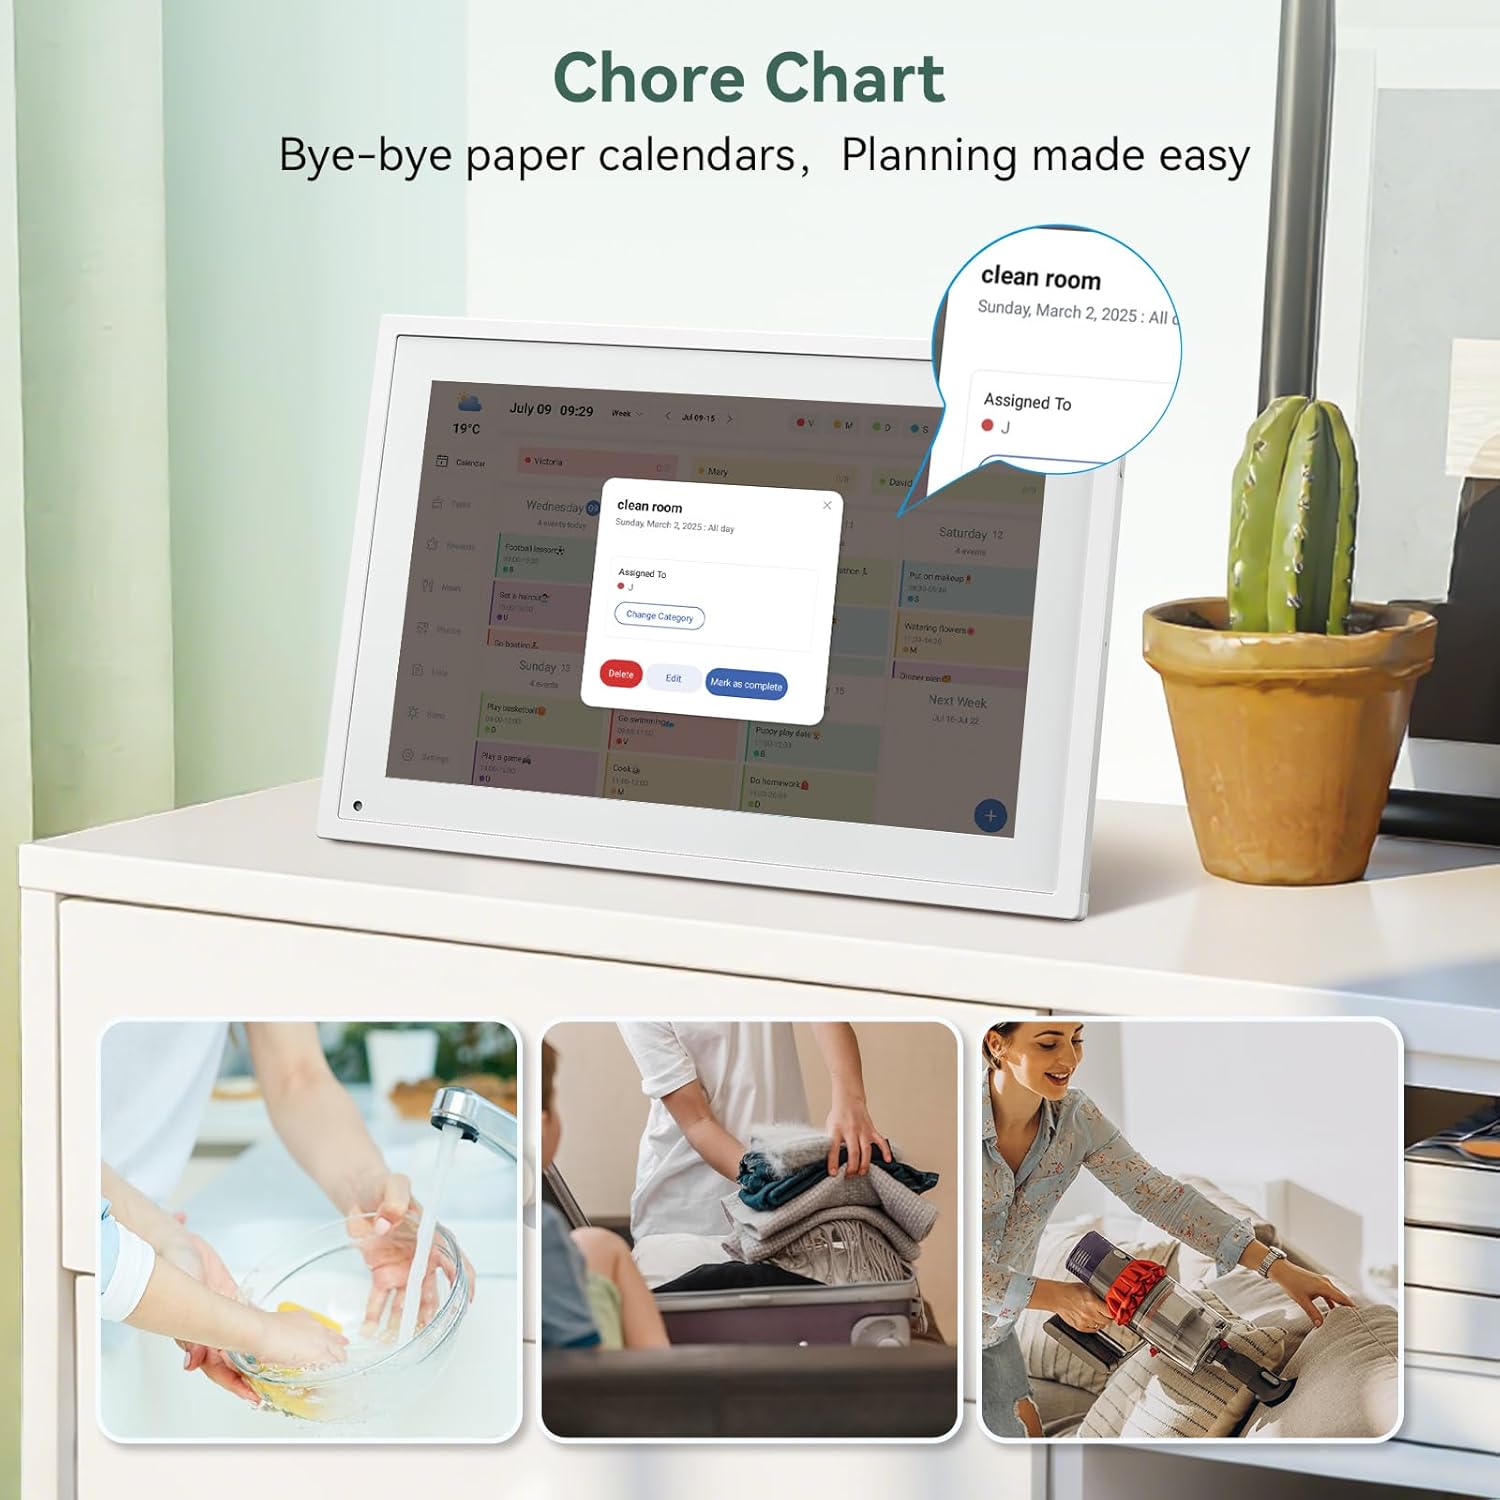
Image 6.2: Managing tasks and chores on the digital calendar interface.
- Creating Tasks: Use the 'Tasks' section on the device or app to create new tasks. Assign them to specific individuals, set due dates, and configure recurring tasks.
- Tracking Progress: Users can mark tasks as complete. The system tracks completion and can be configured to award points.
- Rewards System: Set up a star-point reward system within the app. Points earned from completed tasks can be redeemed for custom rewards, encouraging participation.

Image 6.3: The task manager and rewards interface, designed for engaging users.
6.4 Meal Planning
Plan your meals directly on the device or through the app.

Image 6.4: Visual meal planning interface on the digital calendar.
- Create Meal Plans: Access the 'Meals' section to plan breakfasts, lunches, dinners, and snacks for the week.
- Custom Recipes: Upload and store your favorite recipes.
- Grocery Lists: Generate grocery lists based on your meal plans.
6.5 Digital Photo Frame Functionality
The device can also function as a digital photo frame.

Image 6.5: The digital calendar switching between calendar and photo frame modes, in both landscape and portrait orientations.
- Switching Modes: Navigate to the 'Photos' section on the device or app to activate the digital photo frame mode.
- Uploading Photos: Upload your favorite memories directly from your smartphone via the eCalendar app.
- Orientation: The device supports both landscape and portrait orientations, automatically adjusting the display.
6.6 Other Features
The TABWEE Digital Calendar includes additional smart features to enhance usability.
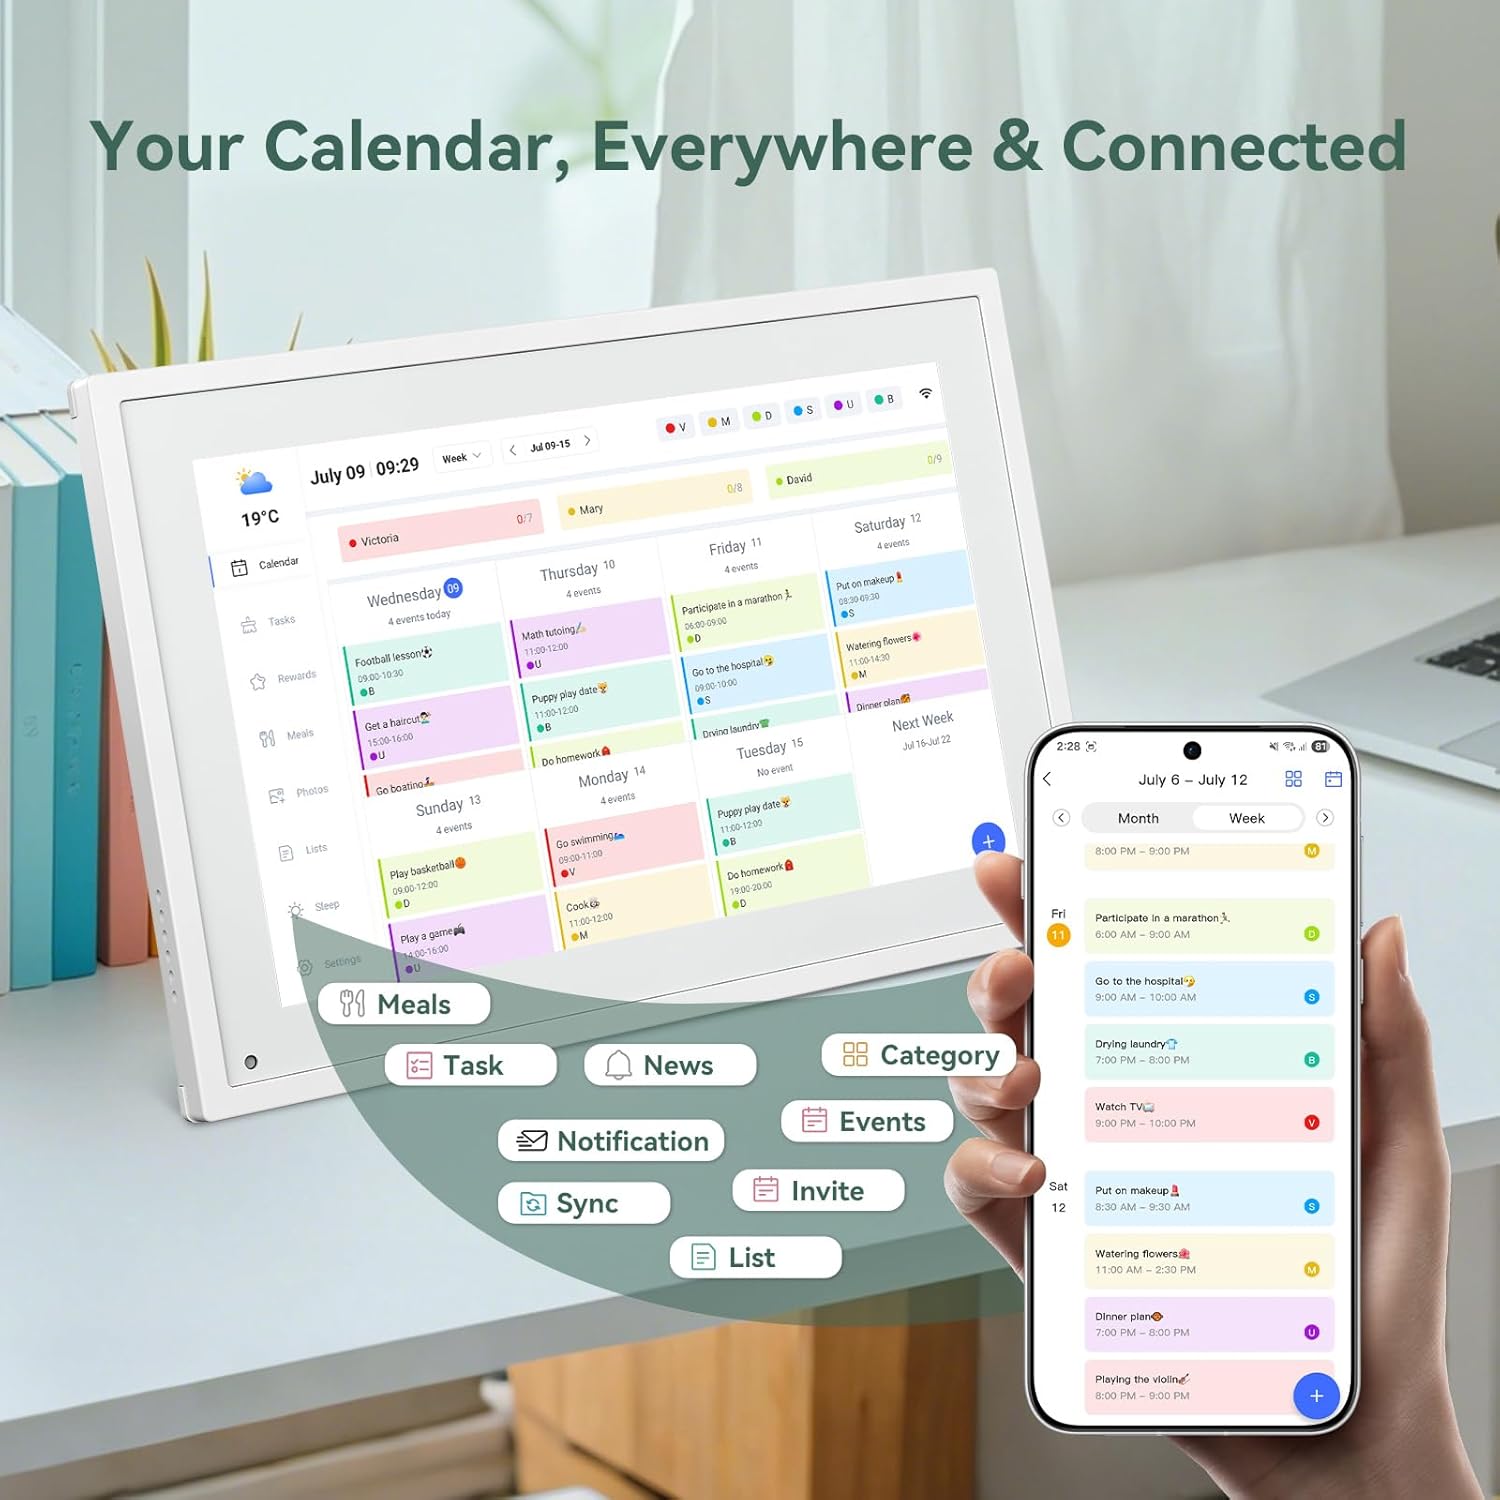
Image 6.6: Overview of smart features and app connectivity.
- Live Weather Forecasts: Displays current weather conditions and forecasts.
- Auto-Brightness: The built-in light sensor automatically adjusts screen brightness for optimal viewing.
- Sleep Mode: Configure scheduled times for the device to enter a low-power sleep mode.
- Custom Lists: Create and manage various lists (e.g., shopping lists, packing lists).
- Color Coding: Assign different colors to events or tasks for easy visual identification.
7. Maintenance
7.1 Cleaning the Device
- Gently wipe the screen with a soft, lint-free cloth. For stubborn smudges, slightly dampen the cloth with water or a screen-cleaning solution.
- Avoid using harsh chemicals, abrasive materials, or aerosol sprays directly on the device.
- Ensure the device is powered off and unplugged before cleaning.
7.2 Software Updates
The device may receive periodic software updates to improve performance and add new features. Ensure your device is connected to Wi-Fi to receive these updates. You will typically be notified on-screen when an update is available.
8. Troubleshooting
| Problem | Possible Cause | Solution |
|---|---|---|
| Device does not power on. | Power adapter not connected or faulty. | Ensure the power adapter is securely connected to the device and a working power outlet. |
| Cannot connect to Wi-Fi. | Incorrect password, out of range, or network issue. | Verify Wi-Fi password. Move the device closer to the router. Restart your router. |
| Calendar events are not syncing. | App not linked, external calendar not connected, or internet issue. | Check app-device linking. Ensure external calendars are correctly linked in the eCalendar app. Verify internet connection. |
| Screen is unresponsive. | Temporary software glitch. | Restart the device by holding the power button until it turns off, then power it back on. |
9. Specifications
| Feature | Detail |
|---|---|
| Model Number | P10 |
| Screen Size | 10.1 Inches |
| Display Type | Touchscreen |
| Connectivity | WiFi |
| Product Dimensions | 10.51 x 0.91 x 7.32 inches (26.7 x 2.3 x 18.6 cm) |
| Item Weight | 2.58 pounds (1.17 kg) |
| Mounting Type | Desk Mount (not wall-mountable) |
| Power Source | Plug-in (no internal battery) |
| Color | White |
10. Warranty and Support
The TABWEE Digital Calendar comes with a standard manufacturer's warranty. For specific warranty terms and conditions, please refer to the warranty card included in your product packaging or visit the official TABWEE website.
For technical support, troubleshooting assistance, or any inquiries regarding your product, please contact TABWEE customer service through their official website or the contact information provided in your product documentation.


