1. Introduction
Thank you for choosing the PARKSIDE Pneumatic Hose Reel. This manual provides essential information for the safe operation, installation, and maintenance of your new hose reel. Please read these instructions carefully before use and keep them for future reference. Proper use and maintenance will ensure the longevity and optimal performance of the product.
2. Safety Instructions
Always observe the following safety precautions to prevent injury or damage:
- Maximum Pressure: Do not exceed the maximum operating pressure of 10 bar (145 PSI). Exceeding this pressure can cause the hose or reel to burst, leading to serious injury.
- Hose Inspection: Before each use, inspect the hose for any signs of wear, cuts, bulges, or damage. Do not use if the hose is damaged.
- Connections: Ensure all connections are secure and free of leaks. Use appropriate thread sealant if necessary.
- Personal Protective Equipment: Always wear appropriate eye protection when working with compressed air.
- Children and Bystanders: Keep children and bystanders away from the work area.
- Unintended Rewind: Be aware that the hose rewinds automatically. Maintain a firm grip on the hose during retraction to prevent uncontrolled movement.
- Mounting: Ensure the hose reel is securely mounted to a sturdy wall or structure capable of supporting its weight and the forces exerted during use.
- Storage: Store the hose reel in a clean, dry place when not in use.
3. Package Contents
Please check that all items are present and undamaged:
- PARKSIDE Pneumatic Hose Reel (with 10m air hose and 3m connection hose)
- Wall mounting hardware (2 screws, 2 dowels)
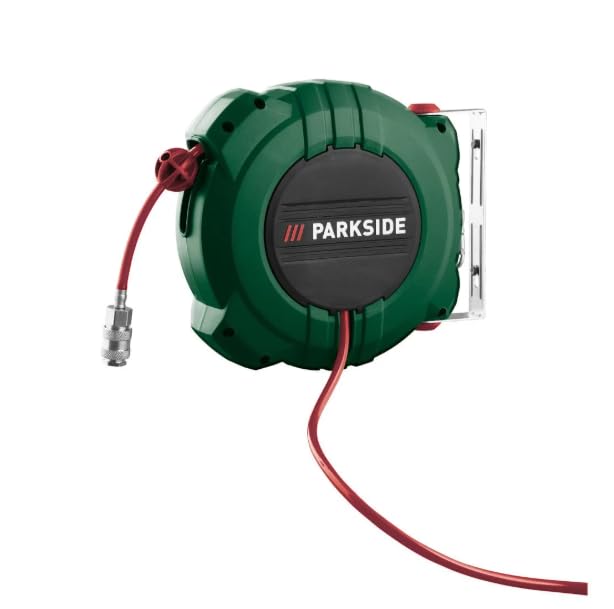
4. Product Overview
The PARKSIDE Pneumatic Hose Reel is designed for convenient and organized management of your compressed air hose. Key features include a 10-meter air hose, a 3-meter compressor connection hose, automatic rewind, and a 180° swivel housing for flexible use.


5. Setup and Installation
The hose reel can be mounted to a wall or hung using its integrated carabiner.
5.1 Wall Mounting
- Choose a suitable, sturdy wall location that can support the weight of the hose reel and the forces applied during use.
- Mark the positions for the two mounting holes using the wall bracket as a template.
- Drill holes of appropriate size for the provided dowels.
- Insert the dowels into the drilled holes.
- Secure the wall bracket to the wall using the provided screws. Ensure it is firmly attached.
- Attach the hose reel housing to the wall bracket. The housing is designed to be removable from the wall bracket without tools, allowing for easy relocation or storage.
- The hose reel housing can swivel 180° on the wall bracket, providing flexibility in directing the hose.
5.2 Connecting to a Compressor
- Connect the 3-meter compressor connection hose (with ¼” coupling) to your air compressor's output.
- Ensure the connection is tight and secure to prevent air leaks.
- Verify that the compressor's operating pressure does not exceed 10 bar.
6. Operating Instructions
6.1 Extending the Hose
Gently pull the air hose out to the desired length. You will hear clicking sounds as the hose extends. These clicks indicate the locking mechanism engaging.
6.2 Locking the Hose
To lock the hose at a specific length, pull it out slightly past the desired point, then allow it to retract slowly until the locking mechanism engages. The hose will stop at that position.
6.3 Automatic Rewind
To retract the hose, pull it out briefly (approximately 10-20 cm) until the locking mechanism disengages. Then, guide the hose back into the reel, maintaining a firm grip to control its speed and prevent whipping.
6.4 Connecting Pneumatic Tools
The 10-meter air hose is equipped with a ¼” quick coupling. Simply connect your pneumatic tools to this coupling for use.
7. Maintenance
Regular maintenance ensures the safe and efficient operation of your hose reel.
- Cleaning: Wipe the hose reel housing and hose with a damp cloth to remove dust and debris. Do not use harsh chemicals or abrasive cleaners.
- Hose Inspection: Periodically inspect the entire length of the air hose for any signs of wear, cracks, punctures, or damage. Replace the hose if any damage is found.
- Connection Checks: Regularly check all air connections for tightness and leaks. Leaks can reduce efficiency and put strain on your compressor.
- Mounting Security: Ensure the wall mounting hardware remains secure. Tighten screws if necessary.
8. Troubleshooting
If you encounter issues with your hose reel, refer to the following common problems and solutions:
- Hose does not retract: Ensure the hose is pulled out briefly to disengage the locking mechanism. Check for any obstructions preventing retraction.
- Hose does not lock: Ensure the hose is pulled out far enough for the locking mechanism to engage. The mechanism may be dirty or obstructed.
- Air leaks: Check all connections (compressor to reel, reel to tool) for tightness. Inspect the hose for punctures or damage.
- Low air pressure at tool: Verify the compressor is operating correctly. Check for leaks in the hose or connections. Ensure the hose is fully extended and not kinked.
If problems persist, contact customer support.
9. Specifications
| Feature | Specification |
|---|---|
| Air Hose Length | Approx. 10 m |
| Compressor Connection Hose Length | Approx. 3 m |
| Hose Wall Thickness | Approx. 0.8 mm |
| Maximum Operating Pressure | 10 bar (145 PSI) |
| Flow Rate | Approx. 1.03 m³/h |
| Compressed Air Connection Size | ¼" |
| Material | Steel, Plastic, Stainless Steel |
| Dimensions (L x W x H) | Approx. 25.2 x 23.4 x 10.1 cm |
| Weight | Approx. 1.7 kg |
10. Warranty and Support
This product is manufactured to high-quality standards. In the unlikely event of a defect or malfunction, please refer to your purchase documentation for warranty details. For technical support or inquiries, please contact the retailer or manufacturer directly. Keep your proof of purchase for any warranty claims.