
1. Introduction
The ANNKE 32CH H.265 Pro+ 3K Lite Digital Video Recorder (DVR) is a versatile surveillance solution designed for both home and business security. This hybrid DVR supports various camera types, including TVI, AHD, CVI, CVBS, and IP cameras, offering comprehensive monitoring capabilities. It features advanced H.265 Pro+ compression for efficient storage, intelligent human and vehicle detection, and convenient remote access.
This manual provides detailed instructions for setting up, operating, maintaining, and troubleshooting your ANNKE DVR system.

Image: Overview of the ANNKE 32CH 3K Lite 5-in-1 Hybrid DVR system.
2. What's in the Box
Upon opening your ANNKE DVR package, please verify that all the following items are included:
- 1 x 32CH DVR (No Hard Drive Included)
- 1 x USB Mouse
- 1 x Power Adapter
- 1 x User's Manual For DVR
- 1 x HDMI Cable
- 1 x Network Cable

Image: All components included in the ANNKE DVR package.
Note: Hard drive is not included and must be purchased separately if 24/7 recording is desired.
Video: An unboxing video demonstrating the contents of the ANNKE 32CH 3K Lite DVR package.
3. Setup
3.1 Physical Connections
Before powering on the DVR, ensure all necessary connections are made:
- Connect your surveillance cameras to the BNC video input ports on the back of the DVR.
- Connect a monitor to the HDMI or VGA output port for local viewing.
- Connect the USB mouse to one of the USB ports for system navigation.
- Connect the network cable from the DVR's LAN port to your router or network switch for remote access.
- Connect the power adapter to the DVR's power input and then to a power outlet.

Image: Front and rear views of the ANNKE DVR, highlighting various input and output ports for connection.
Image: Detailed diagram showing the dimensions and labeled ports on the ANNKE DVR.
Video: A guide on how to connect an ANNKE NVR system, applicable to DVR setup for initial connections.
3.2 Initial Configuration
Upon first power-on, the DVR will guide you through an initial setup wizard:
- Set Account Password: Create a strong password for the 'admin' user. This is crucial for security. It is recommended to fill in a password reminder in case you forget the password. The device will not work without activation.
- Time Zone & Date Format: Select your local time zone and preferred date format.
- Network Configuration: The system typically uses DHCP by default. Ensure the DVR obtains an IP address from your network.
- Hard Disk Formatting: If you have installed a new hard drive, you will need to format it for the DVR to recognize and use it for recording. Follow the on-screen prompts to format the hard disk. If your recorder does not have a hard disk, you can directly click 'Next'.
- Remote Access (P2P): Enable the P2P (Peer-to-Peer) function for easy remote access via the mobile app. You may need to enable Stream Encryption and set a verification code.
After completing the wizard, the DVR will be ready for operation.
4. Operating the DVR
4.1 Live View
Once configured, you can view live feeds from your connected cameras on the monitor. The DVR supports simultaneous playback of multiple channels.

Image: A monitor displaying live feeds from multiple cameras connected to the ANNKE DVR.
4.2 Smart Detection Features
The ANNKE DVR includes advanced AI-powered detection capabilities:
- Human & Vehicle Detection: Accurately identifies humans and vehicles, reducing false alarms from environmental factors like falling leaves.
- Line Crossing & Intrusion Detection: Define specific areas or lines to trigger alerts when crossed or intruded upon.
These features provide instant app/email alerts for enhanced surveillance.

Image: Illustration of human and vehicle detection capabilities, showing a person carrying a box and a vehicle.

Image: Examples of app, email, and buzzer alerts triggered by motion detection.
4.3 Smart Playback
Efficiently search for important events using the smart playback feature, which allows you to filter recordings by detected events (e.g., person, vehicle).

Image: The smart playback interface with a timeline indicating detected person and vehicle events.

Image: A detailed smart playback timeline with thumbnails of recorded events, such as a person or vehicle.
4.4 Remote Access
Access your surveillance footage in real-time from various devices, including Android/iOS phones, tablets, or PCs, using the dedicated mobile application.

Image: Various devices (phone, tablet, laptop, desktop) connected to and displaying surveillance footage remotely.

Image: A smartphone displaying the remote access interface for the DVR.

Image: Remote access to surveillance footage across various devices, including phones, tablets, and computers.
Video: An overview of the ANNKE 32CH 3K Lite DVR's AI features and remote access capabilities.
5. Maintenance
5.1 Hard Drive Management
The DVR supports up to 20TB (2x10TB) of storage. Regular maintenance of the hard drive ensures continuous recording and optimal performance.

Image: Visual representation of the DVR's support for up to 20TB of storage.
5.2 H.265 Pro+ Compression
The H.265 Pro+ video compression technology significantly reduces file sizes while maintaining high image quality, maximizing storage efficiency and allowing for longer recording periods compared to older compression standards like H.264.
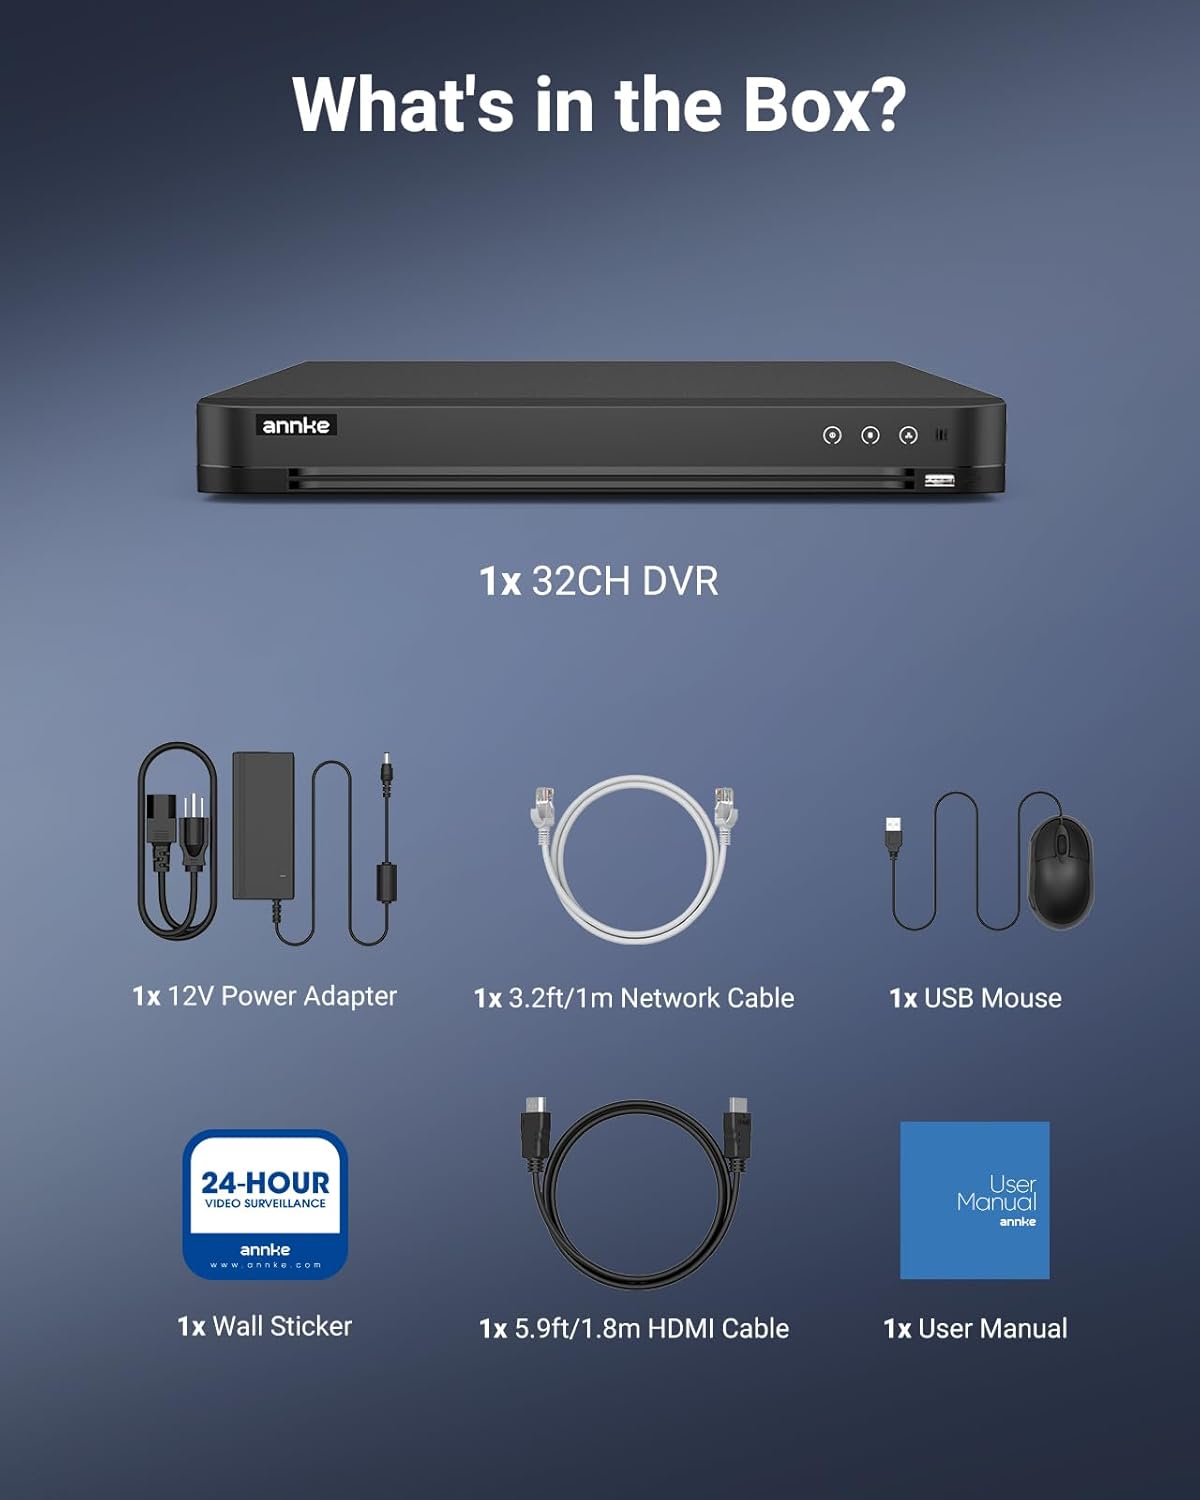
Image: A visual comparison demonstrating the storage efficiency of H.265 Pro+ versus H.264 compression.

Image: A bar chart illustrating that H.265 Pro+ saves 50% more storage space compared to H.264.
5.3 General Care
To ensure the longevity and optimal performance of your DVR:
- Keep the DVR in a well-ventilated area to prevent overheating.
- Avoid exposing the DVR to extreme temperatures, humidity, or direct sunlight.
- Clean the exterior with a soft, dry cloth. Do not use liquid cleaners.

Image: Diagram showing airflow through the DVR for proper cooling.
6. Troubleshooting
6.1 Common Issues
- No Video Output: Check HDMI/VGA cable connections, ensure the monitor is on the correct input, and verify DVR power.
- Network Connection Issues: Ensure the network cable is securely connected. Verify router status and internet connectivity.
- Forgot Password: Use the email or security questions configured during initial setup to reset your password.

Image: Indicator showing successful and unsuccessful internet connections for the DVR.
6.2 Password Reset
If you forget your password, you can reset it using the email or security questions you set up during the initial activation process. This ensures quick and secure access recovery.
7. Specifications
| Feature | Specification |
|---|---|
| Brand | ANNKE |
| Model Number | AU-DX31NB000-V1 |
| Number of Channels | 32 |
| Video Capture Resolution | 2560x1440 (QHD or 1440p) |
| Connectivity Technology | Ethernet, HDMI, USB, VGA |
| Special Feature | Human Detection, Vehicle Detection |
| Video Input | BNC, HDMI, VGA |
| Recording Mode | Continuous |
| Frame Rate | Up to 15 fps |
| Supported HDD Capacity | Up to 20TB (2x10TB) |
| Operating System | Embedded System |
| Item Dimensions L x W x H | 17.72 x 16.14 x 5.91 inches |
| Item Weight | 8.48 pounds |
8. Warranty and Support
ANNKE is committed to providing top-notch surveillance solutions and customer support. For any inquiries or assistance, please refer to the following:
- After-Sale Support: Contact ANNKE customer service for post-purchase assistance.
- Lifetime Technical Help: Benefit from ongoing technical support for your product.
For more information, visit the official ANNKE website or contact their support team directly.

Image: ANNKE security shield logo, representing product reliability and support.