
1. Introduction
Thank you for choosing the talomen K120 UHF Wireless Microphone System. This system is designed to provide stable, high-quality audio transmission for various applications including singing, karaoke, parties, DJ events, and church services. This manual provides detailed instructions for setup, operation, maintenance, and troubleshooting to ensure optimal performance and longevity of your device.

Image 1: talomen K120 UHF Wireless Microphone System components.
2. Package Contents
Please verify that all items listed below are included in your package:
- 1 x Dual Channel Wireless Metal Receiver
- 2 x UHF Handheld Wireless Microphones
- 2 x Antennas
- 1 x 1/4" Audio Cable
- 1 x Power Adapter
- 2 x Anti-Roll Rings
- 2 x AA Batteries (rechargeable)
- 1 x User Manual

Image 2: Visual representation of all included package contents.
3. Product Overview
3.1. Receiver
The dual-channel wireless metal receiver is the central unit of the system, managing signal reception and output. It features a rugged metal build for durability and an LCD display for easy monitoring of frequencies and signal strength.
- Dual UHF Channels: Supports two microphones simultaneously.
- Auto-Scan Function: Automatically finds clear frequencies to minimize interference.
- Volume Controls: Independent volume knobs for each microphone channel.
- Output Ports: Balanced XLR outputs for each channel (BAL A, BAL B) and a mixed 1/4" output (MIX).
- Antenna Ports: Two ports for connecting the included antennas to enhance signal reception.

Image 3: Detailed view of the receiver's front panel with controls and rear panel with input/output ports.
3.2. Handheld Microphones
The system includes two UHF handheld dynamic microphones designed for clear vocal reproduction and reliable performance.
- Dynamic Microphone Elements: Captures voice with professional clarity, featuring cardioid pickup patterns.
- Selectable Frequencies: Each microphone offers 15 selectable frequencies within UHF Channel 1 (580.1-584.3 MHz) and Channel 2 (589.1-593.3 MHz).
- LCD Display: Shows channel and battery status.
- Rechargeable Batteries: Powered by included 1200mAh rechargeable batteries, offering approximately 9 hours of use on a 3-hour charge. USB-C charging port is located at the bottom of the microphone.
- Anti-Roll Rings: Included to prevent microphones from rolling off surfaces.
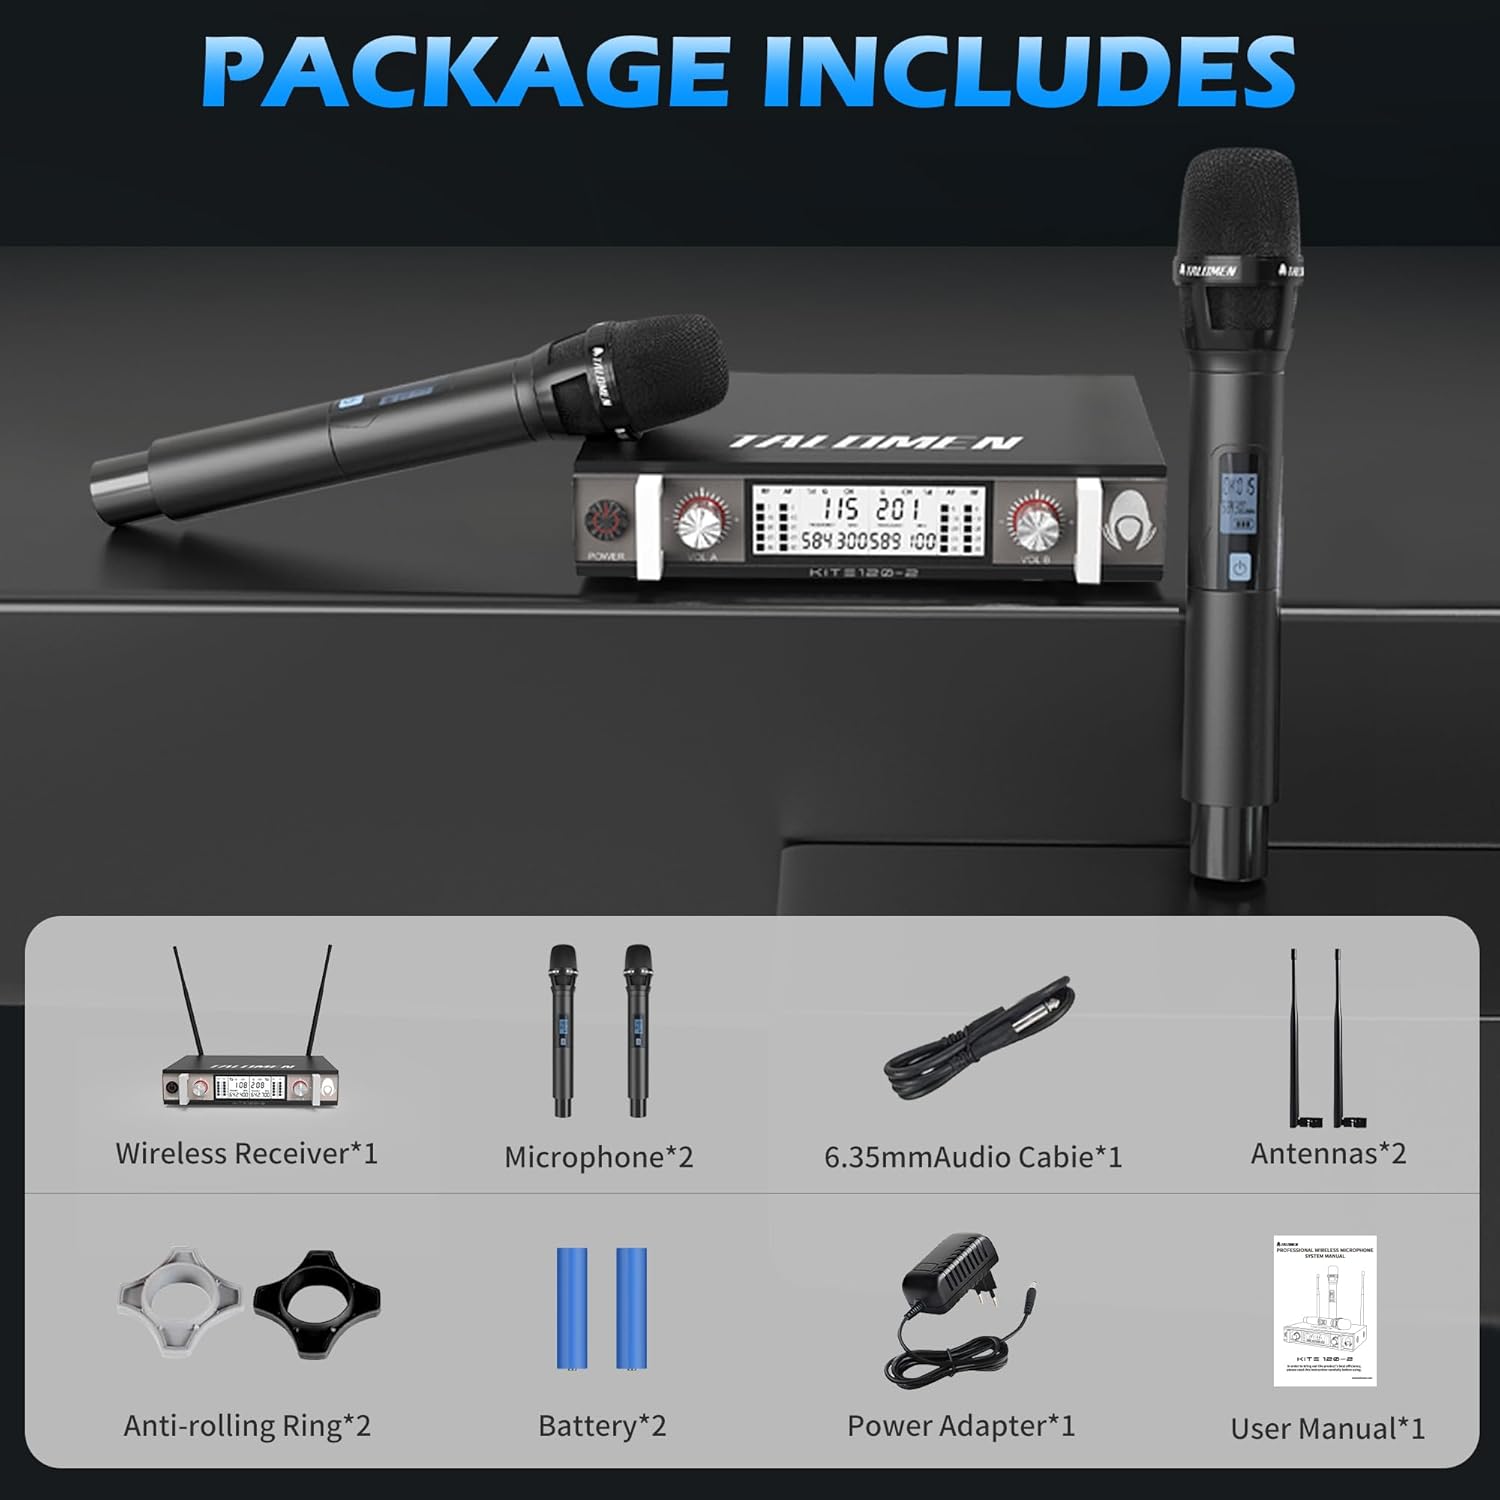
Image 4: Key features of the handheld microphone.
4. Setup Instructions
4.1. Install Antennas
- Locate the two antenna ports on the rear panel of the receiver.
- Screw the included antennas clockwise into the ANT A and ANT B ports until secure. Adjust their position for optimal signal reception.
4.2. Connect Power to Receiver
- Connect the power adapter to the DC IN port on the rear of the receiver.
- Plug the power adapter into a suitable electrical outlet.
4.3. Install Batteries in Microphones
- Unscrew the bottom cap of each handheld microphone.
- Insert the included rechargeable AA batteries, ensuring correct polarity (+/-).
- Screw the bottom cap back onto the microphone.
- If batteries are low, charge them using a USB-C cable (not included) connected to the charging port at the bottom of the microphone.

Image 5: Battery installation and charging port location.
4.4. Connect Receiver to Audio System
Choose one of the following connection methods based on your audio equipment:
- Using XLR Cables (Recommended for individual channel control): Connect XLR cables from the BAL A and BAL B outputs on the receiver to the corresponding XLR inputs on your audio mixer or PA system.
- Using 1/4" Audio Cable (Mixed Output): Connect the included 1/4" audio cable from the MIX output on the receiver to a 1/4" input on your amplifier, karaoke machine, or PA system. This will combine both microphone signals into a single output.
5. Operating Instructions
5.1. Power On/Off
- Press the POWER button on the receiver's front panel to turn it on. The LCD display will illuminate.
- Press and hold the power button on each handheld microphone to turn them on. The microphone's LCD display will show its channel and battery status.
5.2. Automatic Pairing and Frequency Selection
The system features automatic pairing. When the receiver and microphones are powered on, they should automatically connect to available frequencies.
- Auto-Scan: The receiver will automatically scan for the clearest frequencies.
- Manual Frequency Adjustment: Each microphone offers 15 selectable frequencies. If you experience interference, you can manually change the frequency on the microphone. Short press the small button inside the microphone (accessible by unscrewing the bottom cap) to cycle through frequencies. Long press to toggle between Mic A and Mic B channels. The receiver will automatically sync.

Image 6: Frequency adjustment interface on the microphone and receiver.
5.3. Adjusting Volume
Use the VOL A and VOL B knobs on the receiver's front panel to adjust the individual volume levels of Microphone A and Microphone B.
5.4. Microphone Usage and Range
- Hold the microphone approximately 2-6 inches from your mouth for optimal sound quality.
- The system provides a recommended operating range of 393 feet (120 meters) and up to 656 feet (200 meters) in line-of-sight conditions.
- Use the included anti-roll rings to secure the microphones when placed on flat surfaces.

Image 7: Operating range of the wireless system.
6. Maintenance
6.1. Cleaning
- Wipe the receiver and microphones with a soft, dry cloth.
- Do not use liquid cleaners or abrasive materials, as they may damage the finish or internal components.
6.2. Battery Care
- Recharge the microphone batteries regularly to maintain optimal performance.
- If the system will not be used for an extended period, remove the batteries from the microphones to prevent leakage.
6.3. Storage
- Store the system in a cool, dry place away from direct sunlight and extreme temperatures.
- Keep the original packaging for safe storage and transport.
7. Troubleshooting
| Problem | Possible Cause | Solution |
|---|---|---|
| No sound from microphones | Microphones or receiver not powered on; low microphone battery; incorrect cable connection; receiver volume too low; microphone not paired. | Ensure all devices are powered on; check microphone battery level; verify audio cable connections; increase receiver volume; re-pair microphone with receiver. |
| Interference or signal dropouts | Operating distance too far; obstacles blocking line-of-sight; other wireless devices interfering; frequency conflict. | Reduce distance between microphone and receiver; ensure clear line-of-sight; change microphone frequency; turn off other interfering wireless devices. |
| Low or distorted sound | Microphone volume too low; audio system volume too low; microphone too far from mouth; damaged cable. | Increase microphone volume on receiver; adjust volume on connected audio system; hold microphone closer to mouth; replace audio cable if damaged. |
8. Specifications
- Model Name: K120
- Brand: talomen
- Connectivity Technology: 6.35MM JACK, RF, UHF, Wireless, XLR
- Connector Type: 6.35 mm Jack, XLR
- Special Feature: 393ft Long Range, Auto Scan, Dual Channel Receiver
- Compatible Devices: Amplifier, Audio Mixer, Karaoke Machine, PA System, Speaker
- Color: Black
- Material: Metal
- Polar Pattern: Unidirectional
- Item Weight: 5.83 pounds (2.65 Kilograms)
- Impedance: 1 Ohm
- Signal-to-Noise Ratio: 86.4 dB
- Number of Channels: 2
- Frequency Response: 20 KHz
- Power Source: Battery Powered (Microphones), AC Adapter (Receiver)
- Number of Batteries: 2 AAA batteries required (included)
- Battery Type: Lithium Ion (for rechargeable batteries)
9. Warranty and Support
For warranty information or technical support, please refer to the contact details provided with your purchase or visit the official talomen website. Keep your proof of purchase for any warranty claims.