
Introduction
Thank you for purchasing the EASYERA Digital Wall Clock. This manual provides detailed instructions for setting up, operating, and maintaining your new digital clock. Please read this manual thoroughly before use to ensure proper functionality and to maximize your product experience. This clock features a vibrant RGB display, automatic time synchronization via Bluetooth, and adaptable placement options for both wall mounting and desktop use.
Product Features
- RGB Dynamic Ambient Light: Choose from eleven eye-catching RGB colors and adjust the brightness to perfectly suit your mood and room. The EASYERA digital wall clock can transform your space with immersive lighting.
- Wall Mounted and Desktop Placement: This digital wall clock can be easily mounted on a wall or placed on a desk, offering flexibility and convenience for various environments.
- Automatic Daylight Saving Time (DST) Adjustment: Enjoy hassle-free timekeeping with automatic DST adjustment, ensuring the clock always displays the correct time without manual intervention.
- Bluetooth Time Synchronization: The clock supports Bluetooth time synchronization, eliminating the need for manual time updates.
- Auto-Dimming Brightness: Features 10 levels of auto-dimming brightness to adapt to ambient light conditions, ensuring optimal visibility day and night.
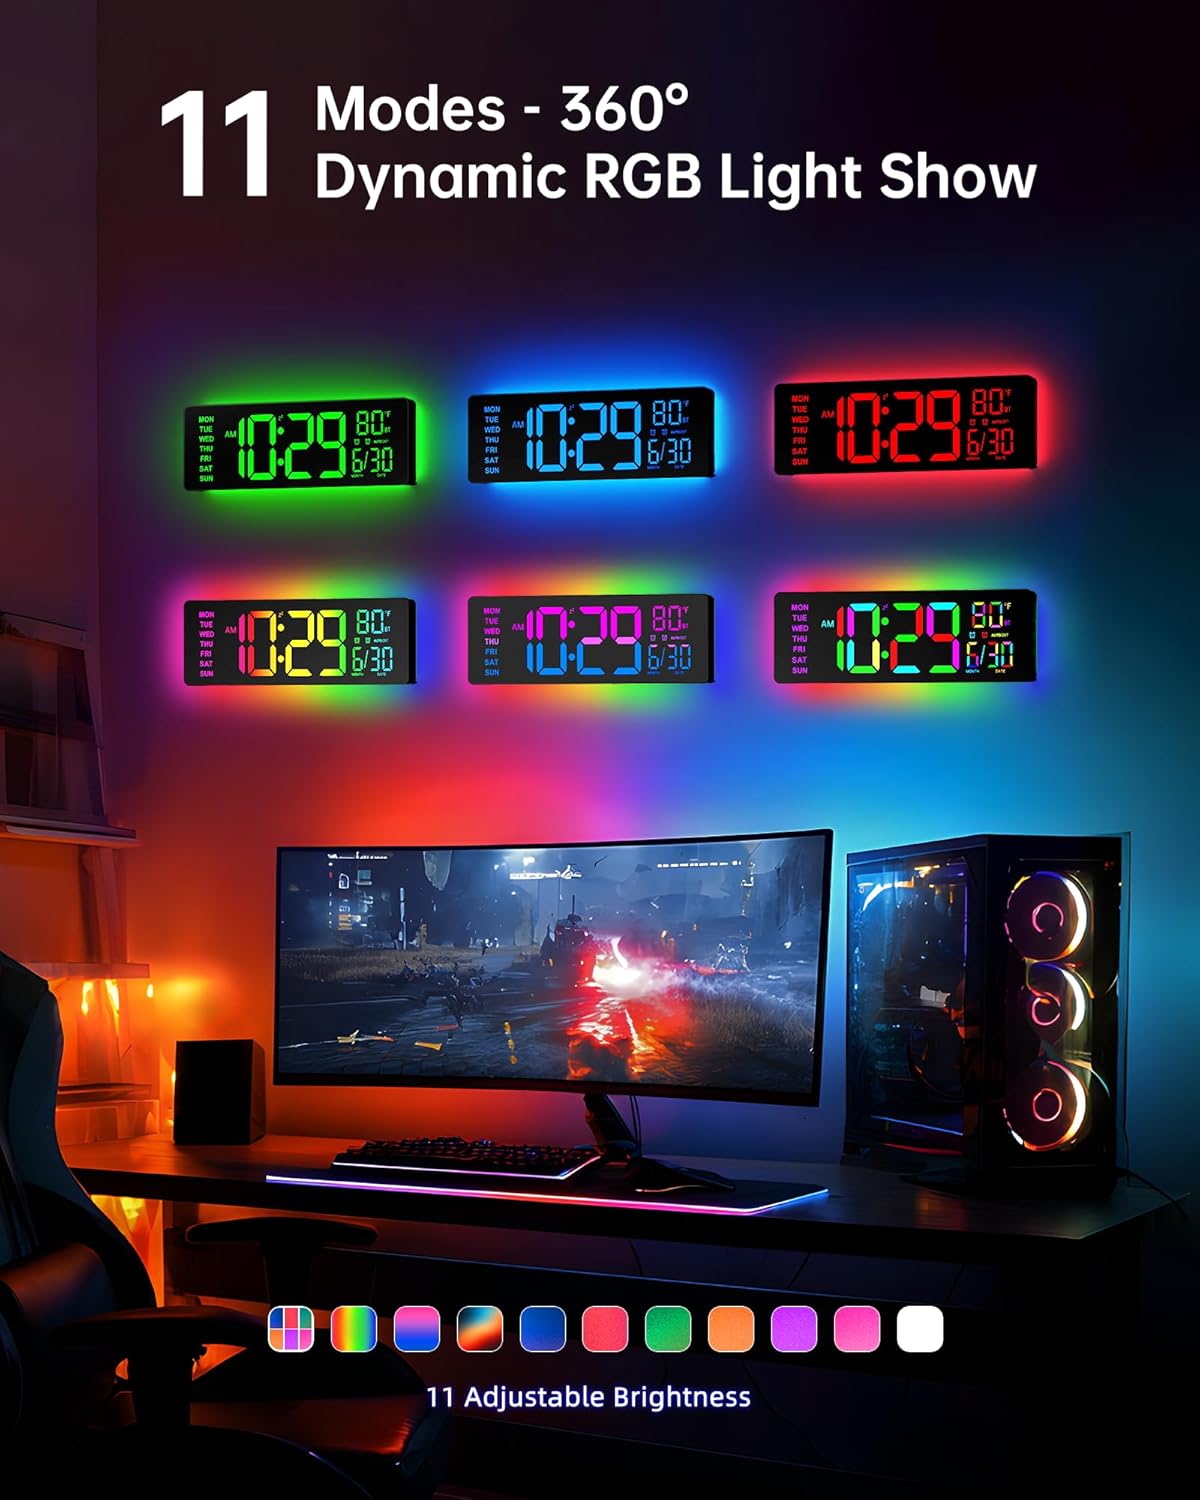
Image: The EASYERA Digital Wall Clock showcasing 11 distinct RGB light modes, demonstrating its dynamic ambient lighting capabilities. The image also highlights the 360-degree dynamic RGB light show feature.
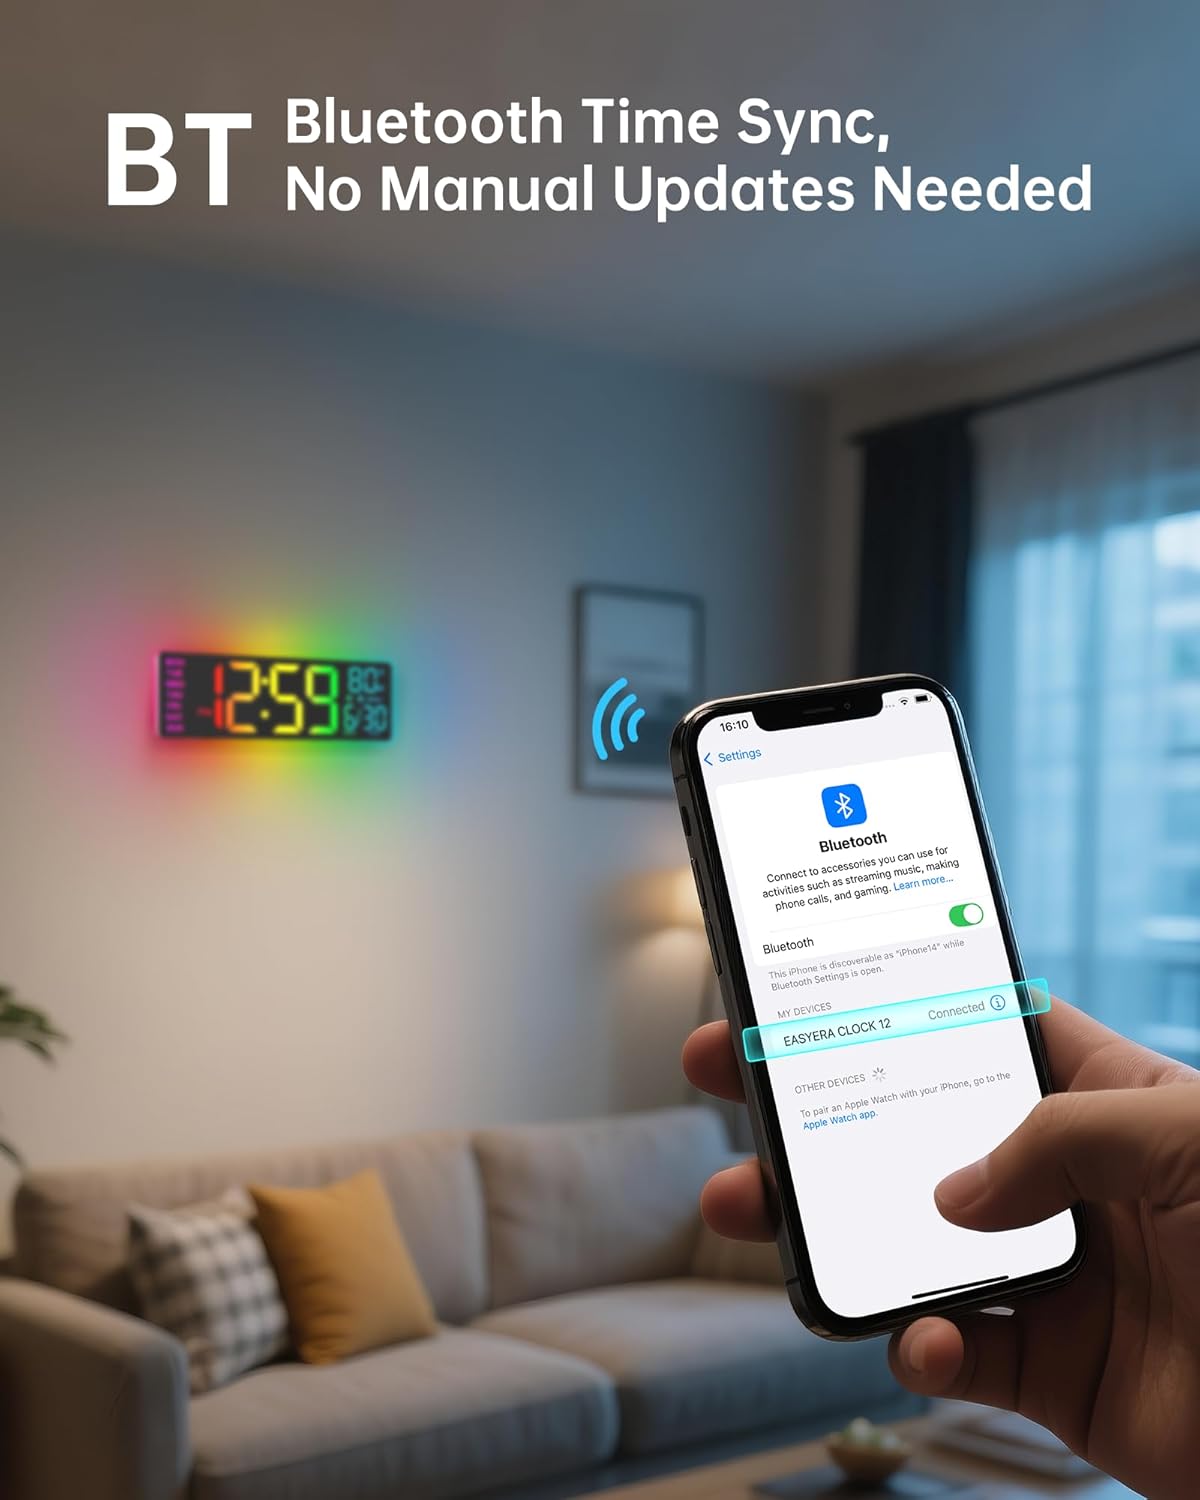
Image: A smartphone screen displaying a successful Bluetooth connection to the "EASYERA CLOCK 12", illustrating the clock's Bluetooth time synchronization feature for automatic updates.

Image: The EASYERA Digital Wall Clock demonstrating 10 levels of auto-dimming brightness, showing how the display adjusts from 100% to 0% brightness to suit different lighting conditions, including a bedroom setting.

Image: The EASYERA Digital Wall Clock illustrating its automatic adjustment for Daylight Saving Time (DST), showing a "+1H Spring Forward" and "-1H Fall Back" scenario with corresponding time changes.
Package Contents
Please check the package contents upon opening to ensure all items are present:
- EASYERA Digital Wall Clock (16.5" or 12" model)
- USB Power Cable (up to 11.5 feet for 16.5" model)
- Power Adapter (USB wall charger)
- Remote Control (for certain models/features)
- User Manual (this document)
- Mounting Hardware (screws, wall anchors - if applicable)
Setup
1. Power Connection
- Unpack the clock and all accessories from the box.
- Connect the USB power cable to the clock's power input port.
- Plug the other end of the USB power cable into the provided power adapter.
- Insert the power adapter into a standard electrical outlet. The clock display will illuminate.
Note: The clock is plug-in powered and does not use batteries for operation. Ensure a stable power supply.

Image: The 16.5-inch EASYERA Digital Wall Clock with its USB power cable connected to a wall outlet, illustrating its power source and enhanced readability due to its size. Dimensions are shown as 15.6 inches wide and 5.2 inches high.

Image: The 12-inch EASYERA Digital Wall Clock with its power cable plugged into a wall outlet, demonstrating its plug-in power source. Dimensions are shown as 15.3 inches wide and 5.1 inches high.
2. Placement (Wall Mounted or Desktop)
- For Wall Mounting: Identify a suitable location on a wall. Use the provided mounting hardware (if included) and follow standard wall mounting procedures. Ensure the clock is level and securely fastened.
- For Desktop Placement: Place the clock on a flat, stable surface such as a desk, shelf, or nightstand. Ensure it is positioned where the display is clearly visible and the power cable can reach an outlet without strain.
3. Initial Time Synchronization (Bluetooth)
Upon first power-up, the clock will attempt to synchronize its time via Bluetooth with a paired device (e.g., smartphone). Ensure Bluetooth is enabled on your device and follow the pairing instructions in the "Operating Instructions" section.
Operating Instructions
1. Basic Controls (Remote Control)
The clock is primarily controlled using the included remote control. Familiarize yourself with the buttons:
- ON/OFF: Powers the clock on or off.
- TIME SET: Enters time setting mode.
- +/-: Adjusts values (e.g., hour, minute, brightness).
- MODE: Cycles through display modes (e.g., 12/24 hour, temperature unit).
- RGB/COLOR: Changes RGB light colors or modes.
- BRIGHTNESS: Adjusts display brightness.
- DST: Manually toggles Daylight Saving Time (though automatic is default).
2. Setting Time and Date (Manual Override)
While the clock features automatic Bluetooth time synchronization, you can manually set the time and date if needed:
- Press the "TIME SET" button on the remote. The hour digits will flash.
- Use the "+/-" buttons to adjust the hour.
- Press "TIME SET" again to move to minutes, then adjust with "+/-".
- Continue pressing "TIME SET" to cycle through year, month, and day, adjusting each with "+/-".
- Press "TIME SET" one last time or wait a few seconds for the settings to save and exit.
3. Adjusting Brightness
The clock has 10 levels of auto-dimming brightness. You can also manually adjust it:
- Press the "BRIGHTNESS" button on the remote to cycle through preset brightness levels.
- Alternatively, use the "+/-" buttons when the brightness setting is active to fine-tune the level.
4. Changing RGB Colors and Modes
To change the ambient RGB lighting:
- Press the "RGB/COLOR" button on the remote to cycle through the eleven available static colors.
- Some models may have additional dynamic lighting modes; continue pressing "RGB/COLOR" to activate them.
5. Bluetooth Pairing
For automatic time synchronization, pair your clock with a Bluetooth-enabled device:
- Ensure Bluetooth is enabled on your smartphone or tablet.
- On your device, search for available Bluetooth devices.
- Select "EASYERA CLOCK" or a similar name from the list.
- Once paired, the clock will automatically synchronize its time with your device.
6. Daylight Saving Time (DST)
The clock is designed to automatically adjust for DST. If manual intervention is ever required:
- Press the "DST" button on the remote to manually toggle DST on or off. The clock will adjust by one hour forward or backward.
Maintenance
- Cleaning: To clean the clock, gently wipe the display and casing with a soft, dry, lint-free cloth. Do not use abrasive cleaners, solvents, or chemical sprays, as these may damage the surface.
- Power: Always disconnect the power adapter from the outlet before cleaning or if the clock will not be used for an extended period.
- Environment: Avoid exposing the clock to extreme temperatures, direct sunlight for prolonged periods, or high humidity. Keep it away from water and other liquids.
Troubleshooting
| Problem | Possible Cause | Solution |
|---|---|---|
| Clock does not power on. | No power supply; loose connection. | Ensure the power adapter is securely plugged into the clock and the wall outlet. Try a different outlet. |
| Time is incorrect. | Bluetooth not paired; manual setting error; DST issue. | Ensure Bluetooth is paired for automatic sync. Manually set the time if needed. Check DST setting. |
| Remote control not working. | Battery depleted; obstruction; remote out of range. | Replace remote battery. Ensure no obstructions between remote and clock. Operate within effective range. |
| Display is too dim or too bright. | Brightness setting incorrect. | Adjust brightness using the "BRIGHTNESS" button on the remote. |
| RGB lights not changing. | Incorrect button pressed; internal issue. | Press the "RGB/COLOR" button on the remote. If issue persists, contact customer support. |
Specifications
- Product Name: EASYERA Digital Wall Clock
- Models: 16.5" Large Digital Wall Clock, 12" Digital Wall Clock
- Display Type: LED Digital, RGB Color
- Power Source: USB Powered (Plug-in)
- Connectivity: Bluetooth for Time Synchronization
- Features: Automatic DST Adjustment, 11 RGB Colors, 10 Levels Auto-Dimming Brightness, Wall Mountable / Desktop Placement
- Dimensions (Approx.):
- 16.5" Model: 15.6 inches (Width) x 5.2 inches (Height)
- 12" Model: 15.3 inches (Width) x 5.1 inches (Height)
- ASIN: B0FG2ZVQL7
- Date First Available: May 29, 2025
Warranty Information
EASYERA products are manufactured with high-quality standards. This product comes with a standard manufacturer's warranty against defects in materials and workmanship. Please refer to the product packaging or contact customer support for specific warranty terms and conditions. Keep your purchase receipt as proof of purchase for warranty claims.
Customer Support
If you have any questions, require assistance, or encounter issues not covered in this manual, please contact EASYERA Customer Support:
- Email: support@easyera.com
- Website: Visit the EASYERA Store on Amazon
- Phone: Please check the product packaging or official website for phone support availability.
When contacting support, please have your product model and purchase date available.


