
chartustriable DJ0870
chartustriable DJ0870 2-Door Armoire Wardrobe with LED and Mirror Instruction Manual
Model: DJ0870 | Brand: chartustriable
1. Important Safety Information
Please read all safety instructions before assembly and use. Failure to follow these instructions may result in injury or product damage.
- Anti-Tipping Device: Always secure the cabinet to the wall using the provided anti-tipping device to prevent accidental tipping. This is crucial for safety, especially in households with children or pets.
- Handling: Exercise caution when handling heavy components and the mirror to avoid injury. Two people are recommended for assembly and moving the unit.
- Weight Distribution: Distribute items evenly within the wardrobe to maintain stability. Do not overload shelves or hanging rods.
- Assembly: Ensure all screws and fasteners are securely tightened before use. Periodically check and re-tighten as needed.
- Placement: Place the wardrobe on a flat, level surface. Avoid placing it near heat sources or in areas with excessive moisture.
2. Product Overview
The chartustriable DJ0870 is a freestanding 2-door armoire wardrobe designed for clothing storage. It features an integrated LED lighting system, a full-length mirror, and multiple storage compartments.

Image: The chartustriable DJ0870 2-Door Armoire Wardrobe, featuring a mirrored door, a glass-paneled door, and lower storage drawers.
Key Features:
- Integrated LED Lighting: Equipped with a human body intelligent induction light that activates when the door is opened and turns off when closed. The induction range is approximately 5 meters. The LED light is rechargeable via USB and can last 3-5 months on a single charge.
- High-Definition Tempered Glass Door: Provides a clear view of stored items, enhancing visibility and organization.
- Full-Length Mirror: One door features a functional mirror, offering convenience for outfit checks.
- Flexible Storage: Includes a hanging area, stacking area, and two large storage drawers to accommodate various clothing and accessories.
- Sturdy Construction: Made from P2 engineered wood and metal, designed for stability and long-term use.
Components and Dimensions:
Familiarize yourself with the main components and overall dimensions of the wardrobe.

Image: Overall dimensions of the wardrobe. The unit measures 31.5 inches wide, 19.7 inches deep, and 71 inches high. Internal drawers are 31.5 inches wide, 15.8 inches deep, and 10 inches high.

Image: Detailed view of key components. This includes the metal clothes rail, the tempered glass door panel, the two spacious pull-out drawers, and the wall-mounting anti-tipping bracket.

Image: The wardrobe interior, showcasing the hanging rod with various garments, and the lower compartments filled with folded clothes and accessories.
3. Setup and Assembly Instructions
Assembly is required for this product. It is recommended to have two adults for the assembly process. Please ensure all parts are present before beginning.
Before You Begin:
- Unpack all components and hardware. Verify against the parts list (usually included in the packaging).
- Clear a spacious, clean area for assembly.
- Gather necessary tools (e.g., screwdriver, hammer).
General Assembly Steps:
- Base Assembly: Assemble the base frame of the wardrobe according to the provided diagrams.
- Side Panels: Attach the side panels to the base.
- Back Panel: Secure the back panel to the frame.
- Internal Structure: Install shelves, the hanging rod, and drawer slides.
- Drawers: Assemble the two drawers and insert them into their respective slides.
- Doors: Attach the doors, ensuring proper alignment and hinge function.
- LED Light Installation: Mount the LED sensor light inside the upper compartment.
- Anti-Tipping Device: Crucially, secure the wardrobe to the wall using the anti-tipping device. Follow the specific instructions provided in your packaging for wall mounting.
Note: Detailed, step-by-step assembly instructions with diagrams are included in the product packaging. Refer to those for precise guidance.
4. Operating Instructions
LED Sensor Light:
The wardrobe is equipped with an intelligent motion-sensing LED light in the upper hanging compartment.
- Automatic Activation: The light automatically turns on when the wardrobe door is opened and detects motion within approximately 5 meters.
- Automatic Deactivation: The light will turn off automatically when the door is closed or after a period of no motion.
- Charging: The LED light is powered by a rechargeable battery. Use the included USB charging cable to recharge the light when its brightness diminishes or it stops activating. A full charge typically lasts 3-5 months.

Image: The LED sensor light strip installed inside the wardrobe's upper section, illustrating its function of illuminating the interior when the door is opened.

Image: The wardrobe interior with the LED light activated, showcasing the hanging rod with clothes and the lower storage compartments.
Storage Areas:
The wardrobe offers various storage zones for optimal organization.
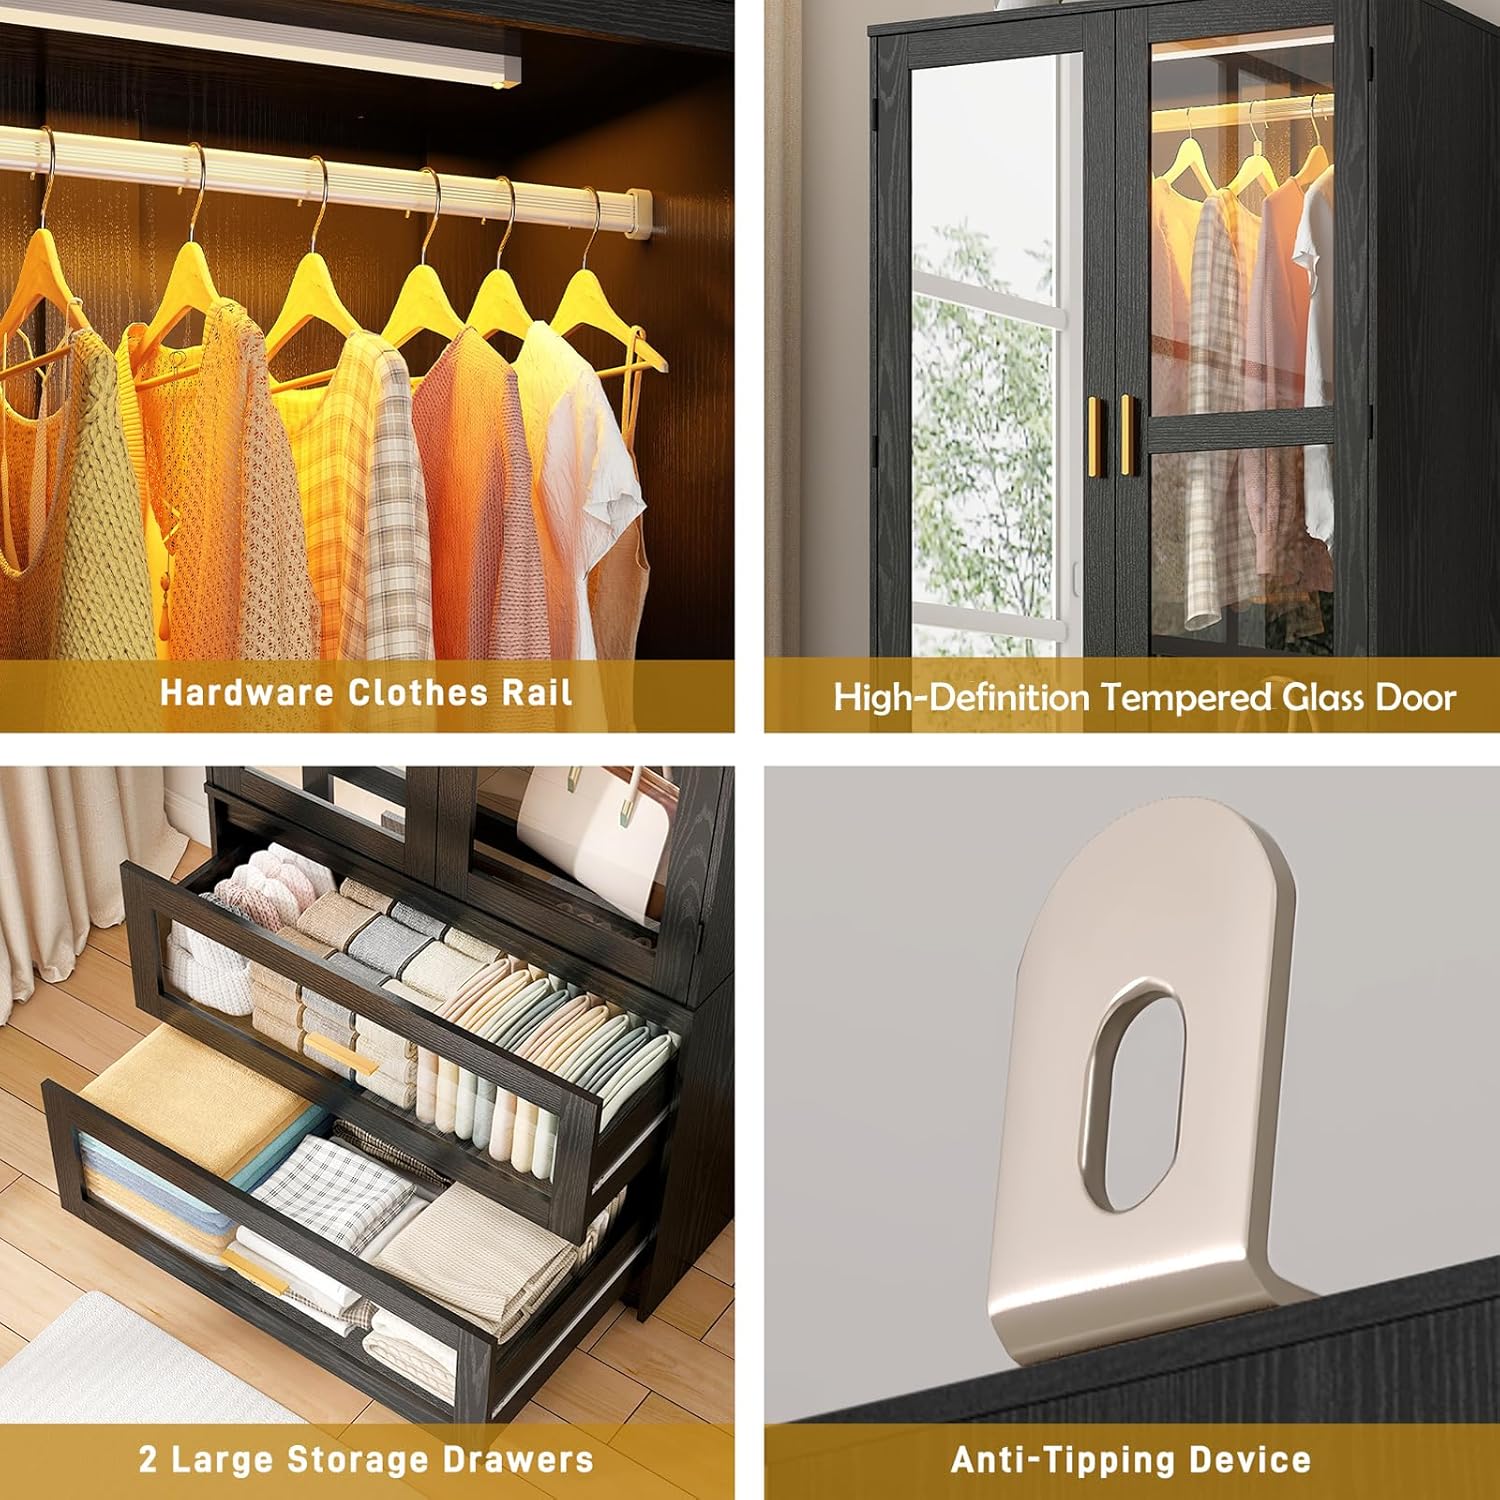
Image: Functional storage areas. The top section is for rarely used items, the middle section with the hanging rod is for dresses and jackets, and the two bottom drawers are for folded items like shirts, socks, and underwear.
- Hanging Area: Utilize the integrated hanging rod for garments that require hanging, such as shirts, dresses, and jackets.
- Stacking Area: The open shelves below the hanging section are suitable for folded clothes, bags, or other accessories.
- Drawers: The two large drawers provide enclosed storage for smaller items, undergarments, or delicate clothing.
- Top Box Area: The top surface of the wardrobe can be used for storing rarely used items or decorative pieces.
5. Maintenance
- Cleaning: Wipe surfaces with a soft, damp cloth. Avoid harsh chemicals or abrasive cleaners that could damage the finish or mirror.
- Mirror Care: Clean the mirror with a glass cleaner and a lint-free cloth.
- Hardware: Periodically check all screws and fasteners to ensure they remain tight. Re-tighten if necessary.
- LED Light: Recharge the LED light as needed using the provided USB cable.
- Avoid Overloading: Do not exceed the weight capacity of the shelves or hanging rod to prevent damage or instability.
6. Troubleshooting
| Problem | Possible Cause | Solution |
|---|---|---|
| Wardrobe is wobbly or unstable. | Uneven floor; loose fasteners; anti-tipping device not installed. | Ensure the wardrobe is on a level surface. Tighten all assembly screws. Install the anti-tipping device securely to the wall. |
| LED light does not turn on. | Battery is depleted; sensor obstructed; faulty unit. | Recharge the LED light using the USB cable. Ensure the sensor is not blocked. If the issue persists after charging, contact customer support. |
| Doors do not close properly. | Misaligned hinges; obstruction; uneven assembly. | Adjust the door hinges. Check for any items blocking the door's path. Verify that the wardrobe frame is square and level. |
| Drawers are difficult to open/close. | Overloaded drawer; misaligned slides; debris in slides. | Reduce the weight in the drawer. Check if the drawer slides are correctly installed and aligned. Clean any debris from the slides. |
| Missing parts or hardware during assembly. | Packaging error. | Contact customer support immediately with your purchase details and a list of missing items. |
7. Specifications
| Feature | Detail |
|---|---|
| Brand | chartustriable |
| Model Name | DJ0870 |
| Product Dimensions (L x W x H) | 31.5"D x 19.7"W x 71"H |
| Color | Black |
| Material | Engineered Wood, Metal |
| Special Feature | Adjustable Shelf, LED Sensor Light, Mirror |
| Mounting Type | Floor Mount (Freestanding with Anti-Tipping Device) |
| Number of Doors | 2 |
| Number of Drawers | 2 |
| Item Weight | 126 Pounds |
| Assembly Required | Yes |
8. Warranty and Support
For warranty information, missing parts, or technical assistance, please contact chartustriable customer support. Refer to your purchase documentation for specific warranty terms and contact details.
Customer Support: Please visit the official chartustriable website or refer to the contact information provided in your product packaging.
Ask a question about this manual
Ask about setup, troubleshooting, compatibility, parts, safety, or missing instructions. Manuals+ will review the question and use this page’s manual context to help answer it.