1. Introduction
Thank you for choosing the HITBOX ARC200S Inverter Welder. This compact and versatile 2-in-1 machine is designed for both MMA (Stick) and Lift TIG welding, suitable for beginners and DIY enthusiasts, as well as light professional use. It features an intelligent LED display, adjustable Hot Start and Arc Force, Anti-Stick, and VRD functions for enhanced control and safety. Please read this manual thoroughly before operation to ensure safe and efficient use of your welding machine.
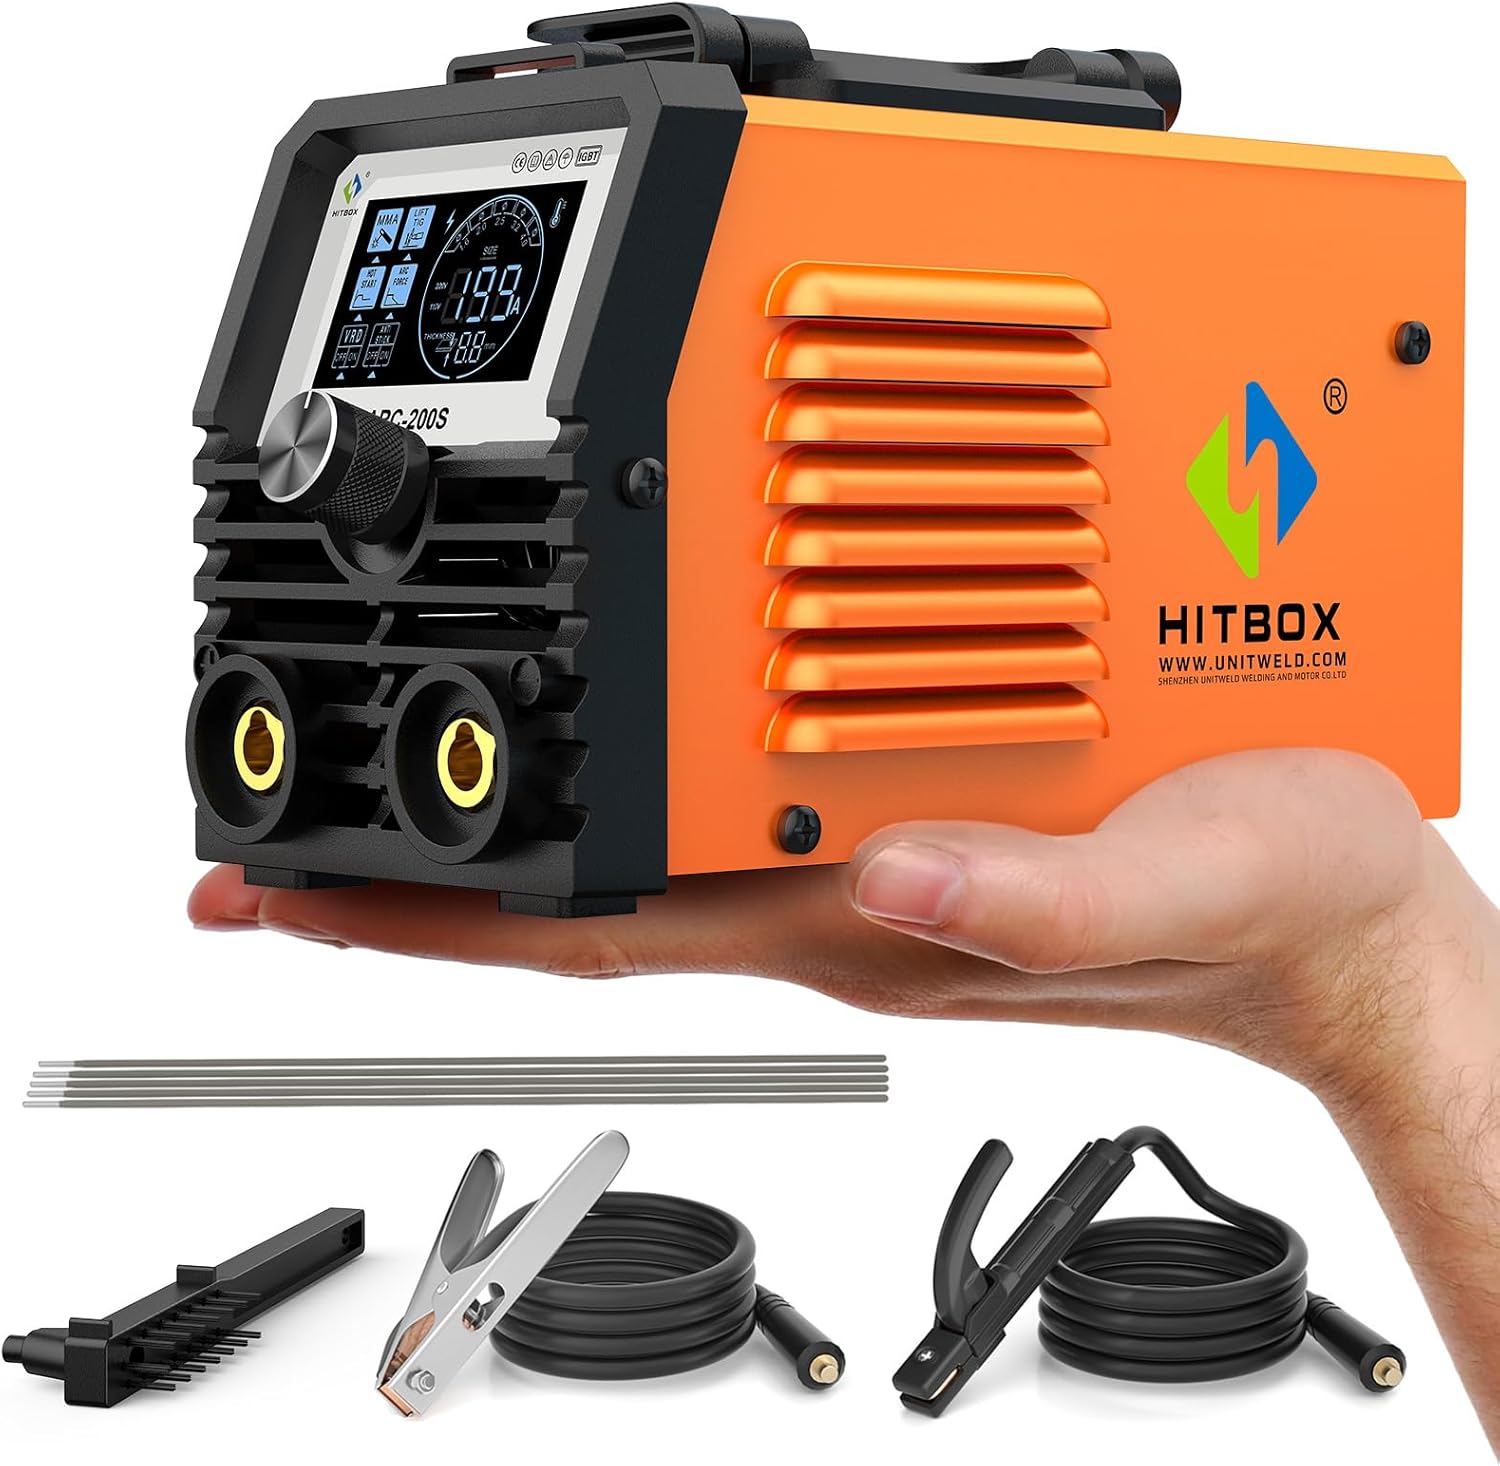
Image 1.1: The HITBOX ARC200S Inverter Welder shown with included accessories: electrodes, ground clamp, electrode holder, and wire brush.
2. Safety Information
WARNING: Welding can be dangerous. Always follow safety precautions to prevent injury or death.
- Always wear appropriate personal protective equipment (PPE), including a welding helmet with proper shade, flame-resistant clothing, welding gloves, and safety shoes.
- Ensure adequate ventilation to avoid inhaling welding fumes.
- Protect bystanders from arc rays and hot metal.
- Do not weld near flammable materials.
- Ensure the welding machine is properly grounded.
- Disconnect power before performing any maintenance or changing accessories.
- Never touch live electrical parts.
- Keep children and unauthorized personnel away from the welding area.

Image 2.1: The HITBOX ARC200S welder highlighting its safety features including protection against overcurrent, overheating, overvoltage, and overload, along with a high-speed cooling fan.
3. Package Contents
Verify that all items are present in the package:
- 1 x HITBOX ARC200S Inverter Welder
- 5 x E6013 Electrodes (2.0 mm)
- 1 x 300A Ground Clamp with 1.5 m Cable
- 1 x 200A Electrode Holder with 1.5 m Cable
- 1 x Wire Brush
- 1 x User Manual
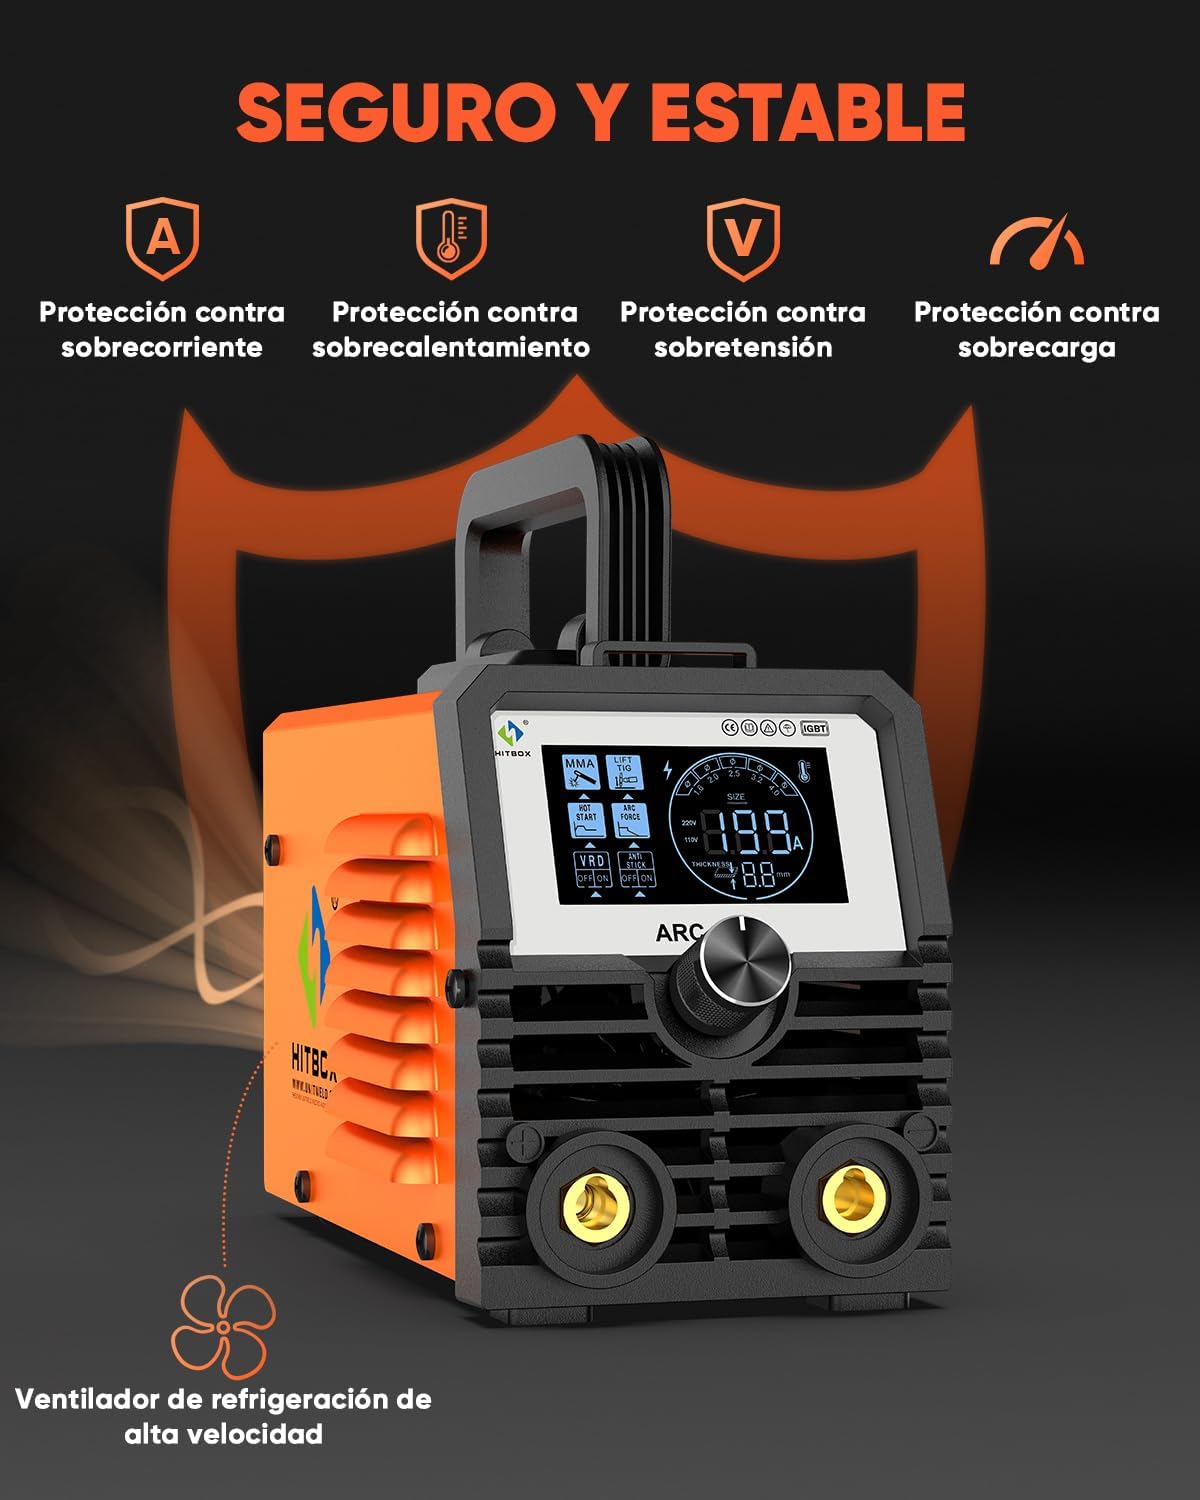
Image 3.1: All components included in the HITBOX ARC200S package, laid out for inspection.
4. Product Specifications
| Feature | Specification |
|---|---|
| Model Number | ARC200S |
| Manufacturer | HITBOX |
| Product Dimensions | 20.5 x 10.5 x 15 cm (8.07 x 4.13 x 5.91 inches) |
| Product Weight | 2.7 kg (5.95 lbs) |
| Input Voltage | 220V ±15% |
| No-Load Voltage | 60V |
| Welding Electrode Compatibility | 1.6 - 2.5 mm (E6013, E6014, E7013, E7018) |
| Tungsten Electrode Compatibility (Lift TIG) | 1.6 - 2.4 mm |
| Functions | MMA (Stick) & Lift TIG (2-in-1) |
| Protection Features | Overcurrent, Overvoltage, Overload, Overheating |
| Enclosure Class | IP21S |
| Insulation Class | F |
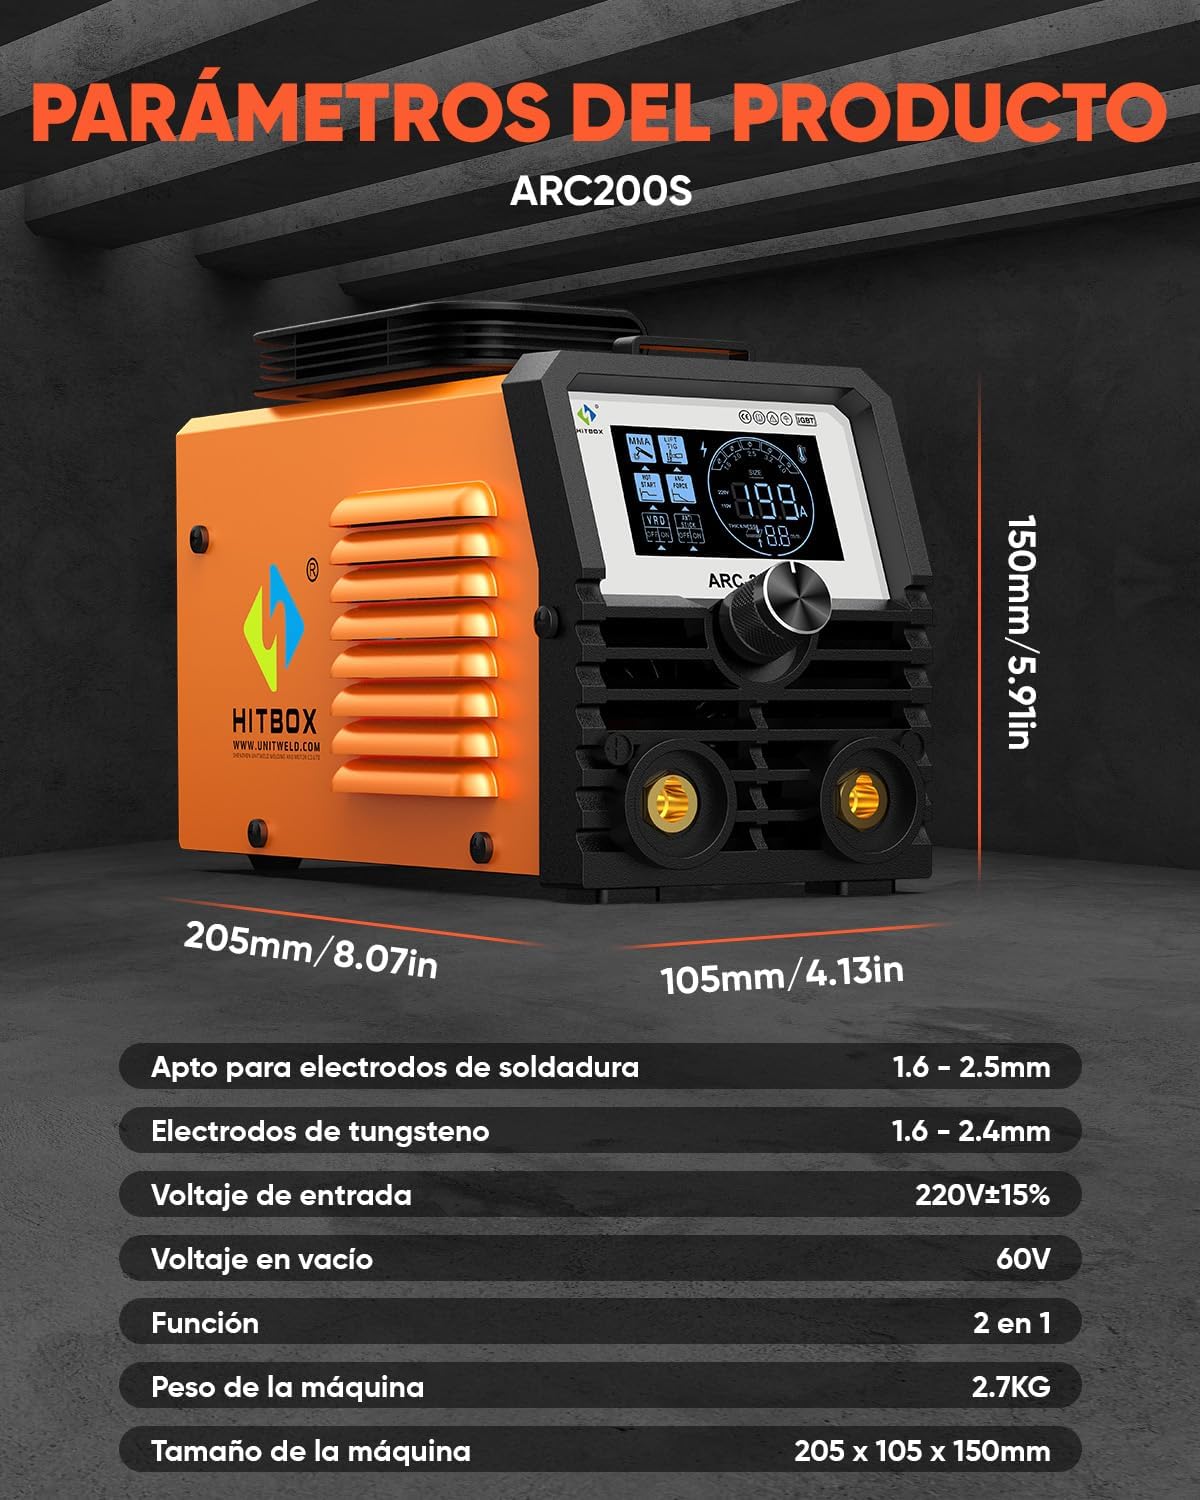
Image 4.1: Detailed product dimensions and key specifications of the HITBOX ARC200S.
5. Setup
5.1 Front Panel Overview

Image 5.1: Diagram illustrating the front panel components of the ARC200S, including the digital LED display, parameter/mode adjustment knob, positive output terminal, and negative output terminal.
- Digital LED Display: Shows welding parameters and settings.
- Parameter / Mode Adjustment Knob: Used to select welding mode and adjust current.
- Positive Output Terminal: Connects to the electrode holder for MMA welding or TIG torch for Lift TIG.
- Negative Output Terminal: Connects to the ground clamp.
5.2 Rear Panel Overview
Image 5.2: Diagram illustrating the rear panel components of the ARC200S, including the power switch, power cable, and cooling fan.
- Power Switch: Turns the machine ON/OFF.
- Power Cable: Connects the machine to the main power supply.
- Cooling Fan: Provides necessary cooling during operation.
5.3 Connecting for MMA (Stick) Welding
- Ensure the welder is turned OFF and unplugged.
- Connect the electrode holder cable to the positive (+) output terminal.
- Connect the ground clamp cable to the negative (-) output terminal.
- Securely attach the ground clamp to the workpiece or welding table.
- Insert an appropriate electrode into the electrode holder.

Image 5.3: Connection diagram for MMA welding, showing the electrode holder connected to the positive terminal and the ground clamp to the negative terminal.
5.4 Connecting for Lift TIG Welding (TIG Torch not included)
- Ensure the welder is turned OFF and unplugged.
- Connect the TIG torch cable to the negative (-) output terminal.
- Connect the ground clamp cable to the positive (+) output terminal.
- Securely attach the ground clamp to the workpiece or welding table.
- Ensure a suitable tungsten electrode is installed in the TIG torch.
- Connect the gas hose from the TIG torch to a shielding gas cylinder (e.g., Argon) with a regulator.
Image 5.4: Connection diagram for Lift TIG welding, showing the TIG torch connected to the negative terminal and the ground clamp to the positive terminal. Note: TIG torch and gas cylinder are sold separately.
6. Operating Instructions
6.1 Power On and Mode Selection
- Plug the power cable into a suitable 230V power outlet.
- Turn on the power switch located on the rear panel.
- The LED display will illuminate. Use the adjustment knob to select between MMA (Stick) and Lift TIG modes.

Image 6.1: The professional-grade HD LED display of the ARC200S, clearly showing welding parameters and selected modes (MMA, Lift TIG, Hot Start, Arc Force, VRD, Anti-Stick).
6.2 Adjusting Welding Parameters
The ARC200S features fully adjustable welding functions for optimal control:
- Current Adjustment: Rotate the adjustment knob to set the desired welding current (Amperage). The display will show the selected value.
- Hot Start: This function provides an initial boost of current to make arc ignition easier, especially with difficult-to-start electrodes. It is adjustable for fine-tuning.
- Arc Force: Helps prevent the electrode from sticking to the workpiece by increasing current when the arc length becomes too short. This is also adjustable.
- Anti-Stick: Automatically reduces the current if the electrode sticks, allowing it to be easily removed without damaging the electrode holder.
- VRD (Voltage Reduction Device): Reduces the open-circuit voltage to a safe level when the machine is idle, enhancing safety. It has an ON/OFF switch.
Refer to the display (Image 6.1) to monitor and adjust these settings.
6.3 Welding Process (General)
- Prepare your workpiece by cleaning it thoroughly to remove rust, paint, or grease.
- Ensure proper ventilation and wear all required PPE.
- Position yourself comfortably and safely.
- For MMA Welding: Strike the arc by lightly touching the electrode to the workpiece and quickly lifting it slightly to establish the arc. Maintain a consistent arc length and travel speed.
- For Lift TIG Welding: Gently touch the tungsten electrode to the workpiece, then lift it slightly to initiate the arc. Maintain a short arc length and feed filler rod manually if required.
- After welding, turn off the machine and allow the workpiece to cool before handling.

Image 6.2: An operator performing MMA (stick) welding with the HITBOX ARC200S, demonstrating the 2-in-1 functionality.
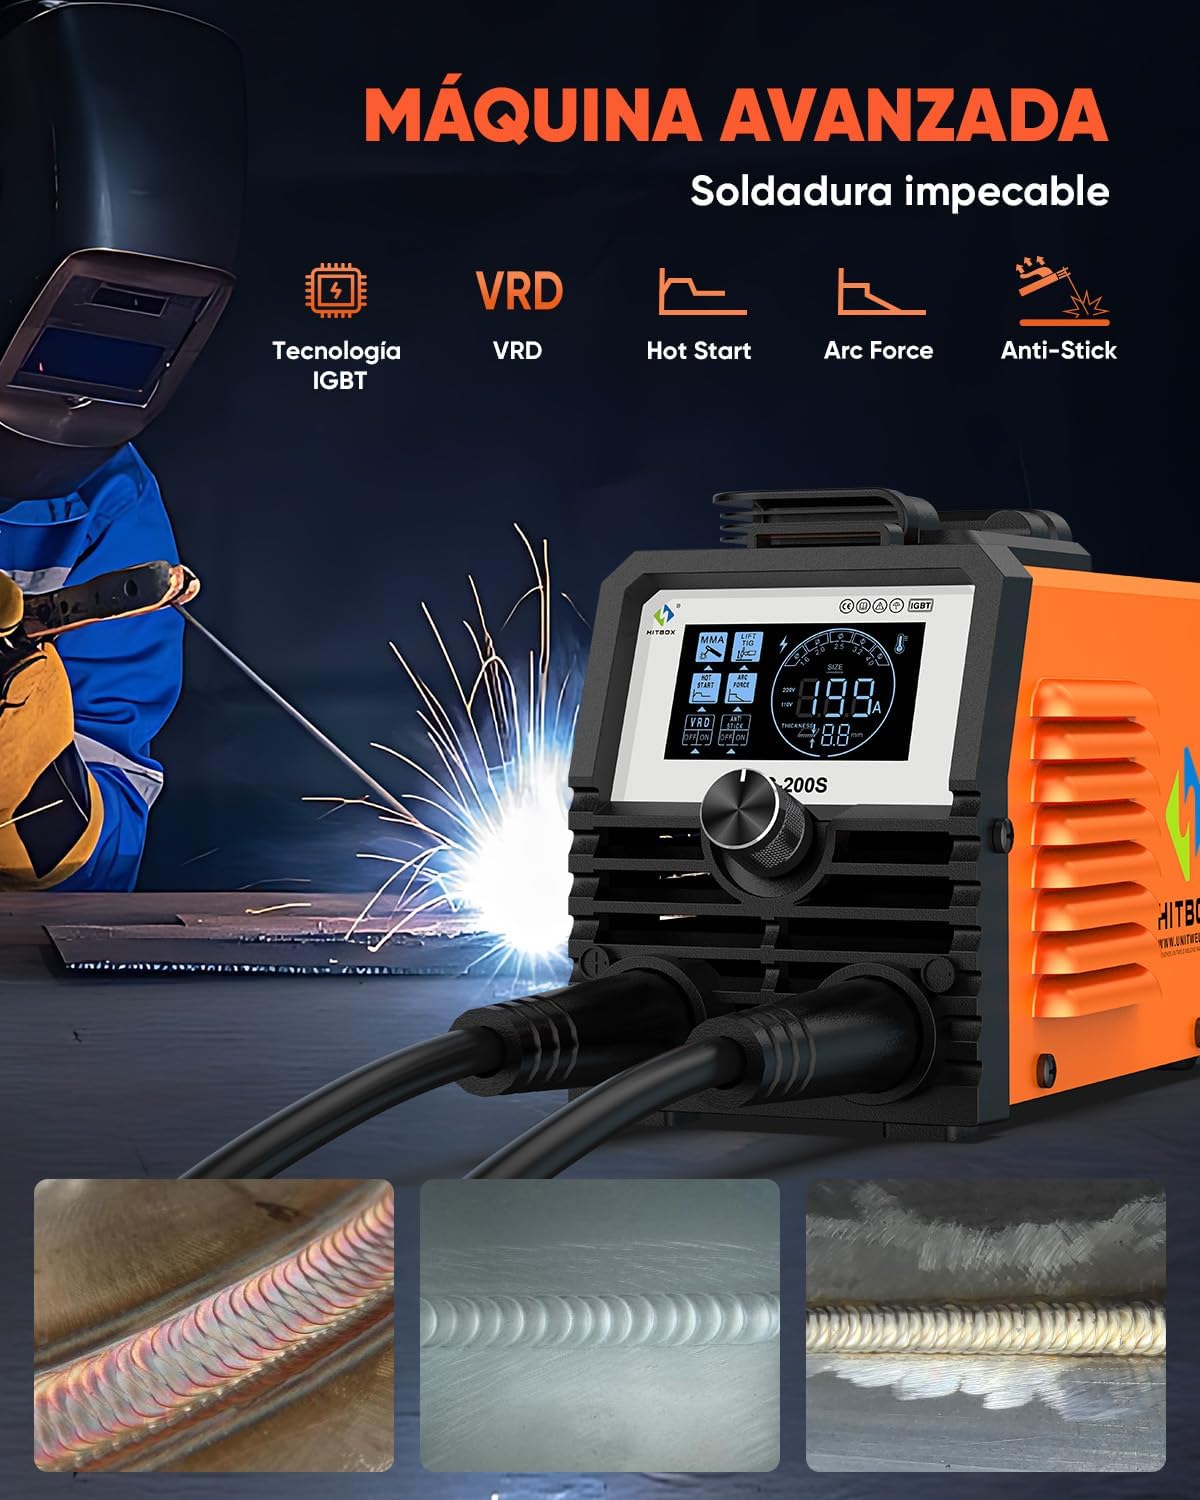
Image 6.3: An operator performing Lift TIG welding with the HITBOX ARC200S, demonstrating the 2-in-1 functionality. Note that the TIG torch is not included with the machine.
7. Maintenance
- Cleaning: Regularly clean the machine's exterior with a dry cloth. Use compressed air to blow out dust from inside the machine through the vents, ensuring the power is disconnected.
- Cable Inspection: Periodically inspect all cables (power, electrode holder, ground clamp) for cuts, fraying, or damaged insulation. Replace damaged cables immediately.
- Terminal Connections: Ensure all terminal connections are tight and free from corrosion.
- Storage: Store the welder in a dry, clean environment, away from excessive dust and moisture.
8. Troubleshooting
| Problem | Possible Cause | Solution |
|---|---|---|
| Machine does not power on. | No power supply; faulty power cable; internal fault. | Check power outlet and cable. Ensure power switch is ON. If problem persists, contact support. |
| No arc ignition. | Poor ground connection; incorrect current setting; damp electrode; faulty electrode holder. | Check ground clamp connection. Increase current. Use dry electrodes. Inspect electrode holder. |
| Arc is unstable or extinguishes frequently. | Low current; improper arc length; dirty workpiece; incorrect electrode type. | Increase current. Maintain proper arc length. Clean workpiece. Use compatible electrodes. |
| Overheat indicator lights up. | Over-duty cycle; blocked ventilation; high ambient temperature. | Allow machine to cool down. Ensure clear ventilation. Reduce welding time. |
9. Warranty and Support
The HITBOX ARC200S Inverter Welder comes with professional technical support for up to 2 years. For any technical assistance, warranty claims, or inquiries, please contact HITBOX customer service.
Please refer to the contact information provided in your purchase documentation or visit the official HITBOX website for support details.


