
FlyingJoy B0FFT2FBJ4
FlyingJoy Heavy-Duty Bariatric Rollator Walker with Seat - User Manual
Model: B0FFT2FBJ4
Introduction
Thank you for choosing the FlyingJoy Heavy-Duty Bariatric Rollator Walker. This manual provides essential information for the safe assembly, operation, and maintenance of your new mobility aid. Please read it thoroughly before use and retain it for future reference.
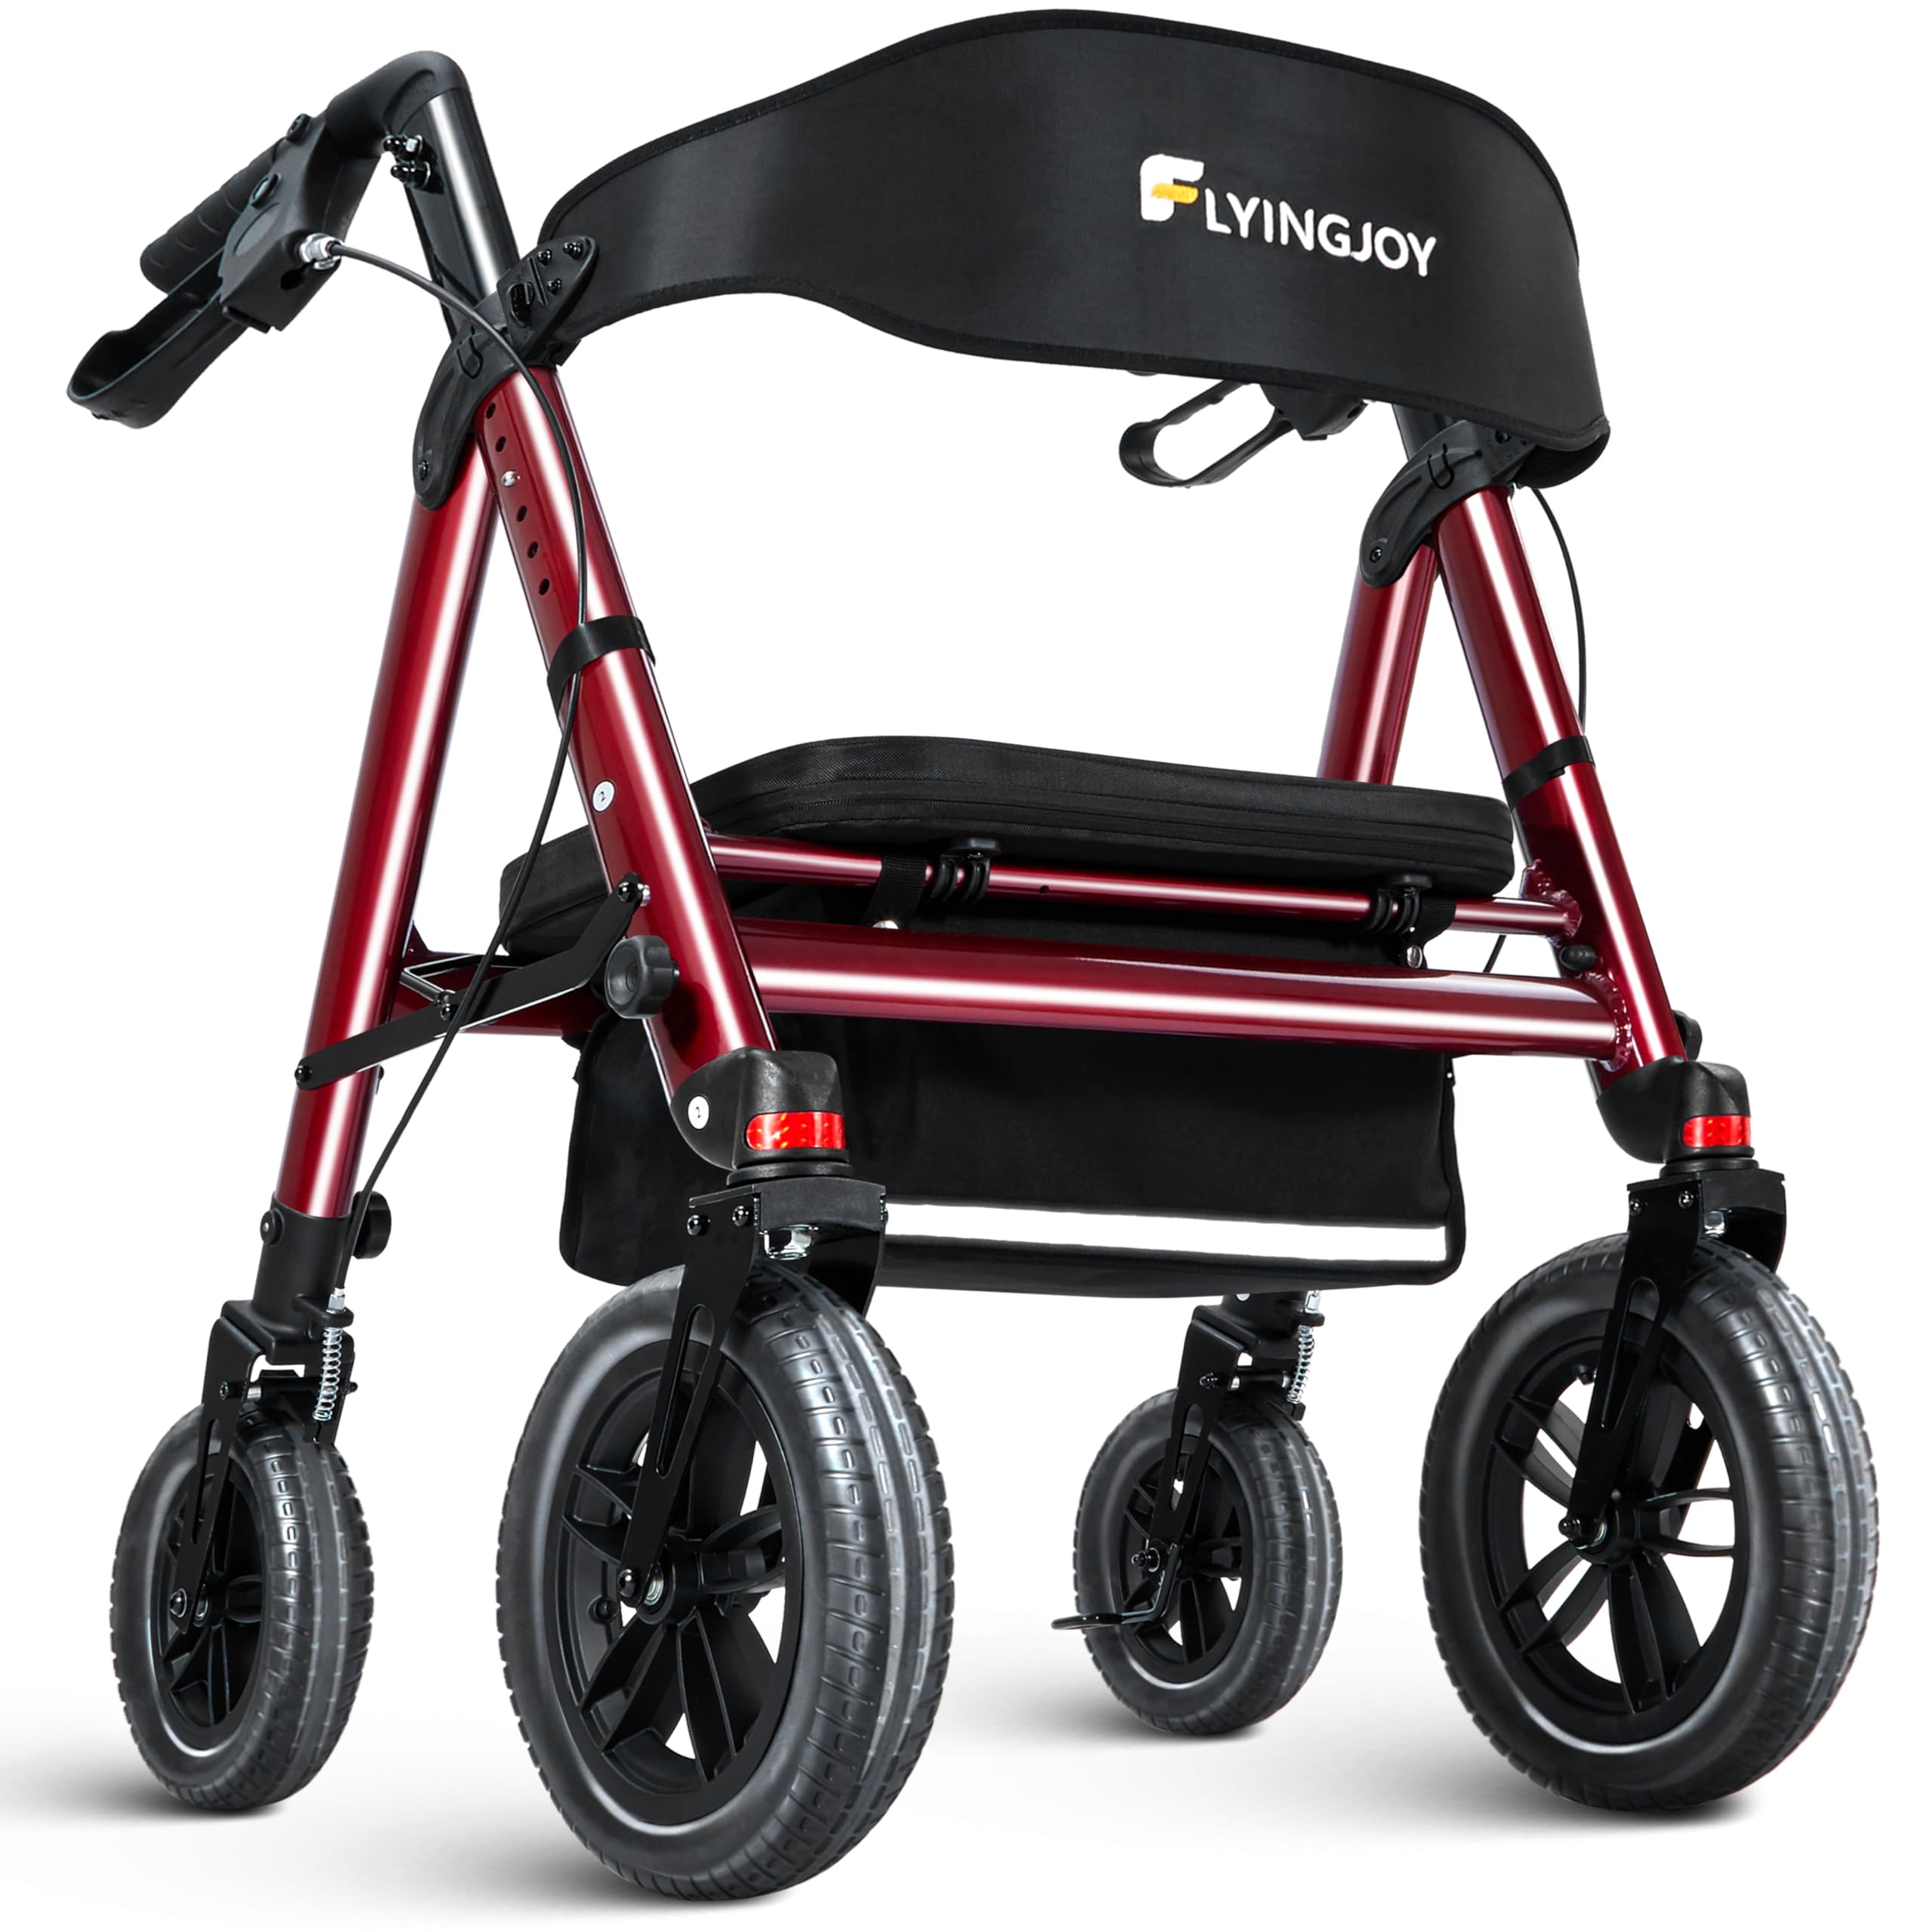
Image: The FlyingJoy Rollator Walker in use, demonstrating its all-terrain capability and stability.
Safety Information
Always prioritize safety when using your rollator walker. Failure to follow these instructions could result in injury.
- Ensure all parts are securely assembled before each use.
- Always engage the parking brakes before sitting on the seat.
- Do not exceed the maximum weight capacity of 450 lbs.
- Be aware of your surroundings and potential obstacles.
- Do not use the rollator on escalators or stairs.
- Consult a healthcare professional for guidance on proper use if you have specific mobility needs.
- The rollator requires a doorway opening wider than 26 inches for comfortable use.

Image: Illustration highlighting the strong triangular frame design for enhanced stability.
Parts List
Before assembly, verify that all components are present:
- Main Frame with Seat and Storage Bag
- Handgrips with Brake Levers (pre-attached)
- Front Wheels (2)
- Rear Wheels (2)
- Backrest
- Instruction Manual

Image: Labeled diagram of the rollator walker components.
Setup and Assembly
The FlyingJoy Rollator Walker is designed for tool-free assembly. Follow these steps:
- Unfold the Frame: Gently pull the sides of the frame apart until it locks into the open position.
- Attach Wheels: Match the numbered wheel labels (①–④) to the corresponding frame tubing. Insert the wheels until they click securely into place.
- Install Backrest: Snap the backrest onto the designated points on the frame.
- Adjust Handle Height: Press the marbles (buttons) on the handle tubes and slide the handgrips up or down to your desired height. Ensure both handles are at the same height and the marbles lock into place.
- Adjust Seat Height: The seat pad offers 5 height settings. Adjust by pressing the buttons on the seat support bars and sliding to the desired position.

Image: Pre-purchase checklist for ensuring a perfect fit, including door size, weight, user height, and seat width.
Operating Instructions
Walking with the Rollator
- Stand upright with the rollator in front of you.
- Place your hands firmly on the handgrips.
- Push the rollator forward a comfortable distance, then step forward with one foot, followed by the other.
- Maintain a steady pace and keep your balance.
Using the Brakes
The rollator features a dual-brake system for safety and control.
- To Slow Down or Stop: Squeeze the brake levers towards the handgrips.
- To Engage Parking Brakes (Lock): Push the brake levers down until they click into the locked position. This prevents the rollator from moving when you sit or stand.
- To Release Parking Brakes: Pull the brake levers up until they release from the locked position.
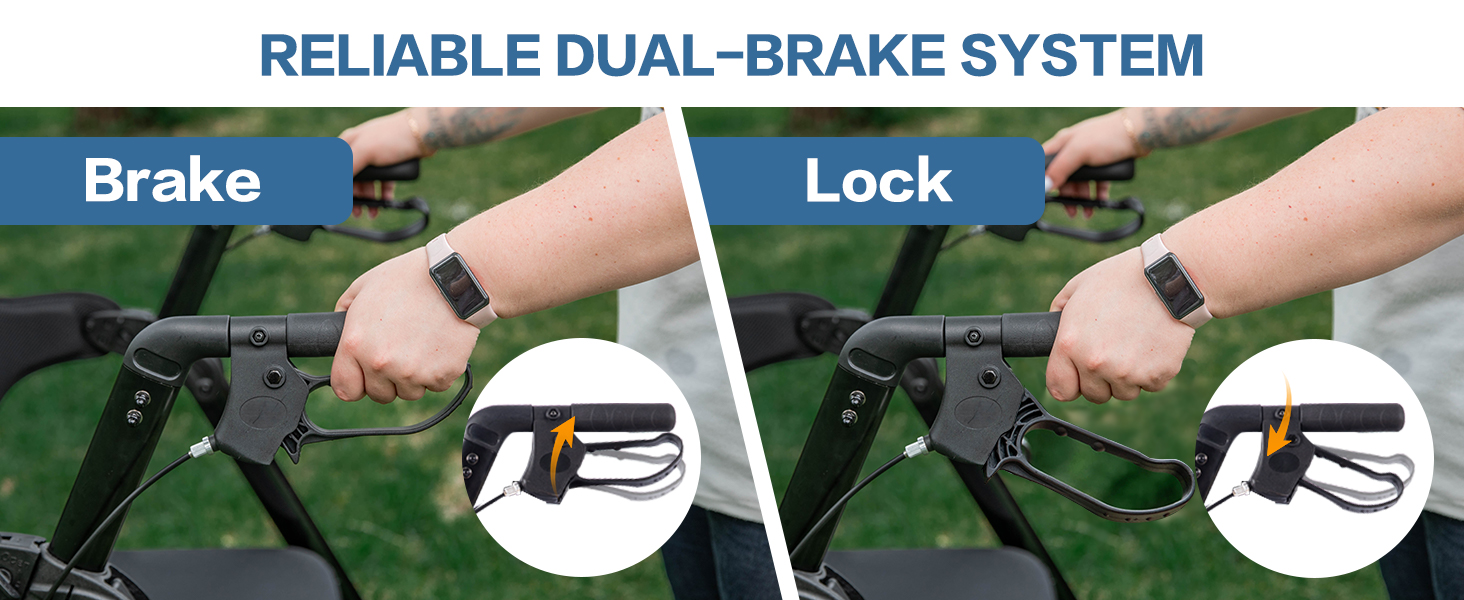
Image: Demonstration of the rollator's reliable dual-brake system.
Using the Seat
- Ensure the rollator is on a flat, stable surface.
- Engage both parking brakes before attempting to sit.
- Turn around and slowly lower yourself onto the padded seat.
- To stand up, push off the handgrips while releasing the parking brakes.

Image: The extra-wide padded seat and backrest for double comfort.
Folding and Transporting
The rollator folds easily for storage and transport.
- Lift the seat upwards.
- Pull the lever located under the seat to initiate folding.
- Continue to fold the frame inwards until it is compact.
- For transport, you can tilt the front slightly and roll it into your car trunk like a suitcase. The under-seat storage bag remains attached when folded.

Image: Unfolded and folded dimensions of the rollator walker.
Maintenance
- Cleaning: Wipe down the frame and seat with a damp cloth and mild detergent. Do not use abrasive cleaners.
- Wheel Inspection: Regularly check the wheels for wear and tear. Ensure they rotate freely and are free of debris.
- Brake Check: Periodically test the brakes to ensure they engage and disengage properly. Adjust if necessary (refer to a qualified technician if unsure).
- Fastener Check: Ensure all screws, bolts, and quick-release mechanisms are tight and secure.
- Storage: Store the rollator in a dry place away from direct sunlight and extreme temperatures.
Troubleshooting
| Problem | Possible Cause | Solution |
|---|---|---|
| Rollator does not roll smoothly. | Debris in wheels, loose wheels, worn wheels. | Clean wheels, ensure wheels are securely attached, replace worn wheels if necessary. |
| Brakes are not engaging or locking properly. | Brake cables are loose or damaged, brake mechanism is dirty. | Inspect brake cables for damage. Clean brake mechanism. If issues persist, consult a technician. |
| Difficulty folding the rollator. | Seat not fully lifted, lever not fully pulled. | Ensure the seat is fully lifted and the folding lever is completely engaged. |
| Handles slide down after adjustment. | Height adjustment marbles not fully engaged. | Ensure the marbles (buttons) snap securely into the adjustment holes. |
Specifications
- Model: B0FFT2FBJ4
- Product Dimensions (Unfolded): 30.13" D x 26.21" W x 35.43"-40.43" H
- Product Dimensions (Folded): 15.35" D x 26.21" W x 35.43"-40.43" H
- Item Weight: 32 pounds
- Maximum Weight Capacity: 450 pounds
- Front Wheel Size: 12 inches
- Rear Wheel Size: 10 inches
- Seat Width: 23.91 inches (extra-wide)
- Handle Height Adjustment: 35.43 to 40.43 inches (6 levels)
- Material: Aluminum, Metal, Plastic
- Storage Bag Capacity: 11 lbs

Image: Visual representation of the rollator's key dimensions and specifications.
Warranty and Support
For any questions, concerns, or support needs regarding your FlyingJoy Rollator Walker, please contact our customer service. We offer a 24-hour customer support response time.
Legal Disclaimer: Statements regarding dietary supplements have not been evaluated by the FDA and are not intended to diagnose, treat, cure, or prevent any disease or health condition. This product is a mobility aid and not a medical device for treatment or cure of diseases.
Related documentsB0FFT2FBJ4

Ask a question about this manual
Ask about setup, troubleshooting, compatibility, parts, safety, or missing instructions. Manuals+ will review the question and use this page’s manual context to help answer it.