1. Introduction
This manual provides comprehensive instructions for the safe and efficient operation, setup, and maintenance of your Sihao A3 UV Printer XP600. This high-resolution flatbed UV printer is designed for versatile printing on various materials, including phone cases, cups, stickers, and acrylics. Please read this manual thoroughly before operating the printer to ensure optimal performance and longevity.
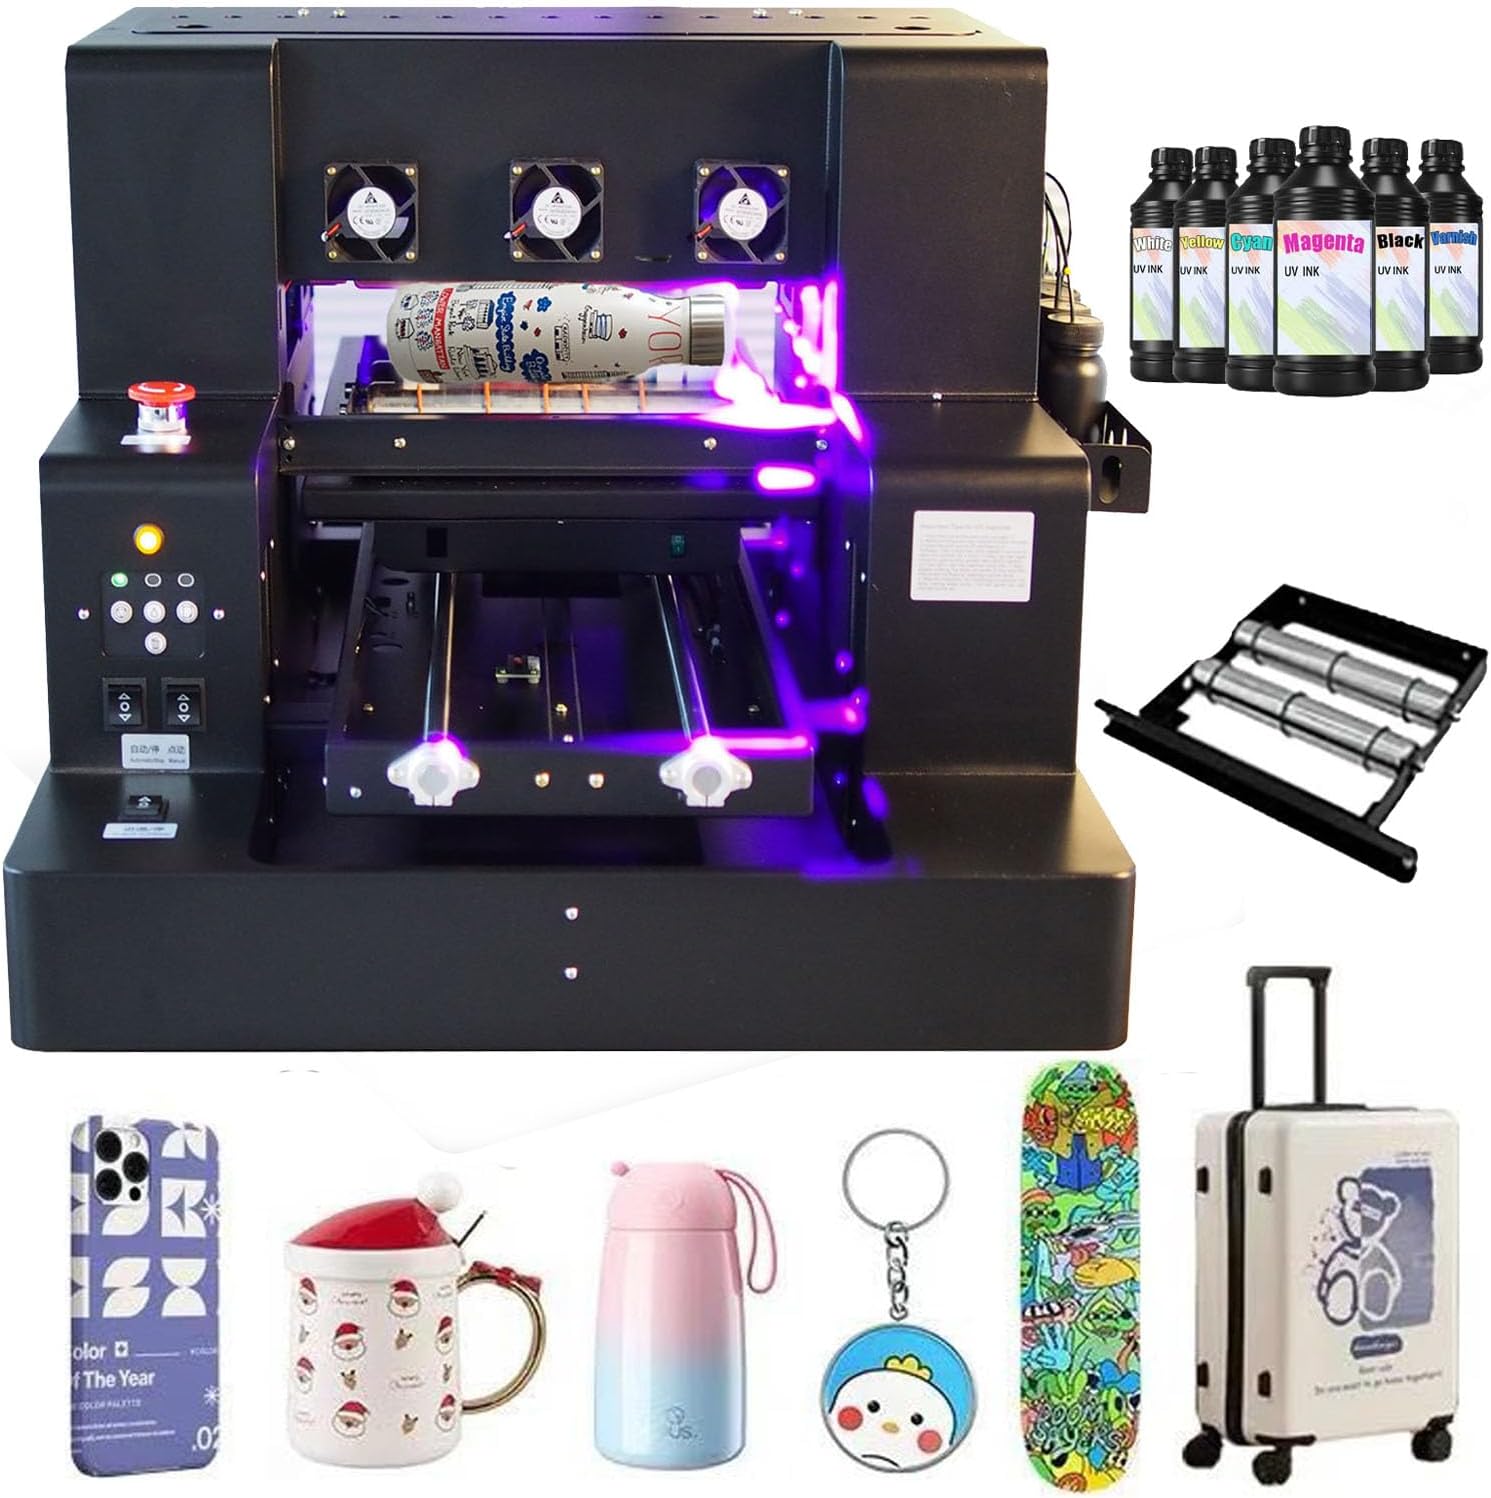
Image 1: The Sihao A3 UV Printer XP600, showcasing its compact design and examples of printed items like phone cases, bottles, and stickers.
2. Package Contents
Verify that all items listed below are included in your package. If any items are missing or damaged, please contact customer support.

Image 2: A visual representation of the items included in the printer package, laid out on a surface.
- 1x UV DTF Printer
- 1x USB User Manual (contains instructions and software)
- 1x Bottle Holder
- 6x Ink Bottles (various colors)
- 1x Ink Damper
- 1x Syringe
- USB and Power Cable
3. Product Overview and Key Features
The Sihao A3 UV Printer XP600 incorporates several advanced features to enhance printing efficiency and quality.

Image 3: Detailed diagram of the printer's control panel and key components.

Image 4: Visuals of the printer's advanced features.
- Suction Platform & Automatic Height Measurement: Ensures precise printing by automatically adjusting the print head height to the material surface.
- Emergency Stop Button: Provides immediate shutdown for safety during operation.
- White Ink Circulation System: Maintains ink fluidity and prevents pigment precipitation, ensuring consistent print quality.
- Auto-Cleaning Function: Helps prevent nozzle blockages and ensures smooth ink flow, extending print head life.
- High Resolution: Capable of printing at 5760*1440dpi for sharp and vibrant results.
4. Setup Guide
4.1. Power Connection and Initial Start-up
Before connecting the printer to power, ensure all packaging materials are removed. Connect the power cable to the printer and a suitable power outlet (110V-220V). Turn on the main power switch. The printer will perform an initial self-check.
Video 1: Demonstrates connecting the power cable and turning on the printer's main power switch. The printer performs an initial startup sequence.
4.2. Installing the Ink Bottle Shelf
Attach the ink bottle shelf to the side of the printer. Loosen the two designated screws, align the shelf, and then tighten the screws to secure it in place.
Video 2: Shows the process of loosening screws, attaching the ink bottle shelf, and tightening the screws to secure it.
4.3. Ink Filling and Tube Connection
Carefully fill the small white bottles with the corresponding colored inks. For white ink, shake the bottle thoroughly for at least 60 seconds before pouring to prevent precipitation. Then, connect the ink tubes to the bottles, matching the color sleeves on the tubes to the correct ink colors. Ensure the tubes extend below the liquid surface in each bottle.
Video 3: Illustrates the process of filling ink into the small bottles and connecting the ink tubes, emphasizing the importance of shaking white ink.
4.4. USB Connection
After initial setup and cleaning, connect the printer to your computer using the provided USB cable. Ensure the connection is secure for proper communication between the computer and the printer.
Video 4: Demonstrates connecting the USB cable to the printer after initial cleaning procedures.
5. Operating Instructions
The Sihao A3 UV Printer XP600 supports various printing modes for different materials. The general workflow involves preparing your design, placing the material, and initiating the print job.

Image 5: General printing workflow from design to finished product.
5.1. Flatbed Printing
For flat items like phone cases, acrylics, and stickers, use the flatbed printing mode. Ensure the item is securely placed on the print tray. The automatic height measurement feature will adjust the print head for optimal results.

Image 6: Examples of various printing applications, including flat plate printing on phone cases.
Video 5: Demonstrates the flatbed printing process on a phone case, showing the printer head moving and UV light curing the ink.
5.2. Cylinder Printing (with Bottle Holder)
To print on cylindrical objects like bottles or cups, install the bottle holder accessory. Place the cylindrical item securely in the holder. The printer will rotate the item during printing to apply the design evenly.
Image 7: Example of cylinder printing on a bottle.
Video 6: Shows the installation of the bottle holder and the process of printing on a cylindrical object.
5.3. DTF Sticker Printing
The printer supports DTF (Direct to Film) sticker printing. Prepare your DTF film with the desired designs and place it on the print tray. After printing, the stickers can be transferred to various surfaces.
Image 8: Example of DTF sticker printing.
Video 7: Demonstrates the process of printing DTF stickers using the printer.
5.4. 3D/Varnish Printing
Achieve textured or embossed effects with 3D or varnish printing. This involves applying multiple layers of white ink or a clear varnish layer to create a raised effect.
Image 9: Example of 3D/Varnish printing with a raised design.
Video 8: Shows the process of creating a 3D embossed print on a flat surface.
5.5. Automatic Printing
For continuous printing tasks, enable the automatic continuous print switch. This allows the printer to automatically process print jobs from the computer without manual intervention for each item.
Video 9: Demonstrates setting up and executing an automatic continuous print job from the computer.
6. Maintenance
Regular maintenance is crucial for maintaining print quality and extending the life of your printer. This includes daily cleaning procedures.
6.1. Head Cleaning
Perform head cleaning regularly, especially if print quality degrades or after periods of inactivity. The printer features a powerful cleaning function accessible via the control panel. Ensure the waste ink bottle is properly positioned to collect flushed ink.
Video 10: Shows how to perform a powerful head cleaning cycle and monitor ink flow into the waste ink bottle.
6.2. White Ink Agitation
Due to the nature of white ink, it is essential to agitate the white ink bottles daily before printing. This prevents pigment settling and ensures consistent white ink output. You can remove the bottles and shake them for approximately 30 seconds.
Video 11: Demonstrates the process of shaking white ink bottles to ensure proper pigment distribution before use.
7. Troubleshooting
This section addresses common issues you might encounter with your Sihao A3 UV Printer XP600.
7.1. Print Quality Issues (Streaks, Missing Colors)
- Cause: Clogged nozzles or settled ink.
- Solution: Perform a powerful head cleaning cycle (refer to Section 6.1). For white ink, ensure it has been thoroughly shaken before use (refer to Section 6.2).
7.2. Printer Not Responding
- Cause: Loose USB connection or power issue.
- Solution: Check the USB cable connection between the printer and computer. Ensure the printer is powered on and the power switch is in the 'on' position. Restart the printer and computer if necessary.
7.3. Material Not Feeding Correctly
- Cause: Incorrect material placement or obstruction.
- Solution: Ensure the material is correctly aligned on the print tray or within the bottle holder. Remove any obstructions from the print path.
8. Specifications
Below are the technical specifications for the Sihao A3 UV Printer XP600.

Image 10: A table detailing the technical specifications of the printer.
| Feature | Specification |
|---|---|
| Printer Type | A3 XP600 UV flatbed printer |
| Print Platform Size | 33*50*18CM |
| UV Lamp Effective Area | 32*50CM |
| Max Bottle Size | 11*33CM |
| Diameter Range of Bottle | 2-11CM |
| Printer Nozzle Type | EPSON XP600 |
| Software Setting Precision | 5760*1440dpi, 2880*1440dpi, 1440*1440dpi |
| Print Speed | 90 seconds (Photo mode) |
| Print Software | AcroRIP White ver 10.3 |
| Print Interface | USB2.0 |
| Color of Printing | CMYK+W+V or CMYK+2W |
| Printer Size | 76*63*51CM |
| Computer Operating System | Windows 7-11 |
9. Warranty and Support
For warranty information and technical support, please refer to the documentation provided on the USB drive included with your printer. If you encounter any issues that cannot be resolved using this manual or the provided software, please contact the seller or manufacturer directly for assistance.
The USB drive contains detailed instructions and software. If you are unable to access or install them, please reach out for support.