1. Important Safety Information
Operating power tools requires adherence to strict safety guidelines to prevent injury. This SawStop Compact Table Saw incorporates a patented safety system designed to detect contact with skin and stop the blade rapidly. However, this system is an additional safety measure and does not replace fundamental safe operating practices.
- Always wear appropriate personal protective equipment (PPE), including safety glasses, hearing protection, and a dust mask.
- Ensure the work area is clean, well-lit, and free from obstructions.
- Never operate the saw under the influence of drugs, alcohol, or medication that impairs judgment.
- Keep hands clear of the blade path. Use push sticks or push blocks when feeding material.
- Disconnect power before performing any maintenance, adjustments, or when changing blades.
- Familiarize yourself with the location and function of the emergency stop button.
- Ensure the safety system is active and functioning correctly before each use.
Warning: The SawStop safety system is designed to reduce the risk of serious injury from blade contact. It does not prevent all injuries and is not a substitute for safe operating procedures.
2. Product Overview
The SawStop CTS-120A60 is a compact table saw designed for portability and precision. It features a 10-inch blade and a robust construction suitable for various cutting tasks. Key features include:
- Patented Safety System: Detects skin contact and stops the blade.
- Portable Durability: Heavy-duty construction for stability on job sites.
- Rack & Pinion Fence: Provides accurate and repeatable cuts with easy adjustment.
- Quick Tilt: Allows for fast and precise blade angle adjustments.

Figure 2.1: Front view of the SawStop CTS-120A60 Compact Table Saw.
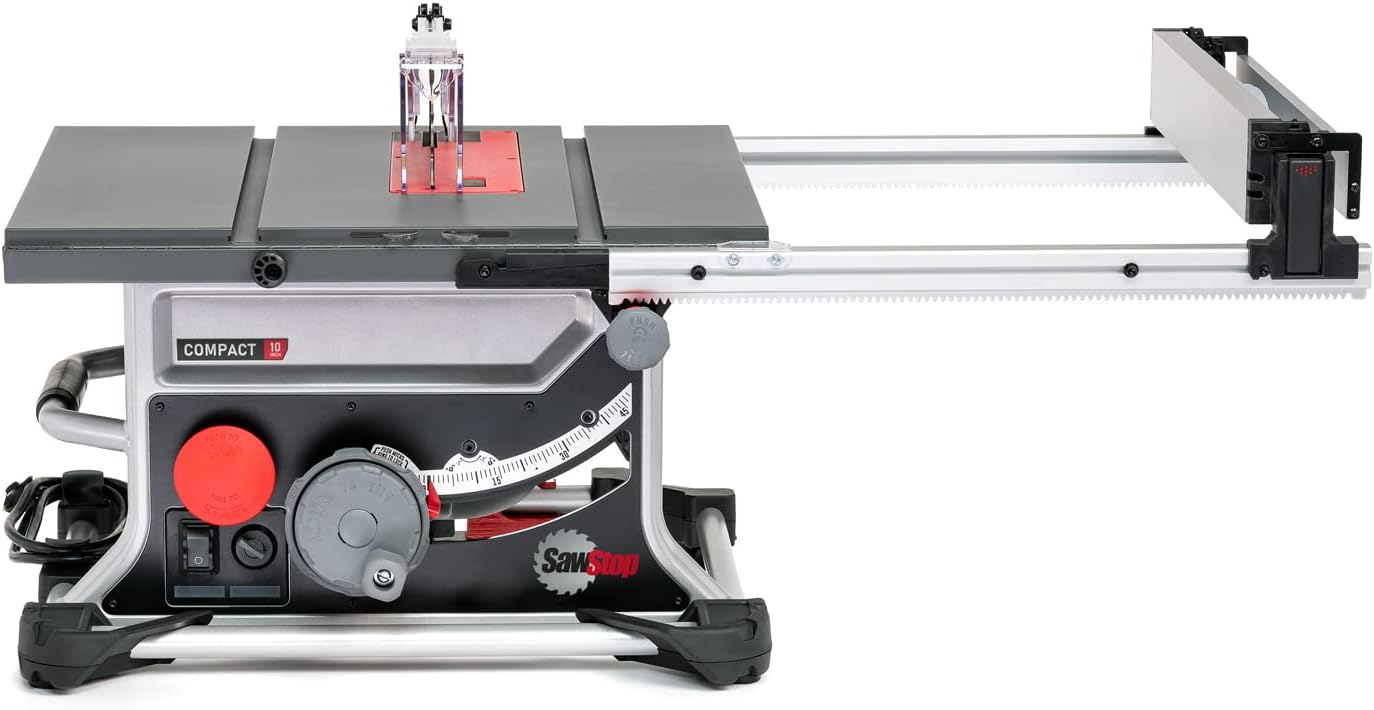
Figure 2.2: SawStop CTS-120A60 with the rack and pinion fence extended for wider cuts.
3. Setup
Before operating the saw, ensure proper assembly and setup. Refer to the included assembly guide for detailed instructions on attaching components.
3.1 Unpacking and Inspection
- Carefully remove all components from the packaging.
- Inspect the saw and all accessories for any shipping damage. Do not operate the saw if damage is present.
- Verify that all included components are present according to the packing list.

Figure 3.1: All included components of the SawStop CTS-120A60 Compact Table Saw, including the saw body, blade, safety cartridge, fence, miter gauge, and wrenches.
3.2 Power Connection
- The saw operates on 110 Volts, 60Hz. Ensure your power supply matches these requirements.
- Connect the saw to a dedicated circuit if possible, or one that can handle the 15A current draw without tripping.
- Always use a grounded outlet.
3.3 Blade Installation and Safety Cartridge
- Ensure the saw is unplugged.
- Install the 10-inch blade according to the directional arrows on the blade and the saw.
- Install the appropriate SawStop safety cartridge. The cartridge is crucial for the safety system's operation.
- Ensure the blade guard and anti-kickback pawls are properly installed and adjusted.
4. Operating Instructions
This section outlines general operating procedures. Always refer to the full manual for detailed instructions specific to your application.
4.1 Adjusting Blade Height and Angle
- Use the blade height adjustment wheel to set the blade to the desired height. For through cuts, the blade should extend approximately 1/8 inch above the workpiece.
- Utilize the Quick Tilt mechanism to adjust the blade angle for bevel cuts. Fine-tune the angle with the micro tilt-adjust feature.

Figure 4.1: Adjusting the blade height and angle using the saw's control knobs.
4.2 Using the Rack & Pinion Fence
- Unlock the fence and slide it to the desired measurement. The rack and pinion system ensures parallel alignment to the blade.
- Lock the fence securely in place before making a cut.
- The fence includes high and low shelf positions to accommodate various material thicknesses and cutting operations.
4.3 Making a Cut
- Ensure all safety guards are in place and the safety system is active.
- Position the workpiece firmly against the fence and table.
- Turn on the saw and allow the blade to reach full speed before beginning the cut.
- Feed the material slowly and consistently through the blade, using a push stick or push block as needed.
- Once the cut is complete, turn off the saw and wait for the blade to stop completely before removing the workpiece or off-cuts.

Figure 4.2: A user demonstrating proper operation of the SawStop CTS-120A60, wearing safety glasses and hearing protection.
5. Maintenance
Regular maintenance ensures the longevity and safe operation of your SawStop table saw.
5.1 General Cleaning
- Always unplug the saw before cleaning.
- Remove sawdust and debris from the table, fence, and blade area after each use. A shop vacuum or compressed air can be used.
- Keep the motor vents clear to prevent overheating.
5.2 Blade and Safety Cartridge Replacement
- Replace dull or damaged blades promptly. Refer to Section 3.3 for blade installation.
- The safety cartridge must be replaced after any activation of the safety system.
- To replace the safety cartridge, ensure the saw is unplugged. Follow the instructions in the full manual for safe removal and installation.
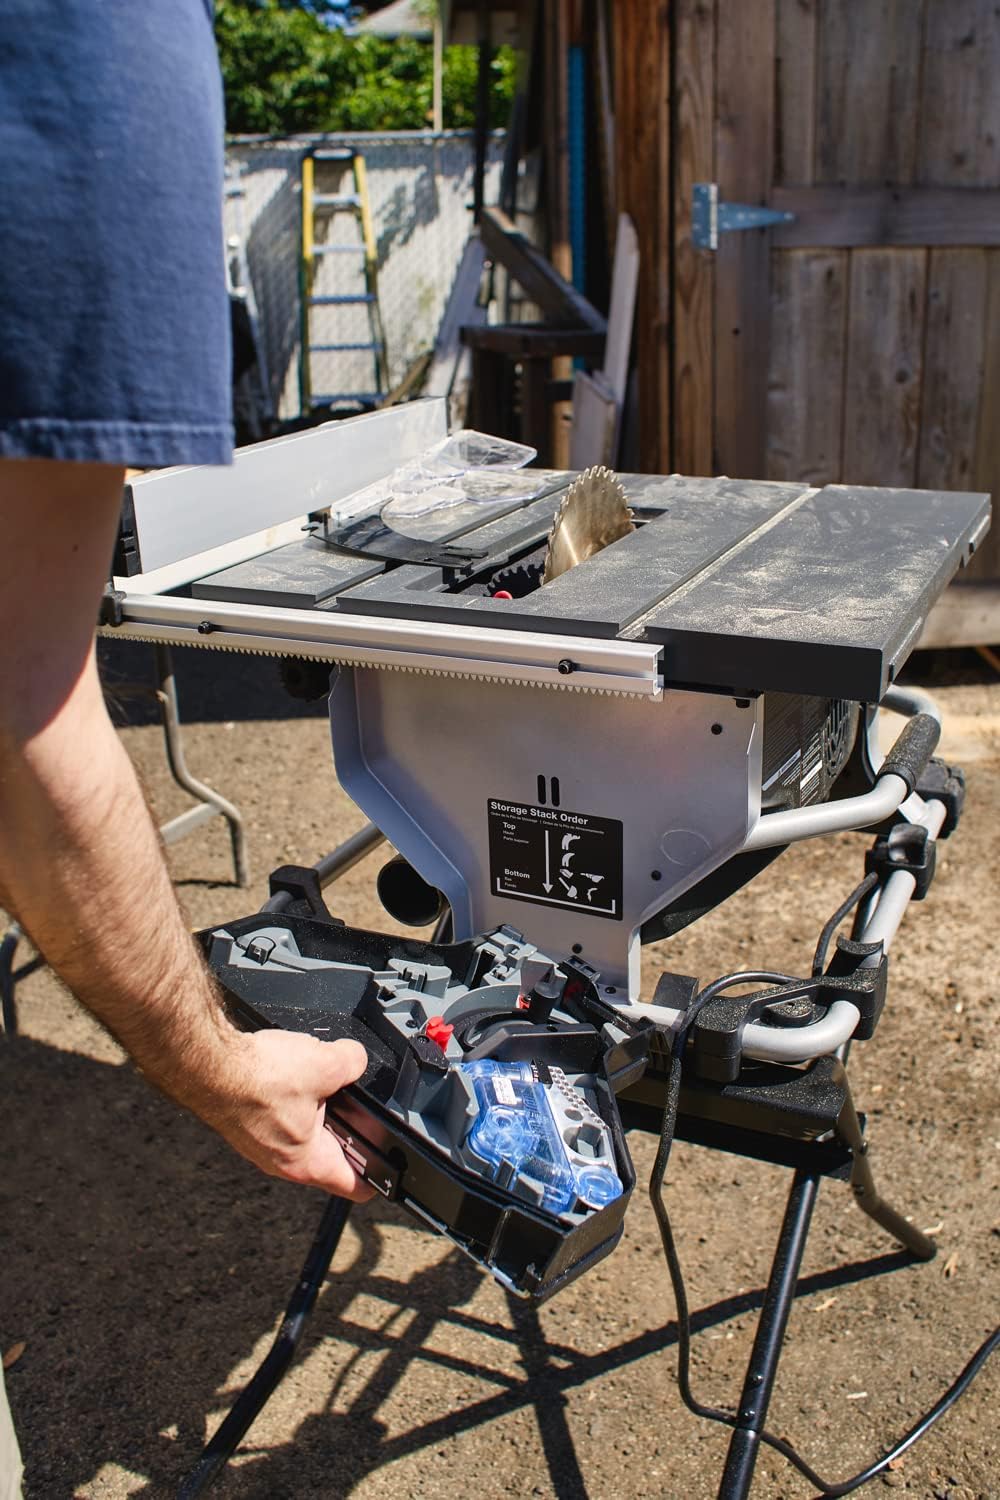
Figure 5.1: Process of removing the SawStop safety cartridge for inspection or replacement.
5.3 Table Surface Care
- Periodically clean the table surface and apply a rust preventative or dry lubricant to ensure smooth material feeding and prevent corrosion.
6. Troubleshooting
This section addresses common issues you might encounter with your SawStop CTS-120A60 table saw.
| Problem | Possible Cause | Solution |
|---|---|---|
| Saw does not start | No power, tripped circuit breaker, safety system not engaged. | Check power connection, reset circuit breaker, ensure safety cartridge is correctly installed and system is armed. |
| Blade stops unexpectedly | Safety system activated, motor overload. | Inspect for skin contact with blade (if safety system activated, cartridge needs replacement). Reduce feed rate, check for dull blade. |
| Inaccurate cuts | Fence not parallel, dull blade, incorrect blade height. | Verify fence alignment, replace blade, adjust blade height. |
| Excessive vibration | Loose blade, damaged blade, unstable saw setup. | Check blade for tightness and damage, ensure saw is on a stable surface. |
If you encounter issues not listed here or if solutions do not resolve the problem, contact SawStop customer support.
7. Specifications
| Brand | SawStop |
| Model Number | CTS-120A60 |
| Power Source | Corded Electric |
| Voltage | 110 Volts |
| Blade Diameter | 10 Inches |
| Speed | 4000 RPM |
| Blade Material | Carbide |
| Item Weight | 79 Pounds |
| Product Dimensions | 27"L x 23.5"W x 14.13"H |
| Special Feature | Brake (SawStop Safety System) |
| Included Components | Attachments (e.g., blade, safety cartridge, fence, miter gauge, wrenches) |
| UPC | 857766003857 |
| CSA Certified | Yes |
8. Warranty and Support
8.1 Manufacturer's Warranty
The SawStop CTS-120A60 Compact Table Saw is covered by a 2 Year Manufacturer Warranty. This warranty covers defects in materials and workmanship under normal use. Please retain your proof of purchase for warranty claims.
For full details regarding warranty terms, conditions, and exclusions, please refer to the official warranty documentation included with your product or visit the SawStop official website.
8.2 Customer Support
For technical assistance, parts, or warranty service, please contact SawStop customer support. Contact information can typically be found on the manufacturer's website or in the documentation provided with your saw.
When contacting support, please have your model number (CTS-120A60) and serial number ready.


