
1. Introduction
Thank you for choosing the KUIIYER T700 2-in-1 Fingerprint & Password Time Clock. This device is designed to provide an efficient and convenient time and attendance system for small to medium-sized businesses. It supports both fingerprint and password identification, offering quick and accurate employee clock-in/out. This manual will guide you through the setup, operation, and maintenance of your new time clock.
2. Product Overview
The KUIIYER T700 features a 2.4-inch TFT color LCD display and supports up to 1000 users, 3000 fingerprints, and 1000 passwords, with a record capacity of 160,000 entries. It also supports 16 departments and 24 shifts, along with multi-language and AI voice prompts for ease of use.
2.1. Device Components

Detailed diagram of the KUIIYER T700 Time Clock, highlighting its 2.4-inch TFT Color LCD Display, Power Interface, USB Interface, Reset Hole, Keyboard, Fingerprint Collector, AI Voice Speaker, Screw Hanging Hole, and Bracket Installation Groove. Dimensions are also shown.
2.2. Key Features
- High Efficiency Biometric Identification: Latest biometric technology for fingerprint identification within 0.5 seconds.
- 2-in-1 Punch Methods: Supports Fingerprint Identification (3000 fingerprint capacity) and PIN Identification (1000 password capacity).
- Large Capacity: Max 1000 user capacity, 160,000 record capacity, 16 departments, and 24 shifts.
- User-Friendly Display: 2.4-inch TFT color LCD display with intuitive interface.
- Multi-language & AI Voice: Supports 12 different languages and AI voice prompts for identity confirmation.
- Safe & Convenient Data Management: Easy data download/upload via USB flash drive (FAT32 formatted recommended, not included). No app or network required for data security.
- No Monthly Fees: Standalone system with automatic hours calculations and power loss protection.
3. Setup
3.1. Unboxing and Included Items
Upon unboxing, ensure all the following items are present:
- KUIIYER T700 Time Clock Device
- Power Adapter
- USB Cable
- Mounting Bracket
- Screws and Wall Anchors
- User Manual
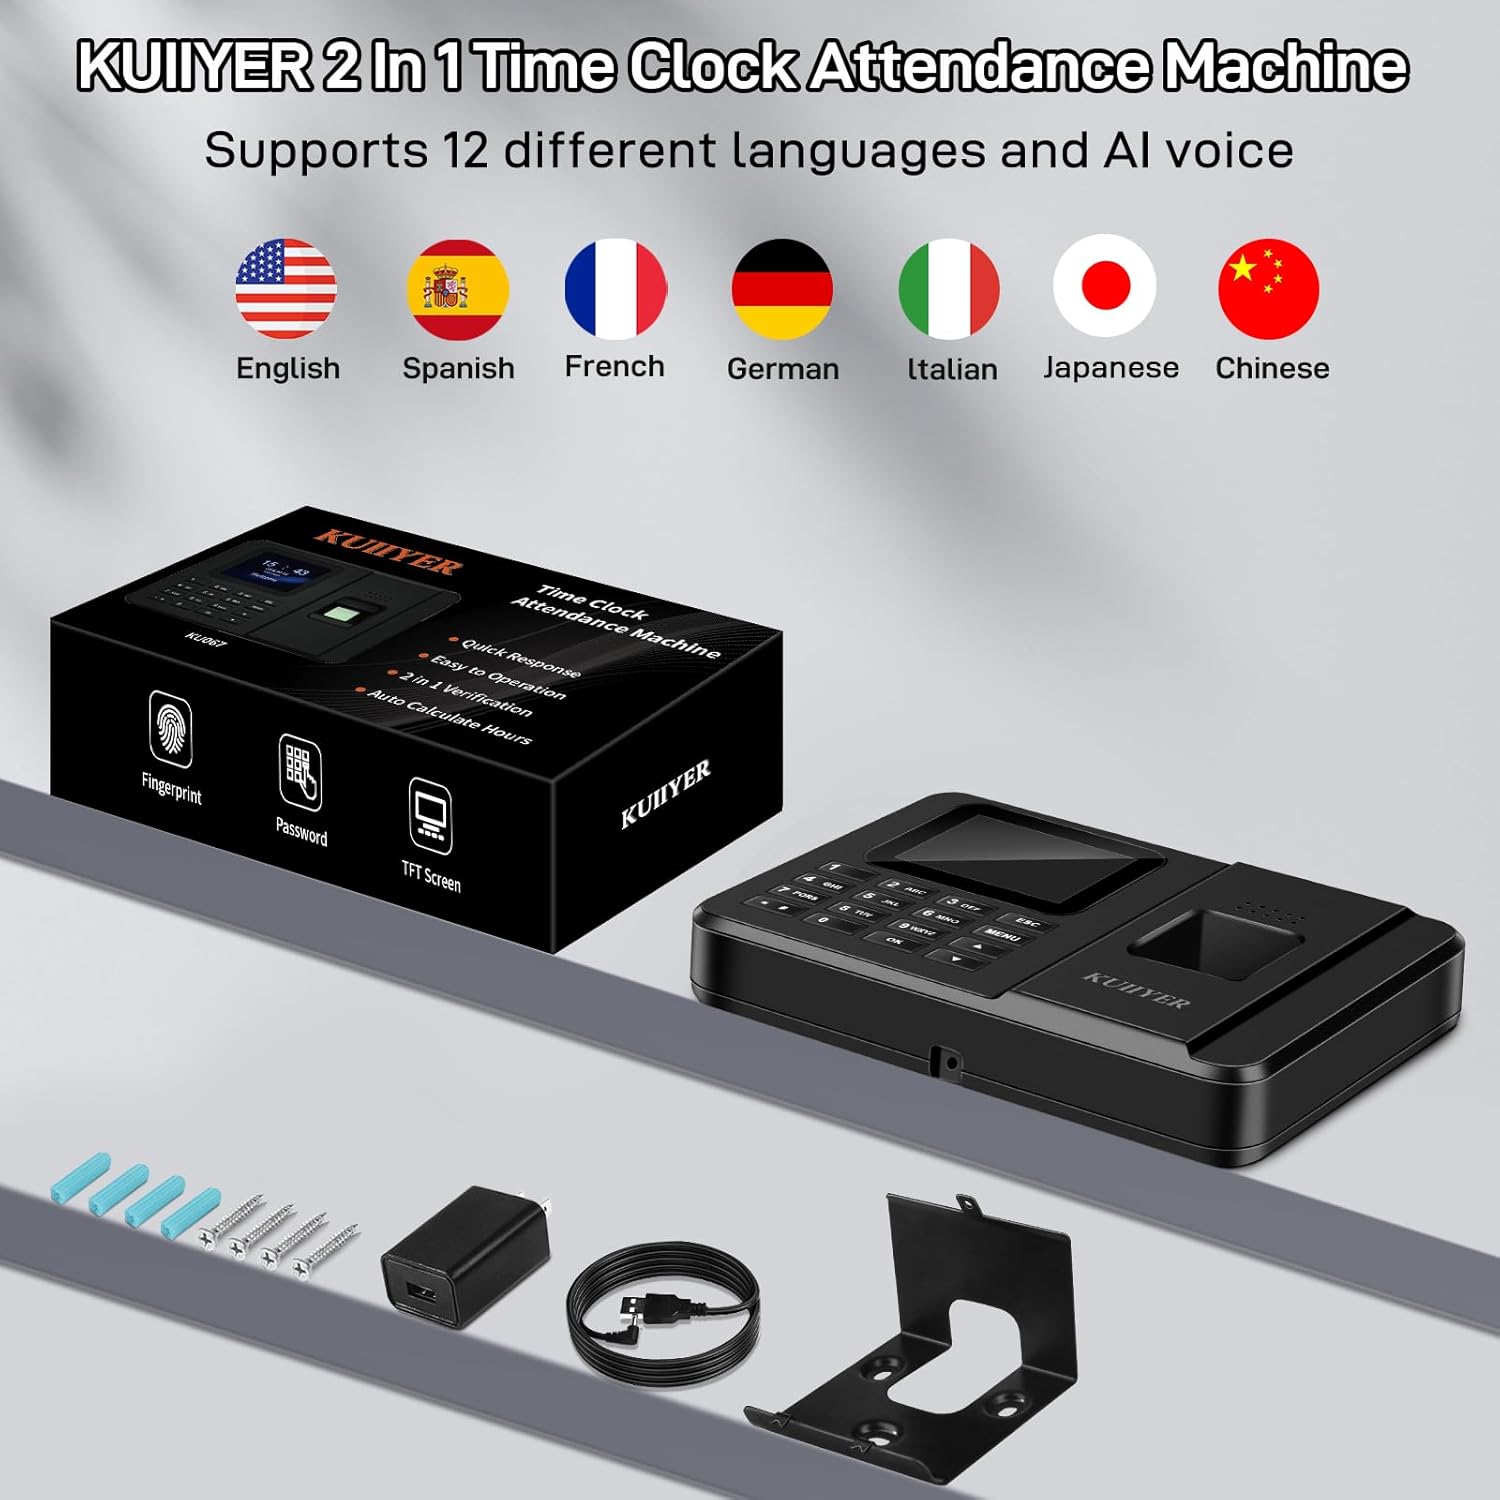
Image displaying the components included with the KUIIYER T700 Time Clock: the device itself, power adapter, USB cable, mounting bracket, and screws. It also highlights multi-language and AI voice support.
3.2. Physical Installation
The KUIIYER T700 can be installed in two ways: on a desktop or wall-mounted.
- Desktop Placement: Simply place the device on a flat, stable surface.
- Wall Mounting: Use the provided mounting bracket, screws, and wall anchors to securely attach the device to a wall at a convenient height.

Image demonstrating the quick and easy installation options for the KUIIYER T700 Time Clock, showing it placed on a desktop and mounted on a wall.
3.3. Initial Power-On and Basic Settings
- Connect the power adapter to the device's power interface and plug it into an electrical outlet.
- The device will power on automatically.
- Follow the on-screen prompts to set the current date, time, and preferred language. The device supports 12 different languages.
4. Operating Instructions
4.1. Adding Users (Employees)
To add new employees to the system:
- Press the 'MENU' button to access the main menu.
- Navigate to 'User Management' and select 'Add User'.
- Enter the employee's ID and Name using the keypad.
- For Fingerprint: Select 'Enroll FP' and follow the on-screen instructions to scan the employee's finger multiple times (typically 3 times from different angles) for accurate registration.
- For Password: Select 'Enroll PWD' and set a unique password for the employee.
- Save the user information.

Image illustrating the 2-in-1 punch methods: fast fingerprint recognition (under 0.5 seconds) and immediate password recognition on the KUIIYER T700 Time Clock.
4.2. Employee Clock-in/out
Employees can clock in or out using their registered fingerprint or password:
- Fingerprint: Place the registered finger on the fingerprint collector. The device will verify the identity and record the time with an AI voice announcement.
- Password: Enter the assigned password using the keypad and press 'OK'. The device will verify and record the time.
4.3. Setting up Departments and Shifts
From the main menu, navigate to 'Dept. Set' and 'Shift Set' to configure departments, work shifts, and attendance rules (e.g., late arrival, early departure thresholds).
4.4. Data Management (Downloading Reports)
To retrieve attendance data:
- Insert a FAT32 formatted USB flash drive (not included) into the device's USB port.
- From the main menu, navigate to 'Data Mgt.' or 'Report'.
- Select 'Download Att. Report' to download attendance records. You can also upload shift settings or employee arrangements from a USB drive.
- The data will be saved as an Excel-compatible file on the USB drive.

Image showing the safe and convenient data management process. An attendance report is downloaded from the time clock to a laptop via a FAT32 formatted USB drive (not included).
4.5. Product Demonstration Video
Official seller video demonstrating the KUIIYER 2-in-1 Time Clock, showcasing its features and the versatility of its two check-in methods (fingerprint and password).
Seller video providing a real buyer's showcase of a similar NGTeco time clock, demonstrating user setup, fingerprint enrollment, and data download functionalities.
5. Maintenance
- Keep the device clean and free from dust. Use a soft, dry cloth for cleaning.
- Avoid exposing the device to direct sunlight, high temperatures, or excessive moisture.
- Regularly back up attendance data to prevent loss. The device features power loss protection, but regular backups are recommended.
6. Troubleshooting
6.1. Fingerprint Recognition Issues
- Ensure the finger is clean and dry.
- Place the entire finger pad firmly on the sensor.
- If issues persist, re-enroll the fingerprint, ensuring multiple angles are captured during registration.
6.2. Data Download Failure
- Ensure the USB flash drive is FAT32 formatted.
- Try a different USB port or a different USB flash drive.
- Check the device's 'Sys.Info' menu for available record capacity.
6.3. Incorrect Time/Date
- Access the 'System' menu and then 'Date/Time Set' to correct the settings.
- Ensure the device is receiving consistent power.
7. Specifications
| Feature | Detail |
|---|---|
| Brand | KUIIYER |
| Model Number | T700 |
| Item Weight | 7 ounces |
| Product Dimensions | 6.69 x 1.5 x 4.72 inches |
| Material Type | Premium ABS Plastic |
| Display | 2.4-inch TFT Color LCD |
| User Capacity | Max 1000 |
| Fingerprint Capacity | 3000 |
| Password Capacity | 1000 |
| Record Capacity | 160,000 |
| Languages Supported | 12 (English, Spanish, French, German, Italian, Japanese, Chinese, etc.) |
| Data Export | USB Flash Drive (FAT32 recommended) |
8. Warranty & Support
KUIIYER offers a 90-DAYS Unconditional Return policy and a 24-Month Promise for any quality-related issues. Our professional customer support team is available to handle your issues and provide assistance within 12 hours.
For further support, please refer to the contact information provided in your product packaging or visit the official KUIIYER store online.
