Introduction
This manual provides essential information for the safe and effective use of the Kaiser EW 100 Precision Boring Head, model 312.616. This Swiss-made modular boring head is designed for precision machining operations, specifically for creating accurate holes with fine surface finishes. Adhering to the guidelines in this manual will ensure optimal performance and longevity of your tool.
Product Overview
The Kaiser EW 100 is a high-precision boring head known for its robust construction and accurate adjustments. It is typically used in conjunction with a milling machine or machining center to achieve precise bore diameters.
Components
- Boring Head Body: The main housing of the tool, containing the adjustment mechanism.
- Tool Holder: The component that securely holds the boring bar or cutting insert.
- Adjustment Dial: A graduated dial for precise diameter adjustments, often with fine increments.
- Mounting Shank: The part that connects the boring head to the machine spindle.

This image shows the overall view of the Kaiser EW 100 Precision Boring Head, highlighting its robust construction and key features.

This image provides a size reference for the boring head, shown alongside a measuring tape.

A detailed view of the cutting insert securely mounted in the boring head, demonstrating the precision cutting edge.

This image focuses on the precision adjustment dial, indicating "1 DIV = .0005 DIA" for fine diameter control.

A top-down view of the boring head, clearly showing the "Kaiser Swiss Made" branding and model numbers "EW 100" and "312.616".
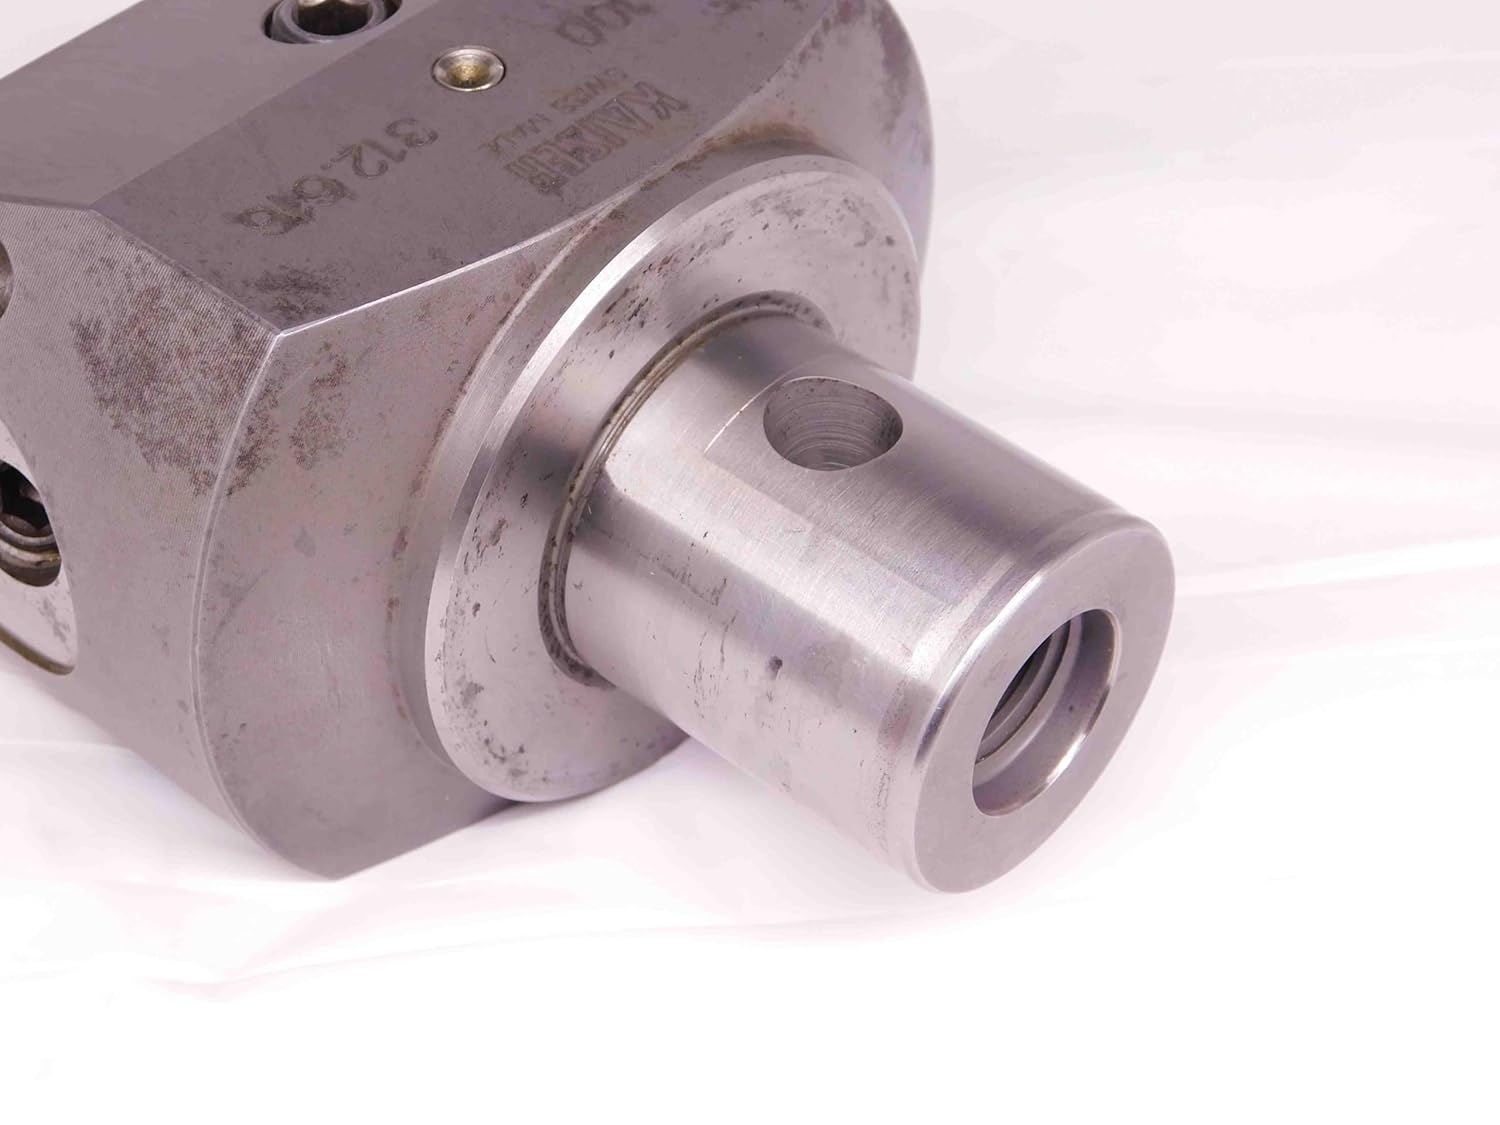
This image displays the mounting shank of the boring head, which connects to the machine spindle, and the internal threading for securing the boring bar.
Setup
Proper setup is crucial for achieving accurate results and ensuring safe operation.
- Inspection: Before each use, thoroughly inspect the boring head for any signs of damage, wear, or loose components. Ensure all screws are tightened to their specified torque.
- Mounting: Securely mount the boring head onto the machine spindle. Verify that the connection is rigid and free from play to prevent runout during operation.
- Insert Installation: Carefully install the appropriate cutting insert into the tool holder. Ensure it is correctly seated and tighten the retaining screw according to the insert manufacturer's specifications.
- Boring Bar Selection: Choose a boring bar that is suitable for the desired bore diameter, depth, and material. Use the shortest possible boring bar to maximize rigidity.
- Initial Adjustment: Make a preliminary diameter adjustment using the fine adjustment dial. This initial setting can be refined after a trial cut.
Operating
Follow these steps for effective and precise boring operations.
- Workpiece Setup: Securely clamp the workpiece on the machine table. Ensure it is stable and properly aligned.
- Tool Path Programming: If using a CNC machine, program the desired boring path, including feed rates, spindle speeds, and depth of cut, based on material and desired finish.
- Trial Cut: Perform a trial cut on a scrap piece of material or make a shallow cut on the actual workpiece. Measure the initial bore diameter accurately.
- Fine Adjustment: Use the precision adjustment dial to achieve the exact desired bore diameter. Each division on the dial typically corresponds to a specific change in diameter (e.g., 0.0005 inches as indicated on the product). Turn the dial clockwise to increase diameter and counter-clockwise to decrease.
- Boring Operation: Initiate the boring operation, ensuring proper coolant flow and efficient chip evacuation. Monitor the process for any unusual sounds or vibrations.
- Measurement: After boring, carefully measure the finished bore diameter using appropriate measuring tools (e.g., bore gauge, micrometer) to confirm accuracy.
Maintenance
Regular maintenance ensures the longevity and precision of your Kaiser boring head.
- Cleaning: After each use, clean the boring head thoroughly to remove chips, coolant residue, and debris. Use a soft cloth and appropriate cleaning agents. Avoid harsh chemicals that may damage the finish or internal components.
- Lubrication: Periodically apply a thin layer of high-quality machine oil to moving parts and adjustment mechanisms to ensure smooth operation and prevent corrosion. Consult the product's original documentation for specific lubrication points.
- Storage: Store the boring head in a clean, dry environment, preferably in its original case or a protective container, to prevent damage from impacts, dust, and moisture.
- Insert Replacement: Replace worn or chipped cutting inserts promptly. Using dull inserts can lead to poor surface finish, inaccurate dimensions, and increased stress on the boring head.
- Inspection: Regularly inspect the boring head for any signs of wear, damage, or excessive play in the adjustment mechanism. Address any issues immediately to prevent further damage or compromised precision.
Troubleshooting
This section addresses common issues you might encounter during operation.
| Problem | Possible Cause | Solution |
|---|---|---|
| Poor Surface Finish | Worn or chipped insert, incorrect feed/speed, vibration, insufficient coolant. | Replace insert, adjust cutting parameters (feed/speed), check machine rigidity, ensure adequate coolant flow. |
| Inaccurate Bore Diameter | Incorrect adjustment, tool deflection, machine runout, temperature variations. | Re-adjust carefully using the fine adjustment dial, use proper boring bar and setup, check machine spindle runout, allow for thermal stability. |
| Excessive Tool Wear | Incorrect cutting parameters (too high speed/feed), wrong insert grade for material, lack of coolant. | Optimize feed/speed, select appropriate insert material and coating, ensure proper coolant delivery. |
| Vibration/Chatter | Long boring bar overhang, loose clamping of workpiece or tool, worn machine bearings, incorrect cutting parameters. | Use shortest possible boring bar, ensure rigid clamping, inspect machine for mechanical issues, adjust feed/speed. |
Specifications
Key technical specifications for the Kaiser EW 100 Precision Boring Head.
| Feature | Detail |
|---|---|
| Model | EW 100 |
| Part Number | 312.616 |
| Type | Precision Boring Head, Modular |
| Origin | Swiss Made |
| Mount | KAB6 (inferred) |
| Adjustment Precision | 1 DIV = .0005 DIA (as indicated on product) |
| ASIN | B0FFDNZL8P |
| Product Manufacturer | Kaiser |
| Seller | M & J Tooling LLC |
Warranty and Support
Specific warranty information and direct support contacts for the Kaiser EW 100 Precision Boring Head are not provided in the available product data. For details regarding warranty terms, technical support, or service, please refer to your original purchase documentation or contact the seller directly.
Seller Contact: M & J Tooling LLC, Dayton, Ohio. (Further contact details not provided in product data).
For general product information or to find authorized distributors, you may also visit the official Kaiser website.


