
1. Introduction
This manual provides essential information for the safe and effective use of your Solong Wireless Tattoo Gun Kit. This all-inclusive kit is designed for both beginners and experienced users, offering a premium wireless tattoo machine with adjustable stroke lengths, a powerful battery, and a variety of essential accessories. Please read these instructions thoroughly before operation to ensure proper setup, usage, and maintenance.
2. Package Contents
Your Solong Wireless Tattoo Gun Kit includes the following items:
- Wireless Tattoo Machine (with 2 rechargeable batteries)
- Assorted Cartridge Needles (20 count)
- Tattoo Inks (1 large black, 5 small assorted colors)
- Practice Skin
- Grip Tape
- Ink Cups
- USB-C Charging Cable
- Transfer Paper (5 sheets)
- Gloves

Figure 2.1: Overview of the Solong Wireless Tattoo Gun Kit contents, including the machine, needles, inks, and accessories.
3. Safety Information
- Practice Inks: The small colored tattoo inks included in this kit are for practice skin use only. Do not use these inks on human skin. The large bottle of black ink is suitable for human skin.
- Sterilization: All cartridge needles are individually packaged and sterilized. Ensure the packaging is intact before use. Discard used needles properly in a sharps container.
- Hygiene: Always wear gloves and maintain a clean working environment to prevent cross-contamination.
- Professional Use: This kit is intended for individuals with proper training and knowledge of tattooing practices. Improper use may result in injury or infection.
4. Setup
4.1 Assembling the Tattoo Pen
- Attach Battery: The tattoo pen features a magnetic battery connection. Align the battery with the top of the pen and it will securely attach.
- Insert Cartridge Needle: Gently push the desired cartridge needle into the front opening of the tattoo pen until it clicks into place.
- Adjust Needle Length: Rotate the grip section of the pen (the part below the display) left or right to adjust the needle protrusion from 0-4.5mm.
- Adjust Stroke Length: The machine offers 7 adjustable stroke lengths (2.0mm, 2.3mm, 2.6mm, 3.0mm, 3.4mm, 3.8mm, 4.2mm). Rotate the designated ring on the machine body to select your desired stroke length.
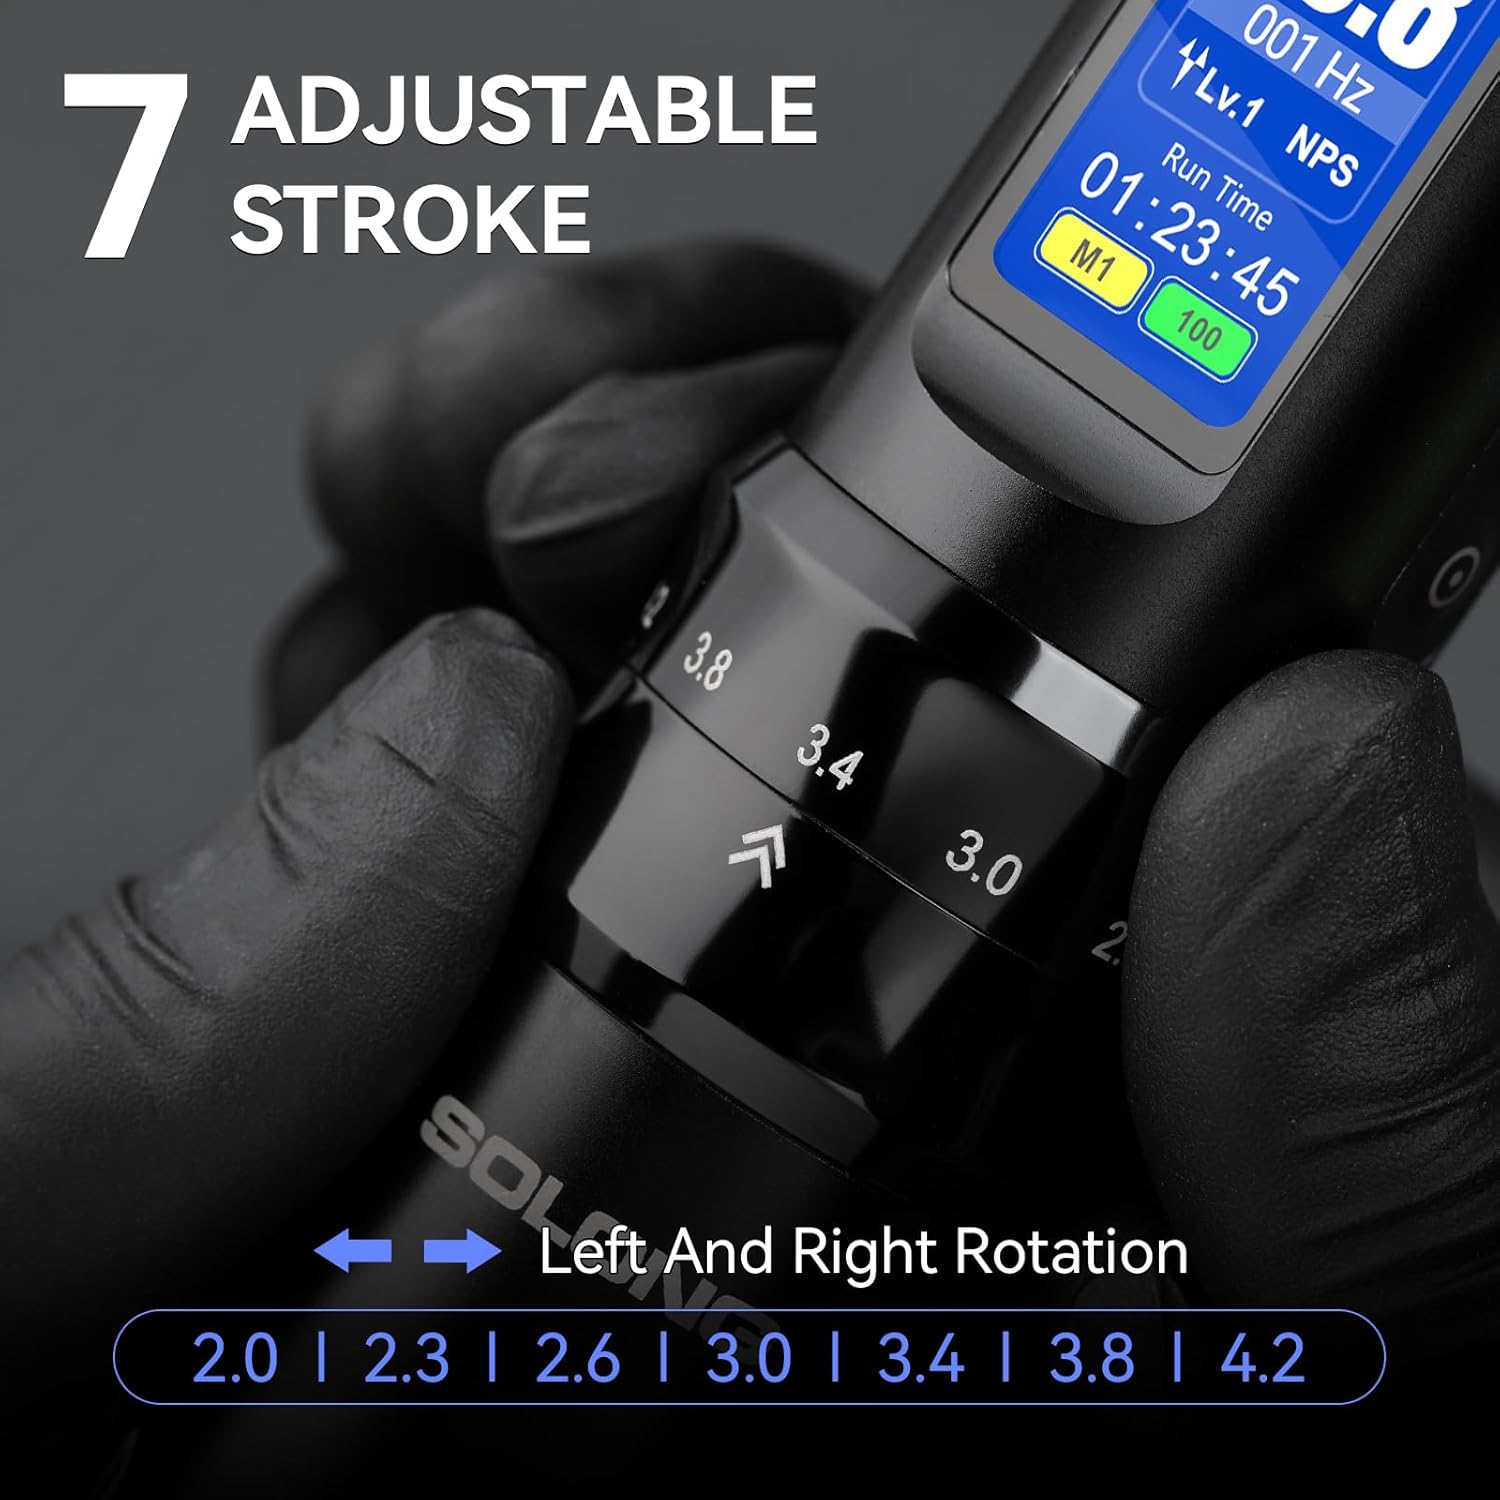
Figure 4.1: The tattoo pen features a rotating mechanism to adjust the stroke length between 2.0mm and 4.2mm.
4.2 Charging the Battery
The wireless tattoo pen is powered by a high-performance 1600mAh lithium battery. It features a USB-C charging port located at the top of the battery unit. Connect the provided USB-C cable to the port and a suitable power source. A full charge takes approximately 2 hours and provides 5-6 hours of continuous working time.
5. Operating Instructions
5.1 Power On/Off
- Power On: Press and hold the power button (red circle) for 1.5 seconds. The device will display a power-on animation and then enter standby mode.
- Power Off: Press and hold the power button for 1.5 seconds.
- Start/Pause: A short press of the power button will start or pause the machine.
5.2 Adjusting Voltage and Frequency
The OLED digital display shows output voltage, frequency, run time, and battery level. Use the up (▲) and down (▼) buttons to adjust the operating voltage (output range 4-12V).

Figure 5.1: The OLED display provides real-time information on output voltage, frequency, and battery status.
5.3 Memory Modes (M1, M2, M3)
The device features three memory settings (M1, M2, M3) allowing you to save preferred voltage and frequency settings for different tattooing techniques (e.g., lining, shading, stippling). Use the 'M' button to cycle through these modes. In stippling mode, you can adjust the frequency range from 1-10 Hz using the up (▲) and down (▼) keys.
5.4 Changing Display Wallpaper
To personalize your device, you can change the display wallpaper. Press both the up (▲) or down (▼) button and the 'M' button simultaneously for 3 seconds to cycle through the 5 available color wallpapers.

Figure 5.2: Pressing specific buttons simultaneously allows you to change the display wallpaper color.
5.5 Forced Start Mode
When the device is powered off, quickly double-click the power button to activate Forced Start Mode. A lightning symbol (⚡) will appear on the display to indicate that Forced Start is activated. This mode provides an initial power boost for certain needle configurations.

Figure 5.3: Double-clicking the power button activates the Forced Start Mode, indicated by a lightning bolt icon.
5.6 In-Use Demonstration
Observe the tattoo gun in operation to understand its quiet performance and precision.

Figure 5.4: The Solong Wireless Tattoo Gun in action, demonstrating its ergonomic design and quiet operation.
Video 5.1: A demonstration of the Solong Wireless Tattoo Gun Kit, showcasing its components and basic assembly.
6. Maintenance
- Cleaning: After each use, clean the machine body with a soft, damp cloth and a mild disinfectant. Avoid getting liquids into the internal components.
- Storage: Store the tattoo machine and accessories in a clean, dry place away from direct sunlight and extreme temperatures.
- Needle Disposal: Always dispose of used tattoo needles in a designated sharps container to prevent accidental injury and contamination.
7. Troubleshooting
- Machine Not Turning On: Ensure the battery is fully charged and properly attached. If using a wired setup (not applicable for this wireless model), check all cable connections.
- Inconsistent Power/Performance: Check battery level. Ensure the needle cartridge is correctly seated. Clean the machine to remove any debris that might impede motor function.
- Display Issues: If the display is unresponsive or showing errors, try restarting the machine. Ensure the battery is adequately charged.
8. Specifications
| Feature | Specification |
|---|---|
| Model | SL-TKE200A-1-USA |
| Stroke Lengths | 7 adjustable (2.0mm, 2.3mm, 2.6mm, 3.0mm, 3.4mm, 3.8mm, 4.2mm) |
| Output Voltage Range | 4-12V |
| Battery Capacity | 1600mAh Lithium |
| Charging Time | Approx. 2 hours |
| Working Hours | 5-6 hours (per battery) |
| Motor Speed | 10,000 RPM ±5% |
| Noise Level | <45dB |
| Needle Length Adjustment | 0-4.5mm |
9. Warranty and Support
For warranty information, technical support, or any questions regarding your Solong Wireless Tattoo Gun Kit, please refer to the contact information provided with your purchase or visit the official Solong Tattoo website. Keep your proof of purchase for warranty claims.