
1. Product Overview
The Acegeek Pulse AG-PULSE-BK is a mid-tower gaming case designed for PC enthusiasts. It features a tempered glass side panel, mesh front panel for optimal airflow, and supports various motherboard form factors. This manual provides essential information for the installation, operation, and maintenance of your gaming case.
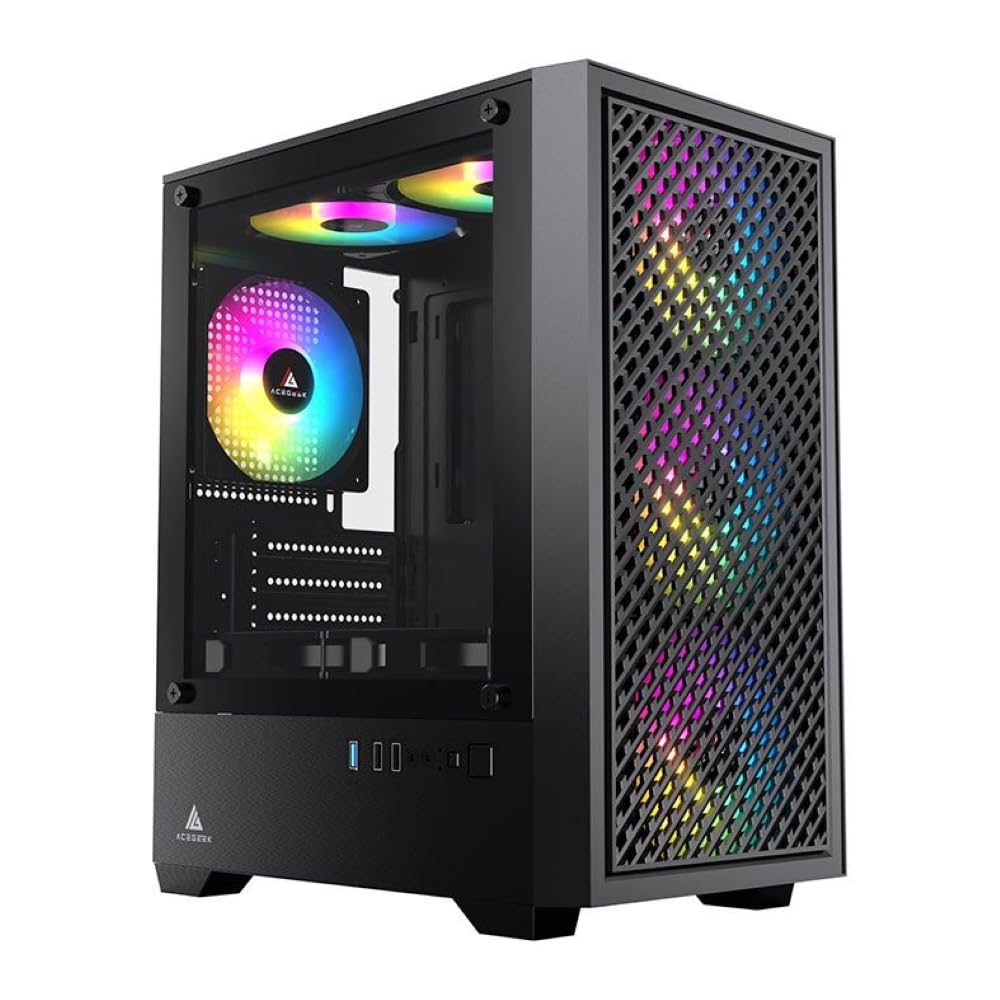
Figure 1: Front view of the Acegeek Pulse Gaming Case, showcasing the mesh front panel and internal RGB fan lighting.
Key Features:
- Mid-Tower design for balanced size and component compatibility.
- Tempered glass side panel for showcasing internal components.
- Mesh front panel for enhanced airflow.
- Support for Micro-ATX, ITX, and ATX motherboards.
- Dedicated bays for HDD and SSD storage.
- Multiple fan mounting options for efficient cooling.
- Support for up to 240mm liquid cooling radiators.
2. Setup and Installation
Before beginning installation, ensure you have all necessary components and tools. Always handle components with care and refer to individual component manuals for specific installation instructions.
2.1 Preparing the Case
- Remove Side Panels: Unscrew the thumbscrews on the rear of the case to remove the tempered glass side panel and the solid steel side panel.
- Accessory Kit: Locate the accessory kit inside the case, which contains screws, standoffs, and cable ties.

Figure 2: Top-rear-side view of the case, showing the tempered glass panel secured by thumbscrews.
2.2 Motherboard Installation
- Install Standoffs: Ensure the correct standoffs are installed for your motherboard (Micro-ATX, ITX, or ATX).
- Place Motherboard: Carefully align your motherboard with the standoffs and I/O shield opening.
- Secure Motherboard: Fasten the motherboard with the provided screws.
2.3 Storage Drive Installation
- The case supports 1 x HDD + 1 x SSD or 2 x SSDs. Locate the designated mounting points for 2.5-inch SSDs and 3.5-inch HDDs.
- Secure drives using the appropriate screws.
2.4 Fan and Radiator Installation
Note: Fans are not included with this case.
- Front: Up to 3 x 120mm fans.
- Top: Up to 2 x 120mm fans or 1 x 240mm liquid cooler radiator.
- Rear: 1 x 120mm fan.
- Bottom: Up to 2 x 120mm fans.

Figure 3: Internal view of the case, highlighting fan mounting locations at the front and bottom.
2.5 Power Supply and Graphics Card Installation
- Power Supply: Install your ATX power supply in the dedicated compartment at the bottom rear of the case. Maximum PSU length is 190mm.
- Graphics Card (VGA): Install your graphics card into the appropriate PCIe slot on your motherboard. The case supports VGA cards up to 280mm in length.
2.6 Cable Management
Utilize the 20mm cable management space behind the motherboard tray and the included cable ties to route and secure cables for a clean build and improved airflow.
3. Operating Instructions
Once all components are installed and connected, replace the side panels. Connect your peripherals (monitor, keyboard, mouse) and power cable to the power supply.
- Power On: Press the power button located on the front I/O panel to start your computer.
- Front I/O Ports: The front panel includes 3 x USB 2.0 ports and audio jacks for convenient access to peripherals and headsets.
- Airflow: Ensure adequate space around the case for proper airflow, especially at the front mesh panel and top/rear fan exhausts.
4. Maintenance
Regular maintenance helps ensure optimal performance and longevity of your PC components.
- Dust Filters: The case is equipped with dust filters. Periodically remove and clean these filters to prevent dust buildup inside the case, which can hinder cooling performance.
- Tempered Glass Panel: Clean the tempered glass panel with a soft, lint-free cloth and a non-abrasive glass cleaner. Avoid harsh chemicals or abrasive materials that could scratch the glass.
- Internal Cleaning: With the system powered off and unplugged, use compressed air to gently remove dust from internal components and fan blades.
5. Troubleshooting
If you encounter issues, consider the following basic troubleshooting steps:
- System Not Powering On:
- Ensure the power supply is switched on and properly connected to the wall outlet.
- Verify all power cables (24-pin ATX, 8-pin CPU, PCIe for GPU) are securely connected to the motherboard and components.
- Check that the front panel power button connector is correctly attached to the motherboard's front panel header.
- No Display Output:
- Ensure your monitor is connected to the graphics card (not the motherboard's integrated graphics ports, unless you are using integrated graphics).
- Reseat the graphics card in its PCIe slot.
- Check that RAM modules are properly seated.
- Overheating:
- Verify all case fans and CPU cooler fans are spinning correctly.
- Clean dust filters and internal components as described in the Maintenance section.
- Ensure proper thermal paste application on the CPU cooler.
For more complex issues, consult the manuals for your individual PC components or seek assistance from a qualified technician.
6. Specifications
| Feature | Specification |
|---|---|
| Model | AG-PULSE-BK |
| Case Type | Mid-Tower |
| Material | Metal (SPCC), ABS, Tempered Glass |
| Motherboard Support | ATX, Micro-ATX, Mini-ITX |
| Drive Bays | 1 x 3.5" HDD + 1 x 2.5" SSD or 2 x 2.5" SSD |
| Expansion Slots | 5 |
| Front I/O Ports | 3 x USB 2.0, Audio (Headphone/Microphone) |
| Fan Support (Front) | 3 x 120mm |
| Fan Support (Top) | 2 x 120mm |
| Fan Support (Rear) | 1 x 120mm |
| Fan Support (Bottom) | 2 x 120mm |
| Liquid Cooling Support (Top) | 1 x 240mm Radiator |
| Max CPU Cooler Height | 165mm |
| Max VGA Length | 280mm |
| Max PSU Length | 190mm |
| Cable Management Space | 20mm |
| Product Dimensions (L x W x H) | 27.5 x 35.8 x 36 cm |
| Product Weight | 3.2 Kilograms |
| Special Features | Tempered glass side panel, Dust filter, 240mm water cooler support |
7. Warranty Information
The Acegeek Pulse AG-PULSE-BK Gaming Case comes with a manufacturer's warranty of 12 months from the date of purchase. This warranty covers defects in materials and workmanship under normal use.
The warranty does not cover damage caused by:
- Improper installation or use.
- Accidental damage, abuse, or neglect.
- Unauthorized repairs or modifications.
- Normal wear and tear.
Please retain your proof of purchase for warranty claims.
8. Support
For further assistance, technical support, or warranty inquiries, please contact Acegeek customer service through their official website or the retailer where the product was purchased.
When contacting support, please have your product model (AG-PULSE-BK) and proof of purchase readily available.