1. Product Overview
The RPNB Deluxe Fireproof Safe Box, Model RPEFS66, is designed to provide secure storage for your valuables, including cash, jewelry, important documents, and more. It features a robust construction, digital touchscreen access, and fire-resistant properties.

Image 1.1: RPNB Deluxe Fireproof Safe Box with its door open, revealing the spacious interior with adjustable shelves and various items stored inside.
2. Safety Information
- Always store backup keys in a secure location away from the safe.
- Ensure the safe is placed on a level surface.
- Do not store flammable liquids or pressurized containers inside the safe.
- Keep the safe out of reach of children.
- The safe is fire-resistant but not water-resistant. Protect from water exposure.
3. Setup and Installation
3.1 Unpacking and Initial Inspection
- Carefully remove the safe from its packaging.
- Inspect the safe for any signs of damage during transit. Contact customer support immediately if damage is found.
- Locate the handle spokes, backup keys, and mounting bolts, which are typically packed inside the safe.
3.2 Installing the 3-Spoke Handle
The 3-spoke handle is packed separately to prevent damage during shipping. To install:
- Align the handle spokes with the central shaft on the safe door.
- Push the handle firmly onto the shaft until it clicks into place.
- Ensure the handle rotates smoothly to engage and disengage the locking bolts.
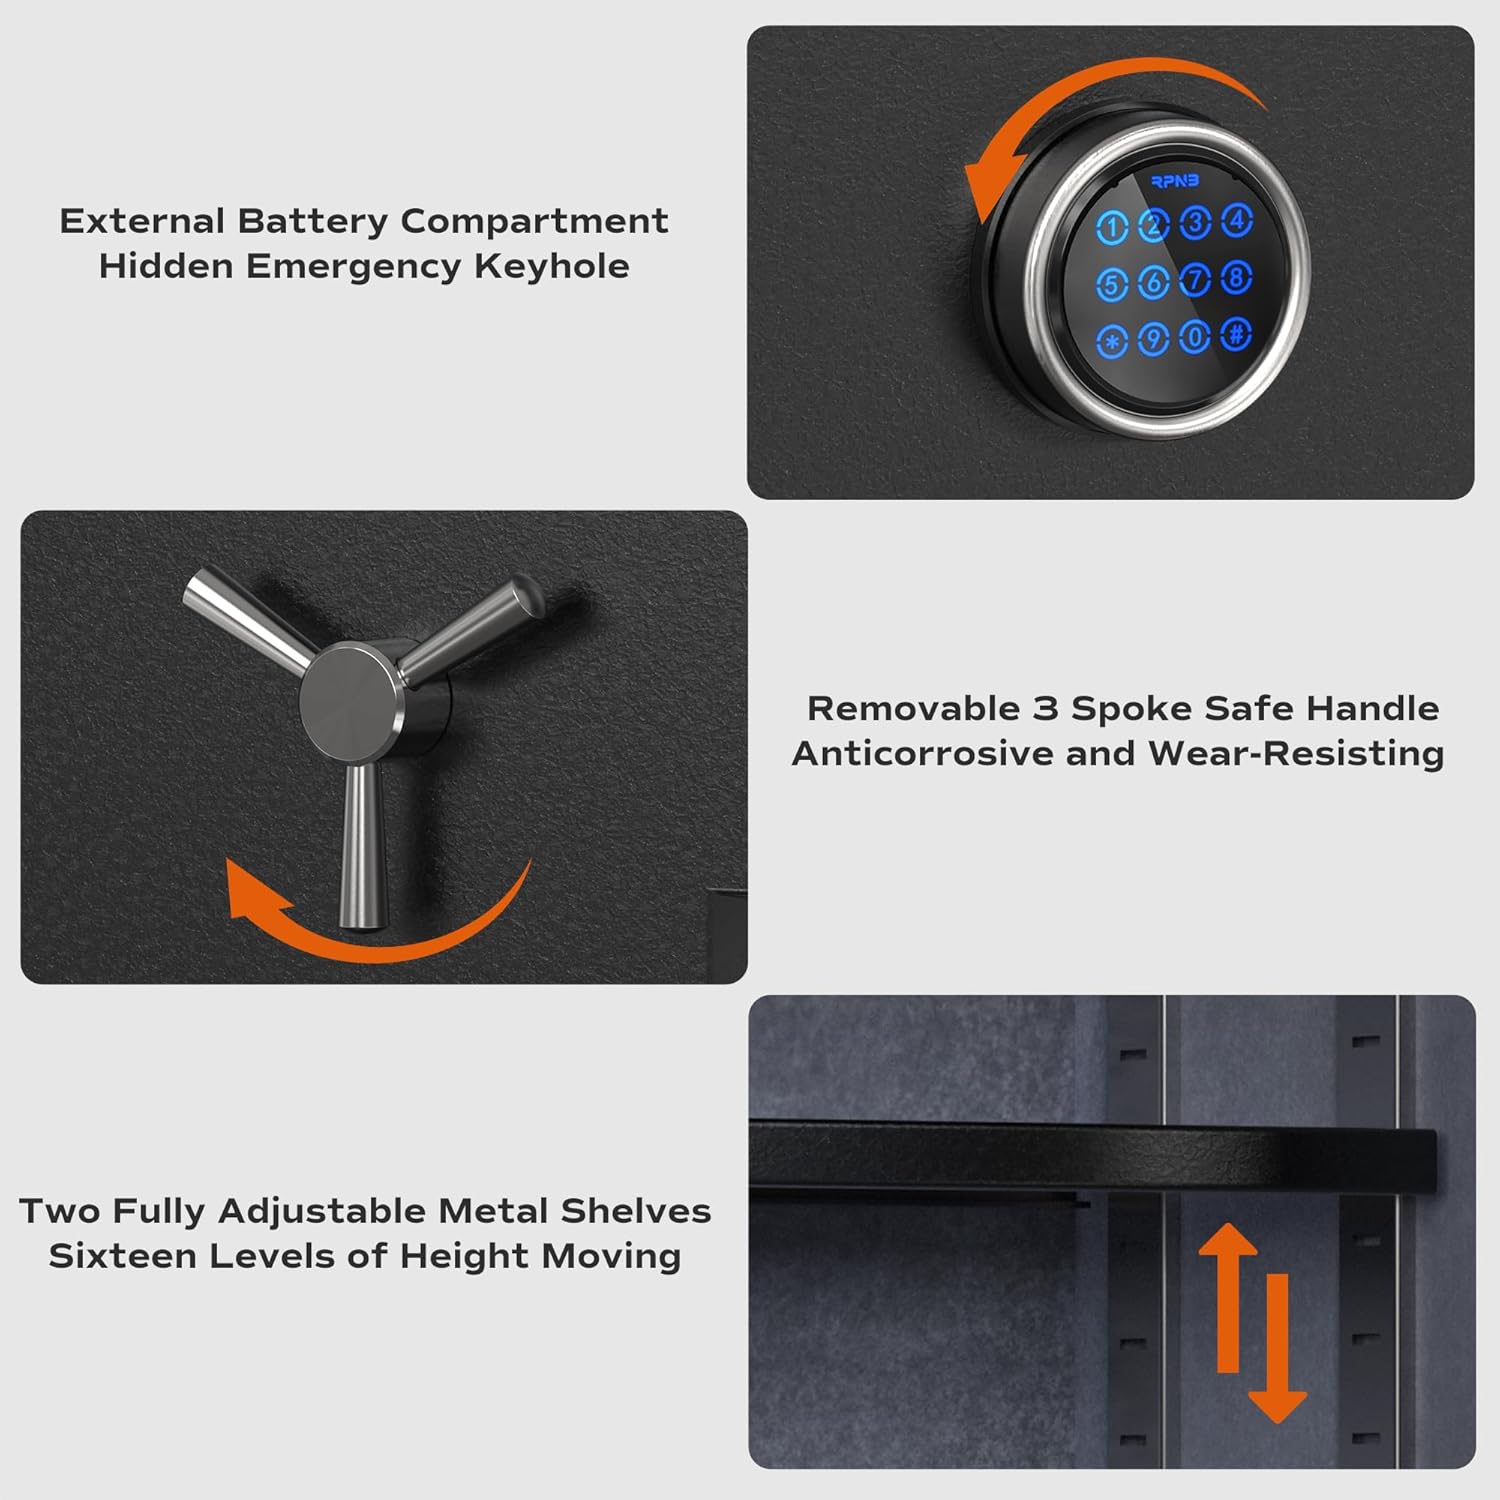
Image 3.1: Detailed view of the RPNB safe's external battery compartment, the removable 3-spoke handle, and the adjustable metal shelves inside.
3.3 Battery Installation
The safe requires batteries for the digital touchscreen keypad. The external battery compartment is designed for convenient replacement.
- Locate the external battery compartment, usually on the front panel or side of the keypad.
- Open the compartment cover.
- Insert the required batteries (typically AA, refer to the compartment for exact type and quantity) ensuring correct polarity.
- Close the compartment cover securely.
3.4 Mounting the Safe (Optional)
For enhanced security, the safe can be floor-mounted using the provided mounting bolts.
- Choose a suitable location for the safe, ensuring it is on a stable, level surface.
- Mark the drilling points through the pre-drilled holes in the bottom of the safe onto the floor.
- Move the safe and drill pilot holes into the floor at the marked locations.
- Reposition the safe over the holes and secure it using the mounting bolts.
4. Operating Instructions
4.1 Opening the Safe
The RPEFS66 safe offers multiple entry methods:
- Using the Digital Touchscreen Keypad:
- Enter your programmed 10-digit master passcode on the touchscreen.
- Once the correct code is entered, the safe will indicate successful authentication (e.g., a green light or beep).
- Immediately turn the 3-spoke handle clockwise to open the door.
- Using Backup Keys:
- Locate the hidden emergency keyhole, typically behind a removable cover on the keypad.
- Insert one of the backup keys into the keyhole and turn it.
- While the key is turned, turn the 3-spoke handle clockwise to open the door.

Image 4.1: Illustration of the two primary methods for accessing the RPNB safe: using the provided backup keys or entering a code on the 10-digit touchscreen keypad.
4.2 Programming/Changing Passcodes
Refer to the specific instructions included with your safe for detailed steps on programming or changing the master passcode. This process typically involves pressing a program button (often inside the safe), entering a new code, and confirming it.
4.3 Adjusting Shelves
The safe includes two fully adjustable shelves with 16 levels of liftable height, allowing for flexible storage space.
- To adjust a shelf, remove all items from it.
- Lift the shelf slightly and pull it out from its current support brackets.
- Re-insert the shelf into the desired height level, ensuring it is securely seated on both sides.
4.4 Emergency Alert System and Silent Mode
The safe features a built-in vibration alarm for enhanced security. If the safe is shaken violently, an alarm will be triggered, and the keypad will be temporarily disabled. To disarm, use a backup key.
To enable Silent Mode, follow the instructions in your safe's specific manual. This mutes keypad sounds for discreet entry.
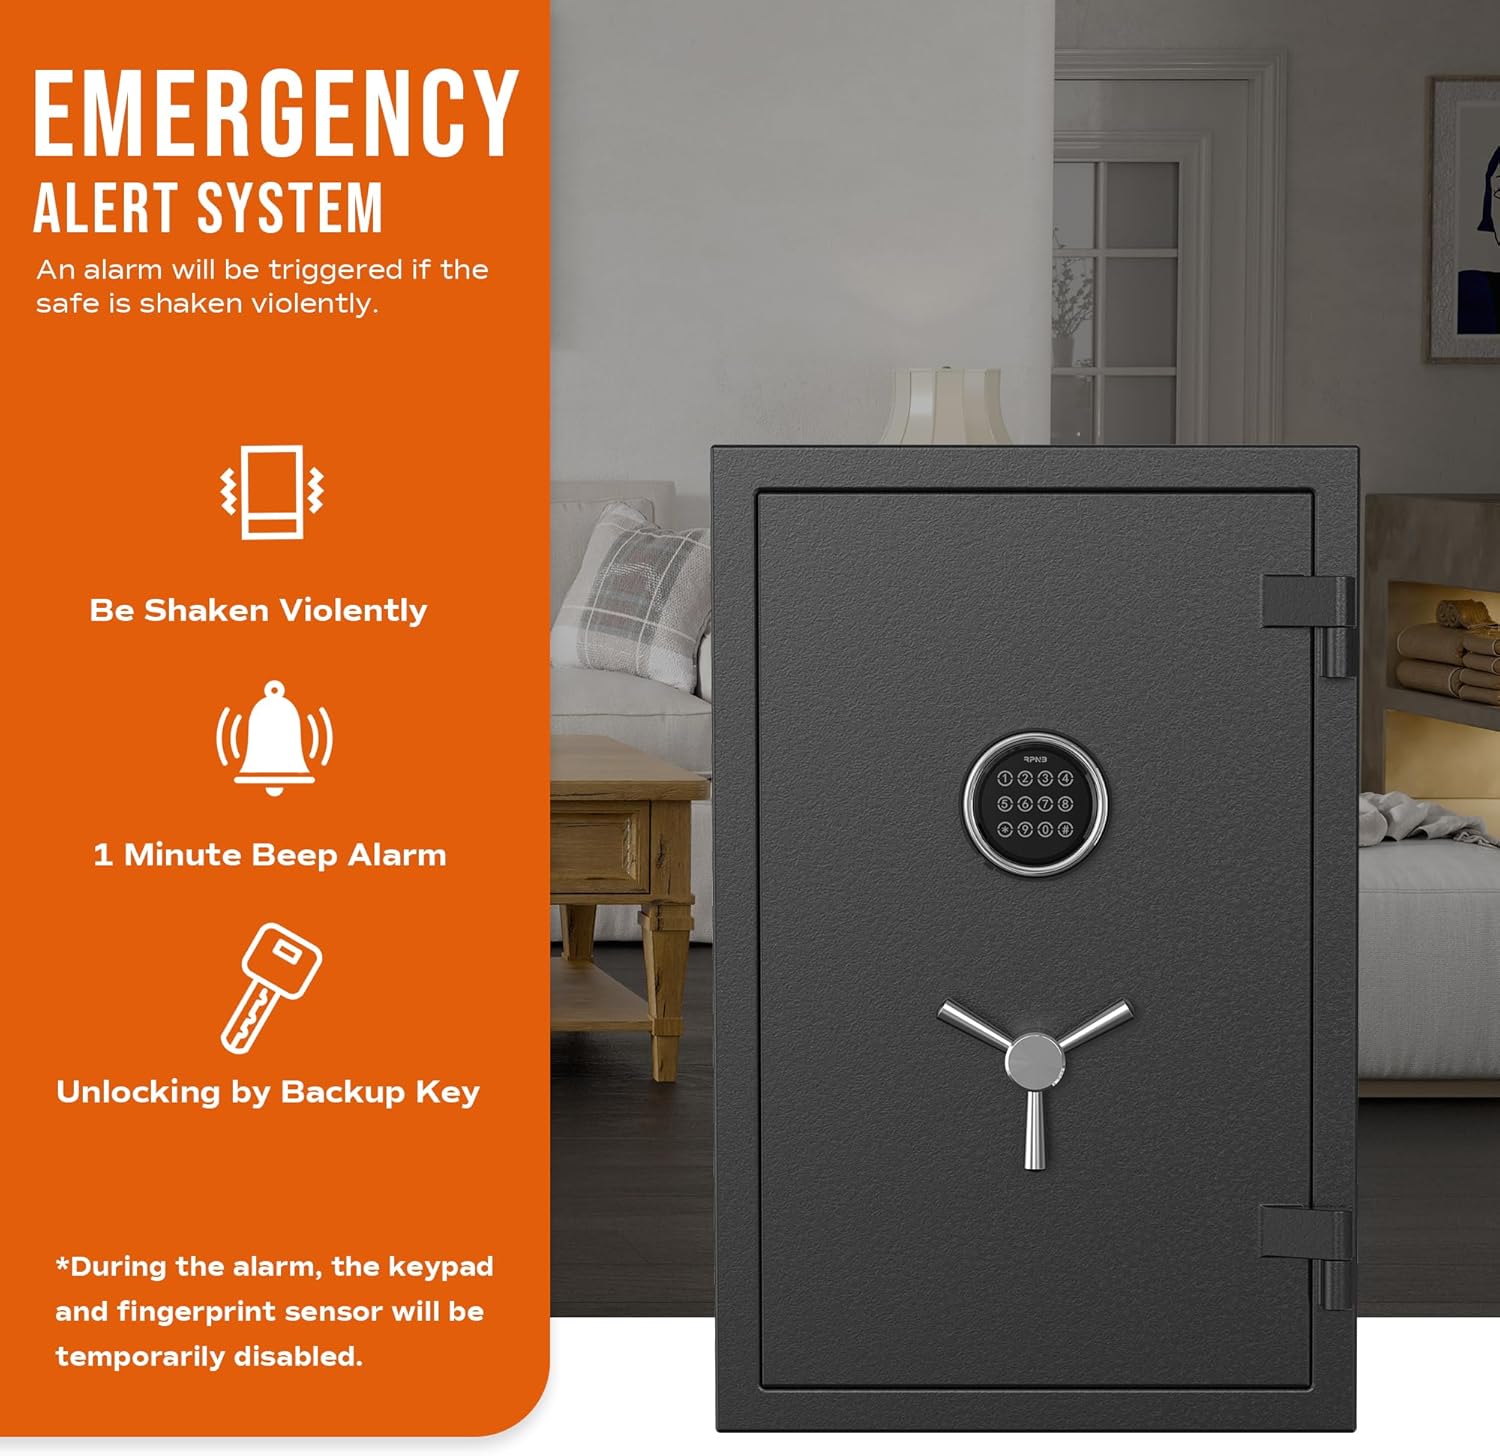
Image 4.2: Visual representation of the safe's emergency alert system, detailing how it responds to violent shaking with an audible alarm and temporary keypad disablement.
5. Maintenance
5.1 Battery Replacement
When the battery indicator light (if present) illuminates or the keypad becomes unresponsive, it's time to replace the batteries. Use the external battery compartment for easy access.
5.2 Cleaning
Clean the exterior of the safe with a soft, damp cloth. Avoid using abrasive cleaners or solvents that could damage the finish or electronic components.
5.3 General Care
Periodically check the locking bolts and hinges for smooth operation. Ensure the safe door closes and seals properly.
6. Troubleshooting
- Safe will not open with code: Check battery level. Ensure the correct code is entered. Try using the backup key.
- Keypad unresponsive: Replace batteries. If still unresponsive, use the backup key and contact customer support.
- Alarm triggered unexpectedly: Ensure the safe is on a stable surface and not subject to vibrations. Disarm with the backup key.
- Handle does not turn: Ensure the safe is unlocked electronically or with the key before attempting to turn the handle.
7. Specifications

Image 7.1: Dimensional diagram for RPNB Safe Model RPEFS66, illustrating exterior and interior measurements.
| Feature | Detail |
|---|---|
| Brand | RPNB |
| Model Number | RPEFS66 |
| Product Dimensions (Exterior) | 13.78"D x 16.93"W x 25.98"H |
| Interior Dimensions | 24.21"H x 15.35"W x 9.84"D |
| Capacity | 2.12 Cubic Feet |
| Lock Type | Electronic Combination Lock, Key |
| Material | Alloy Steel |
| Special Features | Alarm System, Anti-Theft, Removable Shelf |
| Mounting Type | Floor Mount |
| Item Weight | 95 Pounds |
| Fire Resistance | UL 72 Standard for 30 minutes at 1200 ℉ |
| Water Resistance Level | Not Water Resistant |
| Batteries Required | Yes (Not Included) |
8. Warranty and Support
For warranty information, technical assistance, or any questions regarding your RPNB Deluxe Fireproof Safe Box, please contact RPNB customer support. Details can typically be found on the manufacturer's website or in the packaging materials.


