
Introduction
This manual provides comprehensive instructions for the safe and efficient operation, maintenance, and troubleshooting of your BAKON GI-45LBS Torque Screwdriver. Designed for high-precision screw assembly, this tool features a brushless motor, adjustable torque, and an ergonomic design to enhance productivity and user comfort. Please read this manual thoroughly before using the product to ensure optimal performance and longevity.
Safety Instructions
Always follow basic safety precautions to reduce the risk of injury or damage. Keep this manual for future reference.
- Read all instructions: Familiarize yourself with the tool's functions and operating procedures.
- Wear appropriate safety gear: Always wear eye protection.
- Keep work area clean: Cluttered areas invite accidents.
- Avoid hazardous environments: Do not use in damp or wet locations, or where flammable liquids or gases are present.
- Secure workpiece: Always secure the workpiece to prevent movement during operation.
- Use the correct tool: Do not force a small tool or attachment to do the job of a heavy-duty tool.
- Disconnect power: Always disconnect the power supply before making adjustments, changing accessories, or storing the tool.
- Store idle tools: When not in use, tools should be stored in a dry, high, or locked-up place, out of reach of children.
Product Overview
The BAKON GI-45LBS is a high-performance electric torque screwdriver designed for precision assembly tasks. Key components include:
- Brushless Motor: Ensures high performance, stable operation, and extended service life.
- Adjustable Torque Mechanism: Allows precise torque settings for various applications.
- Ergonomic Grip: High-quality PC material body, compact, lightweight, and impact-resistant for comfortable long-term use.
- Magnetic Sensing Stop Mechanism: Provides high precision, instant braking, and low impact force.
- Interchangeable Bit Holder: For quick and easy bit changes.
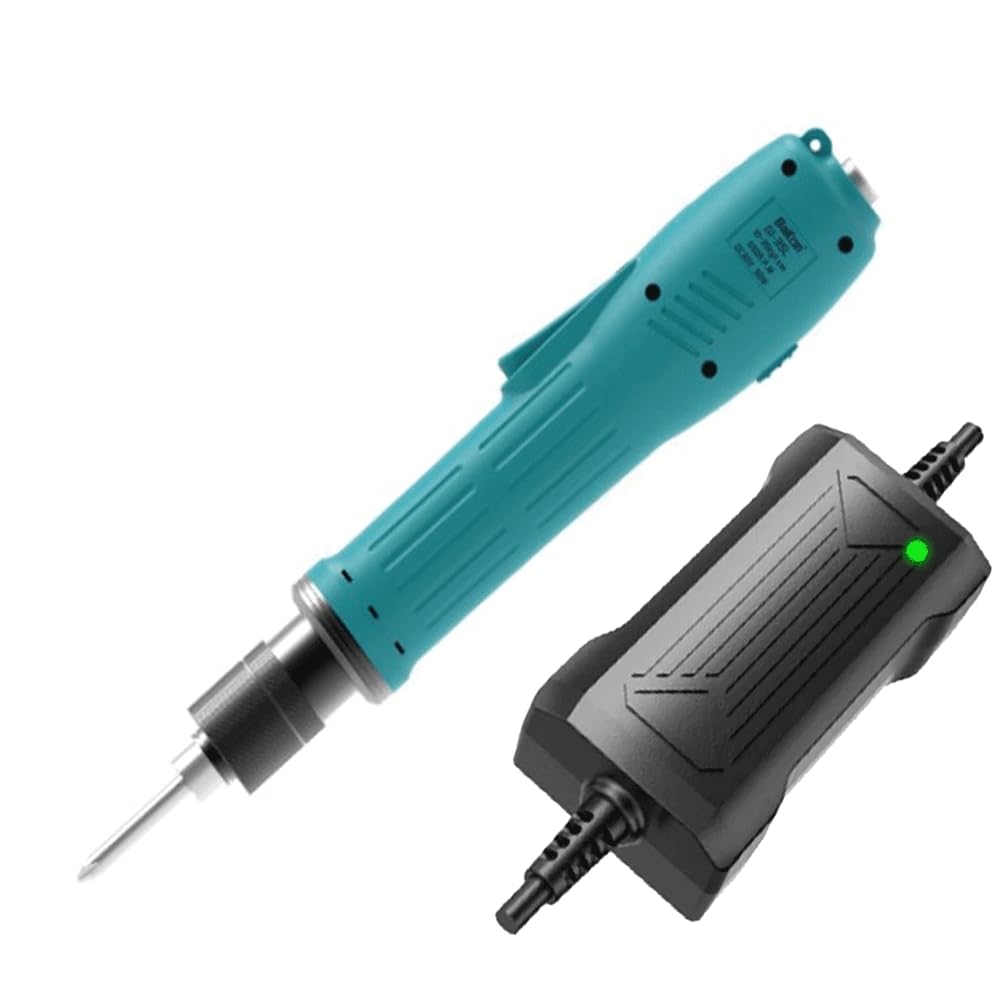
Figure 1: BAKON GI-45LBS Torque Screwdriver. This image shows the overall design of the screwdriver, highlighting its ergonomic shape and bit holder.

Figure 2: Close-up of the torque adjustment mechanism. This image illustrates the rotating collar used to set the desired torque level, indicated by numerical markings.

Figure 3: Internal gear mechanism of the screwdriver. This cutaway view reveals the precision gears responsible for power transmission and torque control within the tool.

Figure 4: BAKON GI-45LBS Torque Screwdriver shown with its power adapter. This image displays the complete package, including the tool and its power supply unit.
Specifications
| Feature | Detail |
|---|---|
| Brand | BAKON |
| Model Name | Torque Screwdriver |
| Model Number | GI-45LBS |
| Number of Items | 2 (Screwdriver and Power Adapter) |
| Head Style | Security Torx |
| Material | Chrome Vanadium Steel (for bits, implied) |
| Color | Turquoise |
| Recommended Uses | Fast assembly and screwing operations requiring high RPM and precise torque, especially for high-precision products like phones and digital cameras. |
| Weight | 800 Grams |
| Features | Adjustable Torque, Interchangeable Bit, Lightweight, Non-slip Grip, Locking Mechanism |
| Operating Voltage | 100V-250V |
| Speed Adjustment | 0-1000 rpm |
Setup
- Unpacking: Carefully remove the screwdriver and all accessories from the packaging. Inspect for any damage.
- Power Connection: Connect the power adapter to the screwdriver's power input port. Plug the power adapter into a compatible 100V-250V electrical outlet. Ensure the connection is secure.
- Installing a Bit:
- Ensure the screwdriver is disconnected from the power supply.
- Insert the desired interchangeable bit into the bit holder until it clicks securely into place.
- To remove, pull the bit holder collar forward and extract the bit.
Operating Instructions
- Power On/Off: The screwdriver typically activates when the trigger is pressed and deactivates when released.
- Adjusting Torque:
- Locate the torque adjustment collar near the bit holder (refer to Figure 2).
- Rotate the collar to align the desired torque setting with the indicator mark. Higher numbers typically indicate higher torque.
- Always test the torque setting on a scrap piece of material before applying it to your final workpiece.
- Adjusting Speed (RPM):
- The screwdriver supports speed adjustment from 0-1000 rpm. Consult the specific controls on your device for speed regulation, which may be a dial or trigger pressure sensitive.
- Forward/Reverse Rotation:
- Locate the forward/reverse switch, usually positioned near the trigger.
- Push the switch to the desired direction for tightening (forward) or loosening (reverse) screws.
- Ensure the tool is stopped before changing the direction of rotation.
- Screwing Operation:
- Place the bit firmly into the screw head.
- Apply gentle, steady pressure and press the trigger to start the rotation.
- The magnetic sensing stop mechanism will automatically stop the rotation once the set torque is reached, preventing overtightening.
Maintenance
Regular maintenance ensures the longevity and optimal performance of your torque screwdriver.
- Cleaning: Keep the tool clean and free from dust and debris. Use a soft, dry cloth to wipe down the exterior. Do not use harsh chemicals or abrasive cleaners.
- Bit Inspection: Regularly inspect screwdriver bits for wear or damage. Replace worn bits to maintain optimal performance and prevent damage to screw heads.
- Power Cord: Check the power cord for any signs of damage, cuts, or fraying. Replace immediately if damaged. The power cable is designed with silicone wire and a three-wire cable resistant to hardening for long service life.
- Storage: Store the screwdriver in a dry, clean, and secure location, away from direct sunlight and extreme temperatures.
Troubleshooting
| Problem | Possible Cause | Solution |
|---|---|---|
| Screwdriver does not turn on. | No power supply; faulty power cord/adapter; internal malfunction. | Check power connection and outlet. Inspect power cord for damage. If issues persist, contact support. |
| Torque setting is inconsistent. | Incorrect torque adjustment; worn bit; internal mechanism issue. | Re-adjust torque collar. Replace worn bits. Ensure proper bit insertion. |
| Bit slips from screw head. | Worn or incorrect bit; insufficient pressure; wrong screw head type. | Use the correct bit for the screw type. Replace worn bits. Apply firm, steady pressure. |
| Unusual noise or vibration. | Loose components; internal damage; debris inside. | Stop use immediately. Disconnect power. Do not attempt to repair. Contact support. |
Warranty and Support
The BAKON GI-45LBS Torque Screwdriver comes with a 2-year EU Spare Part Availability Period. This indicates that spare parts will be available for a minimum of two years from the date of purchase within the European Union.
For technical support, warranty claims, or service inquiries, please contact your authorized BAKON dealer or visit the official BAKON website for contact information.