
Retevis B64
Retevis B64 Two Way Radio
User Manual
Introduction
The Retevis B64 Two Way Radio is a robust and user-friendly communication device designed for clear and efficient communication in various environments. Featuring advanced AI soundproofing and PMR446 license-free operation, it is ideal for car repair shops, dealerships, factories, and outdoor activities. This manual provides comprehensive instructions for setup, operation, and maintenance of your Retevis B64 radios.

Figure 1: Retevis B64 Two Way Radio (10-pack)
What's in the Box
Your Retevis B64 package includes the following items:
- Walkie Talkie x 10
- Battery x 10
- Hand Strap x 10
- Type-C charging cable x 10
- Earpiece x 10
- Base Charger x 10
- Belt clip x 10
- User manual x 5
Product Overview
Familiarize yourself with the components of your Retevis B64 radio:

Figure 2: Retevis B64 Product Details and Components
- Channel Switch Knob: Used to select communication channels.
- Volume/Power Knob: Rotates to turn the radio on/off and adjust volume.
- Tx/Rx LED Indicator: Lights up to indicate transmission (Tx) or reception (Rx).
- PTT Button (Push-to-Talk): Press and hold to transmit your voice.
- Side Key 1: Long press to enable 6-language switching.
- Side Key 2: Quick press to turn AI noise cancellation on/off. Long press to activate local and remote emergency alerts.
- Speaker: Outputs received audio.
- Type-C/Accessory Port: For charging and connecting accessories like earpieces.
- Microphone: Captures your voice for transmission.
Setup
1. Battery Installation and Charging
The Retevis B64 radios come with 1200mAh batteries included. Before first use, ensure the batteries are fully charged.

Figure 3: Convenient Charging Options (Type-C and Base Charging)
- Using the Base Charger: Insert the radio into the provided charging base. The indicator light on the base will show charging status.
- Using Type-C Cable: Connect a standard Type-C USB cable to the radio's Type-C port and a power source.
- A full charge provides up to 54 hours of standby time and 26 hours of usage.
2. Attaching the Earpiece
For private and clear communication, attach the included earpiece.

Figure 4: Earpiece Connection and Features
- Locate the K 2-pin connector on the earpiece cable.
- Plug the connector firmly into the Type-C/Accessory port on the side of the radio.
- Adjust the earpiece for comfortable wear. The earpiece features a 360° rotating design and a durable long cable.
3. One-Key Pairing
The Retevis B64 supports easy one-key pairing for quick setup with other compatible radios.

Figure 5: One-Key Pairing for Retevis B64 Radios
- Ensure both radios are powered on and on the same channel.
- Refer to the radio's voice prompts or specific pairing instructions for your model to initiate the one-key pairing process. This feature simplifies group communication setup.
Operating Instructions
1. Power On/Off and Volume Adjustment
- To power on the radio, rotate the Volume/Power knob clockwise until you hear a click.
- Continue rotating the knob clockwise to increase the volume, and counter-clockwise to decrease it.
- To power off, rotate the knob counter-clockwise until it clicks off.
2. Channel Selection
- Rotate the Channel Switch knob to select one of the 16 available channels.
- Ensure all radios in your group are set to the same channel for communication.
3. Transmitting and Receiving (PTT)
- To transmit, press and hold the PTT (Push-to-Talk) button on the side of the radio. Speak clearly into the microphone.
- Release the PTT button to stop transmitting and listen for a response.
- The Tx/Rx LED indicator will light up during transmission and reception.
4. AI Noise Reduction
The Retevis B64 features advanced AI noise reduction for clear communication in noisy environments.

Figure 6: Two-way AI Noise Reduction in action
- Quick press Side Key 2 to toggle AI noise cancellation on or off.
- AI Noise Reduction uses smart algorithms to process audio signals at both ends of walkie-talkie communication and filter out background noise in real-time, enhancing communication quality by providing clear audio.
5. VOX (Voice Operated Exchange) Technology
VOX allows for hands-free communication, activating transmission when you speak.

Figure 7: Hands-Free Communication with VOX Technology
- VOX activates with a long-press of the side key on the 2-way radio (refer to specific model settings if different from Side Key 1 or 2).
- Once activated, you can communicate without pressing the PTT button. The radio will transmit when it detects your voice.
6. Multi-language Support
The radio supports 6 languages for voice prompts, aiding international staff communication.

Figure 8: Six-Language Support for Voice Prompts
- Long press Side Key 1 for 2 seconds to enable language switching. Follow the voice prompts to select your desired language (English, French, German, Italian, Spanish, Russian).
7. Emergency Alarm
In case of an emergency, the radio can activate an alarm.

Figure 9: Emergency Alarm Functionality
- Long press Side Key 2 to activate local and remote emergency alerts. This sends a distress signal to other radios in your group.
8. Recording and Playback
The radio supports recording and playback of communications, useful for training or documentation.
- Refer to the specific menu options or button combinations for your radio model to initiate recording and playback functions. This feature ensures clarity and accountability on construction sites or similar environments.
Maintenance
1. Cleaning Your Radio
- Wipe the radio's surface with a soft, damp cloth. Do not use harsh chemicals or abrasive cleaners.
- Ensure the Type-C port and other openings are free of dust and debris.
2. Battery Care
- Avoid overcharging or completely draining the battery.
- If storing the radio for an extended period, charge the battery to about 50% capacity.
3. Storage
- Store the radio in a cool, dry place away from direct sunlight and extreme temperatures.
- Keep the radio away from strong magnetic fields.
Troubleshooting
If you encounter issues with your Retevis B64 radio, refer to the following common problems and solutions:
| Problem | Possible Cause | Solution |
|---|---|---|
| No power | Battery drained or not properly installed. | Charge the battery. Ensure battery is correctly inserted. |
| Cannot transmit or receive | Wrong channel selected; out of range; low battery. | Verify channel matches other radios. Move closer to other radios. Charge battery. |
| Poor audio quality / Distorted sound | AI Noise Reduction off; interference; microphone/speaker blocked. | Ensure AI Noise Reduction is enabled (quick press Side Key 2). Move away from sources of interference. Check microphone and speaker for obstructions. |
| VOX not working | VOX sensitivity too low or feature disabled. | Check VOX settings and sensitivity. Ensure VOX is activated (long press side key). |
| Earpiece discomfort | Improper fit or prolonged use. | Adjust earpiece position. Take breaks from wearing. |

Figure 10: Common Communication Challenges Addressed by Retevis B64
Specifications
| Feature | Detail |
|---|---|
| Model Number | B64 |
| Brand | Retevis |
| Number of Channels | 16 |
| Special Features | Noise Reduction, Multi-language switching |
| Frequency Range | 446.00625-446.19375Mhz (PMR446) |
| Talking Range Maximum | 5 Kilometer |
| Voltage | 3.7 Volts |
| Battery Capacity | 1200mAh (included) |
| Standby Time | Up to 54 hours |
| Usage Time | Up to 26 hours |
| Product Dimensions | 3.5D x 9.8W x 5.1H centimetres |
| Weight | 140g / 0.31lb |
| Water Resistance Level | Not Water Resistant |
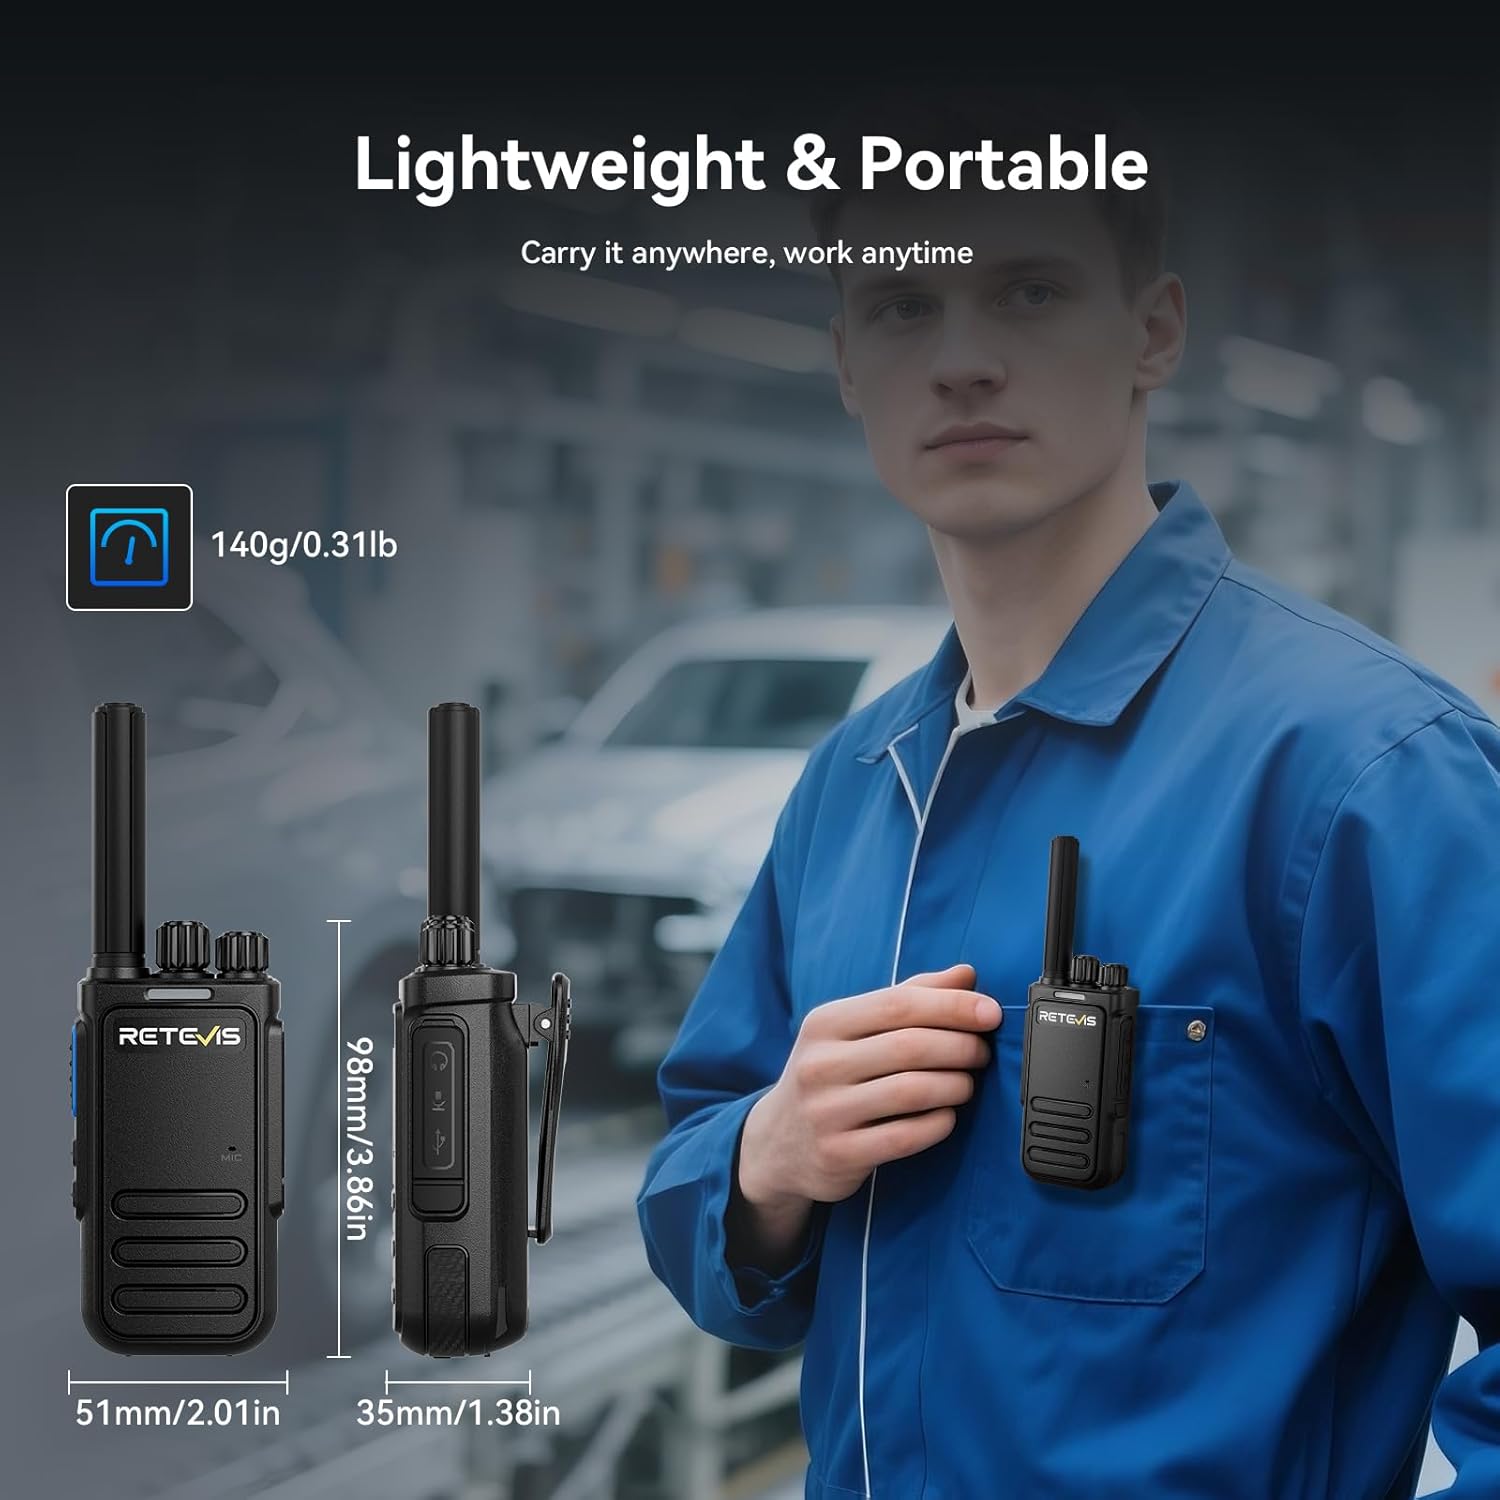
Figure 11: Lightweight and Portable Design of Retevis B64
Warranty and Support
Retevis is committed to providing excellent customer service and support for your B64 two-way radios.

Figure 12: Retevis Professional Service Support
- 2-Year Support: Enjoy comprehensive support for two years from the date of purchase.
- 30-Day No-Reason Return: If you are not satisfied, you may return the product within 30 days.
- 12-Hour Prompt Response: Expect a quick response to your inquiries within 12 hours.
- Professional Service: Access dedicated professional service for any technical assistance or queries.
For further assistance, please visit the official Retevis store or contact customer support through the platform where you purchased the product.
Related documentsB64


Ask a question about this manual
Ask about setup, troubleshooting, compatibility, parts, safety, or missing instructions. Manuals+ will review the question and use this page’s manual context to help answer it.