
Pamray S15
Pamray S15 58-Inch Computer Desk User Manual
Model: S15
1. Introduction
Thank you for choosing the Pamray S15 58-Inch Computer Desk. This desk is designed to provide a functional and organized workspace for various uses, including gaming, studying, and office tasks. It features integrated LED lighting, convenient power outlets, a monitor stand, and ample storage solutions. Please read this manual thoroughly before assembly and use to ensure proper setup and safe operation.
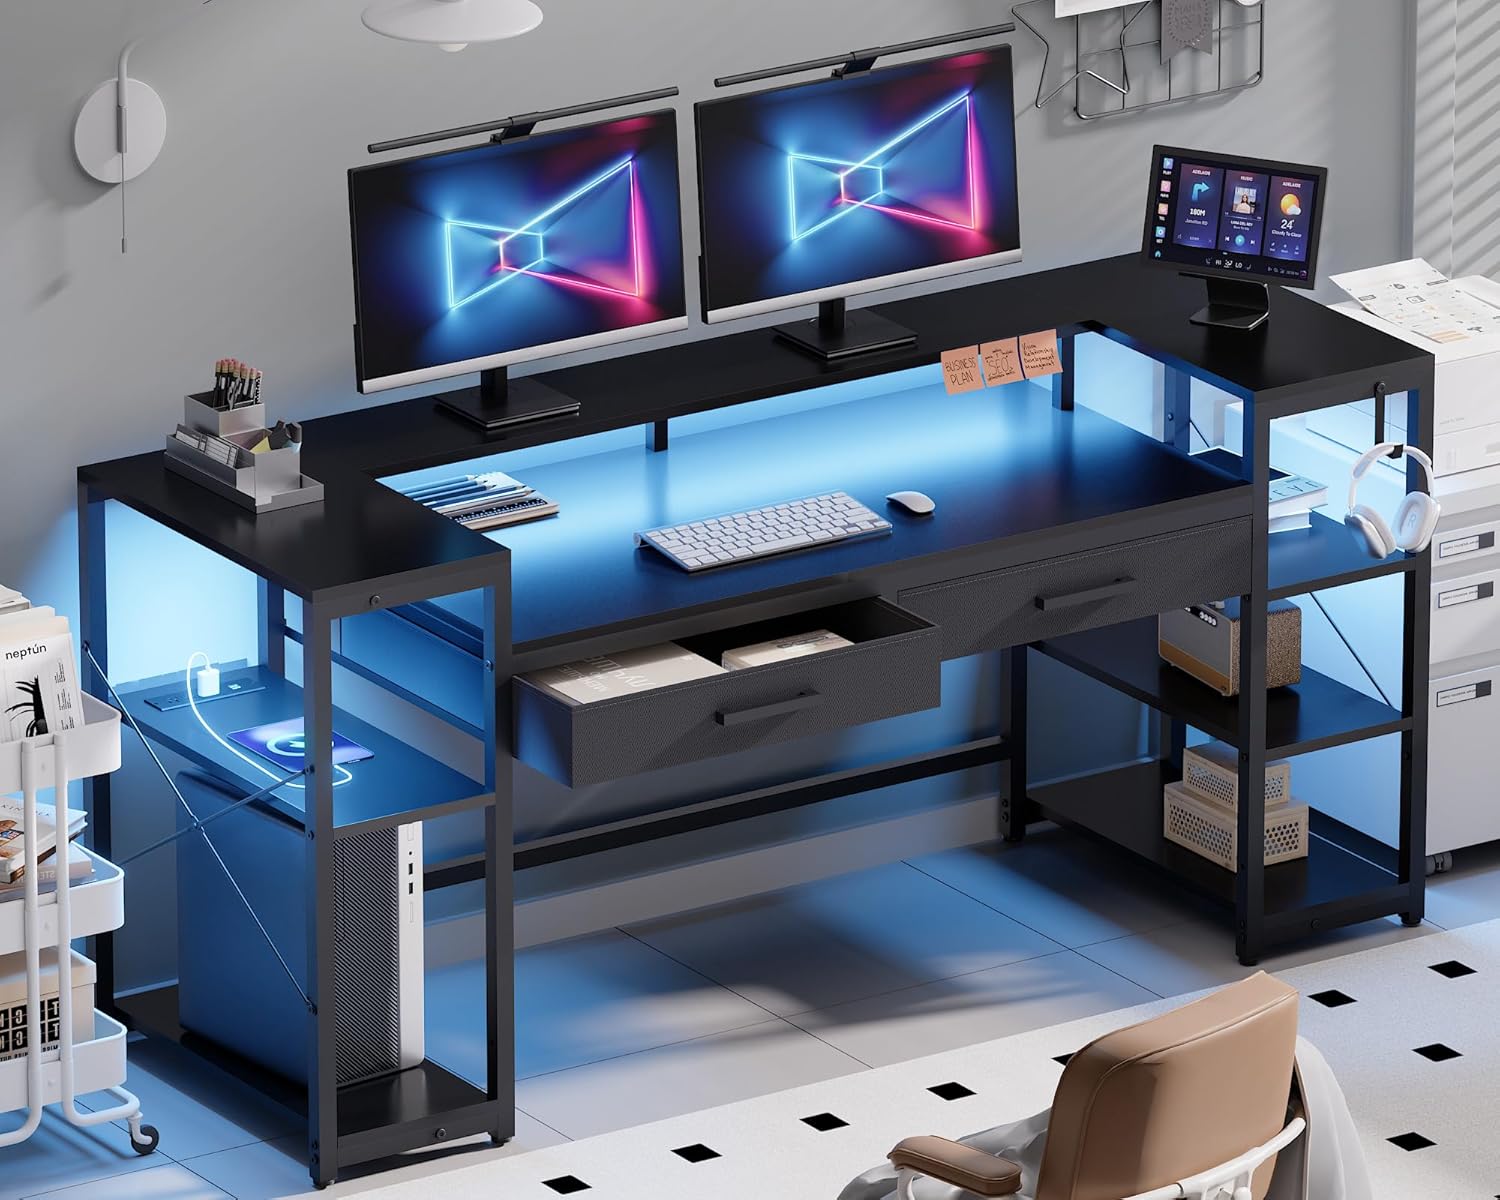
Image 1.1: The Pamray S15 58-Inch Computer Desk in a modern setup, showcasing its LED lighting, monitor stand, and storage.
2. Safety Information
- Always assemble the desk on a soft, clean surface to prevent scratches.
- Ensure all screws and fasteners are securely tightened before use. Periodically check and re-tighten as necessary.
- Do not exceed the maximum weight capacity of 200 pounds for the tabletop and 10 pounds for each drawer.
- Keep small parts and packaging materials away from children and pets.
- Avoid placing hot items directly on the desk surface without protection.
- Do not stand or sit on the desk.
- Ensure the power cord for the outlets and LED lights is not pinched or damaged.
3. Package Contents
Before beginning assembly, verify that all components listed below are present and undamaged. If any parts are missing or damaged, please contact customer support.
- Desk Panels (Tabletop, Monitor Stand, Shelf Boards)
- Metal Frame Components (Legs, Support Bars, 'X'-shaped Braces)
- 2 Non-Woven Fabric Drawers
- LED Light Strip with Controller
- Built-in Power Outlet Unit (3 AC outlets, 2 USB ports)
- Adjustable Leg Pads
- Assembly Hardware (Screws, Allen Key, etc.)
- Instruction Manual
4. Assembly Instructions (Setup)
Clear installation instructions and all necessary tools are included in the accessory box. For visual guidance, comprehensive installation videos are accessible by scanning the Transparency QR code on the packaging.
4.1. General Assembly Steps
- Unpack and Identify Parts: Carefully remove all components from the packaging. Lay them out and compare them against the parts list in the included manual.
- Assemble the Metal Frame: Begin by connecting the main metal frame components using the provided screws and Allen key. Ensure all connections are snug but do not overtighten until the frame is fully assembled.
- Attach Desk Panels: Secure the tabletop, monitor stand, and shelf boards to the assembled metal frame. Pay attention to the orientation of each panel.
- Install Drawers: Insert the two non-woven fabric drawers into their designated slots.
- Install LED Light Strip: Adhere the LED light strip to the underside of the monitor stand or desired location. Connect it to the controller.
- Integrate Power Outlet Unit: Place the power outlet unit into its designated cutout on the desk surface.
- Attach Adjustable Leg Pads: Screw the adjustable leg pads into the bottom of the desk legs.
- Final Tightening: Once all components are in place, go back and securely tighten all screws.

Image 4.1: An illustration detailing the assembly process for the desk frame and panel components.
4.2. Reversible Shelves
The side shelves are designed to be reversible, allowing you to configure them on either the left or right side of the desk to suit your space and preferences. Refer to the detailed assembly instructions for specific steps on how to achieve your desired configuration.

Image 4.2: The desk featuring open storage shelves and a dedicated PC space, illustrating the reversible shelf design.
5. Operating Instructions
5.1. LED Lights Operation
The integrated LED light strip can be controlled via a remote control or a dedicated smartphone application. The lights offer 213 dynamic modes and over 10,000 color options. You can adjust brightness, color, and mode to create your desired ambiance.
- Power On/Off: Use the remote or app to turn the LED lights on or off.
- Color Selection: Choose from a wide spectrum of colors to match your mood or decor.
- Mode Selection: Select from various dynamic lighting effects.
- Brightness Adjustment: Increase or decrease the light intensity.
- Music Sync: The LED lights can synchronize with music, reacting to audio input.

Image 5.1: The RGB LED light strip in operation, demonstrating its various color options and app control capabilities.
5.2. Power Outlets and USB Ports
The desk is equipped with a built-in power outlet unit for convenient charging and powering of your devices.
- AC Outlets: Features 3 standard AC outlets (125V/12A) for laptops, monitors, and other electronics.
- USB Ports: Includes 2 USB ports (5V/2A) for charging smartphones, tablets, and other USB-powered devices.
- Power Cord: The unit comes with a 4.92ft power cord.
- Rated Power: The total rated power for the unit is 1500W.
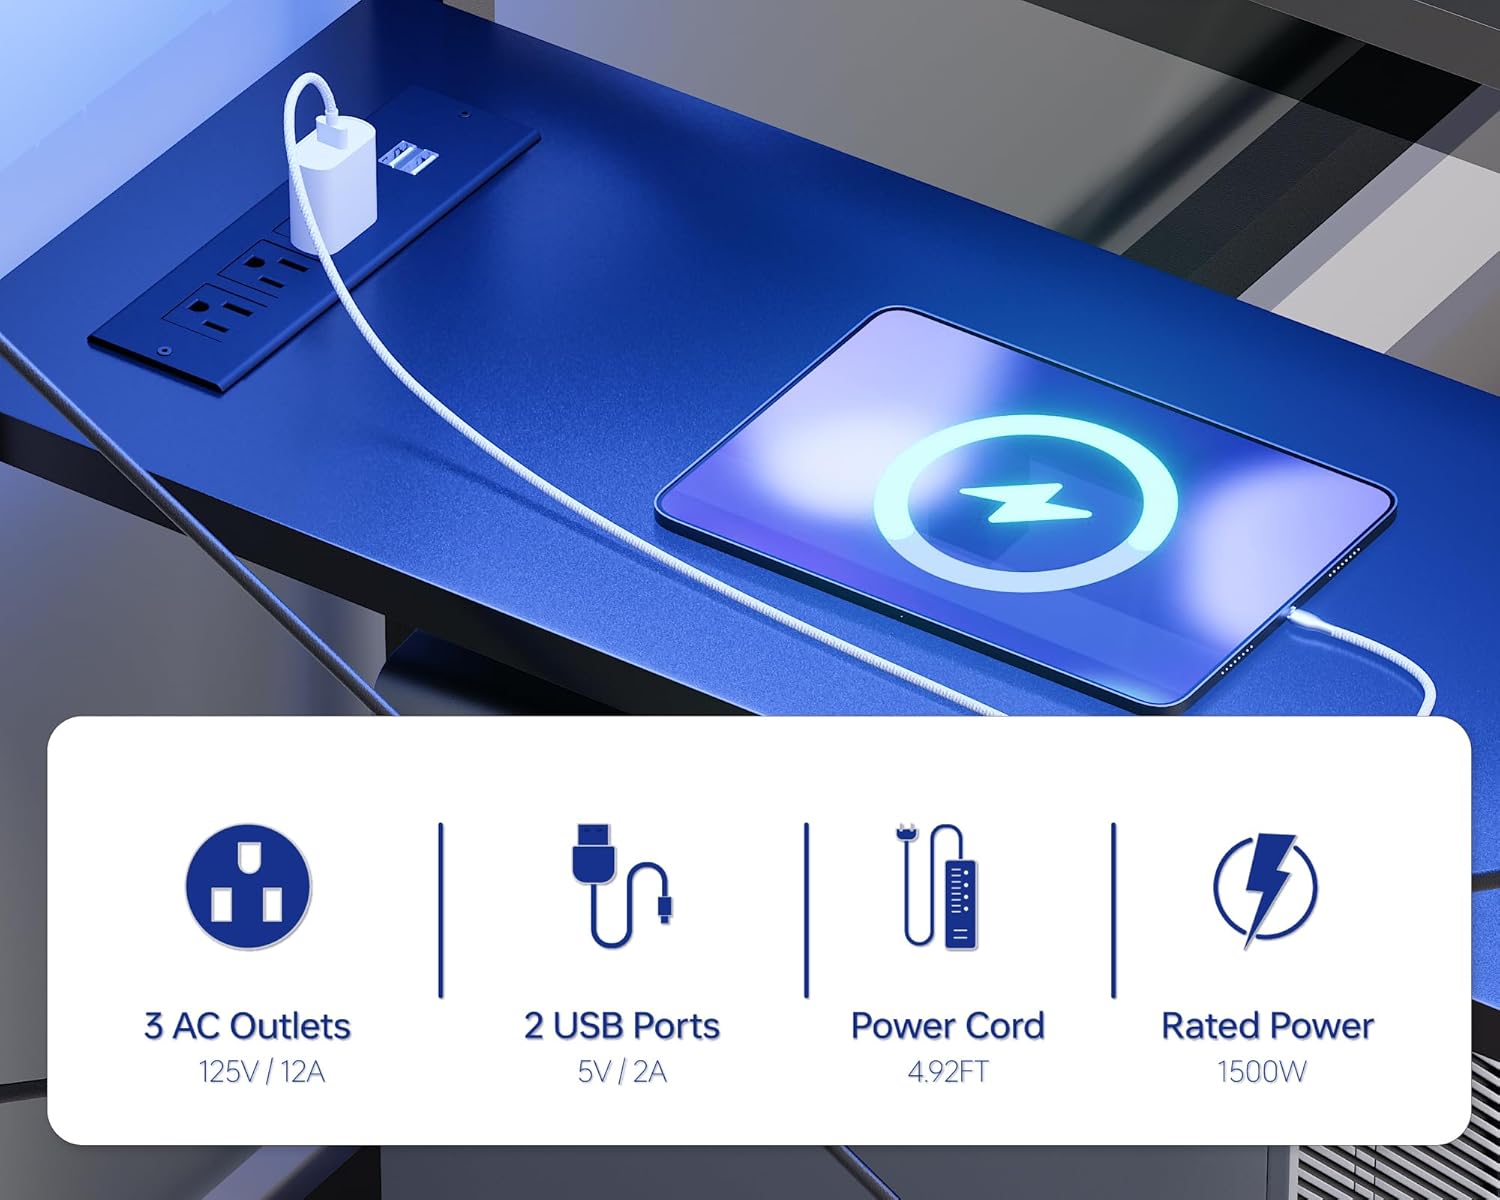
Image 5.2: A detailed view of the integrated power outlet unit, showing the AC outlets and USB charging ports.
5.3. Storage and Monitor Stand
- Monitor Stand: The sturdy U-shaped monitor stand can accommodate two monitors or laptops, elevating them to an ergonomic viewing height and freeing up desktop space.
- Drawers: Two non-woven fabric drawers provide concealed storage for office supplies, gaming accessories, or personal items.
- Open Shelves: Two open side shelves offer additional storage and display space for books, decor, or a PC tower.

Image 5.3: The desk featuring its U-shaped monitor stand, designed to optimize screen height and desktop space.

Image 5.4: A close-up of one of the desk's non-woven fabric drawers, illustrating its capacity for storing various items.
6. Maintenance
- Cleaning: Wipe the desk surface with a soft, damp cloth. Avoid harsh chemicals or abrasive cleaners that may damage the finish.
- Spills: Immediately wipe up any spills to prevent water damage to the tabletop. The tabletop is designed to be water-resistant.
- Hardware: Periodically check and tighten all screws and fasteners to maintain stability.
- LED Lights: Ensure the LED strip and controller are kept dry and free from dust.
- Power Outlets: Keep the power outlets clean and free from debris. Do not insert foreign objects into the outlets.
Image 6.1: Water droplets on the desk surface, illustrating its water-resistant properties.
7. Troubleshooting
- Desk is Unstable/Wobbly:
a. Ensure all assembly screws are fully tightened.
b. Adjust the leg pads on the bottom of the desk legs to level the desk on uneven floors. - LED Lights Not Working:
a. Check if the power cord for the LED strip is securely plugged into a working outlet.
b. Ensure the LED controller is properly connected to the light strip.
c. Replace the remote control battery if applicable. - Power Outlets Not Functioning:
a. Verify that the desk's main power cord is securely plugged into a working wall outlet.
b. Check if the power switch on the outlet unit (if present) is in the 'On' position.
c. Ensure the total power draw of connected devices does not exceed the 1500W rated power. - Drawers Do Not Slide Smoothly:
a. Ensure the drawer fabric is not caught or misaligned.
b. Check for any obstructions within the drawer slots.
Image 7.1: A close-up view of the adjustable leg pads, which help stabilize the desk on uneven surfaces.
8. Specifications
| Feature | Detail |
|---|---|
| Brand | Pamray |
| Model Number | S15 |
| Product Dimensions (D x W x H) | 18.9" x 58.27" x 36.38" (48cm x 148cm x 92.4cm) |
| Color | Black |
| Tabletop Material | FSC-Certified Wood |
| Base Material | Metal (Powder Coated) |
| Maximum Tabletop Weight Capacity | 200 lbs |
| Drawer Weight Capacity (Each) | 10 lbs |
| Power Outlets | 3 AC (125V/12A), 2 USB (5V/2A) |
| Power Cord Length | 4.92 ft |
| Rated Power | 1500W |
| LED Lights | RGB, 213 modes, 10,000+ colors, App/Remote Control, Music Sync |
| Special Features | Monitor Stand, 2 Drawers, 2 Open Shelves, Reversible Shelves, Adjustable Leg Pads, 'X'-shaped Braces |
| Assembly Required | Yes (Tools Included) |

Image 8.1: A diagram illustrating the detailed dimensions of the Pamray S15 Computer Desk.
9. Warranty and Support
For warranty information, product support, or to report missing/damaged parts, please refer to the contact information provided in your product packaging or visit the official Pamray website. Keep your purchase receipt for warranty claims.
Related documentsS15


Ask a question about this manual
Ask about setup, troubleshooting, compatibility, parts, safety, or missing instructions. Manuals+ will review the question and use this page’s manual context to help answer it.