1. Introduction
The neculogy G10-P15pro is an all-in-one podcast equipment bundle designed for live streaming, podcast production, recording, and online communication. It features an integrated audio mixer with a 4.5-inch adjustable angle screen and comes equipped with a P15 microphone. This manual provides essential information for setting up, operating, and maintaining your G10-P15pro system.
2. Package Contents
Please verify that all items listed below are included in your package:
- G10 Audio Mixer
- P15 Condenser Microphone
- Microphone Desk Stand
- Microphone Pop Filter
- XLR Cable
- USB A-C Cable
- 3.5mm TRRS Audio Cable
- 3.5mm TRS Headphone
- USB-C OTG Cable
- User Manual (this document)

Image: G10 Podcast Equipment with all included accessories and dimensions.
3. Product Overview
The G10 audio mixer features a user-friendly interface with a 4.5-inch high-definition dot-matrix LCD screen. This screen offers 6 angle adjustments for optimal viewing and displays dynamic music spectrums, rich tunes, pitch adjustments, and real-time storage information.
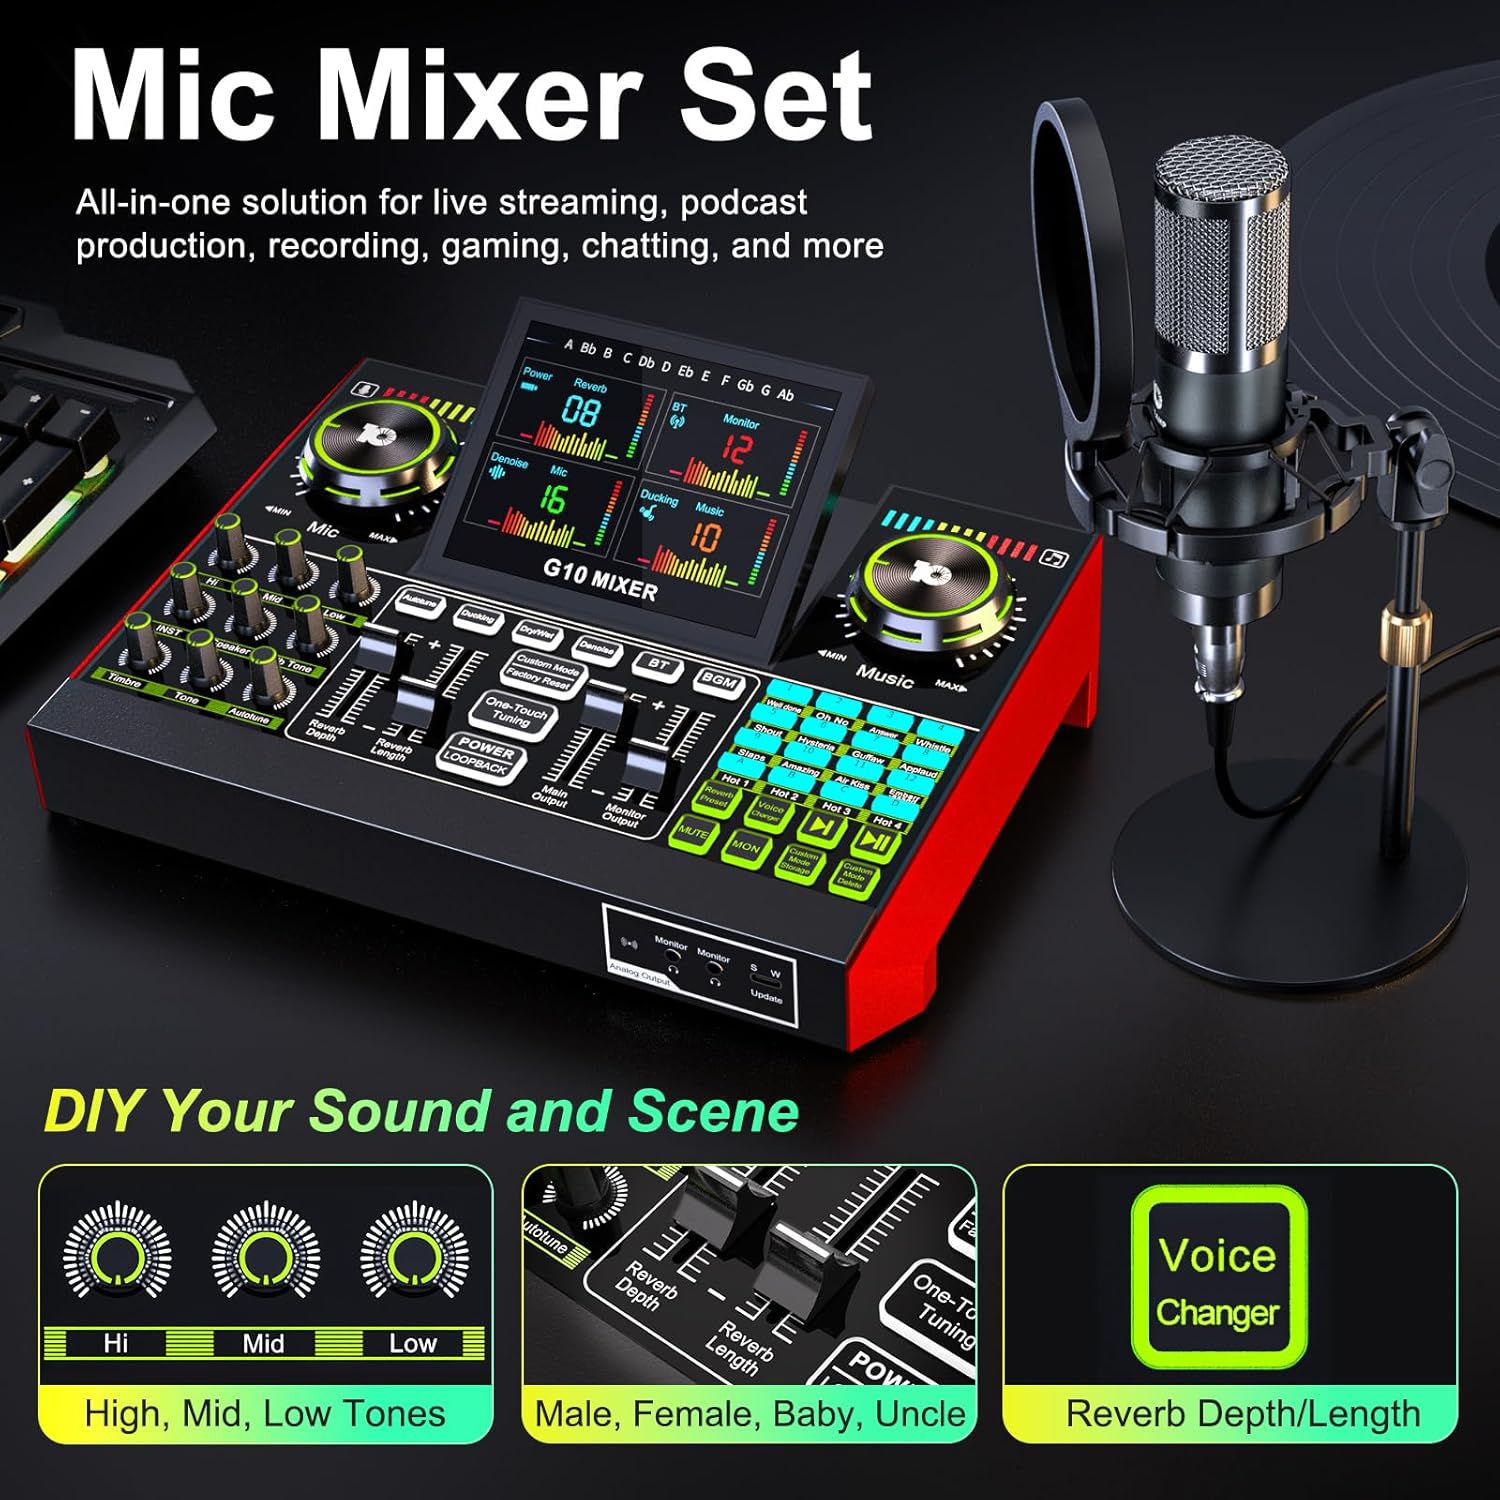
Image: Overview of the G10 Mic Mixer Set, showing the mixer and microphone setup.
3.1. G10 Mixer Controls and Ports
The mixer includes various knobs, faders, and buttons for comprehensive audio control. Key controls include:
- Mic Knob: Adjusts microphone input volume.
- Music Knob: Adjusts background music volume.
- Tone Controls: High, Mid, Low tone adjustments for microphone.
- INST Knob: Adjusts instrument input volume.
- Timbre, Tone, Autotune Knobs: Fine-tune vocal characteristics.
- Reverb Depth/Width Faders: Control reverb effects.
- Main Output/Monitor Output Faders: Adjust overall output levels.
- Voice Changer: Buttons for male, female, baby, and uncle voice effects.
- Sound Pads: 16 customizable sound effect pads.
- Ducking: Automatically reduces background sound when you speak.
- Smart Denoise: Intelligently filters out noise for clearer voice.
- One-click voice enhancement: Instantly improves vocal quality.
- Loopback Switch: Enables internal audio routing for recording.
Connectivity options include:
- DC 5V Charging port
- OTG (USB-C digital I/O) for digital transmission to PC/phone
- Live1/Live2 (Analog Transmission) for mobile devices
- Music input (3.5mm TRRS)
- 48V Mic (XLR condenser microphone input with phantom power)
- LINE IN (6.35mm musical instrument input)
- Speaker output
- Headset input & monitoring
- Mic1/Mic2 (3.5mm condenser microphone input)
Video: A brief introduction to the G10 Mic Mixer Set, showcasing its features and connectivity options.
3.2. P15 Microphone
The P15 microphone is a condenser microphone designed for clear audio capture. It features automatic noise reduction, a cardioid polar pattern to focus on sound directly in front of it, and anti-interference capabilities.

Image: Detailed view of the P15 Microphone assembly, highlighting its adjustable lever, shock mount, clip installation, and stable metal base.
4. Setup Instructions
4.1. Microphone Assembly
- Attach the microphone to the shock mount.
- Secure the shock mount to the microphone desk stand.
- Install the pop filter onto the desk stand, positioning it in front of the microphone.
- Connect the XLR cable from the microphone to the 48V Mic input on the G10 mixer.
4.2. Connecting the G10 Mixer
- Power Connection: Connect the USB A-C cable to the DC 5V charging port on the mixer and to a power adapter or a powered USB port.
- PC Connection: For digital transmission, connect the USB A-C cable from the OTG port on the mixer to your PC.
- Mobile Device Connection: Use the 3.5mm TRRS audio cable to connect your mobile device to the Live1 or Live2 analog transmission ports for live streaming.
- Headphones/Speakers: Connect your headphones to the Headset port for monitoring. If using external speakers, connect them to the Speaker output.
- Additional Microphones/Instruments: Connect dynamic microphones to the 3.5mm Mic1/Mic2 ports or instruments to the LINE IN (6.35mm) port as needed.
4.3. Powering On
Press and hold the Power button on the G10 mixer to turn it on. The LCD screen will illuminate, indicating the device is ready for use.
5. Operating Instructions
5.1. Adjusting Audio Settings
Use the various knobs and faders on the mixer to customize your sound:
- Mic Volume: Rotate the large Mic knob to adjust the microphone input level.
- Music Volume: Rotate the large Music knob to adjust the background music level.
- Tone Adjustments: Use the 'Hi', 'Mid', and 'Low' knobs to fine-tune the treble, mid-range, and bass frequencies of your microphone.
- Reverb Effects: Adjust the 'Reverb Depth' and 'Reverb Length' faders to control the intensity and duration of the reverb effect.
- Autotune: Use the 'Autotune' knob to apply pitch correction to your vocals.
5.2. Voice Modes and Effects
The G10 mixer offers a variety of voice modes and effects:
- Voice Changer: Press the 'Voice Changer' button to cycle through different voice effects such as Male, Female, Baby, and Uncle.
- Reverb Presets: The 'Reverb Preset' button allows you to select from 5 preset reverb modes: Original, KTV, Chat, Livestream, and MC.
- Custom Sound Modes: The G10 can save up to 19 personalized voice modes. After adjusting your desired settings, press 'Custom Mode Storage' to save. You can then easily switch between these saved modes.

Image: The G10 mixer displaying the ability to memorize up to 19 various voice modes for quick access.
5.3. Live Streaming Features
Enhance your live streams with these integrated functions:
- Ducking: Activate the 'Ducking' feature to automatically lower background music when you speak, ensuring your voice is clear.
- Smart Denoise: Use the 'Smart Denoise' function to filter out unwanted background noise, providing a cleaner audio output.
- One-click Voice Enhancement: Press the dedicated button for instant vocal clarity and presence.
- BGM (Background Music) Control: When singing, you can choose 'Follow Singing' to hear original vocals or 'Remove Vocal' to eliminate them, allowing the audience to hear only your voice and the accompaniment.

Image: The G10 mixer highlighting 'Ducking' and 'Smart Denoise' features, ideal for chat and gaming livestreams.

Image: A user demonstrating the G10 mixer during a singing livestream, illustrating the 'Follow Singing' and 'Remove Vocal' BGM options.
6. Maintenance
To ensure the longevity and optimal performance of your neculogy G10-P15pro podcast equipment, follow these maintenance guidelines:
- Cleaning: Regularly wipe the surfaces of the mixer and microphone with a soft, dry cloth. Avoid using harsh chemicals or abrasive materials.
- Storage: Store the equipment in a cool, dry place away from direct sunlight, extreme temperatures, and high humidity.
- Charging: Do not overcharge the device. Avoid charging the unit while it is in active use, as this may affect battery life and performance.
- Cable Care: Handle cables carefully. Avoid sharp bends or kinks that could damage the internal wiring.
7. Troubleshooting
If you encounter issues with your G10-P15pro, refer to the following common problems and solutions:
| Problem | Possible Cause | Solution |
|---|---|---|
| No sound output | Volume levels too low; incorrect cable connection; headphones/speakers not connected. | Check Mic, Music, Main Output, and Monitor Output faders. Ensure all cables are securely connected. Verify headphones/speakers are plugged in and functional. |
| Microphone not working | XLR cable loose; phantom power off (for condenser mic); mic volume low; incorrect mic input selected. | Ensure XLR cable is firmly connected. Verify 48V phantom power is enabled for the P15 microphone. Increase Mic knob volume. Check if the correct mic input is active. |
| Poor sound quality/noise | High gain settings; environmental noise; Denoise feature off. | Adjust Mic gain. Activate 'Smart Denoise' feature. Ensure recording environment is quiet. Check for ground loops or interference. |
| Device not powering on | Low battery; power cable not connected; faulty power adapter. | Connect the device to a power source using the provided USB A-C cable and adapter. Allow it to charge. Try a different USB port or power adapter. |
| Voice changer/effects not working | Feature not activated; incorrect settings. | Ensure the specific effect button (e.g., 'Voice Changer', 'Reverb Preset') is pressed. Check the corresponding faders or knobs for adjustment. |
8. Specifications
| Feature | Specification |
|---|---|
| Model Number | G10-P15pro |
| Brand | neculogy |
| Item Weight | 14.4 ounces |
| Product Dimensions | 11.7 x 9.5 x 8.6 inches |
| Power Source | Battery Powered |
| Voltage | 48 Volts (for phantom power) |
| Number of Channels | 2 |
| Connectivity Technology | USB, XLR |
| Screen | 4.5-inch high-definition dot-matrix LCD, 6 angle adjustments |
| Reverb Modes | 5 preset modes |
| Voice Modes | Up to 19 savable custom modes |
| Sound Pads | 16 funny sound pads |
9. Warranty and Support
For warranty information and technical support, please refer to the official neculogy website or contact their customer service directly. Keep your purchase receipt for any warranty claims.