
K&F CONCEPT KF31.132S1
Contents
K&F CONCEPT 11-inch Magic Arm Clamp Instruction Manual
Model: KF31.132S1
Introduction
The K&F CONCEPT 11-inch Magic Arm Clamp is a versatile accessory designed to securely mount various camera equipment. It features a dual ball head design for flexible positioning and a super clamp for attachment to a wide range of surfaces. This manual provides instructions for proper setup, operation, and maintenance to ensure optimal performance and longevity of your device.
What's in the Box
Verify that all components are present before proceeding with setup:
- Magic Arm
- Super Clamp
- GoPro Adapter
Setup Instructions
1. Attaching the Magic Arm to the Super Clamp
The magic arm and super clamp are designed for easy assembly. The super clamp can be attached to various surfaces like poles, posts, tripods, or desks. It has an opening range of 15mm to 55mm.

Image: Overview of the K&F CONCEPT Magic Arm and Super Clamp, highlighting the 1/4" screw with bouncy locating pin, aluminum alloy construction, and locking knob on the arm, and non-slip tabs with 1/4" and 3/8" screws on the clamp.

Image: Close-up of the super clamp, showing the 1/4" and 3/8" screw holes for attaching accessories. The clamp provides rich extensibility for various setups.

Image: Illustration demonstrating the super clamp's opening range, from a minimum of 15mm to a maximum of 55mm, allowing it to securely grip various surfaces.
- Unscrew the locking knob on the super clamp to open its jaws.
- Position the clamp onto the desired surface (e.g., tripod leg, desk edge, pole).
- Tighten the locking knob until the clamp is securely fastened. Ensure the non-slip tabs provide a firm grip.
- Attach the magic arm to one of the 1/4" or 3/8" locating holes on the super clamp.
- Tighten the screw connection to secure the magic arm to the clamp.
2. Attaching Devices to the Magic Arm
The magic arm features ARRI 1/4" screws at both ends, compatible with a wide range of devices.

Image: Detail of the magic arm's 1/4" screw with a bouncy locating pin, designed for secure attachment to camera cages, cell phone mounts, sports camera mounts, and lights.
- Identify the appropriate mounting point on your device (e.g., DSLR camera, monitor, LED light, microphone, webcam, phone holder).
- Screw the device onto one of the 1/4" ARRI screws on the magic arm.
- If using an action camera (GoPro/DJI/Insta360), attach the provided GoPro adapter to the magic arm first, then mount your action camera to the adapter.
- Ensure all connections are hand-tightened to prevent accidental detachment.
Operating Instructions
Adjusting the Magic Arm
The magic arm features a 360° dual ball head design, allowing for flexible positioning of your attached equipment. All joints can be adjusted simultaneously with a single locking knob.
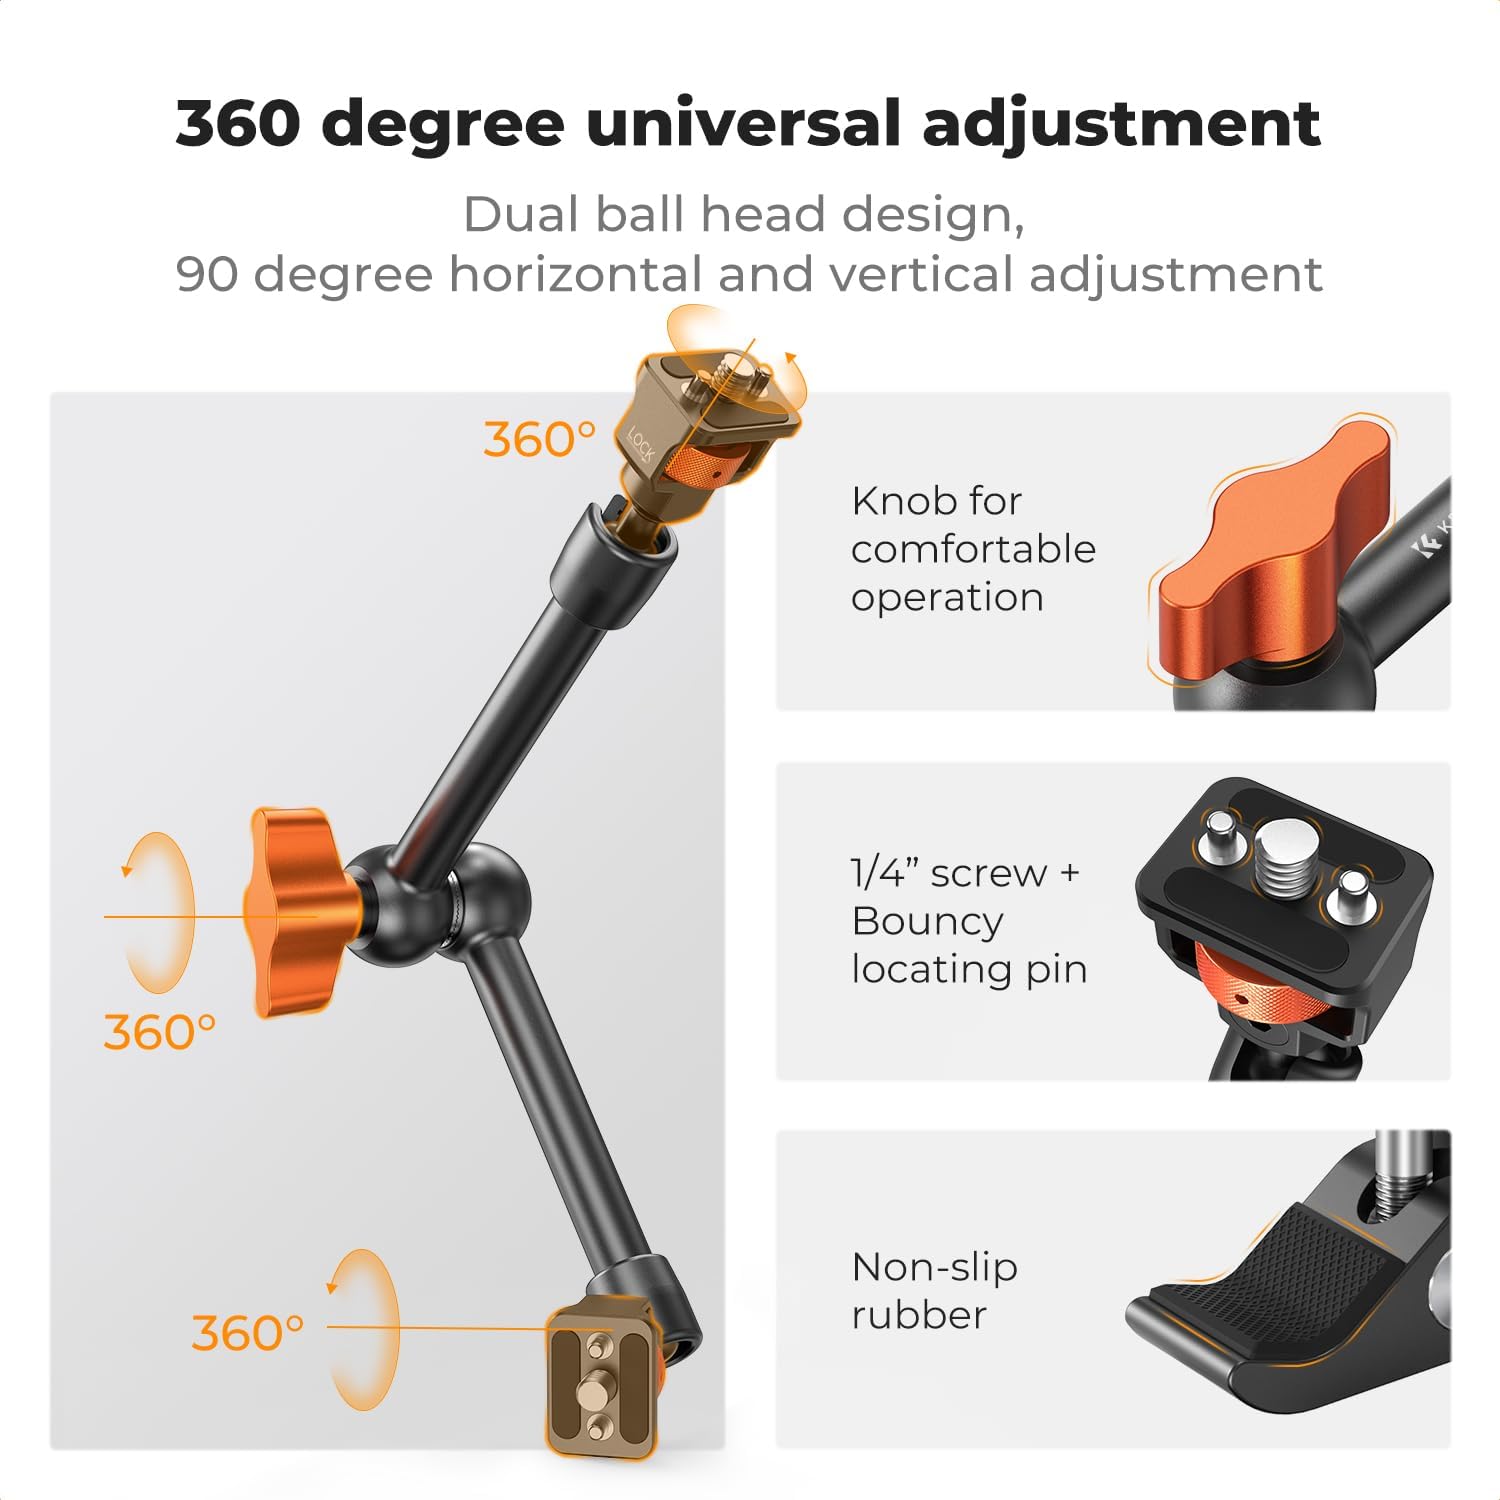
Image: Diagram illustrating the 360-degree universal adjustment capability of the magic arm's dual ball heads, allowing for 90-degree horizontal and vertical adjustments.

Image: Visual representation of the magic arm's quick locking mechanism. Turning the central knob simultaneously tightens or loosens all joints for one-step adjustment.
- Loosen the central locking knob to allow free movement of the arm's joints.
- Adjust the attached device to your desired angle and position. The ball heads offer 360° rotation and 90° horizontal/vertical adjustment.
- Once the desired position is achieved, tighten the central locking knob firmly to secure all joints.
Usage Scenarios
The magic arm clamp kit is suitable for various static or mildly dynamic shooting scenarios, allowing for creative camera placements.
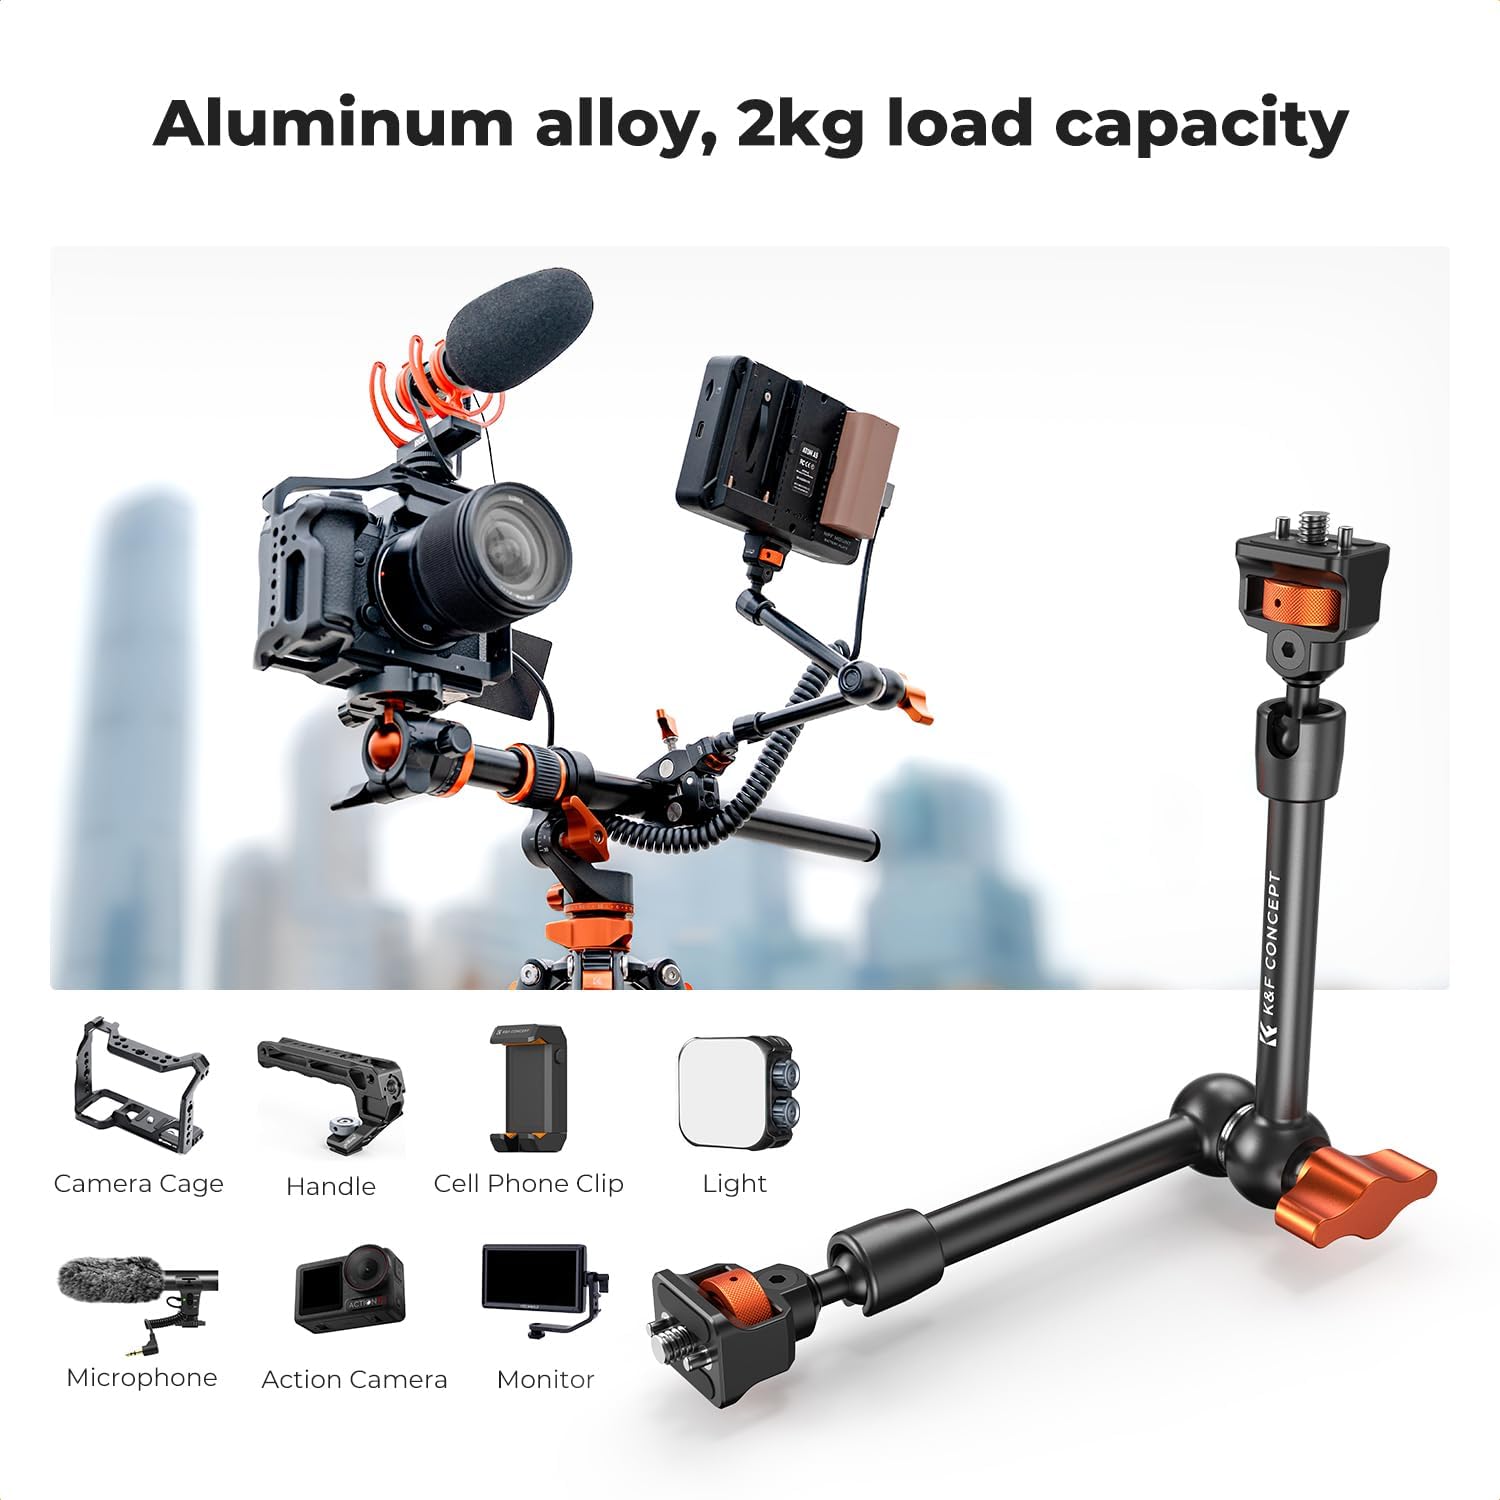
Image: Example setup showing the magic arm supporting a DSLR camera, an external monitor, and a microphone, demonstrating its versatility for different accessories.
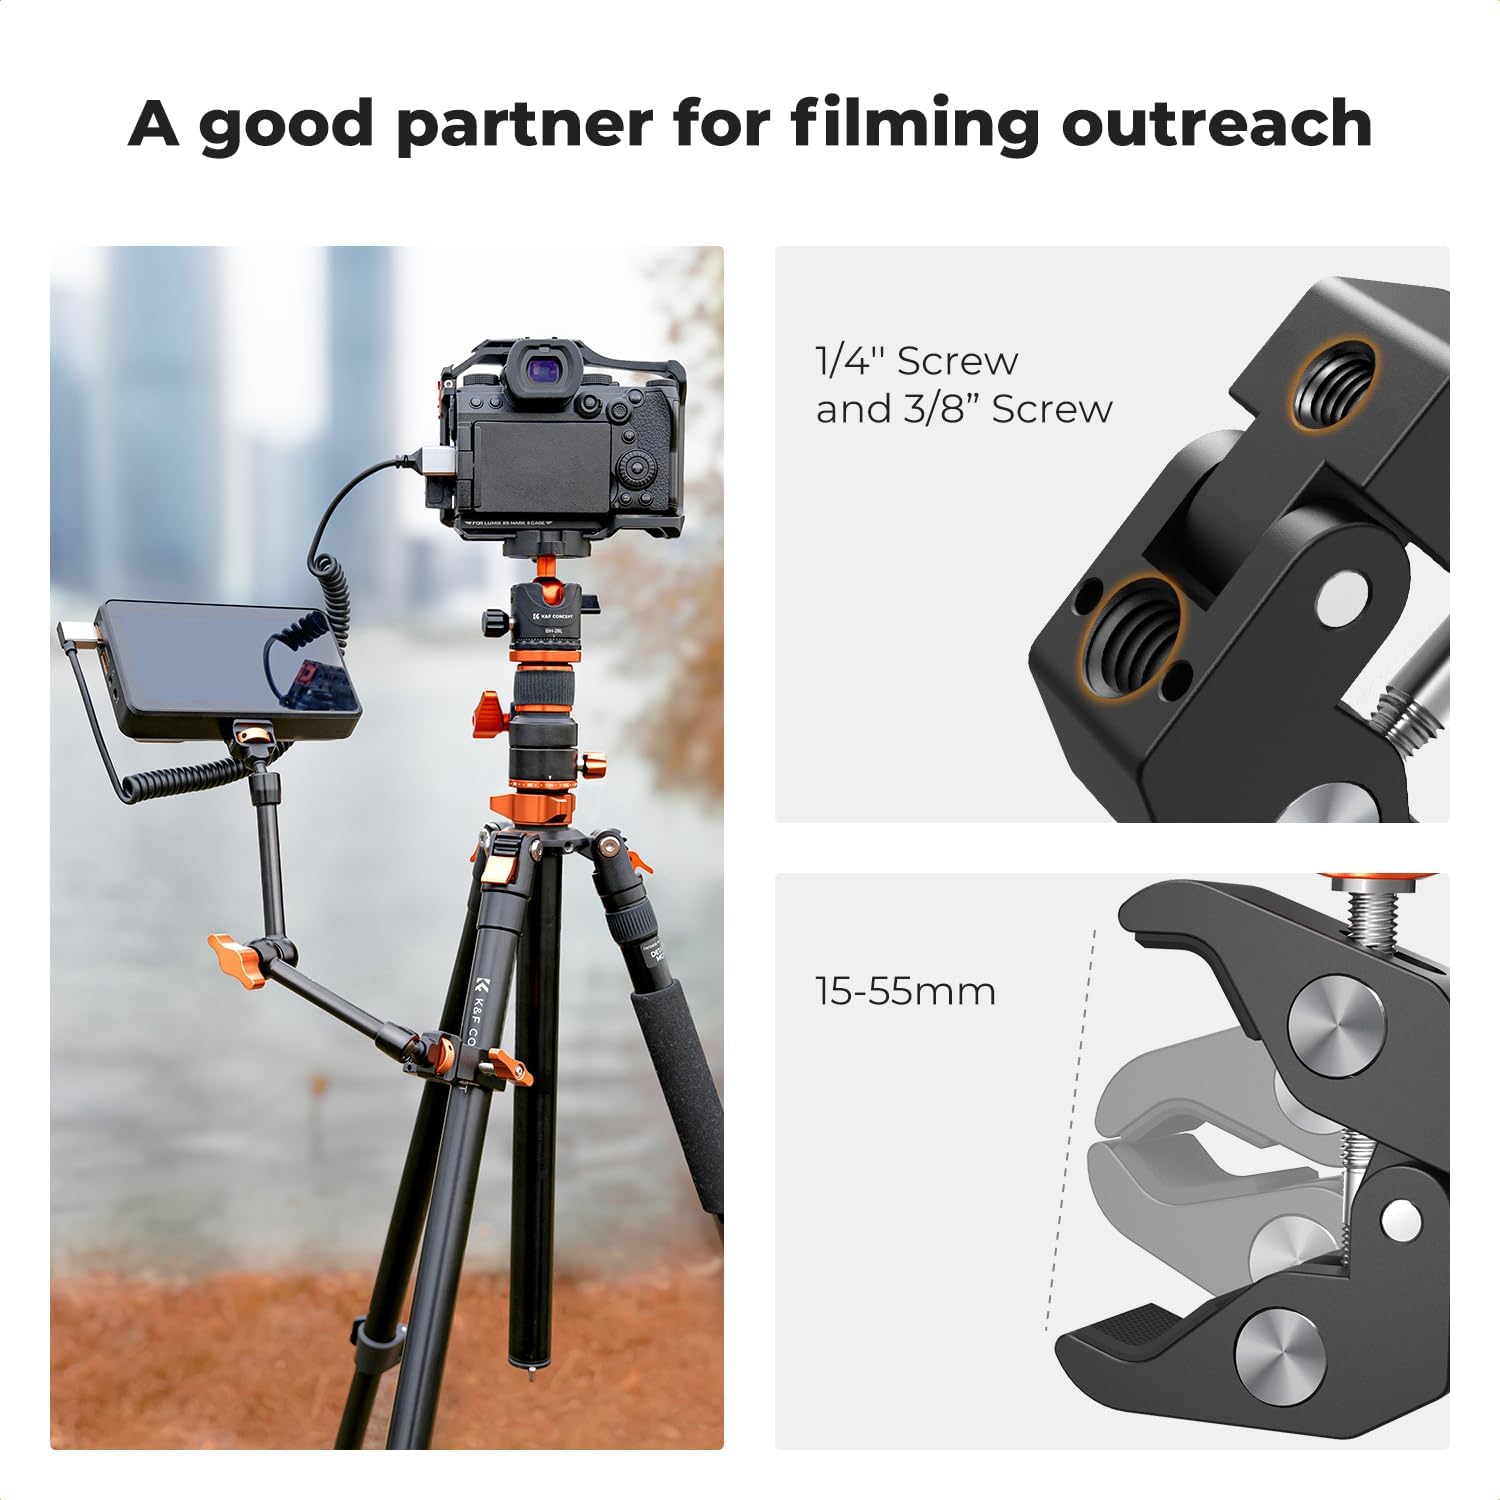
Image: A setup where the magic arm clamp is attached to a tripod, holding both a smartphone and a camera, illustrating its use for multi-device filming.

Image: Collage showing diverse applications of the magic arm, including mounting a phone to a railing, a camera and LED light to a tripod, a phone and microphone to a surface, and an action camera to a stair railing.
Video Demonstrations
Video: A detailed review and demonstration of the K&F CONCEPT 11" Magic Arm Clamp with Super Clamp, showcasing its features and various mounting options.
Video: A demonstration of the K&F Magic Arm, highlighting its versatility for different camera setups and accessories.
Video: A user demonstrating the K&F CONCEPT Magic Arm Clamp, showing how it can be used to mount a phone to a counter for various applications.
Maintenance
To ensure the longevity and optimal performance of your K&F CONCEPT Magic Arm Clamp, follow these maintenance guidelines:
- Cleaning: Wipe the arm and clamp with a soft, dry cloth after each use to remove dust and debris. For stubborn dirt, use a slightly damp cloth and then dry thoroughly. Avoid harsh chemicals or abrasive cleaners.
- Storage: Store the magic arm and clamp in a dry, cool place away from direct sunlight and extreme temperatures.
- Inspection: Periodically check all screws and joints for tightness. Re-tighten if necessary. Inspect the rubber pads on the clamp for wear and tear; these are crucial for grip and equipment protection.
- Lubrication: The ball heads and locking mechanism are designed for smooth operation and generally do not require lubrication. If movement becomes stiff, consult customer support.
Troubleshooting
| Problem | Possible Cause | Solution |
|---|---|---|
| Device slips or rotates after tightening. |
|
|
| Clamp does not grip surface securely. |
|
|
| Difficulty adjusting arm joints. |
|
|
Important Note: The magic arm is suitable for static or mildly dynamic scenarios with a maximum load capacity of 2 kg. Avoid using it with heavy cameras during vigorous movement.
Specifications
| Feature | Detail |
|---|---|
| Brand | K&F CONCEPT |
| Model Name | KF31.132S1 |
| Color | Black |
| Compatible Devices | Action Camera, Camera Cage, Monitors, Phone, DSLR Camera, LED Light, Microphone, Webcam |
| Mounting Type | Surface Mount |
| Additional Features | Adjustable, Rotatable, 360° Dual Ball Heads, ARRI 1/4" & 3/8" Thread Screw |
| Weight Capacity Maximum | 2 Kilograms |
| Item Weight | 0.41 Kilograms |
| Material | Metal, Plastic (Aluminum Alloy) |
| Super Clamp Opening Range | 15mm - 55mm |
Warranty and Support
This K&F CONCEPT product comes with a 1-Year Warranty from the date of purchase. This warranty covers manufacturing defects and material flaws under normal use.
For warranty claims, technical assistance, or any questions regarding your product, please contact K&F CONCEPT customer support through their official website or the retailer where the product was purchased.
Online Support: Visit the official K&F CONCEPT website for FAQs, product registration, and contact information. K&F CONCEPT Store
Ask a question about this manual
Ask about setup, troubleshooting, compatibility, parts, safety, or missing instructions. Manuals+ will review the question and use this page’s manual context to help answer it.