
1. Introduction
This manual provides essential information for the proper setup, operation, and maintenance of your memzuoix 15-inch Portable Monitor (Model A15G1B). Please read these instructions thoroughly before using the product to ensure optimal performance and longevity.
2. What's in the Box
Verify that all items listed below are present in your package:
- 1 x ABS Material Display (memzuoix 15-inch Portable Monitor)
- 1 x Foldable Leather Case
- 1 x Mini HDMI Cable
- 1 x Power Adapter
- 1 x USB-C Cable

Image: The memzuoix portable monitor, its foldable leather case, and included cables (Mini HDMI, USB-C, and power adapter).
3. Product Overview
3.1 Monitor Components
The memzuoix portable monitor features a slim design with essential ports and controls for versatile use.

Image: A detailed side view of the monitor highlighting the On/Off/Back Button, Dia-Wheel Menu, 3.5mm Headphone Hole, Power Port, Full-featured Type-C Port, and Mini HDMI Port.
3.2 Ports and Controls
- On/Off/Back Button: Powers the monitor on or off. Also functions as a 'Back' button within the OSD menu.
- Dia-Wheel Menu: Navigates the On-Screen Display (OSD) menu for settings adjustments. Press to select, roll to adjust.
- 3.5mm Headphone Hole: For connecting external audio devices like headphones or speakers.
- Power Port: Connects to the included power adapter for external power supply.
- Full-featured Type-C Port (x2): Supports power, video, and data transmission via a single USB-C cable. Compatible with devices supporting DP Alt-Mode.
- Mini HDMI Port: Connects to devices via HDMI for video and audio input.
4. Setup
Follow these steps to set up your portable monitor.
4.1 Using the Foldable Leather Case as a Stand
- Place the monitor on a flat surface.
- Fold the magnetic leather case to form a triangular stand.
- Adjust the monitor into the grooves of the case for your desired viewing angle (15°, 30°, or 60°).

Image: The foldable leather case configured as a stand, demonstrating adjustable viewing angles.
4.2 Connecting to Devices
The monitor supports various devices including laptops, smartphones, gaming consoles (PS5, Xbox, Switch), and PCs.
- USB-C Connection (Single Cable): For devices with a full-featured USB-C port (supporting DP Alt-Mode), connect the monitor using the provided USB-C cable. This single cable can transmit power, video, and audio.
- HDMI Connection: For devices with an HDMI output, connect the monitor using the provided Mini HDMI to HDMI cable. An additional USB-C to USB-A cable or power adapter may be required for power.
- Power Supply: If your device cannot provide sufficient power via USB-C, or when using HDMI, connect the monitor to the included power adapter via one of the USB-C ports.
Video: Demonstrates the unboxing, setting up the monitor stand, and connecting the monitor to a laptop via USB-C for power and display.

Image: The monitor connected to a laptop, a PlayStation 5, and a Nintendo Switch, showcasing its wide compatibility.
4.3 VESA Mounting
The monitor features 75x75mm VESA mounting holes on the back, allowing for wall or arm installation. Ensure you use VESA-compatible mounting hardware (not included).

Image: The back of the monitor showing the VESA mounting pattern for alternative installation options.
5. Operating Instructions
5.1 Power On/Off
Press and hold the On/Off/Back Button for a few seconds to power the monitor on or off.
5.2 On-Screen Display (OSD) Menu
Use the Dia-Wheel Menu to access and navigate the OSD menu. Press the wheel to enter the menu or select an option. Roll the wheel to move between options or adjust values.
Common OSD settings include:
- Brightness/Contrast: Adjust display luminance and contrast levels.
- Color Settings: Modify color temperature, hue, and saturation.
- HDR Mode: Enable or disable High Dynamic Range for enhanced visual detail.
- Input Source: Manually select between USB-C and HDMI inputs.
- Audio: Adjust volume for built-in speakers or connected headphones.
5.3 Display Modes
When connected to a computer, the monitor supports various display modes:
- Extend Mode: Expands your desktop across both screens, providing more workspace.
- Duplicate Mode: Mirrors your primary display, showing the same content on both screens.
- Second Screen Only Mode: Displays content only on the portable monitor, turning off the primary display.
- Portrait Mode: The monitor can be rotated for vertical display, ideal for documents or coding. Adjust settings in your operating system's display preferences.
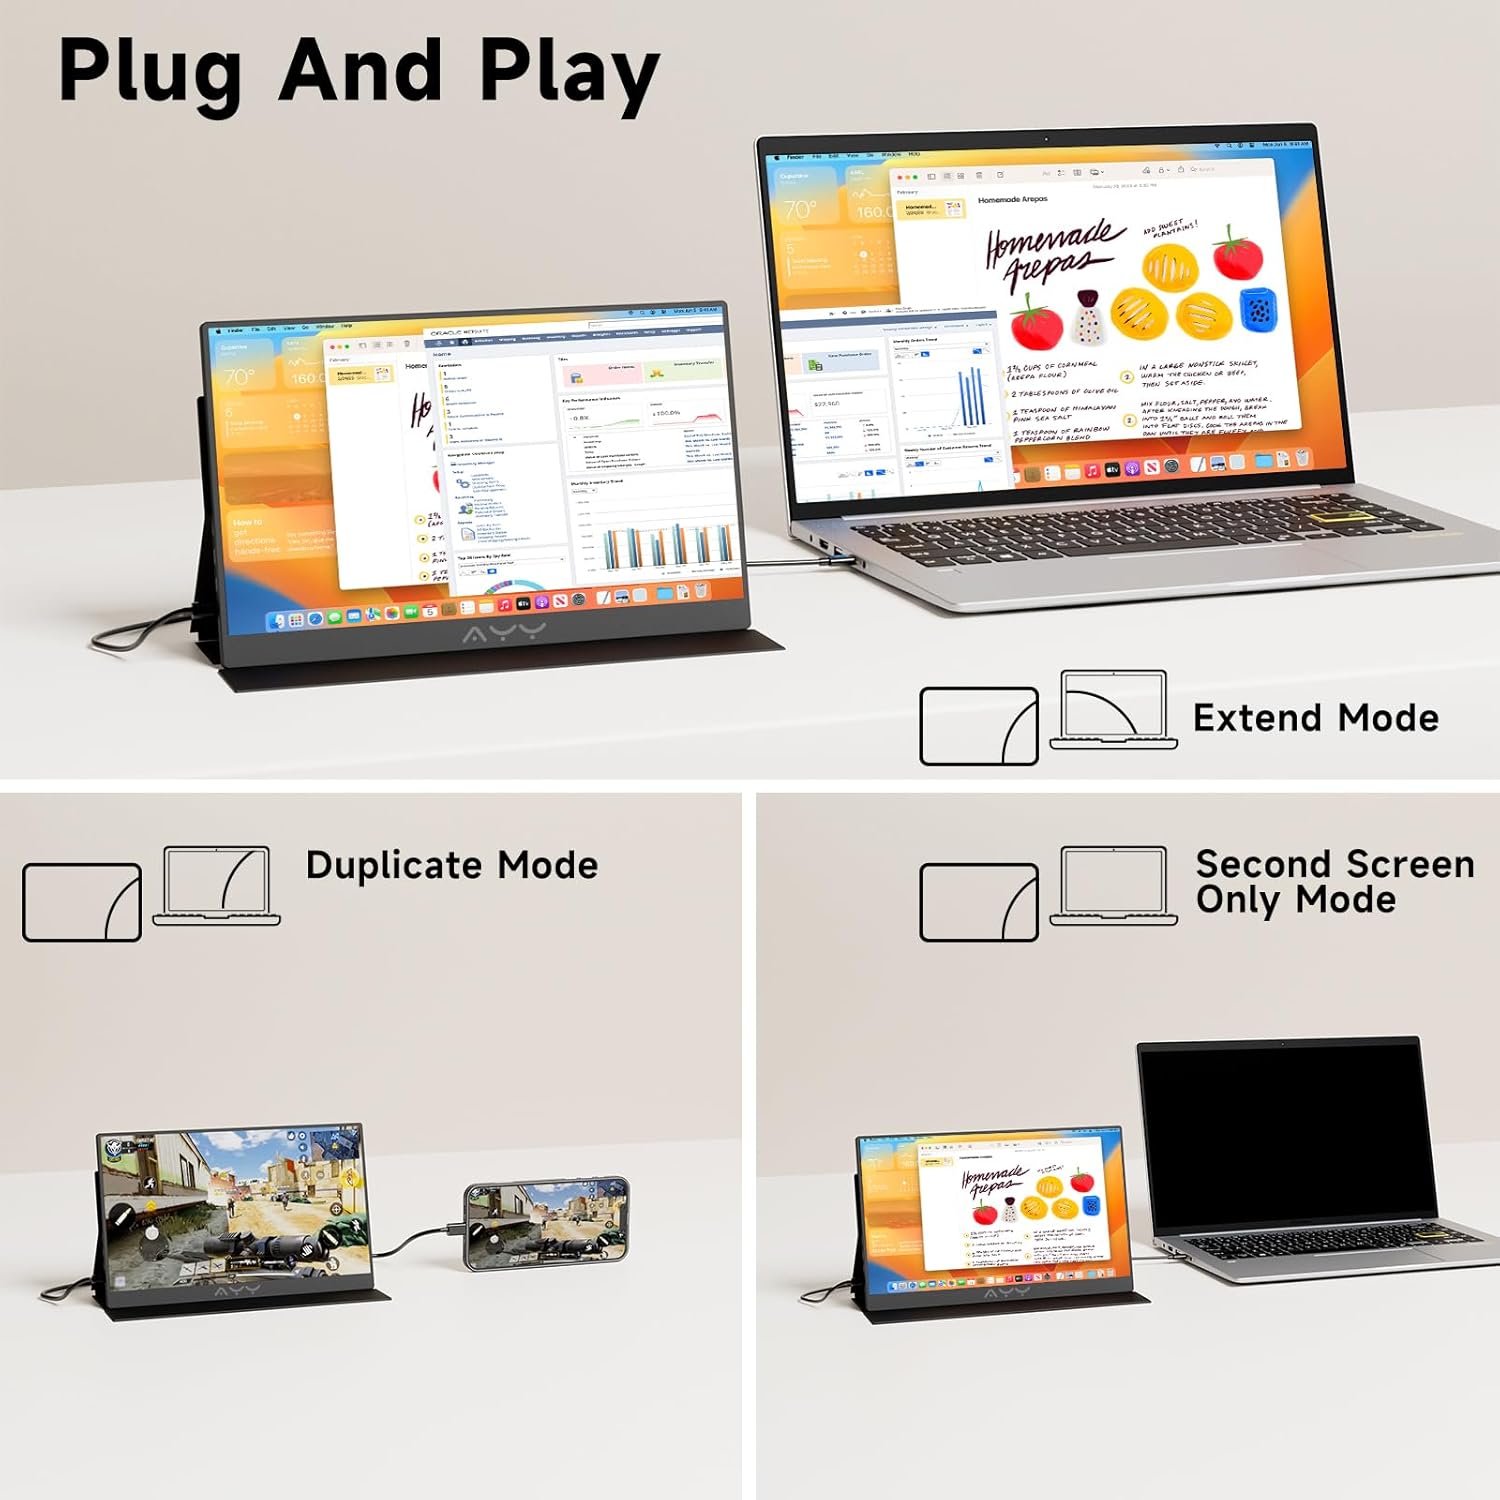
Image: Visual representation of Extend, Duplicate, and Second Screen Only display modes.
5.4 Audio Output
The monitor includes dual built-in speakers. For private listening or higher quality audio, connect headphones or external speakers to the 3.5mm headphone jack.

Image: Illustration highlighting the monitor's built-in dual speakers.
6. Maintenance
Proper care ensures the longevity of your monitor.
- Cleaning the Screen: Use a soft, lint-free cloth slightly dampened with water or a non-abrasive screen cleaner. Avoid harsh chemicals.
- Cleaning the Body: Wipe the monitor's body with a soft, dry cloth.
- Storage: When not in use, store the monitor in its protective foldable case to prevent scratches and damage. Avoid extreme temperatures and humidity.
- Handling: Always handle the monitor by its edges. Avoid applying pressure directly to the screen.
7. Troubleshooting
If you encounter issues, refer to the following common solutions:
| Problem | Possible Cause | Solution |
|---|---|---|
| No Signal / Black Screen | Incorrect input source selected; Loose cable connection; Insufficient power; Device not outputting signal. | 1. Ensure cables are securely connected. 2. Verify the input source in the OSD menu. 3. Connect the monitor to external power using the adapter. 4. Check your device's display settings. |
| No Power | Power cable not connected; Faulty power adapter/cable. | 1. Ensure the power adapter is securely connected to both the monitor and a working power outlet. 2. Try a different USB-C cable or power source if available. |
| Flickering / Unstable Display | Cable issue; Insufficient power; Graphics driver issue. | 1. Replace the video cable. 2. Ensure adequate power supply. 3. Update your device's graphics drivers. |
| No Sound / Low Volume | Volume too low; Incorrect audio output selected on device; Faulty headphones/speakers. | 1. Adjust monitor volume via OSD. 2. Check your device's audio output settings to ensure the monitor is selected. 3. Test with different headphones/speakers. |
| Poor Picture Quality (Mac/MacBook) | HDR setting enabled on Mac. | For Mac/MacBook users, ensure HDR is OFF in System Settings > Displays > High Dynamic Range. |
8. Specifications
Detailed technical specifications for the memzuoix 15-inch Portable Monitor.
| Feature | Specification |
|---|---|
| Brand | memzuoix |
| Model Number | A15G1B |
| Screen Size | 15 Inches |
| Resolution | FHD 1080p (1920 x 1080 Pixels) |
| Aspect Ratio | 16:9 |
| Display Type | LCD (IPS Technology) |
| Screen Surface | Matte, Anti-Glare |
| Refresh Rate | 60 Hz |
| Response Time | 3 Milliseconds |
| Contrast Ratio | 1000:1 |
| Brightness | 220 Candela |
| Viewing Angle | 170 Degrees |
| Color Gamut | 100% sRGB |
| Connectivity | 2 x USB 3.0 Type C (Full-featured), 1 x Mini HDMI, 1 x 3.5mm Audio |
| Power Consumption | 10 Watts |
| Item Dimensions (D x W x H) | 0.35" x 13.62" x 8.66" |
| Item Weight | 1.4 Pounds |
| Mounting Type | Desk Mount / Wall Mount (75x75mm VESA) |
| Additional Features | HDR, Low Blue Light, Built-In Speakers, Frameless |
9. Warranty and Support
9.1 Warranty Information
This memzuoix portable monitor comes with a 1-Year Manufacturer Warranty from the date of purchase. This warranty covers manufacturing defects and workmanship under normal use. It does not cover damage caused by misuse, accidents, unauthorized modifications, or external factors.
9.2 Customer Support
For technical assistance, warranty claims, or any questions regarding your product, please contact memzuoix customer support through the retailer's platform or the official memzuoix website. Please have your model number (A15G1B) and purchase information ready when contacting support.