
1. Introduction
This manual provides essential information for the proper installation, operation, and maintenance of your Deco Gear 49-inch Curved Ultrawide Gaming Monitor (Model: DGVIEW490). Please read this manual thoroughly before using the product and retain it for future reference.
The DGVIEW490 monitor offers an immersive visual experience with its 49-inch curved display, 32:9 aspect ratio, and 3840x1080 resolution. Designed for both gaming and productivity, it features a 144 Hz refresh rate, 4ms response time, HDR 400 support, and FreeSync technology. Connectivity options include HDMI 2.0 and DisplayPort 1.4. This package also includes an extended mouse pad for enhanced desktop functionality.
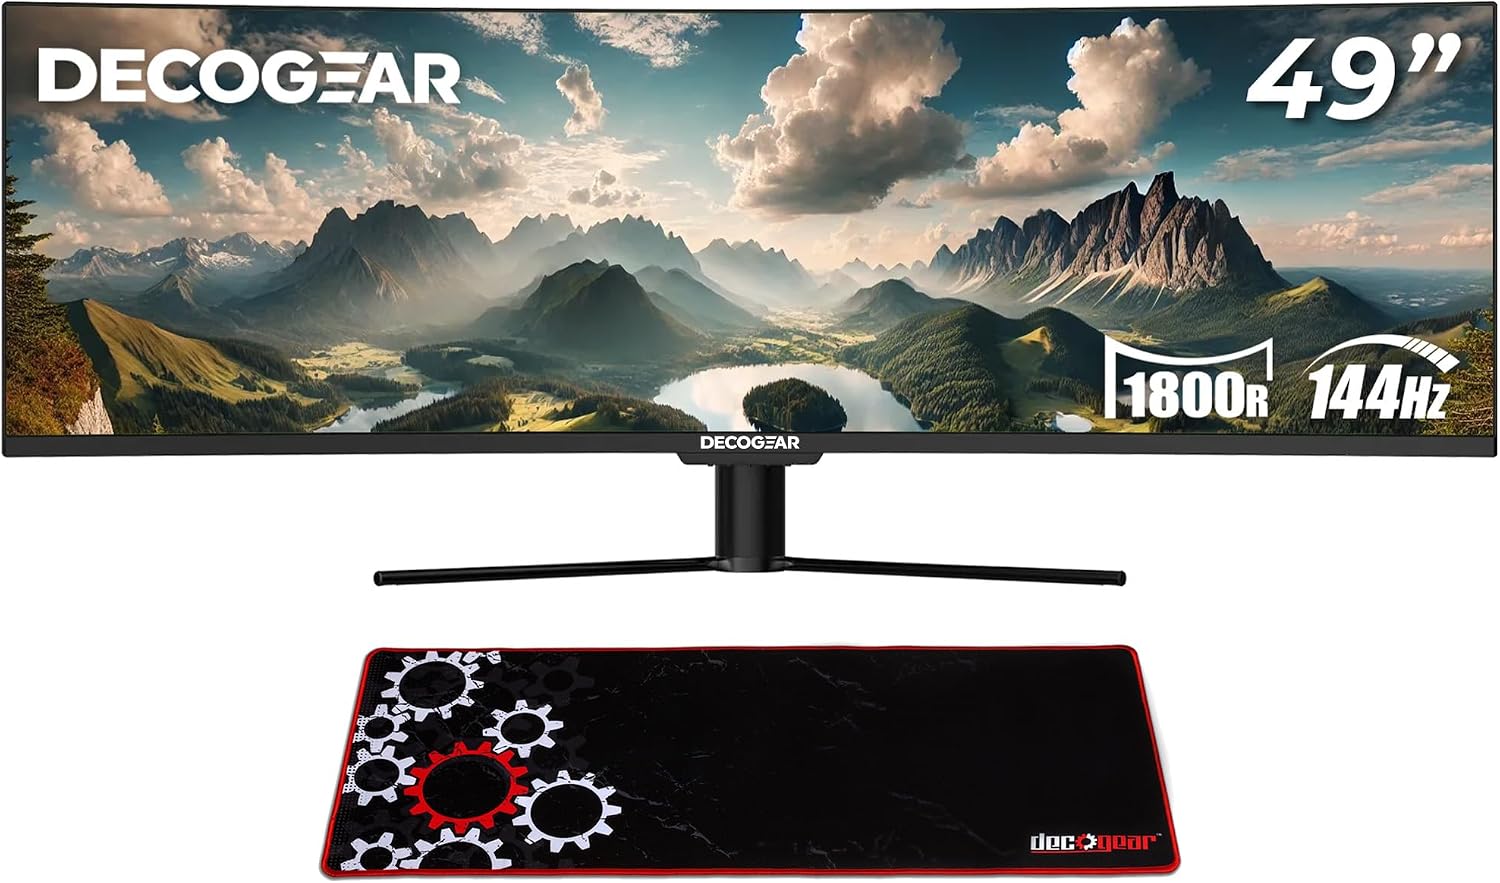
Image 1.1: The Deco Gear DGVIEW490 49-inch Curved Ultrawide Gaming Monitor and the included extended mouse pad.

Image 1.2: The monitor's 32:9 aspect ratio provides an expansive viewing experience.
2. Safety Information
- Ensure the monitor is placed on a stable, level surface to prevent accidental falls.
- Do not expose the monitor to rain, moisture, or extreme temperatures.
- Avoid blocking ventilation openings to prevent overheating.
- Use only the provided power adapter and cables.
- Do not attempt to open or repair the monitor yourself. Refer all servicing to qualified personnel.
- Disconnect the power cable from the outlet during lightning storms or when unused for long periods.
- Keep the monitor away from direct sunlight and heat sources.
- Clean the screen with a soft, lint-free cloth. Avoid using harsh chemicals.
3. Package Contents
Verify that all items listed below are present in your package:
- Deco Gear 49-inch Curved Ultrawide Gaming Monitor (DGVIEW490)
- Monitor Stand Components (Base and Neck)
- Stand Mounting Hardware (Screws)
- Instruction Manual
- DisplayPort Cable
- Power Cable
- Remote Control
- Extended Gaming Mouse Pad

Image 3.1: Overview of the monitor's rear panel with ports and OSD buttons, alongside the included accessories.
4. Setup
4.1 Assembling the Monitor Stand
- Carefully remove the monitor from its packaging and place it face down on a soft, clean surface to prevent scratches.
- Attach the stand neck to the monitor using the provided screws.
- Attach the stand base to the stand neck, securing it with the appropriate screws.
- Ensure all screws are tightened securely.
4.2 Mounting Options (VESA)
The monitor supports VESA mounting standards for wall mounts or alternative desk stands. To use a VESA mount, remove the stand neck (if already attached) and secure the VESA mount to the monitor's rear panel using compatible screws (not included with the monitor).
4.3 Connecting Cables
Refer to Image 3.1 for the location of the ports on the monitor's rear panel.
- Power Connection: Connect the power cable to the monitor's power input and then to a power outlet.
- Video Input:
- DisplayPort: Connect one end of the DisplayPort cable to the monitor's DisplayPort input and the other end to your computer's DisplayPort output.
- HDMI: Connect one end of an HDMI cable (not included) to one of the monitor's HDMI inputs and the other end to your computer's or device's HDMI output.
- Audio Output: Connect headphones or external speakers to the 3.5mm audio output jack on the monitor if desired.
4.4 Initial Power-On
After connecting all necessary cables, press the power button on the monitor or use the remote control to turn on the display. The monitor will automatically detect the active input source. If not, you may need to manually select the input source using the OSD menu.
5. Operating Instructions
5.1 Power On/Off
Press the power button located on the monitor's rear panel (refer to Image 3.1) or the power button on the remote control to turn the monitor on or off.
5.2 OSD (On-Screen Display) Menu Navigation
The OSD menu allows you to adjust various monitor settings. You can navigate the OSD using the buttons on the monitor's rear panel or the included remote control.
- Mode: Access quick settings or switch between preset display modes.
- Select Down/Up: Navigate through menu options.
- Enter: Confirm selection or enter a sub-menu.
- Power: Power on/off the monitor.
5.3 Input Source Selection
To switch between connected devices (e.g., DisplayPort, HDMI 1, HDMI 2), access the OSD menu and navigate to the "Input Source" option. Select the desired input.
5.4 Picture Settings
Adjust display characteristics such as brightness, contrast, color temperature, and HDR settings within the OSD menu's "Picture" section.

Image 5.1: Visual representation of the difference between 144 Hz and 60 Hz refresh rates, highlighting motion clarity.

Image 5.2: The 1800R curve radius of the 49-inch monitor, designed for enhanced comfort and focus.
5.5 Audio Settings
If using the monitor's audio output, adjust the volume and other audio-related settings in the OSD menu.
5.6 Gaming Features (FreeSync, Response Time)
The monitor supports FreeSync technology to reduce screen tearing and stuttering. Ensure FreeSync is enabled in the OSD menu and on your compatible graphics card settings. Response time settings can also be adjusted for optimal gaming performance.
5.7 Picture-in-Picture (PiP) / Picture-by-Picture (PbP) Modes
The DGVIEW490 supports displaying multiple input sources simultaneously. Access the PiP/PbP settings in the OSD menu to configure these modes. PiP displays one input source in a smaller window over another, while PbP divides the screen to show multiple sources side-by-side.

Image 5.3: The monitor's capability to multitask with Picture-in-Picture and Picture-by-Picture modes.
6. Maintenance
6.1 Cleaning the Monitor
- Always unplug the monitor from the power outlet before cleaning.
- Use a soft, lint-free cloth to gently wipe the screen and exterior surfaces.
- For stubborn marks, lightly dampen the cloth with water or a mild, non-abrasive screen cleaner. Do not spray cleaner directly onto the screen.
- Avoid using alcohol, ammonia, or abrasive cleaners, as these can damage the screen or casing.
6.2 General Care
- Avoid placing heavy objects on the monitor or its cables.
- Do not expose the monitor to direct sunlight for extended periods.
- Ensure adequate ventilation around the monitor to prevent heat buildup.
7. Troubleshooting
If you encounter issues with your monitor, refer to the following common problems and solutions:
7.1 No Power / No Display
- Ensure the power cable is securely connected to both the monitor and the power outlet.
- Verify the power outlet is functioning by plugging in another device.
- Check if the monitor's power indicator light is on. If not, press the power button.
- Ensure the video cable (DisplayPort or HDMI) is securely connected to both the monitor and your computer/device.
- Try a different video cable or input port on the monitor.
- Confirm your computer/device is powered on and outputting a signal.
7.2 Image Flickering or Distortion
- Check the video cable for damage or loose connections.
- Adjust the monitor's refresh rate in your computer's display settings.
- Ensure your graphics card drivers are up to date.
- If FreeSync is enabled, try disabling it temporarily to see if the issue persists.
7.3 No Audio
- Ensure headphones or external speakers are properly connected to the monitor's audio output jack.
- Check the volume settings on the monitor's OSD menu and on your computer/device.
- Verify that the correct audio output device is selected in your computer's sound settings.
- If using HDMI/DisplayPort for audio, ensure the monitor is selected as the audio output device.
7.4 Incorrect Resolution or Aspect Ratio
- Adjust the display resolution and aspect ratio in your computer's operating system display settings. The optimal resolution for this monitor is 3840x1080.
- Ensure your graphics card supports the monitor's native resolution.
8. Specifications
| Feature | Specification |
|---|---|
| Model Number | DGVIEW490 |
| Screen Size | 49 Inches |
| Panel Type | Curved Ultrawide |
| Aspect Ratio | 32:9 |
| Resolution | 3840 x 1080 |
| Refresh Rate | 144 Hz |
| Response Time | 4ms |
| Image Contrast Ratio | 3000:1 |
| HDR Support | HDR 400 |
| Connectivity | 2x HDMI 2.0, 2x DisplayPort 1.4, Audio Out (3.5mm) |
| Curvature | 1800R |
| VESA Compatibility | Yes (Mounting hardware not included) |
| Date First Available | September 28, 2019 |

Image 8.1: Connectivity ports on the rear of the monitor, including HDMI, DisplayPort, Audio, and Power inputs.
9. Warranty & Support
9.1 Warranty Information
Deco Gear products are covered by a limited warranty. For specific warranty terms and conditions, please refer to the warranty card included with your product or visit the official Deco Gear website. Keep your proof of purchase for warranty claims.
9.2 Customer Support
If you require further assistance or have questions not covered in this manual, please contact Deco Gear customer support. Contact information can typically be found on the official Deco Gear website or on your product's packaging.
For more information, visit the Deco Gear Store on Amazon.


