
Acegeek AG-KNIGHT-V1-BK
Acegeek Knight-V1 Gaming Chair User Manual
Model: AG-KNIGHT-V1-BK
Introduction
This manual provides comprehensive instructions for the assembly, safe operation, and proper maintenance of your Acegeek Knight-V1 Gaming Chair. Please read this manual thoroughly before assembly and use to ensure optimal performance and longevity of your product. Keep this manual for future reference.
Safety Information
Important Safety Precautions:
- Do not exceed the maximum weight limit of 110 kg (242 lbs). Exceeding this limit may cause damage to the chair and potential injury.
- Use all adjustable mechanisms (recline, height, armrests) only as instructed in this manual. Improper use can lead to instability or damage.
- Ensure all screws and bolts are securely tightened before use and periodically check for looseness.
- Keep hands and fingers clear of moving parts during adjustment.
- Do not stand on the chair.
- Keep children and pets away from the chair during assembly.
- Place the chair on a flat, stable surface.
Package Contents
Before beginning assembly, verify that all components are present and undamaged. If any parts are missing or damaged, please contact Acegeek customer support.
- Backrest
- Seat Base
- Armrests (2)
- Star Base
- Casters (5)
- Gas Lift Cylinder
- Gas Lift Cover
- Mechanism Plate
- Lumbar Cushion
- Headrest Cushion
- Hardware Kit (screws, washers, Allen key)
- Instruction Manual (this document)
Setup and Assembly
Follow these steps carefully to assemble your Acegeek Knight-V1 Gaming Chair. It is recommended to have two people for assembly.
Step 1: Attach Casters to Star Base
Insert each of the five casters into the holes at the end of each leg of the star base. Push firmly until they click into place.

Image: The chair's star base with casters being inserted into the leg openings.
Step 2: Install Gas Lift Cylinder
Place the gas lift cylinder into the center hole of the assembled star base. Then, slide the gas lift cover over the cylinder.
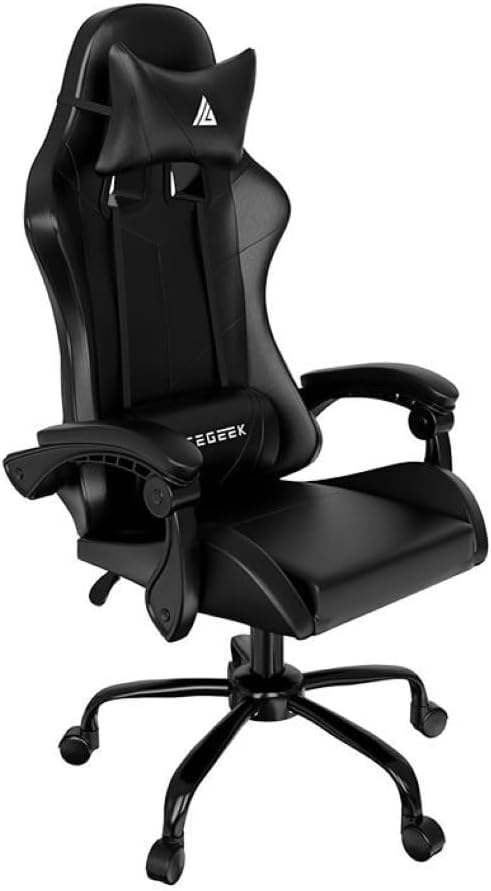
Image: The gas lift cylinder being placed into the center of the five-star base.
Step 3: Attach Mechanism Plate to Seat Base
Align the mechanism plate with the pre-drilled holes on the underside of the seat base. Secure it using the provided screws and Allen key. Ensure the front of the mechanism plate faces the front of the seat.

Image: The underside of the seat base with the mechanism plate attached, showing screw points.
Step 4: Attach Armrests to Seat Base
Attach the armrests to the sides of the seat base using the designated screws. Pay attention to the "L" (left) and "R" (right) markings on the armrests.

Image: The seat base with one armrest partially attached, showing the screw holes.
Step 5: Attach Backrest to Seat Base
Align the backrest with the mounting brackets on the seat base and armrests. Secure it with the remaining screws. It may be helpful to have another person hold the backrest in place during this step.

Image: The backrest being attached to the seat base, showing the connection points.
Step 6: Connect Seat Assembly to Gas Lift
Carefully place the assembled seat and backrest onto the gas lift cylinder, ensuring the center hole of the mechanism plate aligns with the top of the gas lift. Press down firmly to secure.

Image: The fully assembled chair, viewed from the side, showing its overall structure.
Step 7: Attach Cushions
Attach the headrest cushion to the top of the backrest using its elastic straps. Position the lumbar cushion on the lower backrest, adjusting its height for personal comfort.
Operating Instructions
Height Adjustment
To adjust the chair's height, pull the lever located on the right side of the seat upwards. To raise the chair, lift the lever while standing. To lower the chair, lift the lever while seated.
Recline Adjustment
The backrest can be reclined between 90 and 120 degrees. Pull the recline lever, typically located on the left side of the seat, to adjust the angle. Release the lever to lock the backrest in your desired position.
Armrest Adjustment
The armrests are adjustable. Locate the adjustment buttons or levers on the armrests to change their height or angle, if applicable to your model. Adjust to support your arms and shoulders comfortably.
Lumbar and Headrest Cushion Adjustment
The lumbar and headrest cushions are adjustable. Slide them up or down along the backrest straps to find the most comfortable and supportive position for your neck and lower back.
Maintenance and Care
Proper maintenance ensures the longevity and appearance of your gaming chair.
- Cleaning: Wipe the chair with a damp cloth. Avoid using abrasive cleaners, harsh chemicals, or solvents, as these can damage the PU and PVC material.
- Inspection: Periodically check all screws and bolts to ensure they are tight. Re-tighten if necessary to prevent wobbling or instability.
- Casters: Keep the casters clean and free of debris (hair, dust) to ensure smooth movement.
- Avoid Direct Sunlight: Prolonged exposure to direct sunlight can cause the material to fade or crack.
- Weight Limit: Always adhere to the maximum weight recommendation of 110 kg.
Troubleshooting
If you encounter issues with your Acegeek Knight-V1 Gaming Chair, refer to the following common problems and solutions:
| Problem | Possible Cause | Solution |
|---|---|---|
| Chair wobbles or feels unstable. | Loose screws or bolts. Uneven floor. | Check and tighten all assembly screws. Ensure the chair is on a flat surface. |
| Gas lift not adjusting height. | Gas lift cylinder malfunction. Lever not engaged. | Ensure the height adjustment lever is fully pulled. If the issue persists, the gas lift may need replacement. Contact support. |
| Casters not rolling smoothly. | Debris caught in casters. Damaged casters. | Remove any hair or debris from the caster wheels. If damaged, casters may need replacement. |
| Backrest not reclining or locking. | Recline mechanism jammed or damaged. | Ensure the recline lever is fully engaged. Check for any obstructions. If the mechanism is damaged, contact support. |
Specifications
| Brand | Acegeek |
| Model | AG-KNIGHT-V1-BK |
| Color | Black |
| Material (Frame) | Metal + Plate |
| Material (Cover) | PU + PVC |
| Material (Filling) | Normal Foam |
| Gas Lift Class | Class 3 |
| Recline Angle | 90-120 degrees |
| Base Type | 320 mm Metal Base |
| Caster Size | 50 mm Nylon |
| Maximum Weight Capacity | 110 kg (242 lbs) |
| Product Dimensions (D x W x H) | 81 cm x 26 cm x 62 cm |
| Assembly Required | Yes |
| Special Features | Adjustable headrest and lumbar cushions, adjustable armrests, high backrest with integrated headrest. |
Warranty Information
Specific warranty details for the Acegeek Knight-V1 Gaming Chair are typically provided at the point of purchase or on the official Acegeek website. Please retain your proof of purchase for any warranty claims. The warranty generally covers manufacturing defects under normal use. It does not cover damage resulting from misuse, accidents, unauthorized modifications, or exceeding the weight limit.
Customer Support
For technical assistance, missing parts, or warranty inquiries, please contact Acegeek customer support through their official website or the retailer where the product was purchased. Have your model number (AG-KNIGHT-V1-BK) and proof of purchase ready when contacting support.
Online Support: Visit the official Acegeek website for FAQs and contact information.
Email Support: Refer to your purchase documentation for the appropriate email address.
Ask a question about this manual
Ask about setup, troubleshooting, compatibility, parts, safety, or missing instructions. Manuals+ will review the question and use this page’s manual context to help answer it.