
Introduction
Thank you for purchasing the Mistral MHV9812DRW-SB 12-inch DC High Velocity Stand Fan. This manual provides important information for the safe operation, installation, and maintenance of your fan. Please read it thoroughly before use and retain it for future reference.
Important Safety Information
To reduce the risk of fire, electric shock, or injury, observe the following safety precautions:
- Always ensure the fan is placed on a stable, level surface to prevent tipping.
- Do not insert fingers or any objects through the grille when the fan is operating.
- Unplug the fan from the power outlet before cleaning, moving, or performing any maintenance.
- Do not operate the fan with a damaged cord or plug. If the cord or plug is damaged, contact qualified service personnel.
- Keep the fan away from water and moisture. Do not use it in bathrooms or other wet environments.
- This appliance is not intended for use by persons (including children) with reduced physical, sensory or mental capabilities, or lack of experience and knowledge, unless they have been given supervision or instruction concerning use of the appliance by a person responsible for their safety.
- Children should be supervised to ensure that they do not play with the appliance.
- Do not cover the fan or restrict airflow during operation.
- Use only the provided power adapter.
Package Contents
Verify that all components are present and in good condition:
- Fan Head Assembly
- Adjustable Stand Pole
- Base
- Remote Control
- AC Adapter
- User Manual (this document)
Setup and Assembly
Follow these steps to assemble your stand fan:
- Attach the Stand Pole to the Base: Carefully insert the adjustable stand pole into the base. Ensure it is securely fastened according to the markings or locking mechanism.
- Attach the Fan Head: Connect the fan head assembly to the top of the stand pole. Ensure it clicks into place or is tightened securely.
- Adjust Height: Loosen the height adjustment knob/collar on the stand pole, extend or retract the pole to your desired height, and then securely tighten the knob/collar. The fan is height adjustable from approximately 860mm to 1050mm.
- Position the Fan: Place the assembled fan on a firm, level surface, ensuring there is adequate space around it for proper airflow.
- Connect Power: Plug the AC adapter into the fan's power input, then plug the adapter into a standard 220-240V~, 50/60Hz electrical outlet.
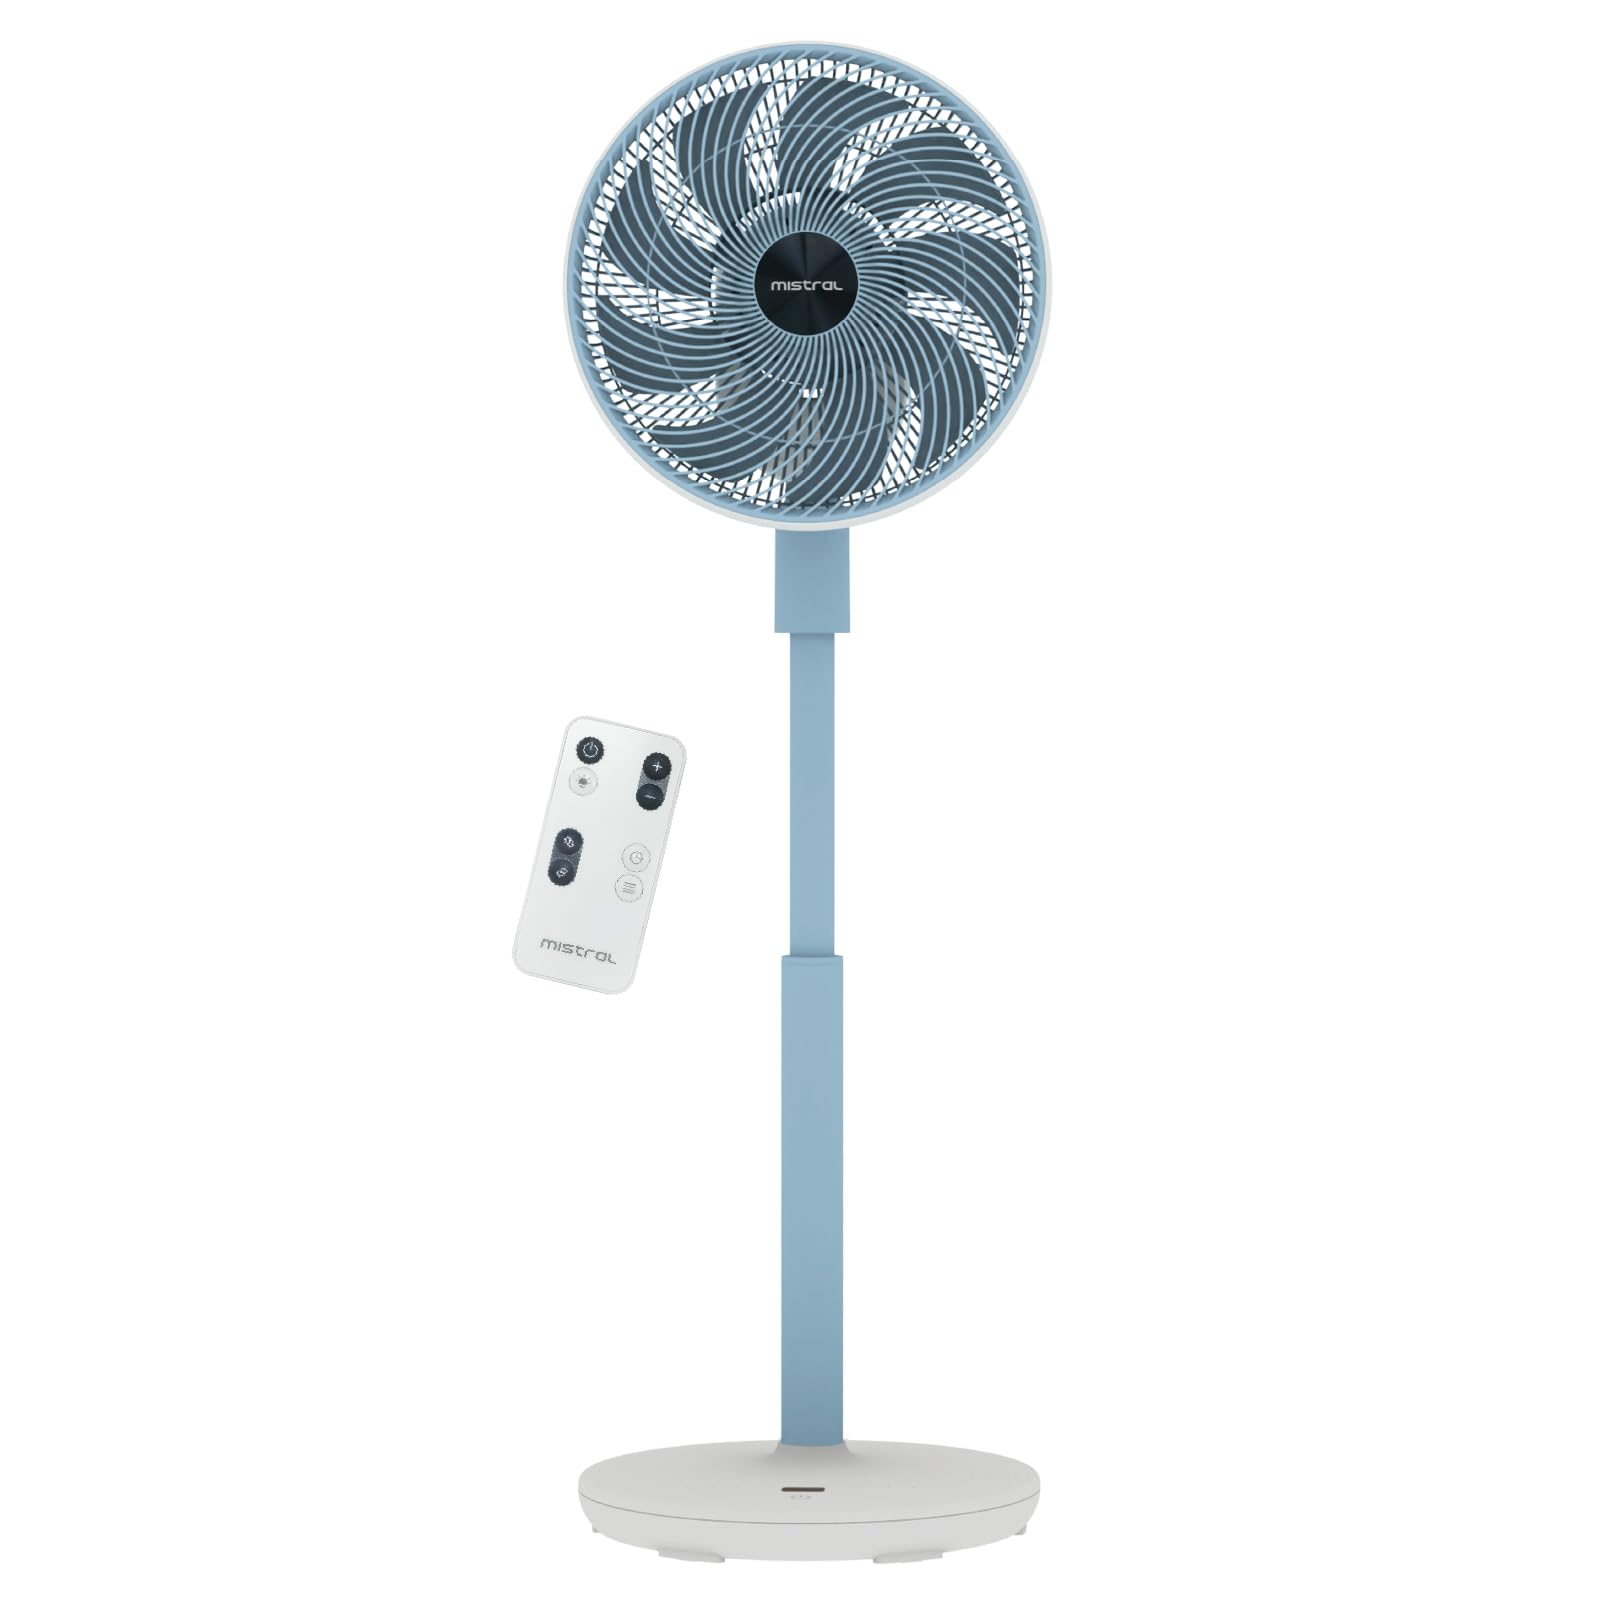
Image: The Mistral MHV9812DRW-SB stand fan in Sky Blue, illustrating its assembled form with the fan head tilted upwards, adjustable pole, and stable base. The image also shows icons for Wi-Fi and voice control features.
Operating Instructions
Your Mistral fan can be operated using the touch control panel on the unit, the included remote control, or via Wi-Fi voice control.
Control Panel and LED Display
The fan features an LED display and touch control panel on its base for direct operation. Refer to the specific icons on the panel for power, speed, mode, oscillation, and timer functions.
Remote Control
The remote control provides convenient access to all fan functions from a distance. Ensure batteries are correctly inserted (not included, typically AAA). Point the remote control towards the fan's receiver.
Wi-Fi and Voice Control
This fan supports Wi-Fi connectivity and voice control for smart home integration. Download the "Mayer Home" application (or specified app) from your device's app store and follow the in-app instructions to connect your fan to your home Wi-Fi network. Once connected, you can control the fan using the app or compatible voice assistants.
Fan Functions
- Power On/Off: Press the power button on the control panel or remote.
- Speed Settings: The fan offers 12 speed settings. Adjust using the speed control buttons.
- Operating Modes: Select from 4 distinct modes:
- Natural: Simulates natural breeze by varying fan speed.
- Sleep: Operates at a lower, quieter speed for undisturbed sleep.
- Eco: Adjusts fan speed based on ambient temperature for energy efficiency.
- Cycle: Provides a continuous, consistent airflow.
- Oscillation:
- Left-Right Oscillation: Choose between 45° or 90° horizontal oscillation.
- Up-Down Oscillation: Choose between 45° or 90° vertical oscillation.
- Timer: Set the fan to automatically turn off after a specified period, up to 12 hours.
- Moodlight: The fan includes a moodlight feature with 2 settings. Activate and adjust via the control panel or remote.
Maintenance and Cleaning
Regular cleaning helps maintain the fan's performance and extends its lifespan.
- Disconnect Power: Always unplug the fan from the power outlet before cleaning.
- Clean Exterior Surfaces: Wipe the exterior surfaces of the fan with a soft, damp cloth. Do not use abrasive cleaners or solvents.
- Clean Fan Grilles and Blades: Use a vacuum cleaner with a brush attachment or a soft cloth to remove dust from the front and rear grilles and fan blades. For thorough cleaning, the front grille may be removable (refer to specific assembly instructions if applicable, not detailed here).
- Storage: If storing the fan for an extended period, cover it to protect it from dust and store it in a cool, dry place.
Troubleshooting
If you encounter issues with your fan, refer to the following common problems and solutions:
| Problem | Possible Cause | Solution |
|---|---|---|
| Fan does not turn on. | No power supply; Power button not pressed; Remote control batteries depleted. | Ensure the power cord is securely plugged into a working outlet. Press the power button on the unit or remote. Replace remote control batteries. |
| Weak airflow. | Fan speed too low; Grilles are blocked by dust. | Increase the fan speed setting. Clean the fan grilles and blades as per maintenance instructions. |
| Fan makes unusual noise. | Fan not on a level surface; Loose parts; Obstruction. | Place the fan on a stable, level surface. Check for any loose components or foreign objects near the blades. Unplug and inspect. |
| Remote control not working. | Batteries depleted or incorrectly inserted; Obstruction between remote and fan. | Replace batteries, ensuring correct polarity. Remove any obstructions and ensure the remote is pointed at the fan's receiver. |
| Wi-Fi connection issues. | Incorrect Wi-Fi password; Fan too far from router; Router issues. | Verify Wi-Fi password. Move the fan closer to the Wi-Fi router. Restart your router. Follow the app's troubleshooting guide for connection. |
If the problem persists after attempting these solutions, please contact customer support.
Specifications
| Feature | Detail |
|---|---|
| Model | MHV9812DRW-SB |
| Voltage | 220-240V~, 50/60Hz |
| Wattage | 30W |
| Air Volume | 38.12 m³ / min |
| Max Air Flow | 6.9 m / s |
| Noise Level | 23dBA (Lowest Speed) | 45dBA (Highest Speed) |
| Product Dimension (L*W*H) | 350 * 350 * 860-1050 mm |
| Net Weight | 3.7 KGS |
| AC Adapter Input | 100-240V~, 50/60Hz |
| AC Adapter Output | 12.0V 3.0A 36.0W |
| Control Type | LED Display Touch Control Panel, Remote Control, Wi-Fi Voice Control |
| Speed Settings | 12 Speeds |
| Operating Modes | Natural, Sleep, Eco, Cycle |
| Oscillation | Left-Right (45°/90°), Up-Down (45°/90°) |
| Timer | 12 Hours |
| Special Features | Moodlight (2 settings) |
| Safety Mark | 240788-11 |
Warranty and Support
Warranty Information
This Mistral MHV9812DRW-SB fan comes with a 1-year warranty on the entire unit and an extended 3-year warranty specifically for the motor. This warranty covers manufacturing defects under normal use. Please retain your proof of purchase for warranty claims.
The warranty does not cover damage resulting from misuse, accident, unauthorized modification, or failure to follow the instructions in this manual.
Customer Support
For technical assistance, warranty claims, or general inquiries, please contact Mistral customer support through their official website or the retailer where the product was purchased. Please have your model number (MHV9812DRW-SB) and proof of purchase ready when contacting support.
Note: Contact information for specific regions may vary. Refer to the official Mistral website for the most up-to-date support details.


