
Introduction
Thank you for choosing the Amazon Basics Single Outlet Hose Watering Timer. This device is designed to simplify your garden irrigation by providing flexible and automated watering schedules. Please read this manual carefully before installation and use to ensure proper operation and longevity of your product.
Product Features
- Smart Watering Timer: Program flexible watering schedules from 1 minute to 3 hours 59 minutes for hassle-free garden irrigation.
- Intuitive Controls: Activate manual watering with customizable duration when needed. The program can be paused for 24, 48, or 72 hours.
- Angled Screen Design: The 45% adjustable tilted screen ensures optimal visibility from any angle, displaying time, program, and battery status.
- Leak-Free Connection: Rubber gaskets ensure a tight seal and prevent water waste. Standard 1.9cm BSP thread. Operates on 2 AA alkaline batteries (not included).

Figure 1: Front view of the Amazon Basics Single Outlet Hose Watering Timer, showing the digital display and control buttons.
Package Contents
Your package should contain the following items:
- 1 x Amazon Basics Single Outlet Hose Watering Timer
- 1 x User Manual
- Rubber gaskets (pre-installed or included for leak-free connection)
Note: 2 AA alkaline batteries are required and are NOT included in the package.
Setup
1. Battery Installation
- Locate the battery compartment on the back of the timer.
- Open the battery compartment cover.
- Insert 2 new AA alkaline batteries, ensuring correct polarity (+/-).
- Close the battery compartment cover securely to maintain water resistance.

Figure 2: Top connection of the timer, showing the filter and threaded inlet. Ensure rubber gaskets are in place for a leak-free seal.
2. Connecting to the Faucet
- Ensure the faucet is clean and free of debris.
- Check that the rubber gasket is properly seated inside the timer's inlet connector.
- Screw the timer onto your standard 1.9cm (3/4 inch) outdoor faucet by hand until it is snug. Do not overtighten.
- Connect your garden hose to the outlet of the timer.
- Slowly turn on the faucet. Check for any leaks. If leaks occur, tighten the connections slightly or adjust the rubber gaskets.
Operating Instructions
1. Setting the Current Time
Refer to the angled screen for clear visibility of settings.
- Press the "SET" button to enter time setting mode.
- Use the "+" and "-" buttons to adjust the hour. Press "SET" to confirm.
- Use the "+" and "-" buttons to adjust the minute. Press "SET" to confirm.
2. Programming a Watering Schedule
The timer allows flexible schedules from 1 minute to 3 hours 59 minutes.
- Press the "PROG" button to enter program setting mode.
- Set the START TIME: Use "+" and "-" to adjust the hour and minute, pressing "PROG" to confirm each.
- Set the WATERING DURATION: Use "+" and "-" to adjust the duration (minutes/hours), pressing "PROG" to confirm.
- Set the WATERING FREQUENCY: Use "+" and "-" to select how often the timer should water (e.g., every 12 hours, every 24 hours, specific days). Press "PROG" to confirm.
- Once all settings are confirmed, the timer will display the next scheduled watering time.
3. Manual Watering
To water manually outside of the programmed schedule:
- Press the "MANUAL" button.
- Use "+" and "-" buttons to set the desired manual watering duration.
- Press "MANUAL" again to start manual watering. The timer will automatically stop after the set duration.
4. Pause Function (Rain Delay)
If it rains or you don't need to water for a few days, you can pause the program:
- Press the "DELAY" button.
- Use "+" and "-" buttons to select the pause duration (24, 48, or 72 hours).
- Press "DELAY" again to confirm. The timer will resume its programmed schedule after the delay period.

Figure 3: Visual representation of the timer's main features, including flexible schedules, manual watering, and secure sealing.
Maintenance
- Battery Replacement: Replace batteries when the low battery indicator appears on the screen to ensure continuous operation.
- Filter Cleaning: Periodically check and clean the filter located in the inlet connector to prevent blockages and maintain water flow.
- Winter Storage: During freezing temperatures, remove the timer from the faucet, drain any remaining water, and store it indoors to prevent damage.
- General Cleaning: Wipe the timer with a soft, damp cloth. Do not use abrasive cleaners or solvents.
Troubleshooting
| Problem | Possible Cause | Solution |
|---|---|---|
| Timer not watering. | Low batteries, incorrect program, faucet off, water pressure too low. | Check battery status and replace if needed. Verify program settings. Ensure faucet is fully open. Check water supply. |
| Water leaking from connections. | Loose connection, damaged gasket, missing gasket. | Tighten connections. Check and replace rubber gaskets if damaged or missing. |
| Display is blank or dim. | Dead or low batteries. | Replace batteries with new AA alkaline batteries. |
Specifications
- Model Number: AMZ622617EU
- Dimensions: 8.2cm x 13.7cm x 18.5cm (Length x Width x Height)
- Weight: 383.4 g
- Thread Type: Standard 1.9cm (3/4 inch) BSP
- Power Source: 2 x AA Alkaline Batteries (not included)
- Watering Duration: 1 minute to 3 hours 59 minutes
- Pause Function: 24, 48, or 72 hours
- Color: Grey, Black, Blue
- Country of Origin: China
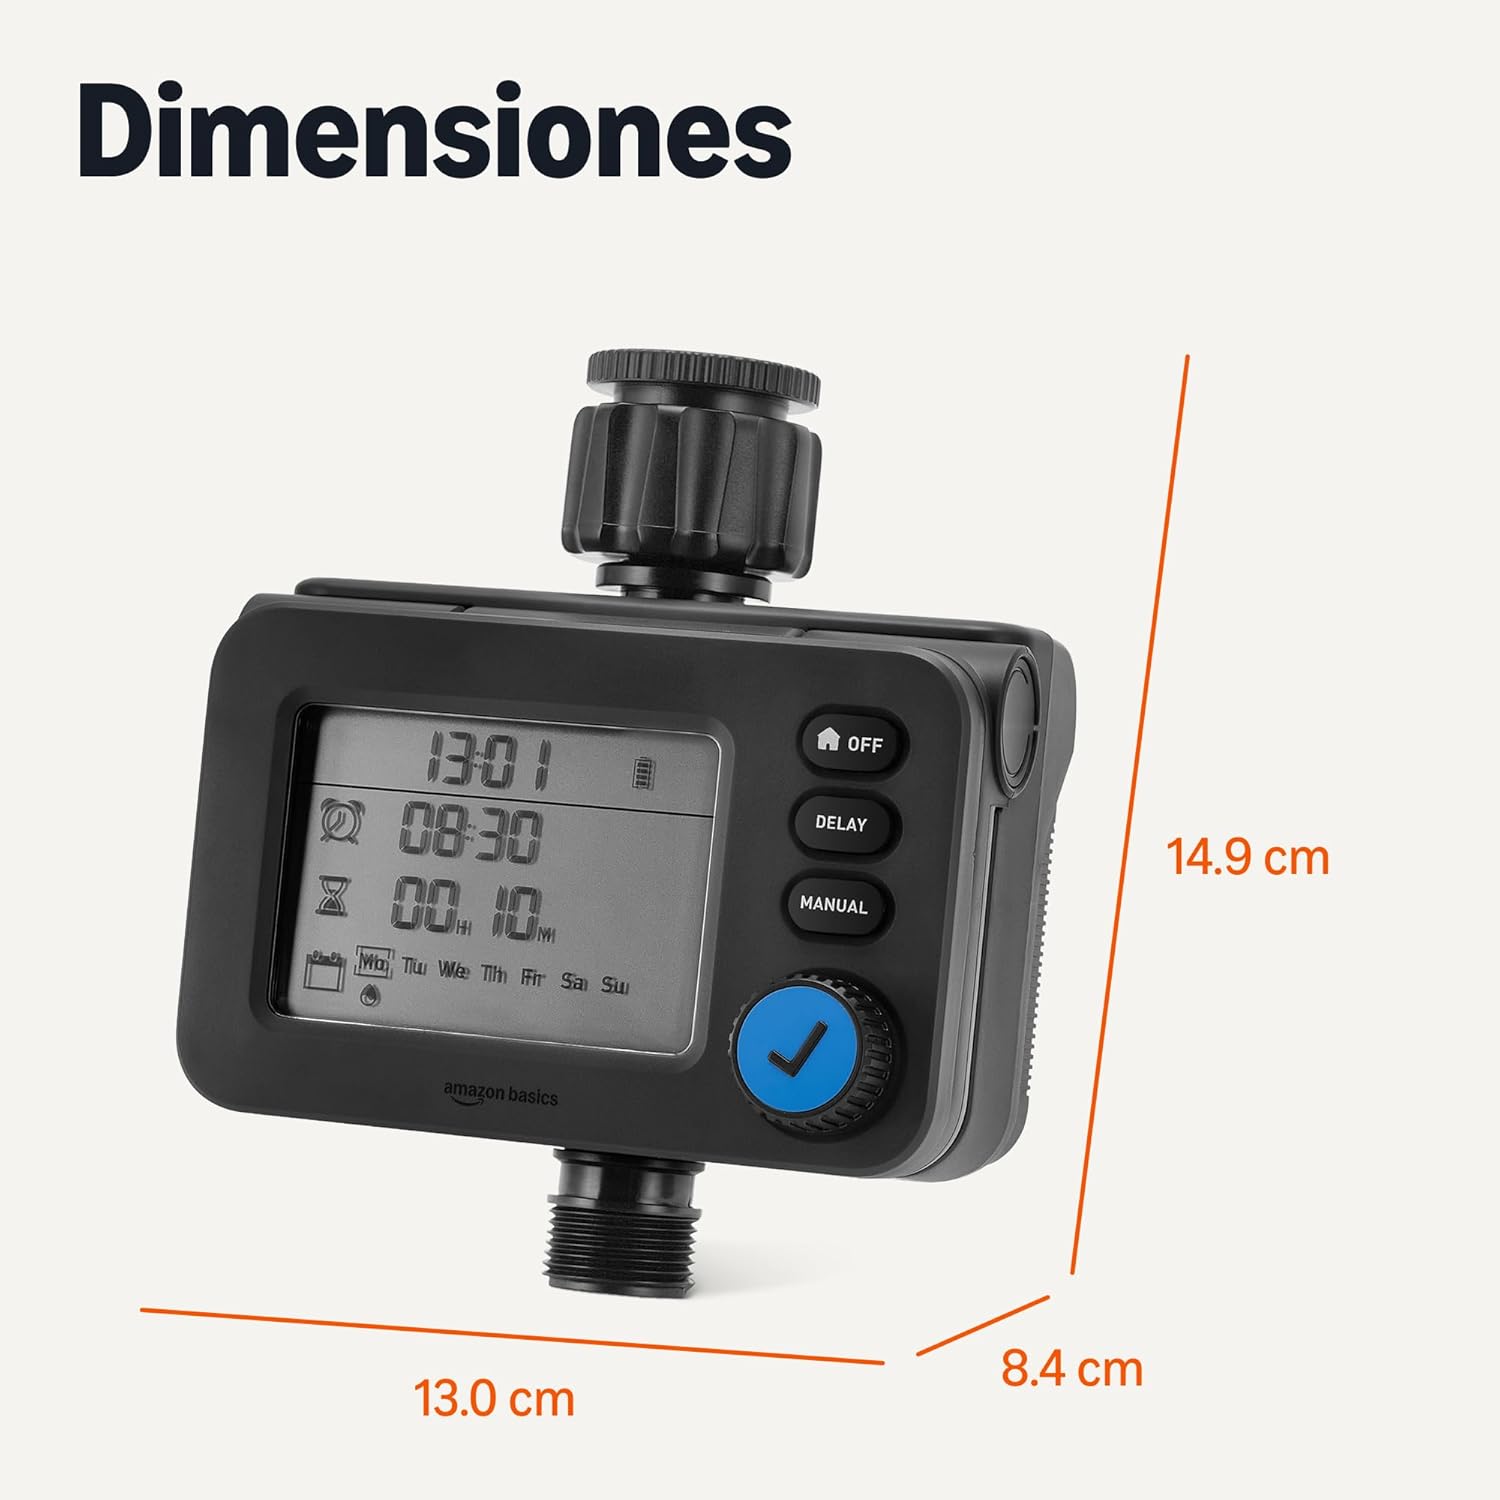
Figure 4: Product dimensions for installation planning.
Warranty and Support
For warranty information and customer support, please refer to the documentation included with your purchase or visit the official Amazon Basics website.