1. Product Overview
The WLIVE Floating Queen Bed Frame is a heavy-duty metal platform bed designed for modern bedrooms. It features an innovative hidden tripod design that creates a 'floating' visual effect, enhanced by integrated LED light strips. The bed frame also includes a built-in charging station for convenience. It is designed to be noise-free and does not require a box spring.
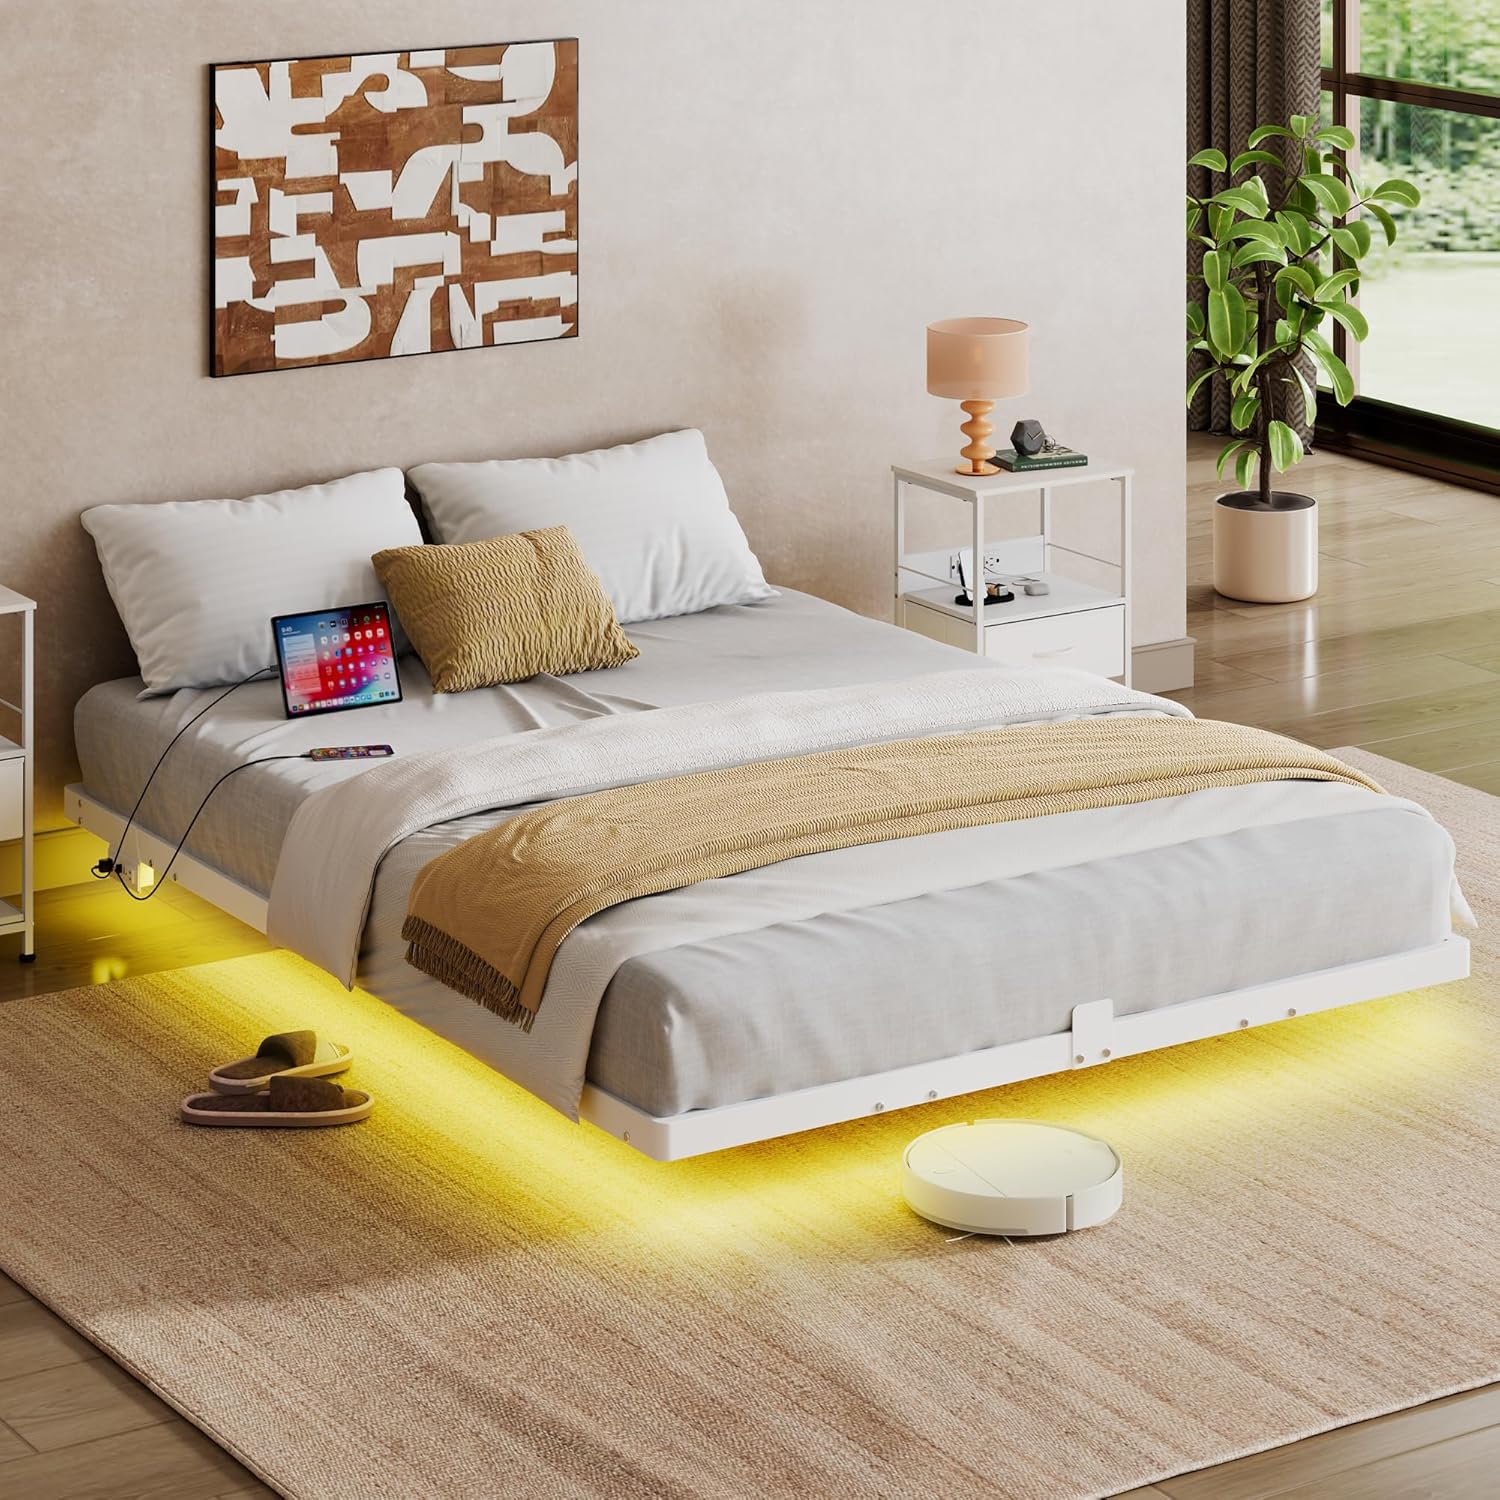
Image 1.1: WLIVE Floating Queen Bed Frame with integrated LED lighting.
Key Features:
- Suspended Visual Design: Hidden tripod legs and bottom LED light strips create a 'floating bed' effect, enhancing room aesthetics and reducing the risk of accidental bumps.
- Multifunctional LED Bed Frame: Features LED light strips with 3M adhesive and Velcro for secure attachment. Control 12 scene modes and 20 colors, adjust speed and brightness via remote control.
- Built-in Charging Station: Equipped with 2 AC sockets (125V/12A) and 2 USB ports (5V/2A) with a 1.5m flexible cable, UL/ETL certified for electrical safety.
- Durable Quality Material: Constructed from high-quality metal slats and adjustable steel legs, reinforced with triangular tension rods for a load-bearing capacity of up to 1500 pounds. Includes anti-wear tube plugs and 3M anti-slip pads for floor protection.
- Quiet Sleep Environment: Solid and stable structure designed to minimize metal friction sounds. Four-directional anti-slip blocks prevent mattress movement.
- Easy Assembly: Designed for straightforward assembly within approximately one hour, with clearly marked parts, reserved holes, and included tools. No box spring required.
2. Safety Information
Please read and understand all safety warnings before assembly and use of the bed frame.
- Do not exceed the weight capacity of 1500 pounds.
- Be cautious of sharp edges and metal components during assembly and use.
- Always follow the assembly instructions carefully to prevent instability or collapse.
- Keep electrical components (LED lights, charging station) dry and away from any flammable materials.
- Do not overload the charging stations.
3. Package Contents
Verify that all components are present before beginning assembly. If any parts are missing or damaged, please contact customer support.

Image 3.1: All components and hardware included in the package.
List of Components:
- Frame Sections (various lengths and shapes)
- Support Legs
- Metal Slats
- Built-in Charging Station
- LED Light Strip with Remote Control
- Hardware (screws, washers, nuts, Allen key, wrench)
- Mattress Slide Stoppers
- Velcro Belts for LED Strip
4. Setup and Assembly Instructions
Follow these steps carefully for proper assembly. It is recommended to have two people for assembly.
Video 4.1: Official WLIVE assembly guide for the bed frame. This video demonstrates the step-by-step process of assembling the bed frame, including attaching the support legs, connecting frame sections, and installing the LED lights and charging station.
Assembly Steps:
- Unpack and Identify Parts: Lay out all components and hardware on a clean, soft surface. Refer to the package contents diagram (Image 3.1) to identify each part.
- Assemble the Main Frame: Connect the main frame sections using the provided screws and tools. Ensure all connections are secure but do not fully tighten until all sections are in place.
- Attach Support Legs: Securely attach the support legs to the designated points on the main frame.
- Install Mattress Stoppers: Place the mattress slide stoppers on the frame as indicated in the instructions to prevent the mattress from shifting.
- Install Metal Slats: Insert the metal slats into their respective slots on the frame. Ensure they are evenly spaced and securely seated.
- Mount Charging Station: Attach the built-in charging station to the side of the bed frame using the provided hardware. Connect its power cable.
- Attach LED Light Strips: Apply the LED light strips to the underside of the bed frame using the 3M adhesive. Use the provided Velcro belts for additional security, especially at corners or areas prone to detachment.
- Final Tightening: Once all components are in place, fully tighten all screws and bolts to ensure the frame is stable and secure.

Image 4.2: Detail of the mattress stopper design to keep the mattress in place.

Image 4.3: Illustration of sturdy triangle support and the easy assembly mechanism for the slats.

Image 4.4: Close-up of the built-in charging station with 2 AC outlets and 2 USB ports.

Image 4.5: The LED light strip secured with a Velcro belt to the metal frame.
5. Operating Instructions
5.1 LED Light Operation
The integrated LED light strips can be controlled via the included remote control.

Image 5.1: The bed frame illuminated by LED lights, showing remote control functions.
- Power On/Off: Use the power button on the remote to turn the LED lights on or off.
- Color Selection: Choose from 20 static colors using the dedicated color buttons on the remote.
- Scene Modes: Select from 12 pre-programmed scene modes to create different ambiances.
- Brightness Adjustment: Increase or decrease the brightness of the lights using the brightness control buttons.
- Speed Adjustment: For dynamic modes, adjust the speed of color changes or effects.
5.2 Charging Station Usage
The built-in charging station provides convenient power access for your electronic devices.
- AC Outlets: Plug in standard electronic devices into the 2 AC outlets (125V/12A).
- USB Ports: Connect USB-powered devices to the 2 USB ports (5V/2A) for charging.
- Ensure the bed frame's main power cord is plugged into a wall outlet for the charging station to function.
- Do not exceed the rated capacity of the outlets or USB ports to prevent damage or safety hazards.
6. Maintenance
Regular maintenance helps ensure the longevity and optimal performance of your bed frame.
- Cleaning: Wipe down the metal frame with a soft, damp cloth. Avoid harsh chemicals or abrasive cleaners that could damage the finish.
- Check Connections: Periodically inspect all screws and bolts to ensure they remain tight. Re-tighten if necessary.
- LED Strip Inspection: Check the LED light strips and their adhesive/Velcro attachments. Re-secure if any sections become loose.
- Electrical Components: Ensure the charging station and its cables are free from damage and kept dry.
7. Troubleshooting
If you encounter any issues, refer to the following common troubleshooting tips:
- Bed Frame is Noisy: Ensure all screws and bolts are fully tightened. Check that the metal slats are properly seated and not rubbing against each other or the frame.
- LED Lights Not Working: Verify that the power cord for the LED lights is securely connected. Check the remote control battery. Ensure the LED strip is not damaged.
- Charging Station Not Functioning: Confirm that the bed frame's main power cord is plugged into a live wall outlet. Check the connections of the charging station to the bed frame. Test with different devices and cables.
- Mattress Slides: Ensure the mattress slide stoppers are correctly installed and positioned.
If problems persist, please contact customer support for further assistance.
8. Specifications
| Feature | Specification |
|---|---|
| Size | Queen |
| Product Dimensions | 79.92"L x 60.43"W x 9.13"H |
| Weight Capacity | Up to 1500 lbs |
| Material | Metal |
| Color | White |
| Special Feature | 4 Mattress Slide Stoppers, LED Light, Charging Station |
| Charging Station | 2 AC Outlets (125V/12A), 2 USB Ports (5V/2A) |
| Assembly Required | Yes |
| Item Weight | 36.4 pounds |

Image 8.1: Dimensions of the Queen size bed frame.
9. Warranty and Support
For warranty information or customer support, please refer to the documentation included with your purchase or visit the official WLIVE website. Our professional after-sales team is available to assist you with any questions or concerns.