
Introduction
This manual provides detailed instructions for the assembly, operation, and maintenance of your WLIVE Floating King Bed Frame. Please read this manual thoroughly before assembly and use to ensure proper function and safety. Keep this manual for future reference.
Important Safety Information
WARNING:
- Do not exceed a total weight of 1500 pounds on the bed frame. Overloading can cause structural damage and potential injury.
- Be cautious of sharp edges and pinch points during assembly and use. Wear protective gloves if necessary.
- Always follow the assembly instructions carefully to prevent injury and ensure the stability of the bed frame.
- Ensure all connections are secure before use. Periodically check and tighten all bolts and screws.
- Keep children and pets away from the assembly area. Small parts can be a choking hazard.
Package Contents
Before beginning assembly, verify that all parts listed in the assembly guide are present and undamaged. Refer to the included assembly guide for a complete list of components and hardware.

Image: Diagram illustrating the metal frame structure and the integrated charging station.
Setup and Assembly
The WLIVE Floating King Bed Frame is designed for straightforward assembly. It is recommended to have two people for assembly to ensure ease and safety, though one person can complete it.
- Unpack Components: Carefully unpack all parts and lay them out on a clean, soft surface (e.g., a rug or blanket) to prevent scratches.
- Identify Parts: Refer to the detailed assembly guide provided in the packaging. All screw parts are clearly marked, and reserved holes are pre-drilled for convenience.
- Assemble Frame Sections: Follow the step-by-step instructions in the assembly guide to connect the main frame sections. Ensure all bolts are finger-tightened initially.
- Install Support Legs: The innovative hidden support leg design provides a floating aesthetic. Ensure these are securely attached as per instructions.
- Attach Slats: Securely attach the heavy-duty steel slats to the frame. These slats eliminate the need for a box spring.
- Install Mattress Stoppers: The bed frame includes four-directional anti-slip blocks to prevent the mattress from sliding. Install these as indicated in the manual.
- Connect Charging Station: Integrate the built-in charging station into the frame. Ensure the power cord is routed safely.
- Install LED Light Strips: The LED light strips come with 3M adhesive and extra Velcro for secure attachment to the underside of the frame. Ensure they are firmly pressed into place to prevent falling.
- Final Tightening: Once all components are in place, systematically tighten all bolts and screws using the provided tools. Do not overtighten.

Image: Close-up views of key assembly features: sturdy triangle support, mattress stopper, easy assembly mechanism, and anti-slip feet.

Image: Illustration of the innovative hidden support leg design, contributing to the floating appearance and reducing obstruction.
Operating Instructions
LED Lighting System
The integrated LED light strips provide customizable ambient lighting for your bedroom.
- Control: Use the provided remote control to operate the LED lights.
- Modes: Select from 12 scene modes to suit your preference.
- Colors: Choose from 20 static colors.
- Adjustments: Adjust the speed and brightness of the lights using the remote control.
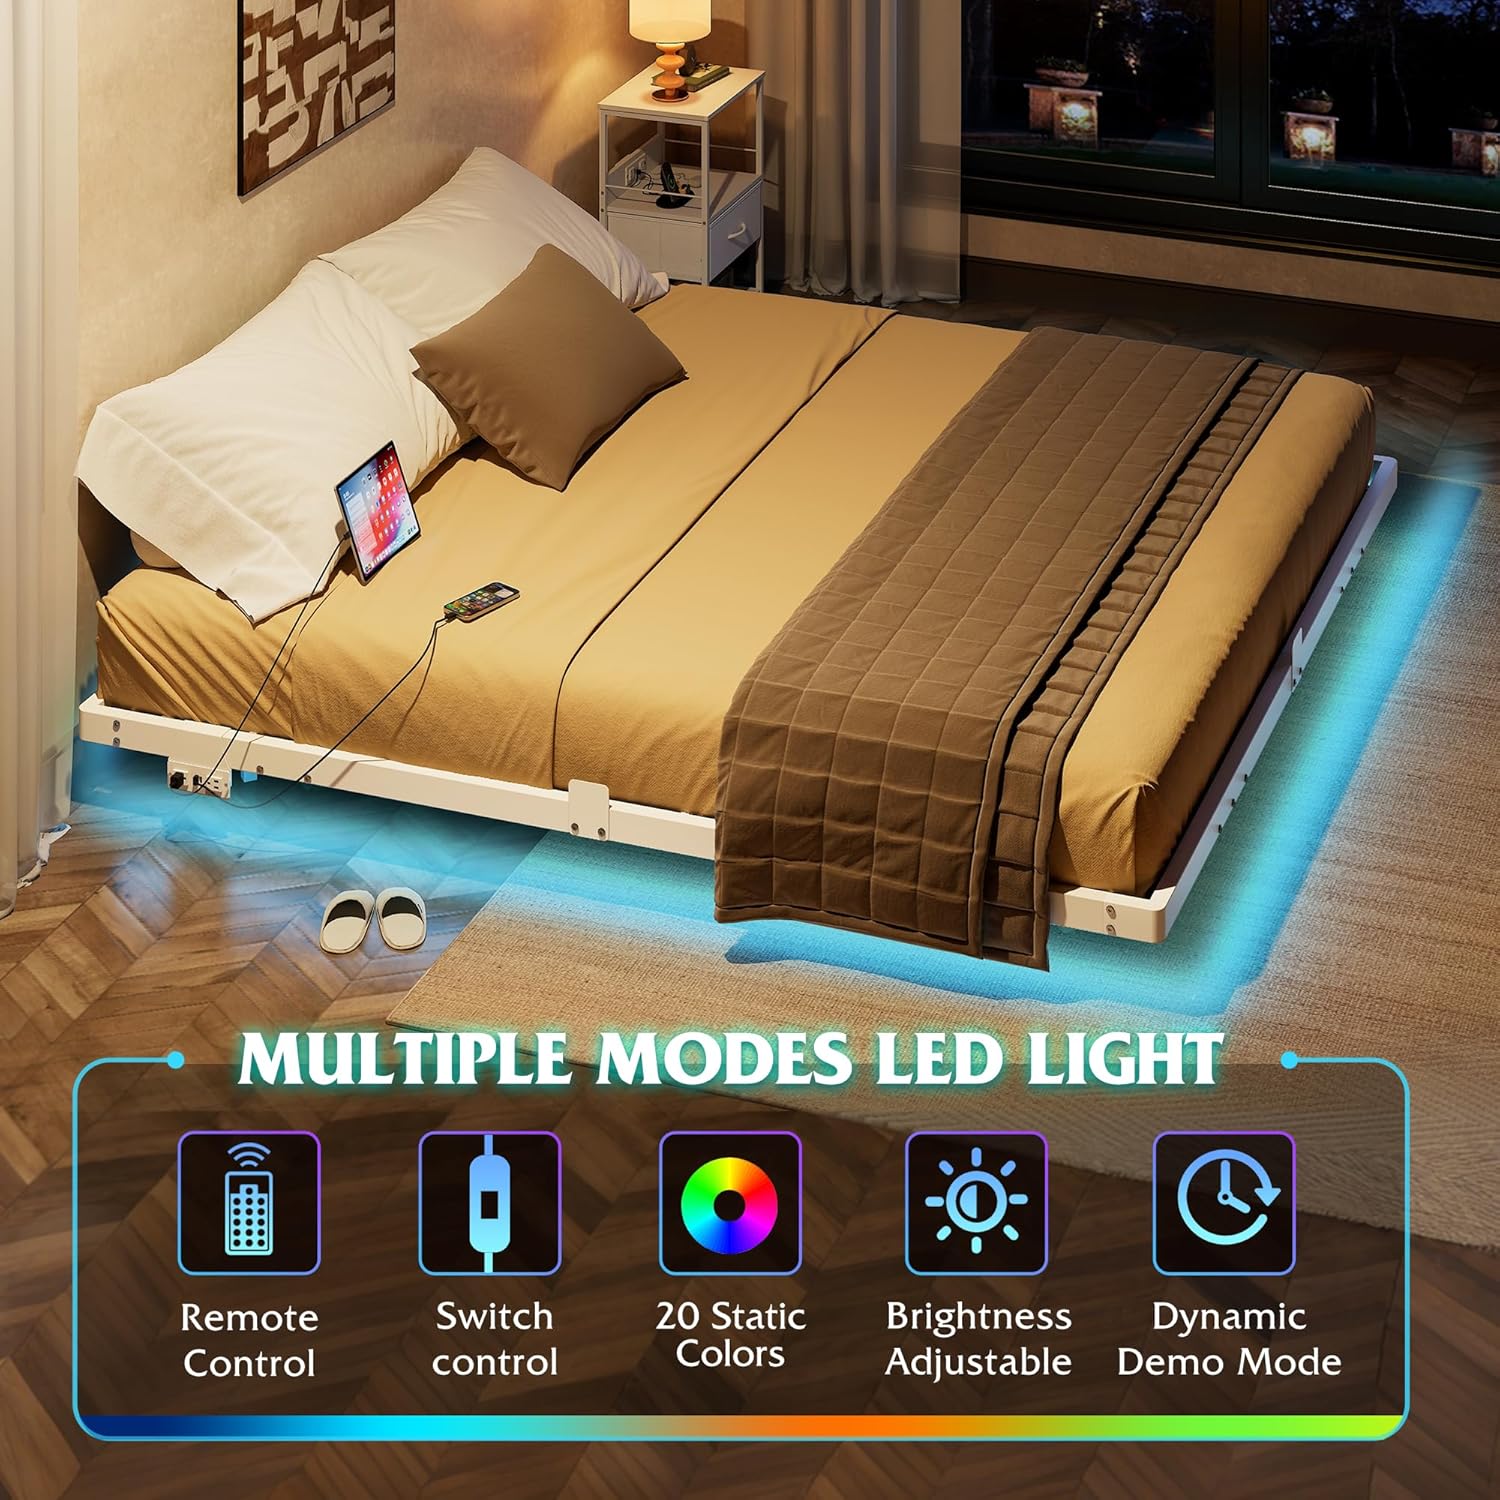
Image: Visual representation of the LED lighting system's features, including remote control, color options, and brightness adjustment.
Integrated Charging Station
The bed frame includes a convenient charging station to power your electronic devices.
- Outlets: Features 2 AC outlets (125V/12A) and 2 USB ports (5V/2A).
- Power Cord: Equipped with a 1.5m (5-ft) flexible power cord.
- Safety: The charging station is UL/ETL certified for electrical safety.
- Usage: Connect mobile phones, tablets, game consoles, or other compatible devices for charging.
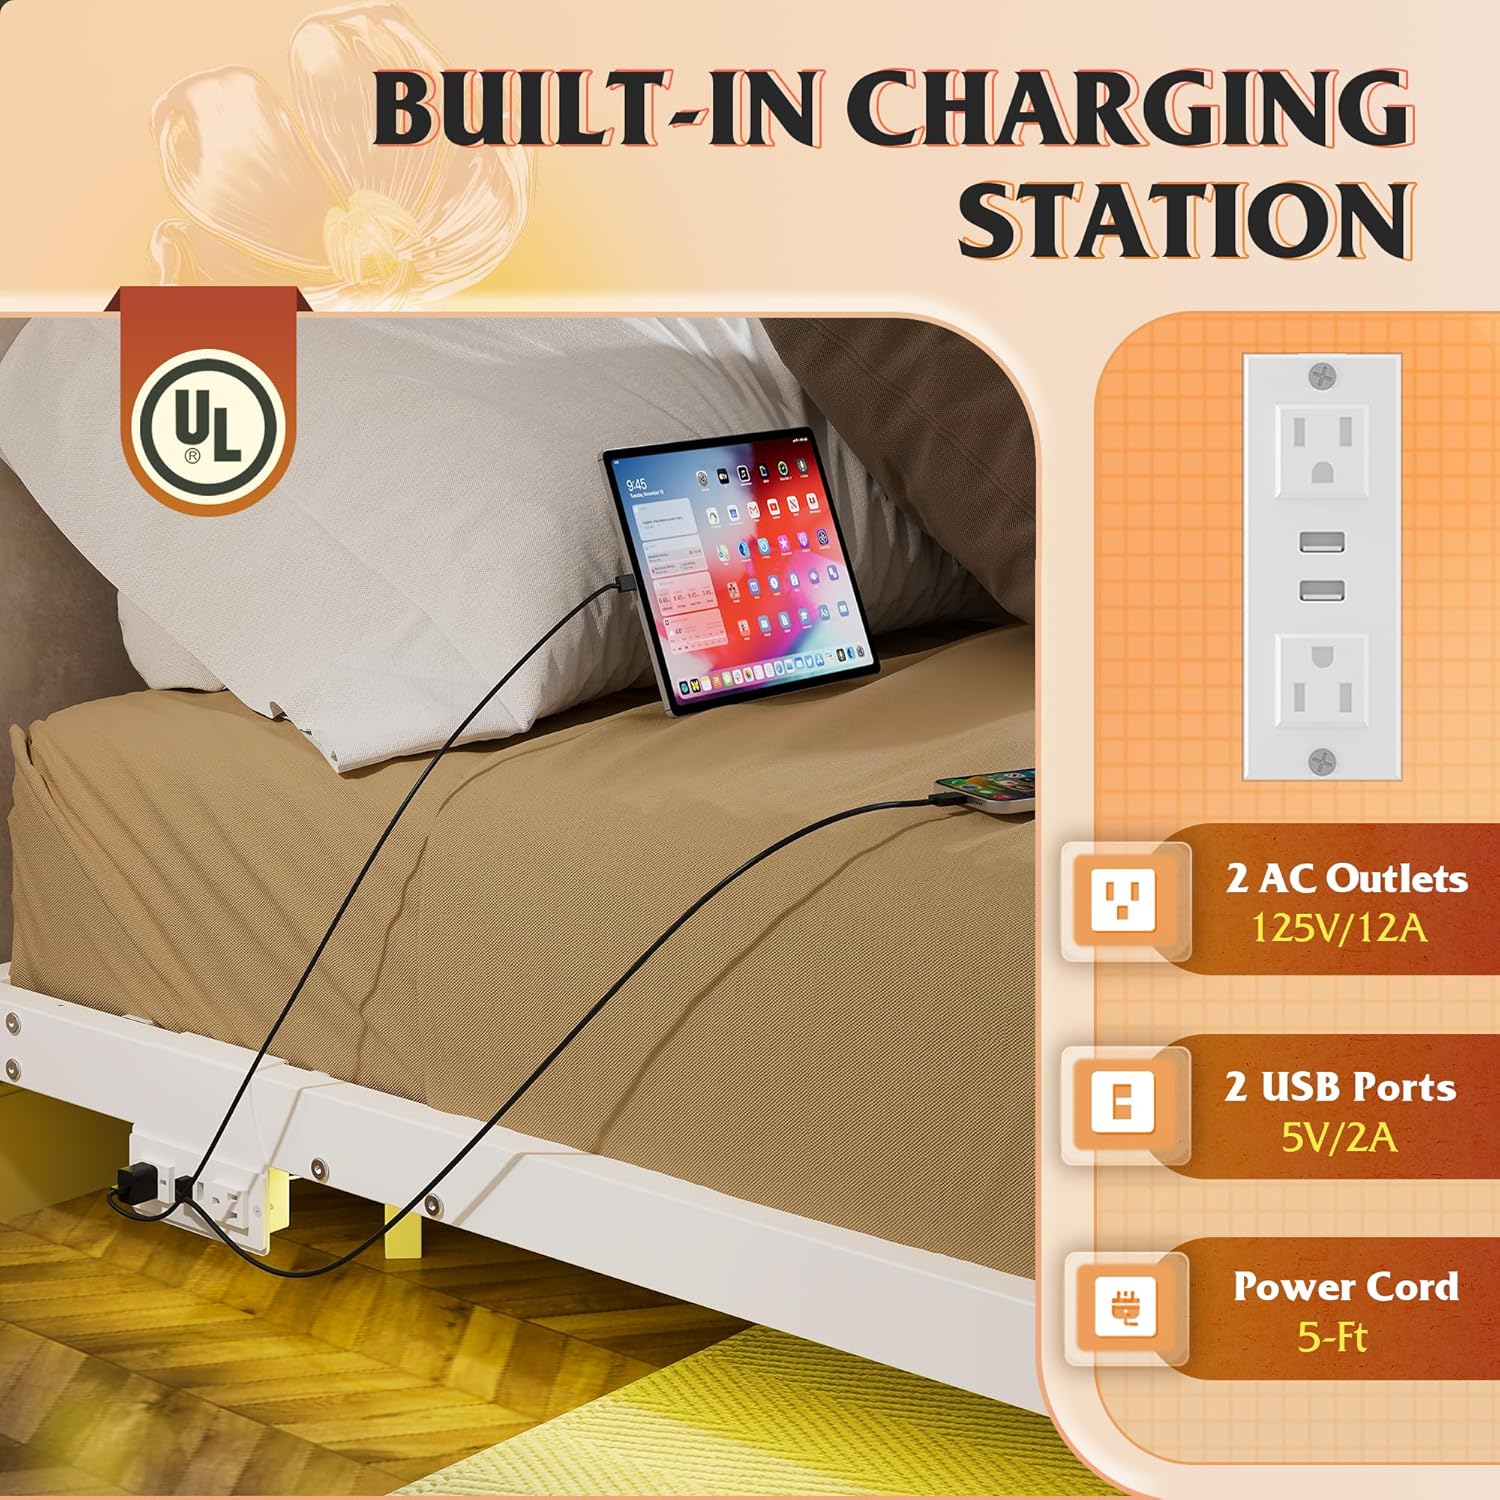
Image: Detailed view of the built-in charging station, highlighting the AC outlets and USB ports in use.
Mattress Stability
The bed frame incorporates a mattress stopper design to prevent your mattress from shifting.
- Anti-Slip Blocks: Four-directional anti-slip blocks are integrated into the frame structure.
- Secure Placement: These blocks help keep the mattress securely in place, ensuring a stable sleeping surface.

Image: Comparison illustrating the effectiveness of the WLIVE mattress stopper design in preventing mattress movement.
Maintenance
- Cleaning: Wipe the metal frame with a soft, damp cloth. Avoid abrasive cleaners or harsh chemicals that could damage the finish.
- Fastener Check: Periodically inspect all bolts and screws to ensure they remain tight. Re-tighten as necessary to maintain structural integrity and prevent noise.
- LED Strip Adhesion: If the LED light strips begin to detach, re-secure them using the provided Velcro or additional adhesive if needed. Ensure the surface is clean and dry before re-applying.
- Anti-Slip Pads: Check the anti-slip pads on the bed legs for wear. Replace if significantly worn to protect your flooring.
Troubleshooting
Noise Issues
- Symptom: Bed frame makes creaking or squeaking noises.
- Solution: Ensure all bolts and screws are securely tightened. Loose connections are a common cause of noise. The frame is designed to eliminate 80% of metal friction sound when properly assembled.
LED Lights Not Functioning
- Symptom: LED lights do not turn on or function incorrectly.
- Solution: Check that the LED strip is properly connected to its power source. Ensure the remote control has working batteries and is pointed directly at the receiver. Verify the LED strip is securely attached to the frame; if it has fallen, re-adhere it using the Velcro and 3M adhesive.

Image: Illustration demonstrating the secure attachment of the LED strip using Velcro and adhesive, preventing detachment issues.
Mattress Sliding
- Symptom: Mattress moves or slides on the frame.
- Solution: Ensure the four-directional anti-slip blocks (mattress stoppers) are correctly installed and positioned. These are designed to hold the mattress in place.
Charging Station Not Working
- Symptom: AC outlets or USB ports are not providing power.
- Solution: Check that the bed frame's main power cord is securely plugged into a functional wall outlet. Ensure the charging station unit itself is properly connected within the bed frame.
Specifications

Image: Dimensional diagram of the King size bed frame, indicating length, width, height, and weight capacity.
| Feature | Detail |
|---|---|
| Brand | WLIVE |
| Model | B0FDK64DQY |
| Size | King |
| Product Dimensions (L x W x H) | 80.12" x 76.38" x 9.13" |
| Color | White |
| Material | Heavy-Duty Steel Slats, Metal Frame |
| Weight Capacity | Up to 1500 pounds |
| Special Features | Floating Design, LED Lights (12 modes, 20 colors), Built-in Charging Station (2 AC, 2 USB), 4 Mattress Slide Stoppers, Noise-free, Anti-slip feet |
| Assembly Required | Yes |
| Item Weight | 45.9 pounds |
| First Available Date | June 18, 2025 |
Warranty and Support
For warranty information and customer support, please refer to the documentation included with your purchase or contact WLIVE directly through their official channels. You can often find support contact information on the product packaging or the seller's website.
For general inquiries or to visit the WLIVE store, please use the following link: WLIVE Store on Amazon