1. Important Safety Instructions
Please read all instructions carefully before using this appliance and retain for future reference. Always follow basic safety precautions to reduce the risk of fire, electric shock, and personal injury.
- Ensure the power supply matches the voltage specified on the rating label.
- Do not operate the unit with a damaged cord or plug.
- Do not block air outlets or inlets.
- Keep the appliance away from flammable gases or liquids.
- Always unplug the unit before cleaning or servicing.
- This appliance is not intended for use by persons (including children) with reduced physical, sensory or mental capabilities, or lack of experience and knowledge, unless they have been given supervision or instruction concerning use of the appliance by a person responsible for their safety.
2. Package Contents
Verify that all items are present and in good condition upon unpacking.
- Portable Air Conditioner (1)
- Remote Control (AAA batteries not included) (1)
- Window Bracket Kit (25.6–67 inches) (1)
- Air Exhaust Hose (1)
- Hose Connector (for attaching to the air conditioner) (1)
- Hose Adapter (for attaching to window bracket) (1)
- Drain Hose (1)
- User Manual (1)
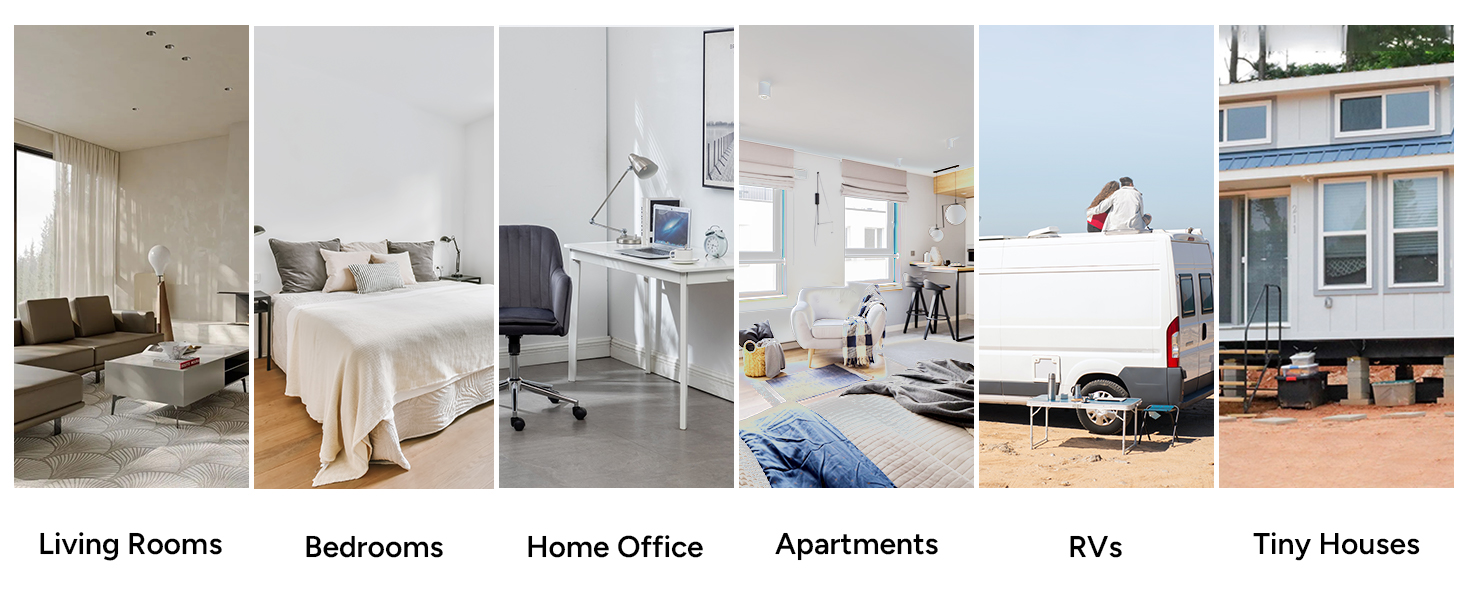
Figure 2.1: Included components of the DR.PREPARE Portable Air Conditioner.
3. Product Features
The DR.PREPARE Portable Air Conditioner offers multiple functions for enhanced comfort.
- 4-in-1 Versatility: Combines cooling, fan, dehumidification, and sleep modes.
- Powerful Cooling: Cools rooms up to 350 sq. ft. with adjustable temperatures from 61°F to 90°F.
- Dehumidification: Removes up to 46 pints (22L) of moisture daily.
- Quiet Sleep Mode: Operates at a low noise level (as low as 45 dB) for undisturbed rest.
- Easy Portability: Equipped with four smooth-gliding casters and side handles for effortless movement.
- User-Friendly Controls: Features an intuitive LED touch panel and a remote control for convenient operation.
- Smart Timer: 1-24 hour automatic ON/OFF timer for scheduled operation.

Figure 3.1: The 4-in-1 multifunctional capabilities of the unit.

Figure 3.2: Design features for easy mobility.
4. Setup and Installation
Follow these steps for proper installation of your portable air conditioner.
4.1 Assembling the Exhaust Hose and Window Kit
- Extend the exhaust hose.
- Twist the hose adapter onto one end of the exhaust hose.
- Twist the hose connector onto the other end of the exhaust hose.
- Assemble the window sealing panel by sliding the adjustable pieces together and securing them with the locking screws. The kit fits windows from 25.6" to 67" wide.
Video 4.1: Step-by-step guide on how to install the DR.PREPARE 8000 BTU Portable Air Conditioner.
4.2 Installing the Unit
- Open the window and place the assembled window sealing panel into the window opening. Adjust to fit securely.
- Slide the hose connector (from the exhaust hose) into the exhaust outlet on the back of the air conditioner unit.
- Connect the hose adapter (from the exhaust hose) to the opening in the window sealing panel.
- Ensure all connections are secure to prevent air leakage.
- Manually open the air outlet shutter on the front of the unit and adjust the airflow direction as needed.

Figure 4.2: Window kit installation for various window types.

Figure 4.3: Connecting the exhaust hose to the unit.
5. Operating Instructions
Your portable air conditioner can be operated using the control panel on the unit or the included remote control.
5.1 Control Panel Overview

Figure 5.1: Control panel and remote control layout.
5.2 Operating Modes
- Cool Mode: Press the 'Mode' button until the snowflake icon appears. Use 'Up' and 'Down' buttons to set the desired temperature (61°F to 90°F). Adjust fan speed with the 'Speed' button.
- Fan Mode: Press the 'Mode' button until the fan icon appears. The unit will circulate air without cooling. Adjust fan speed as desired.
- Dehumidifier Mode: Press the 'Mode' button until the water drop icon appears. The unit will remove moisture from the air.
- Sleep Mode: Activate Sleep Mode for quiet operation and energy savings. The unit will gradually increase the set temperature over time.
Video 5.2: Demonstration of the unit's various operating modes including cooling, dehumidifying, and fan functions.
5.3 Timer Function
Set the unit to automatically turn ON or OFF after a specified period (1-24 hours).
- Press the 'Timer' button.
- Use the 'Up' or 'Down' buttons to select the desired number of hours.
- The timer will activate after a few seconds.

Figure 5.3: Setting the 1-24 hour smart timer.
6. Maintenance
Regular maintenance ensures optimal performance and longevity of your air conditioner.
6.1 Cleaning the Air Filter
The removable, washable mesh filter traps dust and pet hair. Clean it regularly (every two weeks or as needed) for cleaner air and efficient operation.
- Unplug the air conditioner from the power outlet.
- Remove the filter cover from the back of the unit.
- Gently pull out the air filter.
- Wash the filter under running water with a mild detergent.
- Allow the filter to air dry completely before reinserting.
- Reattach the filter cover.
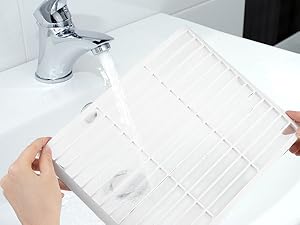
Figure 6.1: Cleaning the washable air filter.
6.2 Draining the Unit
The unit features a self-evaporative system that recycles collected moisture. However, in high humidity conditions, manual draining may be required.
- Manual Drain: When the water tank is full, the unit will stop operating and display an error code. Place a shallow pan under the drain port and remove the drain plug to empty the water.
- Continuous Drain: For continuous drainage, attach the included drain hose to the continuous drain port and direct it to a floor drain or suitable container.
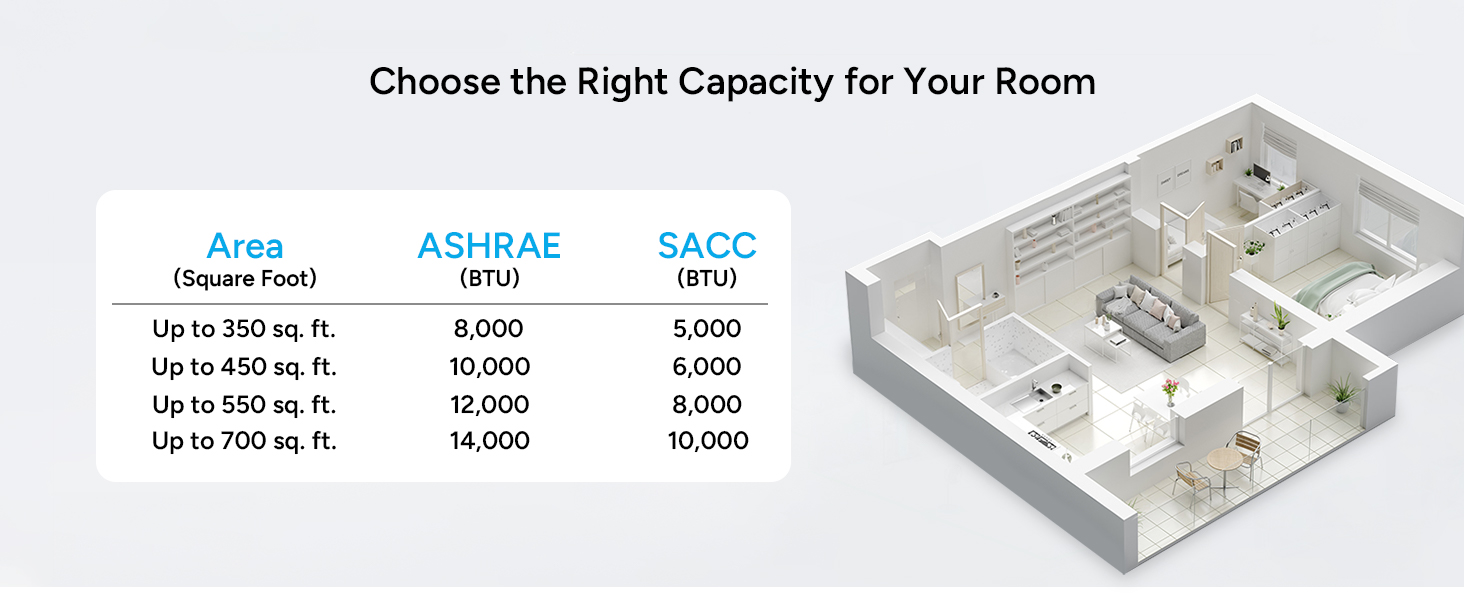
Figure 6.2: Manual and continuous drainage options.
7. Troubleshooting
Before contacting customer support, refer to the following common issues and solutions.
| Problem | Possible Cause | Solution |
|---|---|---|
| Unit does not turn on | No power, tripped circuit breaker, full water tank. | Check power cord, reset breaker, empty water tank. |
| Insufficient cooling | Dirty air filter, blocked air intake/outlet, open windows/doors, room too large. | Clean filter, clear obstructions, close openings, ensure room size is within capacity. |
| Unit is noisy | Unit not level, fan obstruction. | Place on a flat surface, check for obstructions. |
| Water leakage | Drain plug loose, drain hose not properly connected. | Secure drain plug, ensure drain hose is correctly attached. |
8. Specifications
Detailed technical specifications for the DR.PREPARE Portable Air Conditioner.
| Feature | Specification |
|---|---|
| Brand | DR.PREPARE |
| Model Info | DCAC08B |
| Cooling Power | 8000 British Thermal Units (BTU) |
| Coverage Area | Up to 350 sq. ft. |
| Dehumidification Capacity | Up to 46 pints (21.6 Liters) per day |
| Noise Level | 56 Decibels (Normal Operation), 45 Decibels (Sleep Mode) |
| Voltage | 115 Volts |
| Wattage | 780 watts |
| Item Weight | 50 pounds |
| Product Dimensions | 12.4 x 12.6 x 27.6 inches |
| Installation Type | Window (with included kit) |
| Special Features | Dehumidifier, Fast Cooling, Remote Controlled, Sleep Mode |
9. Warranty and Support
This product comes with a standard manufacturer's warranty. For specific warranty details, please refer to the warranty card included in your package or contact DR.PREPARE customer support.
If you encounter any issues or have questions regarding your DR.PREPARE Portable Air Conditioner, please contact our customer support team for assistance. Contact information can be found on our official website or in the product packaging.


