Product Overview
The ApoloSign Digital Calendar is a 15.6-inch smart touchscreen interactive display designed for organizing family schedules, chore charts, and personal tasks. It features a dual operating system, allowing seamless switching between a dedicated Calendar Mode for focused planning and an Android Mode for extended functionality through Google Play apps. The device supports syncing with various calendar services and can also function as a smart photo frame.

Figure 1: ApoloSign 15.6-inch Digital Calendar (Teak)
What's Included
Upon unboxing your ApoloSign Digital Calendar, verify that all components are present:
- ApoloSign Digital Calendar (15.6-inch)
- Power Adapter
- Upper Desk Stand
- Lower Desk Stand
- Wall Mounting Bracket
- User Guide
- Screwdriver
- Drill bit
- Mounting Screws
- Anchors

Figure 2: Included Components
Setup
Unboxing and Initial Inspection
Carefully remove the digital calendar and its accessories from the packaging. Inspect all items for any signs of damage. It is recommended to retain the original packaging for future transport or storage.
Video 1: Unboxing the ApoloSign Digital Calendar, showing the careful removal of the device and its accessories from the packaging.
Mounting Options
The ApoloSign Digital Calendar offers both desktop and wall-mounting options.
Desktop Stand Installation
- Assemble the Upper and Lower Desk Stand components using the provided screwdriver and screws.
- Securely attach the assembled stand to the back of the ApoloSign Digital Calendar.
- Place the calendar on a stable, flat surface.

Figure 3: ApoloSign Digital Calendar on its desktop stand.
Wall Mounting Installation
- Choose a suitable wall location, ensuring it is free from obstructions and has access to a power outlet.
- Use the provided wall mounting bracket as a template to mark drill holes on the wall.
- Drill pilot holes and insert the anchors.
- Secure the wall mounting bracket to the wall using the mounting screws.
- Carefully align the digital calendar with the mounted bracket and slide it into place until it is securely fastened.

Figure 4: ApoloSign Digital Calendar mounted on a wall.
Powering On and Wi-Fi Connection
- Connect the power adapter to the digital calendar and plug it into a power outlet.
- The device will automatically power on. Follow the on-screen prompts to select your language and connect to your Wi-Fi network. A stable Wi-Fi connection is required for full functionality.
Operating Instructions
The ApoloSign Digital Calendar operates with a dual OS, offering a dedicated Calendar Mode and a versatile Android Mode.
Calendar Mode
Calendar Mode is optimized for family organization and task management, providing a clear, focused interface.
- Calendar Syncing: Seamlessly sync and display schedules from multiple platforms including Google Calendar, iCloud, Outlook, and Yahoo. This consolidates all family events into one central view.
- Chore Chart & Routine Planning: Create and manage interactive chore charts and daily routines. Assign tasks to family members, set reminders, and track progress using color-coded labels. This feature supports building consistent habits.
- To-Do Lists: Manage personal and family to-do lists directly from the calendar screen. Add, check off, and prioritize tasks to stay organized.
- Privacy Mode: Hide private events with a single tap, ensuring only essential information is visible when needed.

Figure 5: Syncing multiple calendars.
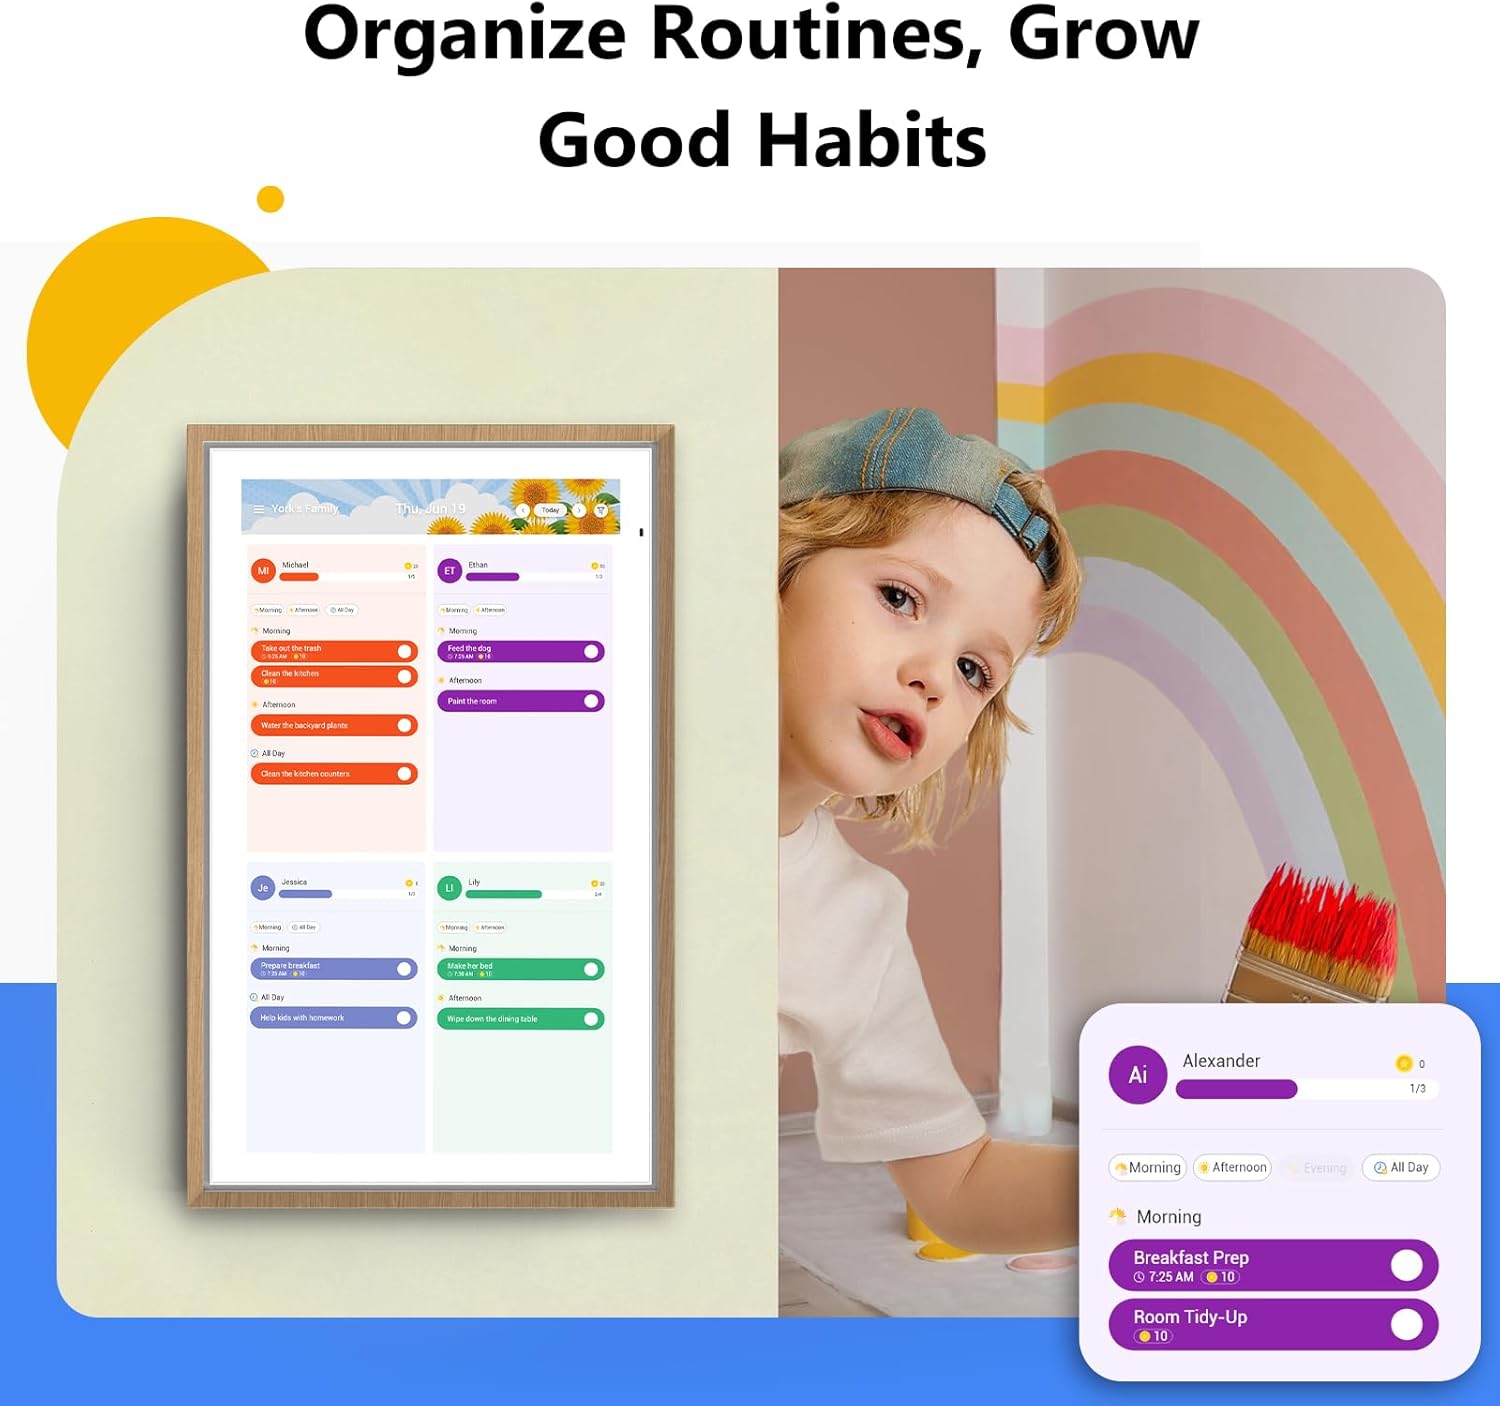
Figure 6: Interactive chore chart and routine planning.

Figure 7: Managing to-do and shopping lists.
Android Mode
Android Mode transforms your calendar into a versatile smart display, offering access to a wide range of applications and customization options.
- Google Play Integration: Download and install various apps from the Google Play Store, including additional calendar tools, entertainment apps, and productivity tools.
- Custom Dashboard Widgets: Personalize your display with customizable widgets for weather, notes, to-dos, and routines. Drag, resize, and arrange widgets to create your ideal dashboard.
- Google Assistant: Utilize built-in quad microphones for hands-free voice control. Set alarms, check the weather, organize tasks, and interact with your calendar using voice commands.
- Smart Home Ready: Connect and control compatible smart home devices such as video doorbells and security cameras directly from the display.
- Smart Photo Frame: Transform your calendar into a digital photo frame. Display photos from Google Photos or upload them directly to the device. No subscriptions are required for this feature.
- Energy-Saving Sleep Mode: The device features an energy-saving sleep mode for restful nights, automatically dimming or turning off the display during specified hours.
- Auto Portrait/Landscape Rotation: The display automatically adjusts its orientation based on how it is positioned.

Figure 8: Android Dashboard with Google Play apps.

Figure 9: Using the calendar as a smart photo frame.
Specifications
| Feature | Detail |
|---|---|
| Brand | ApoloSign |
| Model Number | FA1569T |
| Screen Size | 15.6-inch |
| Color | Teak |
| Item Weight | 9.06 pounds |
| Product Dimensions | 9.91 x 9.91 x 15.83 inches |
| Display Technology | HD Touchscreen with Incell + AG anti-glare tech |
| Operating System | Dual OS (Calendar Mode & Android Mode) |
| Voice Assistant Support | Built-in quad microphones for voice assistants (e.g., Google Assistant) |
| Connectivity | Wi-Fi |

Figure 10: Size comparison of ApoloSign Digital Calendars.
Troubleshooting
For any issues encountered with your ApoloSign Digital Calendar, please refer to the following general guidance:
- No Power: Ensure the power adapter is securely connected to both the device and a working power outlet.
- Wi-Fi Connectivity Issues: Verify your Wi-Fi network is active and the password is correct. Try restarting your router and the digital calendar.
- App Malfunction: If an app is not functioning correctly, try restarting the device. If the issue persists, consider uninstalling and reinstalling the app from Google Play.
- Screen Responsiveness: If the touchscreen is unresponsive, restart the device. Ensure the screen is clean and free of debris.
If you require further assistance or encounter problems not covered here, our expert support team is available around the clock to assist you. Your satisfaction is our top priority.
Warranty and Support
ApoloSign is committed to providing high-quality products and customer satisfaction. While specific warranty details are provided with your purchase documentation, our dedicated support team is available 24/7 to assist with any questions, setup guidance, or troubleshooting needs. Please refer to the contact information provided in your user guide or on the ApoloSign official website for support.


