
Introduction
This manual provides essential instructions for the safe and effective use of your Soarfly C210 Wireless Soldering Iron Kit. Please read this manual thoroughly before operating the device and retain it for future reference. This kit is designed for precision soldering in electronics repair, DIY projects, and handicrafts.
Safety Information
WARNING: Soldering involves high temperatures and can produce fumes. Always follow safety precautions.
- Always wear appropriate safety glasses to protect your eyes from solder splashes.
- Work in a well-ventilated area or use a fume extractor to avoid inhaling solder fumes.
- The soldering iron tip reaches very high temperatures. Avoid direct contact with skin or flammable materials.
- Place the soldering iron in its stand when not in use to prevent accidental burns or damage.
- Ensure the device is fully charged or connected to a stable power source during operation.
- Keep out of reach of children.
- Do not use the soldering iron near explosive gases or flammable liquids.
- Unplug the charging cable when not charging or when cleaning the device.
Package Contents
Verify that all items listed below are included in your package:
- 1 x Soarfly Wireless Soldering Iron
- 1 x Soldering Iron Stand
- 3 x Precision Soldering Tips (C210 type)
- 1 x USB-C Charging Cable
- 1 x Desoldering Wick (1.5m)
- 1 x Solder Wire (20g)
- 1 x Precision Tweezer (round tip)
- 10 x Cleaning Sponges

Image: All components included in the Soarfly C210 Wireless Soldering Iron Kit, including the soldering iron, stand, tips, charging cable, desoldering wick, solder wire, tweezers, and sponges.
Product Features
- Rapid Heating: Heats up in approximately 7 seconds for quick operation.
- Cordless Operation & USB-C Charging: Provides up to 60 minutes of use on a single charge. Rechargeable via USB-C, compatible with power banks, adapters, and laptops.
- Adjustable Temperature & LED Display: Temperature range of 442-1122°F (200-450°C). Real-time temperature and battery status displayed on an LED screen. Long-press to switch between Celsius and Fahrenheit.
- Smart Auto-Sleep & Auto-Off: Enters sleep mode after 40 seconds of inactivity and automatically powers off after 10 minutes to conserve energy and enhance safety.
- Portable Design: Lightweight (107g) and easy to handle, suitable for on-the-go repairs and various work environments.
- Versatile Use: Ideal for electronics repair, DIY projects, circuit boards, jewelry making, and other precision soldering tasks.
Setup
- Charge the Soldering Iron: Before first use, fully charge the soldering iron using the provided USB-C cable and a compatible power source. The LED display will show the battery level.
- Install a Soldering Tip: Select the appropriate soldering tip for your task. Carefully insert the tip into the heating element of the soldering iron. Ensure it is securely seated.
- Prepare the Work Area: Ensure your workspace is clean, well-ventilated, and free of flammable materials. Place the soldering iron stand on a stable surface.
Operating Instructions
Power On/Off
- To Power On: Press and hold the power button for a few seconds until the LED display illuminates. The iron will begin heating to the last set temperature.
- To Power Off: Press and hold the power button until the display turns off.
Temperature Adjustment

Image: A hand adjusting the stepless temperature control dial on the Soarfly C210 soldering iron, showing the range of 392°F-852°F (200°C to 450°C).
- Adjusting Temperature: Rotate the adjustment dial located on the body of the soldering iron to increase or decrease the temperature. The LED display will show the current temperature.
- Switching Units (°C/°F): While the iron is powered on, long-press the power button to toggle between Celsius (°C) and Fahrenheit (°F) display modes.
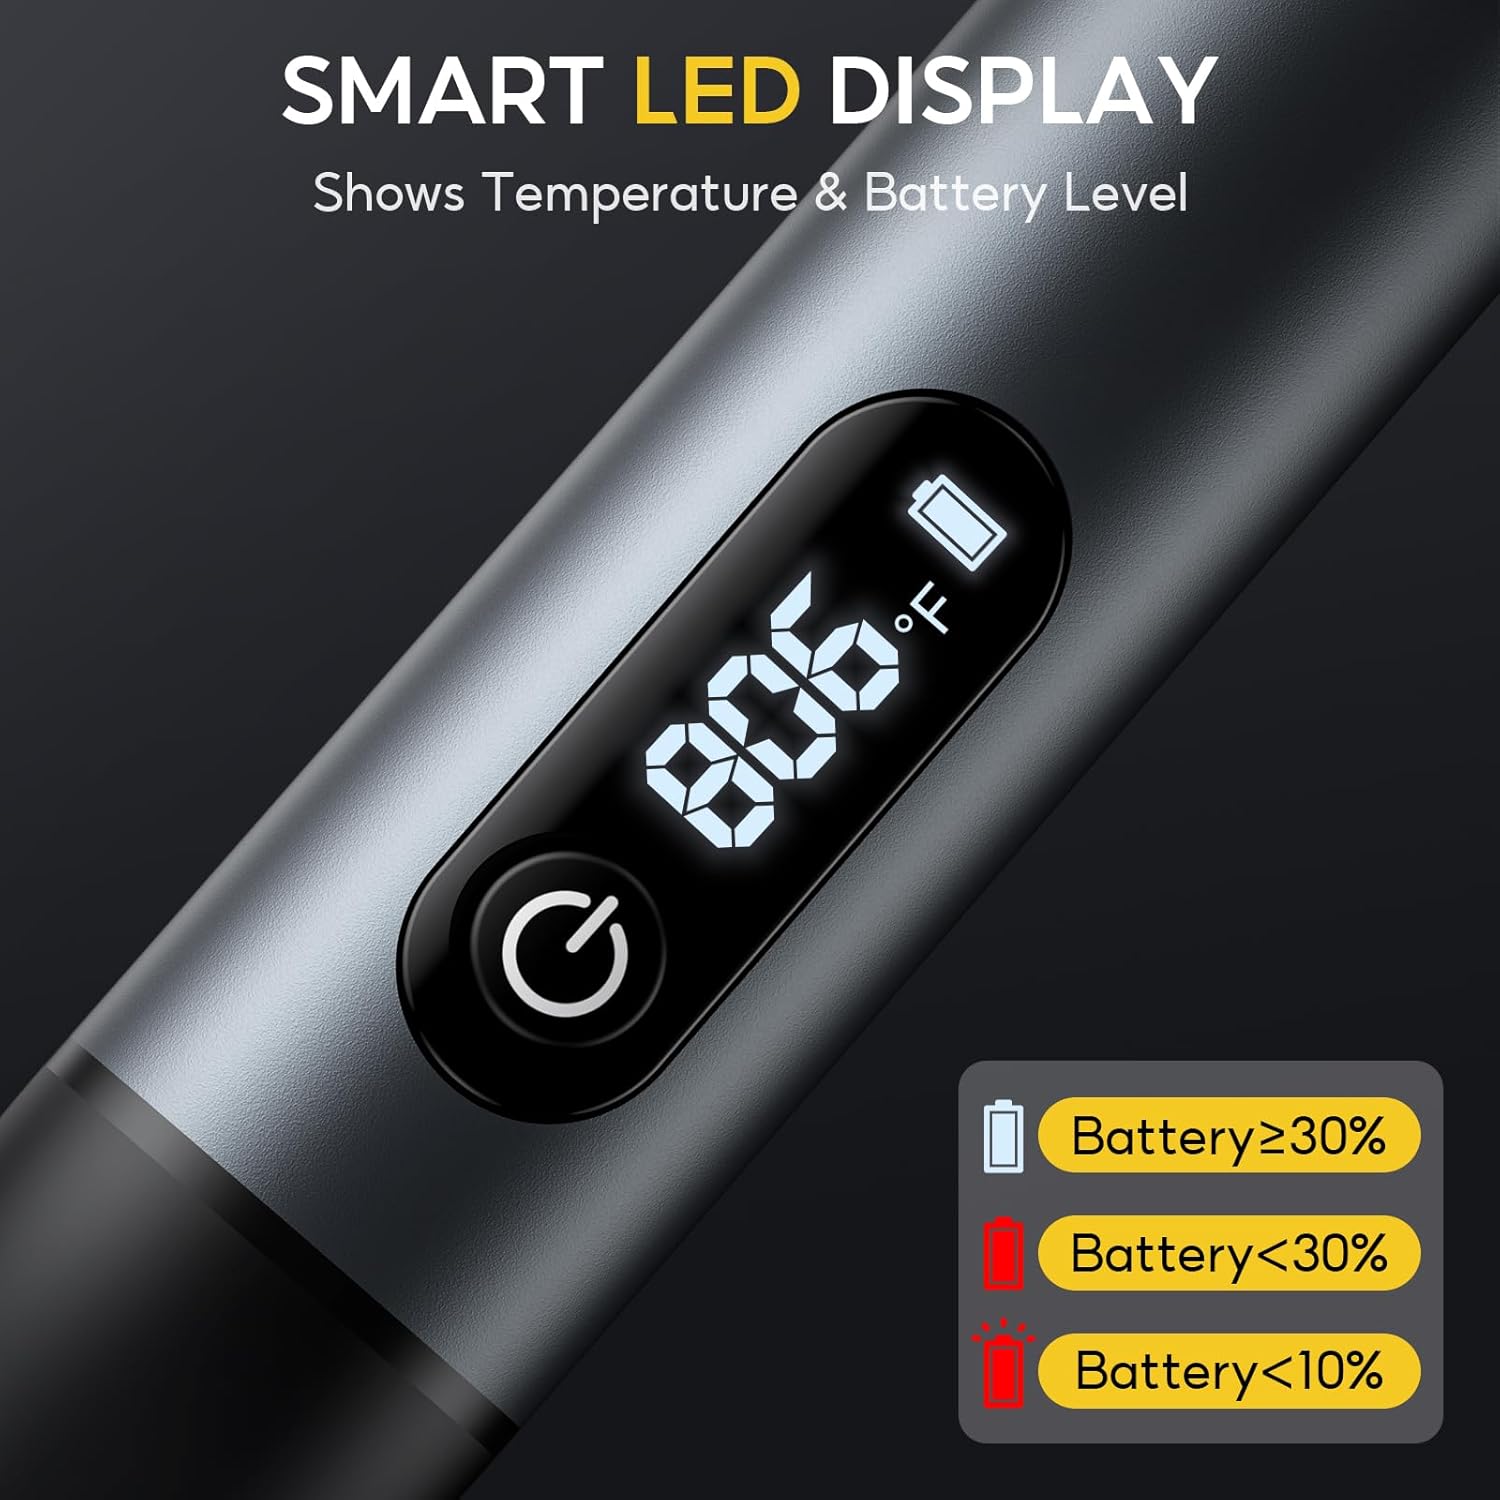
Image: Close-up of the smart LED display on the Soarfly C210 soldering iron, showing the current temperature (e.g., 806°F) and battery level indicator with different colors for charge status.
Soldering Process

Image: A Soarfly C210 soldering iron being used on a circuit board, demonstrating its rapid 7-second heating capability to reach tinning temperature.
- Allow the iron to reach the desired temperature. The LED display will show the real-time temperature.
- Clean the soldering tip by wiping it on a damp sponge.
- Apply a small amount of solder to the tip (tinning) to improve heat transfer.
- Place the hot tip against the components to be soldered, heating both simultaneously.
- Apply solder to the heated joint, not directly to the iron tip. Allow the solder to flow smoothly.
- Remove the solder wire, then remove the iron. Allow the joint to cool naturally without disturbance.

Image: Two panels illustrating the 2-in-1 soldering mode of the Soarfly C210. The top panel shows cordless operation, and the bottom panel shows the iron connected via USB-C for corded use.
The Soarfly C210 can be used in both cordless mode (powered by its internal battery) and corded mode (while connected to a USB-C power source). This allows for continuous operation when needed.
Smart Features

Image: Diagram showing the smart features of the Soarfly C210 soldering iron. It illustrates that the iron enters sleep mode after 40 seconds of idle time and automatically powers off after 10 minutes of inactivity, with a sleep mode indicator.
- Auto-Sleep: If the soldering iron is idle for 40 seconds, it will automatically enter sleep mode to conserve energy and prevent tip oxidation. The sleep mode indicator will activate. To wake it up, simply pick up the iron or press any button.
- Auto-Power Off: After 10 minutes of continuous inactivity (in sleep mode), the soldering iron will automatically power off completely for safety.
Charging
The Soarfly C210 soldering iron is equipped with a built-in rechargeable battery and charges via a USB-C port.
- Connect the provided USB-C cable to the soldering iron's charging port and to a compatible USB power source (e.g., wall adapter, power bank, computer USB port).
- The LED display will indicate the charging status and battery level.
- A full charge provides approximately 60 minutes of continuous use.
- The iron can be used while charging (corded mode).
Maintenance
- Tip Cleaning: Regularly clean the soldering tip using the damp sponges provided. This helps prevent oxidation and ensures efficient heat transfer.
- Tip Tinning: After cleaning and before storage, apply a small amount of fresh solder to the tip to prevent oxidation and prolong its lifespan.
- Storage: Store the soldering iron in a dry, cool place, away from direct sunlight and moisture. Ensure it is powered off and cooled down before storing.
- General Cleaning: Wipe the body of the soldering iron with a soft, dry cloth. Do not use abrasive cleaners or solvents.
Troubleshooting
| Problem | Possible Cause | Solution |
|---|---|---|
| Soldering iron does not heat up. |
|
|
| Temperature display is incorrect. |
|
|
| Battery drains quickly. |
|
|
| Iron enters sleep mode too often. |
|
|
Specifications
| Feature | Detail |
|---|---|
| Model | C210 |
| Brand | Soarfly |
| Temperature Range | 442-1122°F (200-450°C) |
| Heating Time | Approx. 7 seconds to tinning temperature |
| Charging Port | USB Type-C |
| Battery Life | Up to 60 minutes (continuous use) |
| Auto-Sleep | After 40 seconds of inactivity |
| Auto-Power Off | After 10 minutes of inactivity |
| Weight | 107 grams (approx.) |
| Included Tips | 3 x C210 type precision tips |
Warranty and Support
For warranty information and customer support, please refer to the documentation included with your purchase or contact the retailer where the product was acquired. Soarfly is committed to providing quality products and assistance.