
1. Introduction
Thank you for choosing the TOPBLASTERBOX H11 GPS Drone. This manual provides essential information for the safe operation, setup, and maintenance of your drone. Please read it thoroughly before your first flight to ensure proper usage and to maximize your flying experience.

Image: The H11 GPS Drone in flight, highlighting its 4K camera and HD screen capabilities.
2. Safety Guidelines
Always prioritize safety during drone operation. Failure to follow these guidelines may result in injury, damage to property, or legal consequences.
- Local Regulations: Always comply with local aviation laws and regulations. Check if drone registration is required in your region.
- Pre-Flight Check: Ensure the drone, remote controller, and batteries are in good condition before each flight.
- Environmental Conditions: Do not fly in strong winds, rain, snow, or fog. Maintain visual line of sight with the drone at all times.
- Obstacles: Avoid flying near people, animals, buildings, trees, power lines, or other obstacles. Maintain a safe distance.
- Privacy: Respect the privacy of others when operating the drone's camera.
- Battery Safety: Use only approved chargers and batteries. Do not overcharge or puncture batteries.
- Emergency Procedures: Familiarize yourself with emergency stop and Return-to-Home (RTH) functions.
3. Package Contents
Verify that all items are present in your package:
- H11 GPS Drone
- Remote Controller with HD Screen
- 2 x Drone Batteries
- Portable Carrying Bag
- USB Charging Cable
- Spare Propellers (set)
- Screwdriver
- User Manual (this document)

Image: All components included in the H11 drone package, laid out for inspection.
4. Product Overview
4.1 Drone Components
Familiarize yourself with the main parts of your H11 drone:
- Propellers: For lift and propulsion.
- Motors: Brushless motors for efficient flight.
- Camera: 4K UHD camera with 90° adjustable angle and 120° wide-angle lens.
- Battery Compartment: Houses the drone's flight battery.
- LED Indicators: Provide status information (e.g., power, GPS signal).
- Foldable Arms: For compact storage and transport.
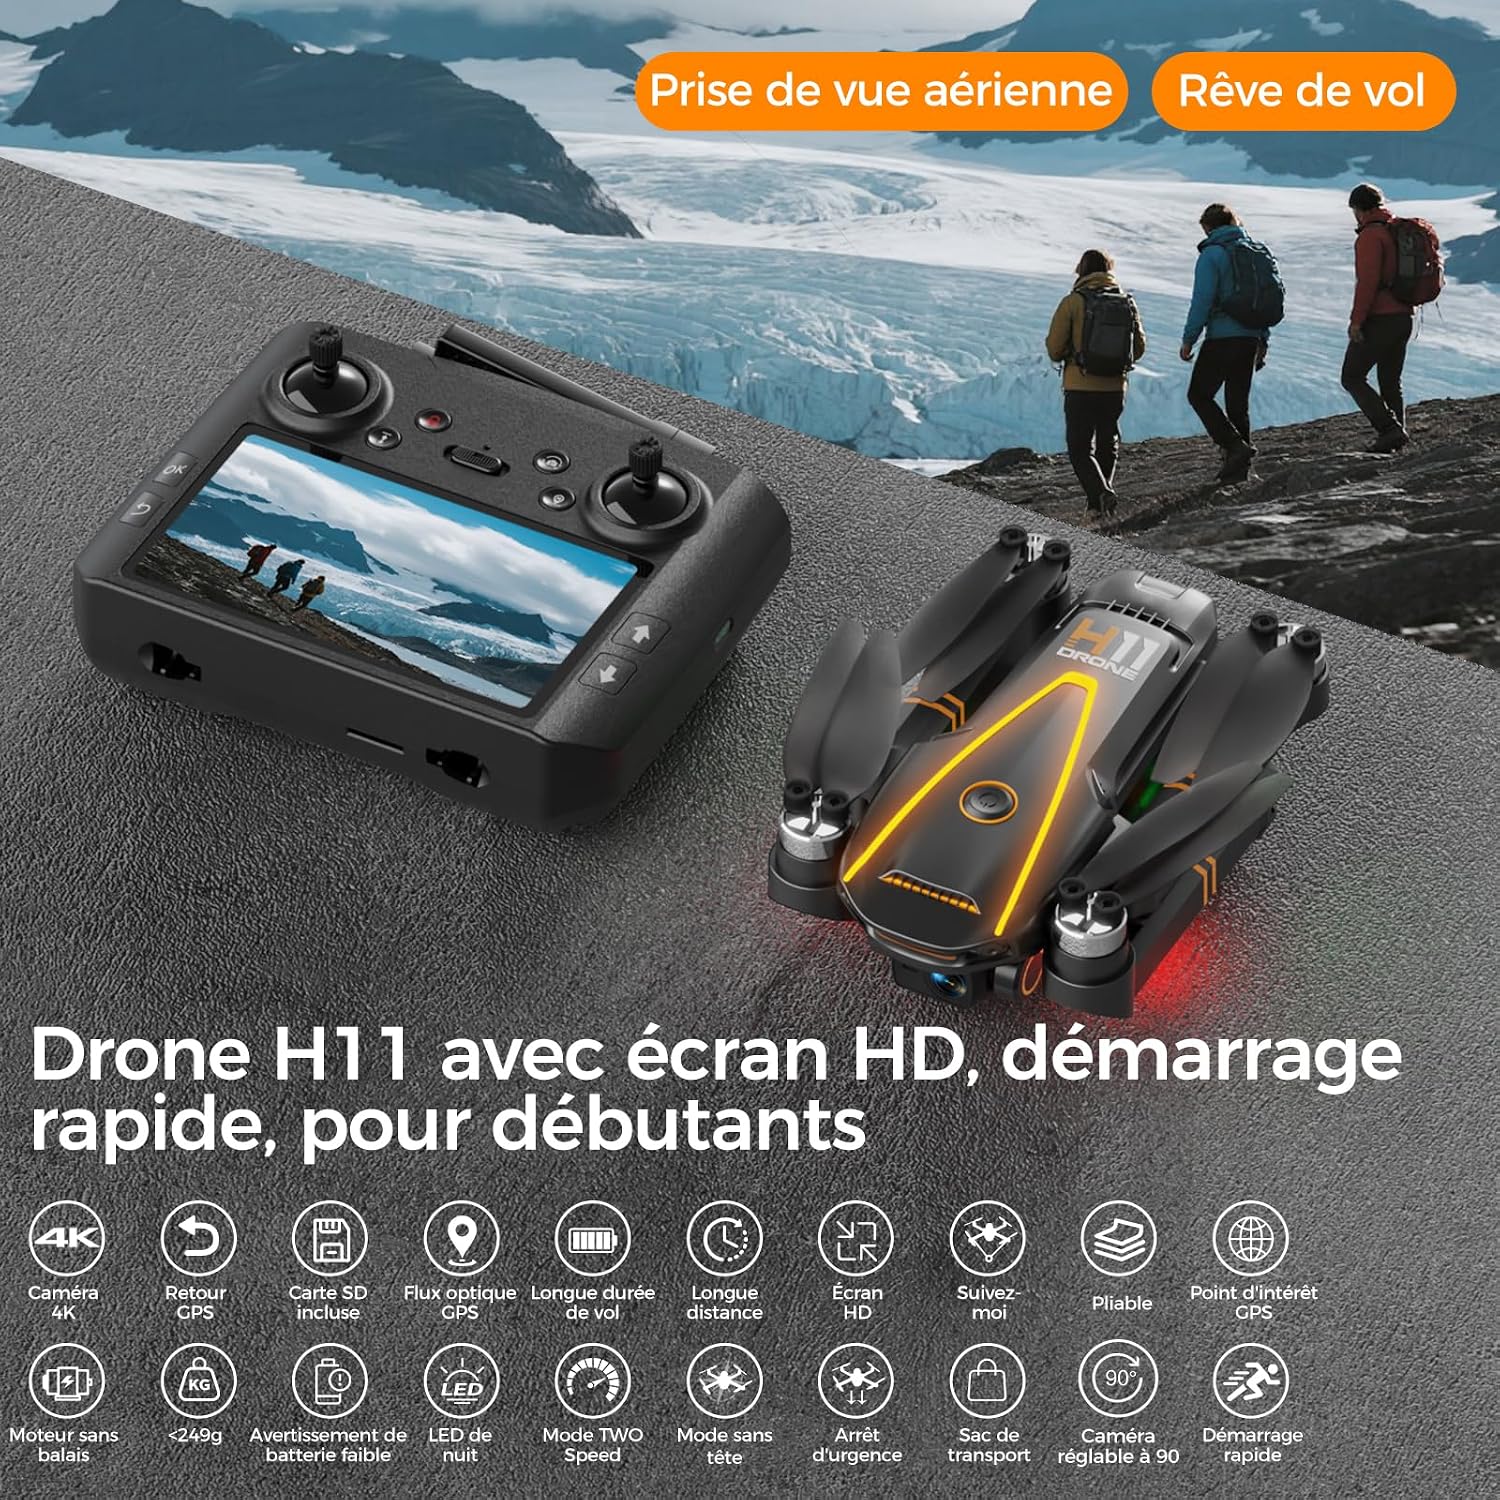
Image: Overview of the H11 drone and its remote controller, highlighting key features.
4.2 Remote Controller Overview
The remote controller features an integrated 4.5-inch HD screen for real-time FPV viewing without needing a smartphone.
- Left Joystick: Controls altitude (up/down) and rotation (yaw left/right).
- Right Joystick: Controls forward/backward and left/right movement.
- Power Button: To turn the controller on/off.
- Photo/Video Button: To capture images or start/stop video recording.
- Return-to-Home (RTH) Button: Initiates automatic return to the takeoff point.
- Speed Switch: Adjusts flight speed (low/high).
- Camera Angle Adjustment: Buttons or dial to change the camera's tilt.
- HD Screen: Displays live FPV feed, flight data, and settings.
Image: Labeled diagram of the remote controller, indicating the function of each control.
5. Setup
5.1 Battery Installation & Charging
Drone Battery:
- Insert the fully charged drone battery into the battery compartment on the rear of the drone until it clicks into place.
- To remove, press the release clips and slide the battery out.
Remote Controller Battery:
- The remote controller has a built-in rechargeable battery.
- Connect the USB charging cable to the remote controller's charging port and to a USB power adapter (not included).
- Charging time is approximately 120 minutes for continuous use.
Charging Drone Batteries:
- Connect the drone battery to the provided USB charging cable.
- Connect the USB cable to a USB power adapter.
- The charging indicator will show charging status (refer to battery or charger for specific light patterns).
- A full charge provides up to 22.5 minutes of flight time per battery (total 45 minutes with two batteries).

Image: Drone battery installation and the extended flight time provided by two batteries.

Image: The remote controller connected to its charging cable.
5.2 Propeller Installation
The propellers are marked A and B. Match them to the corresponding motor arms (A to A, B to B). Ensure they are securely fastened with the provided screws and screwdriver.
5.3 Pre-Flight Checklist
- Ensure drone and remote controller batteries are fully charged.
- Propellers are correctly installed and secure.
- Drone arms are unfolded and locked into position.
- Fly in an open area, free from obstacles and people.
- Check weather conditions (no strong winds or precipitation).
6. Operating Instructions
6.1 Powering On/Off
- Power On: First, turn on the remote controller. Then, press and hold the power button on the drone until the indicator lights turn on.
- Power Off: First, turn off the drone. Then, turn off the remote controller.
6.2 Pairing & Calibration
- Pairing: After powering on both devices, the drone and remote controller will automatically attempt to pair. The drone's indicator lights will change from flashing rapidly to slowly, indicating successful pairing.
- Compass Calibration: Follow the on-screen prompts or manual instructions to perform compass calibration. This typically involves rotating the drone horizontally and vertically.
- GPS Signal Acquisition: Place the drone on a flat, open surface. Wait for the drone to acquire sufficient GPS satellites. The GPS indicator will confirm when ready for flight.
6.3 Basic Flight Operations
- One-Key Takeoff/Landing: Press the dedicated takeoff/landing button on the remote controller for automatic takeoff or landing.
- Manual Takeoff: Push both joysticks down and outwards to start the motors. Then, gently push the left joystick up to ascend.
- Altitude Hold: The drone will automatically maintain its current altitude when the left joystick is released.
- Flight Controls: Use the left joystick for altitude and yaw (rotation), and the right joystick for forward/backward and left/right movement.
6.4 Advanced Flight Modes
The H11 drone offers several intelligent flight modes for enhanced flying and photography.
- Return-to-Home (RTH): Press the RTH button, and the drone will automatically return to its takeoff point. This function also activates in case of low battery or signal loss.

Image: Visual explanation of the RTH function and its triggers.
- Follow Me: The drone will automatically follow the remote controller (and thus the user) at a set distance, capturing dynamic footage.
- Point of Interest: The drone will circle around a designated point, keeping it in the center of the frame.

Image: The drone utilizing Follow Me and Point of Interest modes while tracking subjects in a mountainous landscape.
- Circular Flight: The drone will fly in a circular path around a central point, ideal for panoramic shots.

Image: The drone executing a circular flight pattern around a subject.
- Headless Mode: In this mode, the drone's orientation is relative to the pilot, making it easier to control for beginners regardless of the drone's front direction.
6.5 Camera Operation
The H11 drone is equipped with a 4K UHD camera.
- Taking Photos: Press the Photo button on the remote controller once to capture a still image.
- Recording Videos: Press the Video button once to start recording; press again to stop.
- Adjusting Camera Angle: Use the dedicated buttons or dial on the remote controller to adjust the camera's tilt angle (0-90 degrees) during flight.

Image: Detailed view of the drone's 4K camera and its features.
6.6 FPV Display Usage
The remote controller's integrated 4.5-inch HD screen provides a real-time First-Person View (FPV) from the drone's camera.
- The screen displays the live video feed, flight telemetry (altitude, speed, battery level, GPS status), and other important information.
- You can view captured photos and videos directly on the remote controller's screen.

Image: User operating the drone with the remote controller's FPV screen displaying real-time video.
7. Maintenance & Care
- Cleaning: Use a soft, dry cloth to clean the drone and remote controller. Do not use solvents or harsh chemicals.
- Propeller Replacement: If propellers are damaged, replace them immediately with genuine spare parts. Ensure correct A/B matching.
- Battery Care: Store batteries in a cool, dry place. Do not fully discharge batteries for extended periods. Charge them to about 50-60% for long-term storage.
- Storage: When not in use, store the drone and its accessories in the provided carrying bag to protect them from dust and damage.
8. Troubleshooting
| Problem | Possible Cause | Solution |
|---|---|---|
| Drone does not power on | Low battery; Battery not installed correctly | Charge battery; Reinstall battery securely |
| Remote controller does not power on | Low battery | Charge remote controller |
| Drone cannot pair with remote | Too far apart; Interference | Bring closer; Restart both devices; Move to an open area |
| Drone unstable during flight | Improper calibration; Damaged propellers; Strong winds | Perform calibration; Replace propellers; Fly in calm conditions |
| Poor FPV video quality | Signal interference; Drone too far | Fly closer; Avoid areas with strong Wi-Fi signals |
| GPS signal not acquired | Flying indoors; Obstructions | Fly outdoors in an open area; Wait longer for signal acquisition |
9. Specifications
| Feature | Detail |
|---|---|
| Brand | TOPBLASTERBOX |
| Model Name | H11 Drone |
| Weight | Less than 249g |
| Camera Resolution | 4K Video, 8 Megapixels Still |
| Video Output Resolution | 3840x2160 pixels |
| Camera Angle | 90° Electrically Adjustable, 120° Wide Angle |
| Motor Type | Brushless |
| Flight Time | Up to 22.5 minutes per battery (45 minutes total with 2 batteries) |
| Remote Controller Screen | 4.5-inch HD Display |
| Connectivity Technology | 2.4 GHz (Remote), 5G FPV Transmission |
| Special Features | GPS-powered Return-to-Home, QuickShots, Advanced Flight Modes (Follow Me, Waypoint, Point of Interest), Altitude Hold, Headless Mode |
| Storage Medium | SD Card (included) |
10. Customer Support
For any questions, technical assistance, or warranty claims, please contact TOPBLASTERBOX customer support through your purchase platform or the contact information provided with your product packaging. Please have your model number (H11) and purchase details ready.