
1. Important Safety Information
Please read all instructions carefully before assembly and use. Keep this manual for future reference.
- Electrical Safety: Ensure the power cord is not pinched or damaged. Do not overload the AC outlets or USB ports. Disconnect power before cleaning or moving the dresser.
- Stability: Always install the included anti-tip kit to prevent accidental tipping, especially in households with children or pets. Place the dresser on a flat, stable surface.
- Assembly: Follow assembly steps precisely. Do not use power tools for tightening screws unless specified, as this may damage components.
- Weight Capacity: Do not exceed the recommended weight capacity for the top surface or drawers. Distribute weight evenly.
2. Product Components
Before assembly, verify that all parts are present and undamaged. Refer to the assembly diagram in your package for specific part identification.
- Metal Frame Components
- Wooden Top Board
- Fabric Drawers (8 units)
- LED Light Strip with Controller
- Integrated Power Strip (2 AC outlets, 2 USB ports)
- Adjustable Feet
- Anti-Tip Kit
- Assembly Hardware (screws, bolts, etc.)
3. Setup and Assembly
Assembly is designed to be straightforward. It is recommended to have a clear workspace and follow the numbered steps provided in the separate assembly guide included with your product.
- Unpack Components: Carefully remove all parts from the packaging. Lay them out on a soft, clean surface to prevent scratches.
- Assemble Frame: Connect the metal frame components according to the diagrams in your assembly guide. Ensure all screws are securely tightened.
- Attach Top Board: Secure the wooden top board to the assembled metal frame.
- Install Power Strip: Integrate the power strip into its designated slot on the top board.
- Install LED Strip: Adhere the LED light strip to the underside of the top board or as indicated in the guide. Connect it to the power strip.
- Assemble Fabric Drawers: Insert the bottom panels into the fabric drawers and attach the handles.
- Insert Drawers: Slide the assembled fabric drawers into the frame.
- Adjust Feet: Level the dresser using the adjustable feet at the bottom.
- Install Anti-Tip Kit: Securely attach the anti-tip kit to the dresser and to a wall stud following the instructions provided with the kit. This is a critical safety step.

Image 3.1: Fully assembled ODK LED Dresser, showcasing its design and functionality.

Image 3.2: Close-up view of the anti-tip kit and adjustable feet, essential for stability and safety.
4. Operating Instructions
4.1 LED Light Strip
The integrated LED light strip offers customizable lighting options to enhance your room's ambiance.
- Power On/Off: Use the power button on the LED controller to turn the lights on or off.
- Color Selection: Cycle through 10 adjustable colors using the color selection button.
- Dynamic Modes: Choose from 10 dynamic lighting modes (e.g., fade, flash, strobe) to create different effects.
- Brightness Adjustment: Adjust the brightness level with 7 available settings to suit your preference.
- Memory Function: The LED system retains your last selected settings when powered off and on.
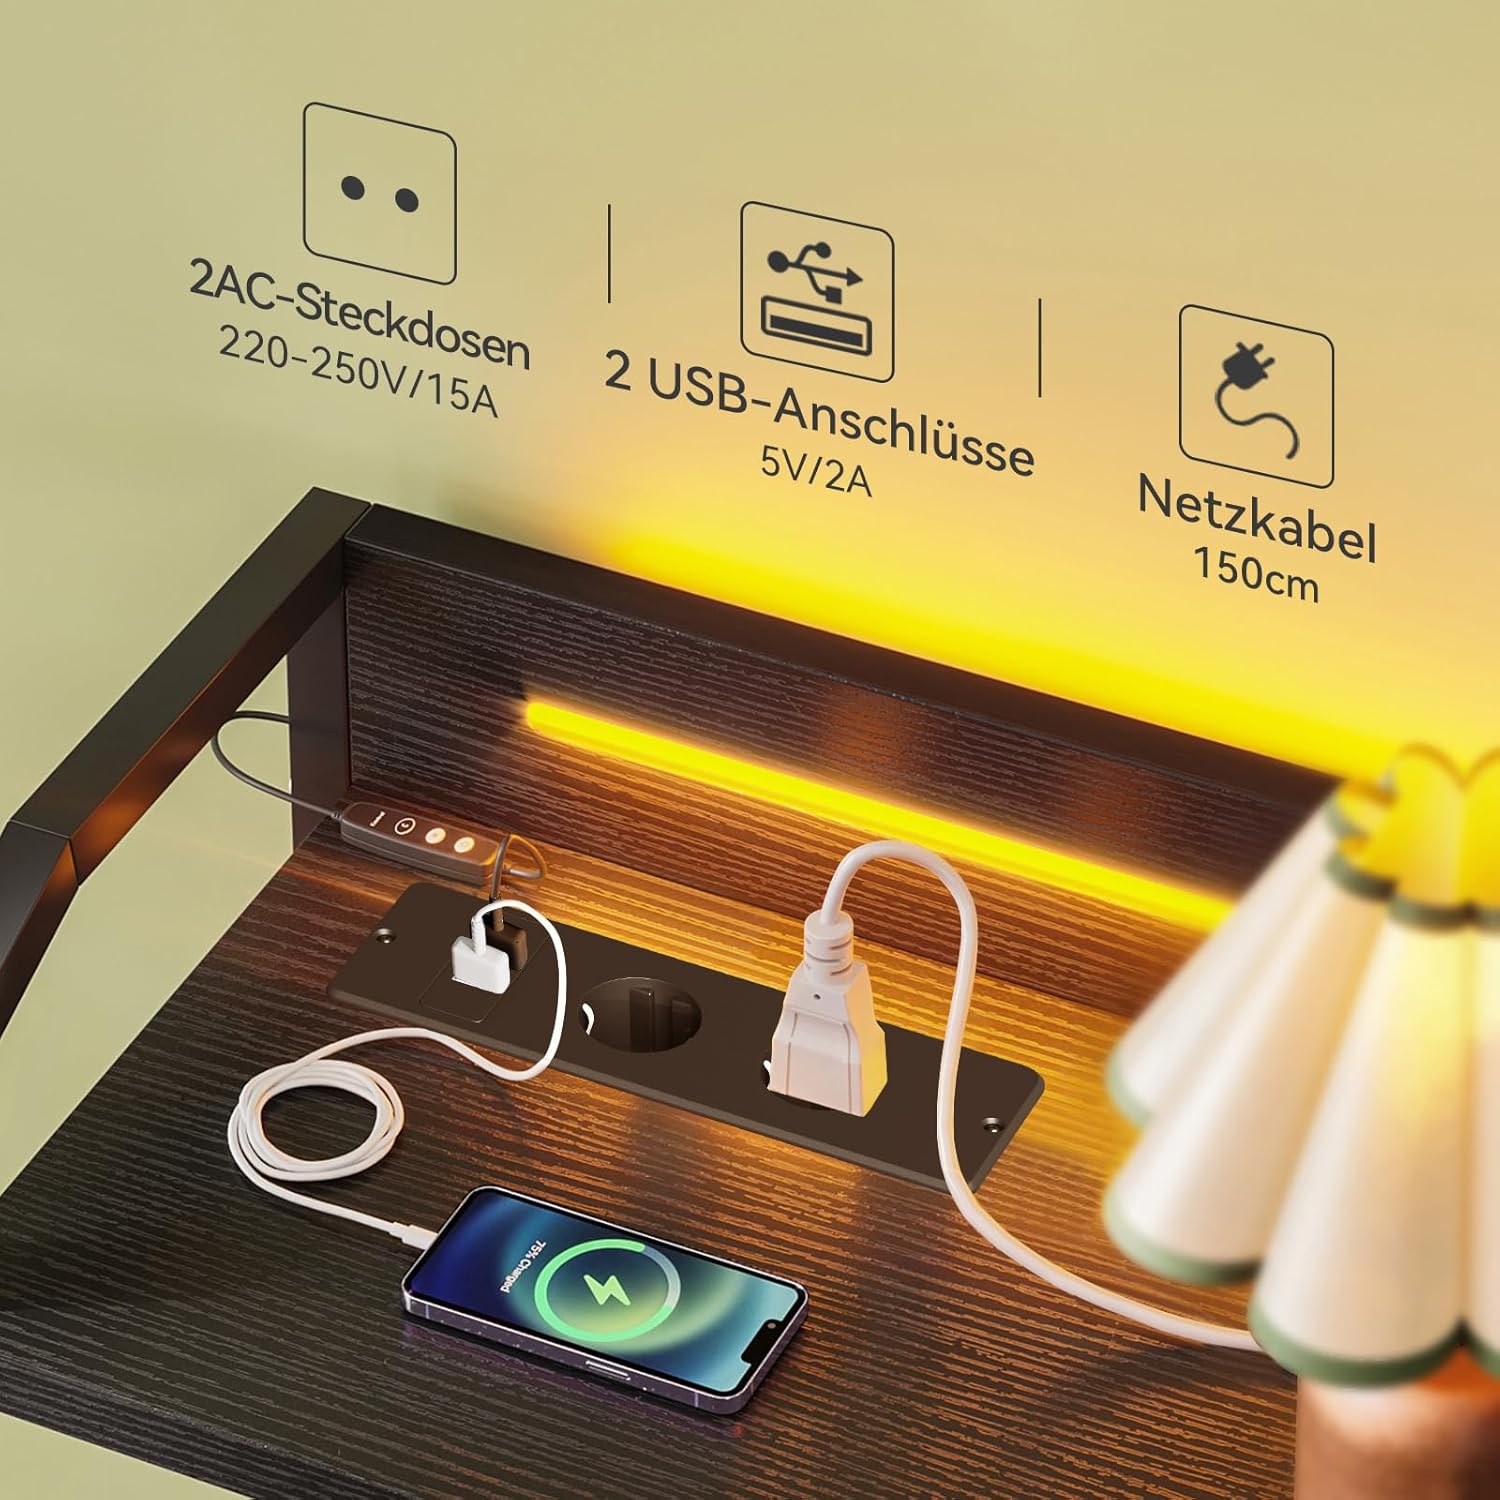
Image 4.1: The LED light strip controller, showing buttons for various lighting adjustments.
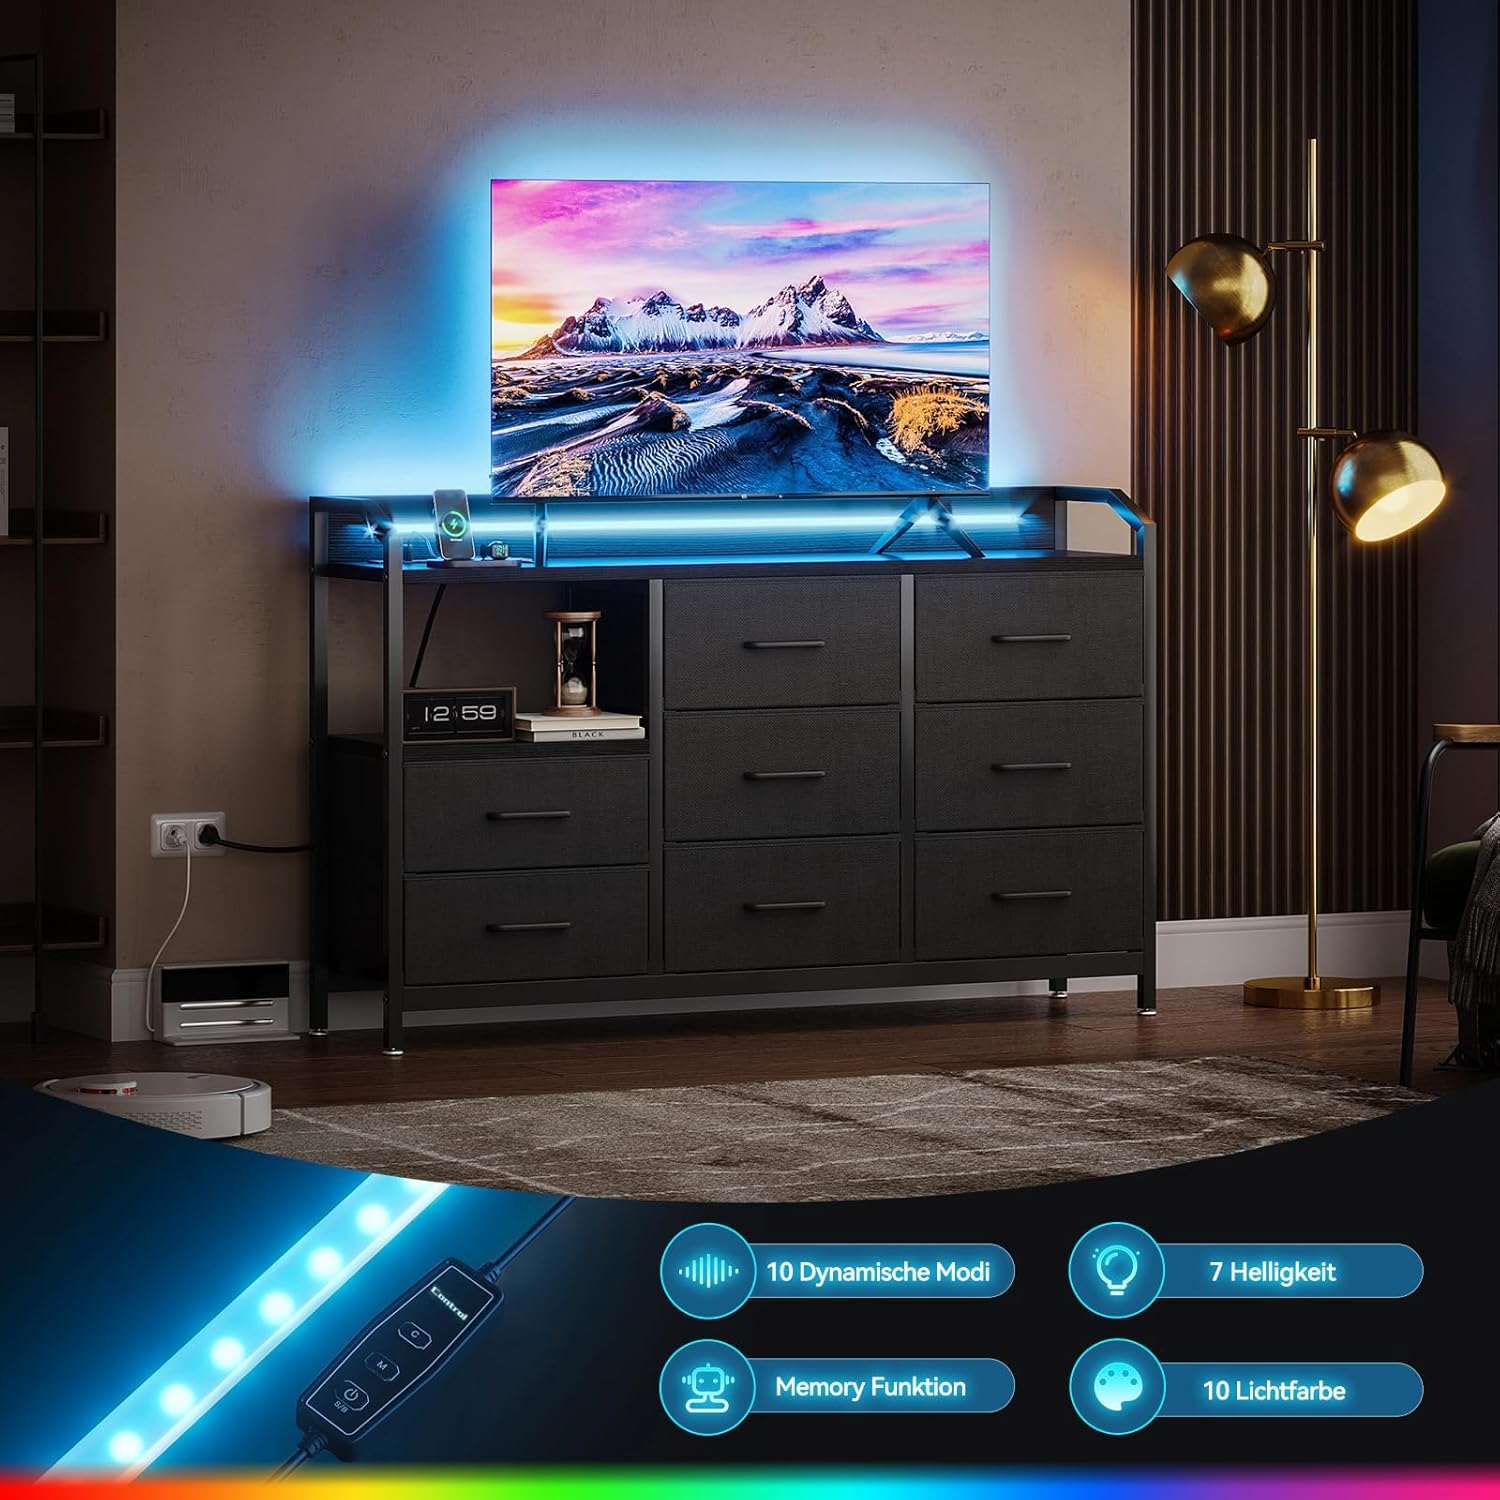
Image 4.2: The dresser with its LED lights active, demonstrating the ambient lighting effect.
4.2 Integrated Power Outlets
The dresser includes a built-in power strip for convenient charging of electronic devices.
- AC Outlets: Two standard European AC outlets (220-250V/15A) are provided for powering appliances.
- USB Ports: Two USB ports (5V/2A) are available for charging smartphones, tablets, and other USB-powered devices.
- Usage: Plug the dresser's main power cord into a wall outlet. Then, connect your devices to the AC outlets or USB ports on the dresser.

Image 4.3: Detail of the integrated power strip, highlighting the AC outlets and USB charging ports.
5. Maintenance
- Cleaning the Frame and Top: Wipe surfaces with a soft, damp cloth. Avoid harsh chemicals or abrasive cleaners.
- Cleaning Fabric Drawers: The cationic fabric drawers are resistant to wear. For minor spills, spot clean with a mild detergent and a damp cloth. Allow to air dry completely. Do not machine wash.
- Electrical Components: Ensure the power strip and LED components remain dry. Do not immerse in water.
- Regular Checks: Periodically check all screws and connections to ensure they remain tight. Re-tighten if necessary.
6. Troubleshooting
- LED Lights Not Working:
- Check if the dresser's main power cord is securely plugged into a wall outlet.
- Ensure the LED strip's connector is properly plugged into the power strip.
- Verify the LED controller is connected and functioning.
- Power Outlets/USB Ports Not Working:
- Confirm the dresser's main power cord is plugged into a live wall outlet.
- Test the wall outlet with another device to ensure it is supplying power.
- Ensure the power strip is correctly installed and connected internally.
- Avoid overloading the outlets; disconnect some devices and retest.
- Dresser Feels Unstable:
- Ensure the dresser is on a flat, level surface.
- Adjust the leveling feet at the bottom of the dresser.
- Verify that the anti-tip kit is correctly installed and secured to both the dresser and the wall.
- Check all assembly screws for tightness.
7. Specifications
| Feature | Detail |
|---|---|
| Brand | ODK |
| Model | B0FDB156JL |
| Color | Black |
| Dimensions (L x W x H) | 110 cm x 30 cm x 88 cm (43.3 x 11.8 x 34.6 inches) |
| Weight | Approx. 15 kg (33 lbs) |
| Number of Drawers | 8 |
| Drawer Material | Cationic Fabric |
| LED Light Strip | 10 adjustable colors, 10 dynamic modes, 7 brightness settings, memory function |
| AC Outlets | 2 (220-250V/15A) |
| USB Ports | 2 (5V/2A) |
| Assembly Required | Yes |

Image 7.1: Detailed dimensions of the ODK LED Dresser.
8. Warranty and Support
ODK offers a 30-day free return and exchange service. For any questions, concerns, or assistance with your product, please contact our professional 24/7 online customer service team. They are dedicated to resolving your issues as quickly as possible.
Please refer to your purchase documentation for specific contact details or visit the ODK official website for support information.