
1. Introduction
The GuliKit Elves 2 Bluetooth Game Controller is a versatile gamepad designed for a wide range of gaming platforms. It combines a retro-inspired ergonomic design with modern technologies to provide a superior gaming experience. This manual provides detailed instructions on how to set up, operate, and maintain your controller.
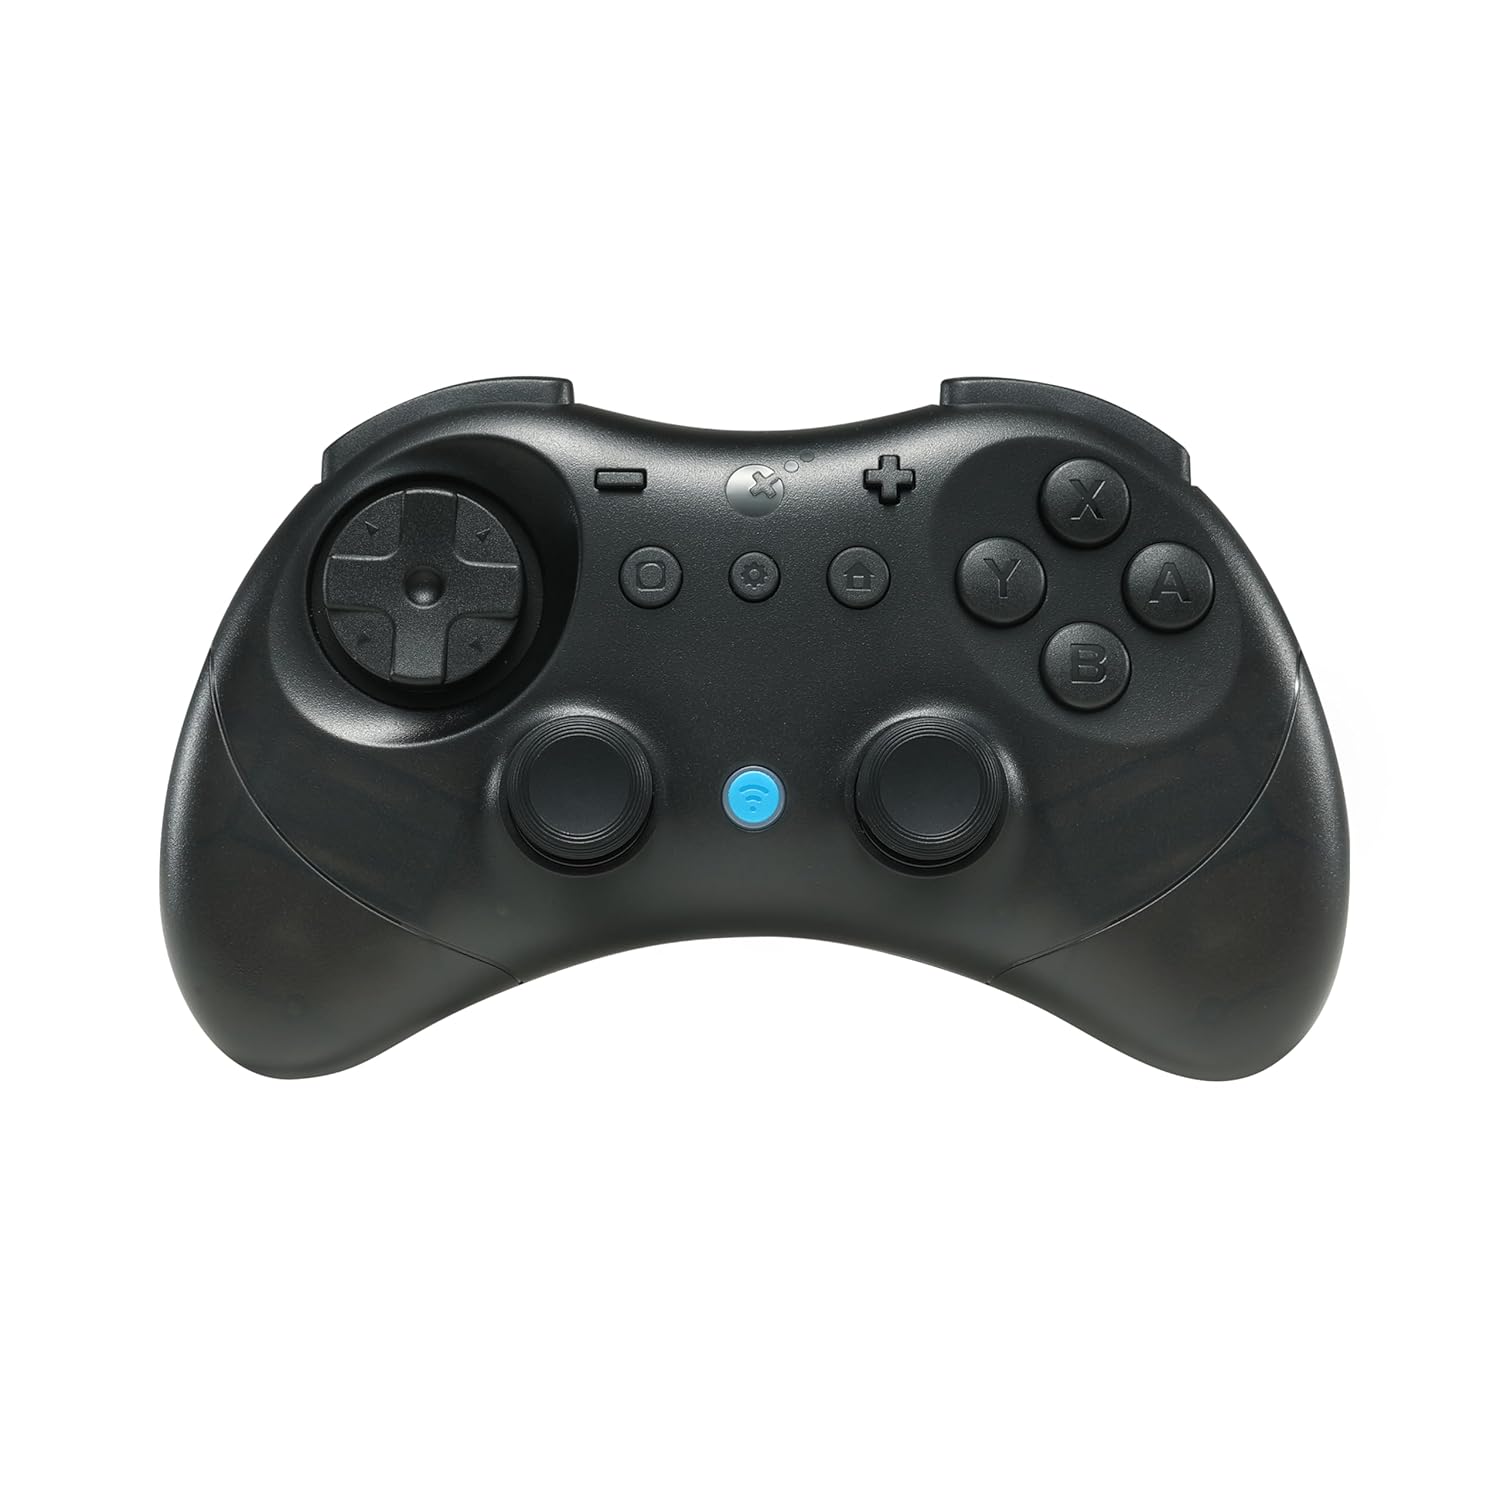
Figure 1: GuliKit Elves 2 Bluetooth Game Controller (Translucent Black)
2. Package Contents
- GuliKit Elves 2 Controller
- Protection Case
- Instruction Manual
Note: A USB-C charging cable is not included in the package. Please use a standard USB-C cable for charging and wired connections.
3. Product Features
- Instant Switch 1 / 2 Wake-up: The first third-party controller to support Switch 2 wake-up.
- Retro-Inspired Design: Offers excellent ergonomics for comfort during extended gaming sessions.
- Smooth Anti-Drift Hall Effect Joysticks: Engineered with GuliKit's leading-edge Hall Effect electromagnetic thumbsticks and anti-friction stick rings for anti-drift durability and 2200-level high precision control.
- Broad Compatibility: Compatible with Switch 2, Switch, Switch Lite, Switch OLED, Windows, iOS, Steam Deck, ROG Ally/X handhelds, and Android devices.
- Ultra-Fast Speed: Supports 1000Hz wired polling rate (PC only) and 730Hz low latency Bluetooth wireless connection.
- Advanced Features: Classic floating D-pad for fighting games, tactile digital triggers, stick deadzone on/off, Turbo function, 800mAh rechargeable battery (up to 20 hours playtime), and a portable carrying case.
- Six-axis Gyro Motion Control: For immersive gaming experiences.
- Asymmetric Dual-rotor Vibration Motors: Provides unprecedented haptic feedback.

Figure 2: Hall Effect Joysticks for high precision and anti-drift performance.

Figure 3: Asymmetric Dual-rotor Vibration Motors for enhanced haptic feedback.

Figure 4: Six-axis Gyroscope for immersive motion control.
4. Setup & Pairing
4.1. Wireless Pairing (Android, iOS, macOS Devices)
- Set the controller to iOS mode.
- Hold the pairing button for 2 seconds. The indicator light will flash quickly, indicating it's in pairing mode.
- On your mobile device, search for "Xbox Wireless Controller" in the Bluetooth settings and add it.
- Once "Connected" is displayed on your screen, the pairing process is complete.
4.2. Pairing with Nintendo Switch
Method 1: Wireless Pairing
- Set the controller to NS mode.
- Hold the pairing button for 2 seconds. The indicator light will flash quickly, indicating it's in pairing mode.
- Go to the Switch's controller connection settings page.
- The interface will display "New controller detected", and the pairing process will be complete.
Method 2: Wired Pairing
- Set the controller to Switch mode.
- Connect one end of a USB data cable to the controller and the other end to the USB-A port on the Switch dock.
- The controller will automatically pair with the Switch.
- Once paired, you can remove the data cable. The controller can also be used in wired mode.
4.3. Special Pairing Method for Nintendo Switch 2 Wake-up
This method is crucial for enabling the Switch 2 wake-up function. Failure to follow these steps precisely will result in the wake-up function not working.
- Set the controller to NS mode, then turn it on.
- Hold the pairing button for 2 seconds. The indicator will flash quickly to start pairing.
- Set your Switch 2 console into sleep mode first (black screen).
- Press the HOME button on a Joy-Con to wake the screen.
- Next, enter the controller pairing interface on the Switch 2 and get paired.
Please refer to the video below for a visual guide on the Switch 2 wake-up pairing method.
Video 1: Special Switch 2 Wake-up Method. This video demonstrates the precise steps required to pair the GuliKit Elves 2 controller with a Nintendo Switch 2 console to enable the wake-up feature.

Figure 5: The GuliKit Elves 2 controller supports waking up both Switch and Switch 2 consoles.
4.4. Pairing with PC (Bluetooth)
- Ensure your PC has Bluetooth capability.
- Set the controller to PC mode.
- Hold the HOME button for 2 seconds. The indicator light will flash quickly, indicating it's in pairing mode.
- On your PC, search for "GuliKit XW" in the Bluetooth settings and add it.
- Once "Connected" is displayed, the pairing process is complete.
4.5. Wired Connection (PC)
- Set the controller to PC mode.
- Connect one end of a USB data cable to the controller and the other end to a USB-A port on your PC.
- For desktop PCs, it is recommended to use a USB port on the back of the PC for a more stable connection.

Figure 6: Multi-platform compatibility and wired/Bluetooth connection options.

Figure 7: Demonstrates 1000Hz wired and 730Hz Bluetooth polling rates for responsive gameplay.
5. Operating Instructions
5.1. Joystick Calibration
- Turn on the controller.
- Press and hold the L, R, D-pad Left, and A buttons simultaneously for 6 seconds.
- During calibration, rotate both joysticks fully in a circular motion 2-3 times.
- The controller will vibrate once, and the calibration mode will automatically exit.
5.2. Button Functions
Refer to the image below for a visual guide to the controller's buttons and their primary functions.
Figure 8: Controller Button Layout. (Note: Specific button mapping may vary by game or platform.)
- HOME Button: Power On/Off, return to menu.
- Power Indicator Light: Shows power status and pairing mode.
- Pairing Button: Initiates Bluetooth pairing.
- Mode Button: Switches between different compatibility modes (NS, PC, iOS).
5.3. Special Functions (Using the Settings Button)
All special functions listed below require holding the Settings (Gear icon) button while pressing the corresponding button.
- Joystick Deadzone Mode:
- Settings + Left Joystick (press once): Activates joystick deadzone. (Controller vibrates once)
- Settings + Left Joystick (hold): Deactivates joystick deadzone. (Controller vibrates for a longer duration)
- Reset All Settings:
- Settings + Minus (-) (hold): Resets the controller to factory default settings. (Controller vibrates for a longer duration)
- Turbo Function: (For A/B/X/Y/R/ZR buttons)
- Settings + Button (press once): Activates normal Turbo (active while button is held). (Controller vibrates once)
- Settings + Button (press twice): Activates auto Turbo (continuous firing). (Controller vibrates twice)
- Settings + Button (hold): Cancels Turbo function. (Controller vibrates for a longer duration)

Figure 9: Semi-auto and Full-auto Turbo functions for rapid input.
- Vibration Intensity Adjustment:
- Settings + D-pad Up (press once): Weak vibration. (Controller vibrates once)
- Settings + D-pad Up (press twice): Standard vibration (default). (Controller vibrates twice)
- Settings + D-pad Up (press three times): Strong vibration. (Controller vibrates three times)
- Settings + D-pad Up (hold): Turns vibration off. (Controller vibrates for a longer duration)
5.4. Power Management
- Automatic Power Off: The controller will automatically power off after 15 minutes of inactivity.
- Manual Power Off: Hold the HOME button for 10 seconds to manually turn off the controller. Alternatively, press the OFF button (if available) to power off without full auto-continue.
- Power On: Press the HOME button to turn on the controller.
6. Maintenance
- Keep the controller clean by wiping it with a soft, dry cloth.
- Avoid exposing the controller to extreme temperatures, humidity, or direct sunlight.
- Do not disassemble the controller, as this will void the warranty.
- Store the controller in its protective case when not in use to prevent damage.
- Charge the controller regularly to maintain battery health, even if not used frequently.
7. Troubleshooting
- Controller not pairing: Ensure the controller is in the correct mode for your device (NS, PC, iOS). Make sure Bluetooth is enabled on your device. Try resetting the controller to factory settings (see section 5.3).
- Switch 2 Wake-up not working: Double-check the special pairing method for Switch 2 wake-up (section 4.3). Ensure the Switch 2 is in sleep mode before attempting to wake it with the controller. Update to the latest firmware if available.
- Input lag or disconnection: Ensure the controller is fully charged. Reduce interference by moving closer to the device or avoiding 2.4GHz Wi-Fi if using Bluetooth. For PC, consider using a wired connection or a stable USB port on the back of the desktop.
- Joystick drift: Perform joystick calibration (section 5.1). If the issue persists, contact customer support.
- Vibration too strong/weak/off: Adjust vibration intensity using the special function (section 5.3).
8. Specifications
| Feature | Detail |
|---|---|
| Model Number | NS58 |
| Dimensions | 5.9 x 3.9 x 1.2 inches |
| Weight | 6.3 ounces |
| Battery Capacity | 800mAh (Rechargeable) |
| Battery Life | Up to 20 hours |
| Wired Polling Rate | 1000Hz (PC only) |
| Bluetooth Polling Rate | 730Hz |
| Connectivity | Bluetooth, Wired (USB-C) |
| Compatibility | Switch 2, Switch, Switch Lite, Switch OLED, Windows, iOS, Steam Deck, ROG Ally/X, Android |
9. Warranty and Support
GuliKit provides customer support for its products. For any issues, questions, or warranty claims, please contact GuliKit Official customer support. Fast customer support is typically available within 24 hours.
Please retain your proof of purchase for warranty purposes.