
Introduction
Thank you for choosing the Fudajo 15-Egg Automatic Incubator. This device is designed to provide an optimal environment for hatching various types of poultry eggs, including chicken, duck, goose, quail, and pigeon. Featuring precise temperature control, automatic egg turning, and a regulated humidity system, this incubator simplifies the incubation process for both beginners and experienced breeders. Please read this manual thoroughly before operation to ensure safe and efficient use of your incubator.

Image: The Fudajo incubator in use, demonstrating its compact design and suitability for various egg types.
Safety Instructions
To prevent injury or damage to the incubator, always follow these safety precautions:
- Read all instructions before operating the incubator.
- Keep the incubator out of reach of children and pets. Adult supervision is required if children are near the device.
- Use only the specified power adapter and voltage (DC12V).
- Do not immerse the incubator or any electrical components in water or other liquids.
- Unplug the incubator from the power source before cleaning or performing any maintenance.
- Ensure the incubator is placed on a stable, level surface in a well-ventilated area, away from direct sunlight, drafts, or extreme temperature fluctuations.
- Do not block the ventilation openings.
- If any damage is observed, discontinue use and contact customer support.
Package Contents
Verify that all items are present in the package:
- Fudajo 15-Egg Automatic Incubator Unit
- Egg Turning Tray
- Humidity Water Channels/Tubes
- Power Adapter
- Battery Backup Cable (for 12V battery connection)
- Instruction Manual
Product Overview
Familiarize yourself with the main components of your incubator:
- Digital Display: Shows current temperature, humidity, and incubation days.
- Control Buttons: Used to set temperature and other parameters.
- Ventilation Fan: Ensures uniform heat distribution inside the incubator.
- Automatic Egg Turner: Motorized rollers that gently turn eggs at set intervals.
- Humidity System: External water channels connected to standard water bottles (not included) for automatic humidity regulation.
- Integrated Candler: Built-in light for observing embryo development.
- Power Inputs: Separate ports for main power adapter and 12V battery backup cable.
Setup
Follow these steps to prepare your incubator for use:
- Unpack: Carefully remove all components from the packaging.
- Placement: Place the incubator on a flat, stable surface in a room with a consistent ambient temperature (ideally 20-25°C). Avoid areas with drafts or direct sunlight.
- Humidity System Connection: Fill standard water bottles (not included) with distilled water and connect them to the external water channels on the incubator. Ensure a secure fit to prevent leaks.
- Main Power Connection: Connect the power adapter to the incubator's main power input and then plug it into a suitable electrical outlet.
- Backup Power Connection (Optional): For uninterrupted operation during power outages, connect the provided battery backup cable to a fully charged 12V battery (not included) and then to the incubator's backup power input.
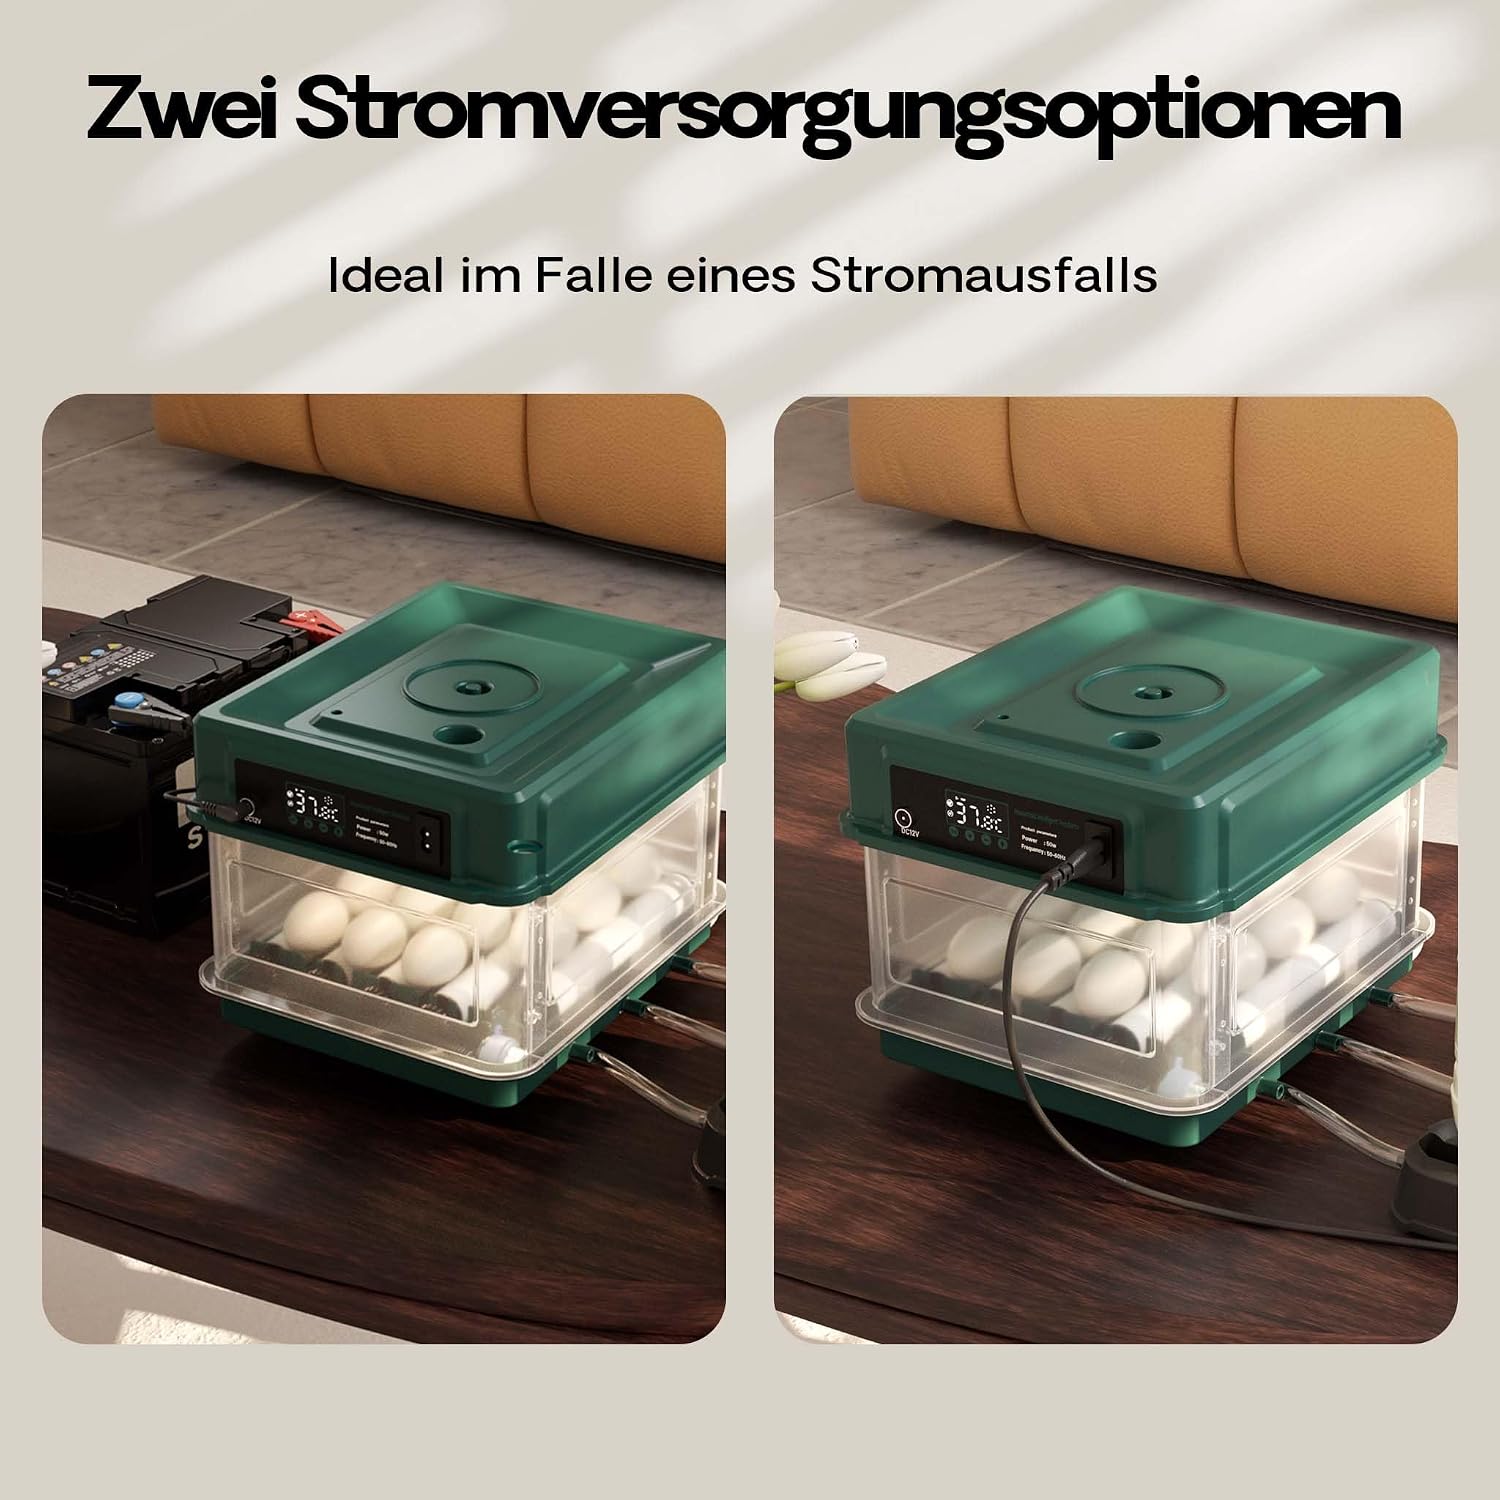
Image: The incubator supports both standard power and 12V battery backup for continuous operation.
Operating Instructions
Operating your Fudajo incubator involves monitoring and adjusting key environmental factors:
- Initial Power On: Once plugged in, the digital display will illuminate, showing the current internal temperature and humidity. Allow the incubator to stabilize for at least 30 minutes before placing eggs.
- Setting Temperature: Use the control buttons (refer to the specific button layout on your device) to set the desired incubation temperature. A common temperature for chicken eggs is 37.5°C (99.5°F). The incubator will automatically heat to and maintain this setting.
- Managing Humidity: The intelligent humidity system will draw water from the connected bottles to maintain the set humidity level. Monitor the water levels in the bottles and refill as needed. Typical humidity for the first 18 days is 50-60%, increasing to 65-75% for the last few days before hatching.
- Placing Eggs: Carefully place up to 15 fertilized eggs onto the adjustable roller tray. Ensure eggs are clean and free from cracks. The adjustable rollers accommodate various egg sizes.
- Automatic Egg Turning: The incubator's motor will automatically turn the eggs at regular intervals (e.g., every 2 hours). This mimics a brooding hen and prevents the embryo from sticking to the shell, promoting healthy development.
- Egg Candling: Utilize the integrated candler to periodically check the development of the embryos. This allows you to identify infertile eggs or those with arrested development, which can then be removed.
- Backup Power Operation: In the event of a main power failure, the incubator will seamlessly switch to the connected 12V battery, ensuring continuous incubation without interruption. The display may indicate the power source change.

Image: Digital display showing precise temperature and humidity control.

Image: Automatic egg turning mechanism in action, preventing embryo adhesion.

Image: Integrated candler for easy monitoring of embryo development.
Maintenance
Proper maintenance ensures the longevity and hygiene of your incubator:
- Cleaning: After each incubation cycle, unplug the incubator and allow it to cool. Remove the egg tray and clean all internal surfaces with a damp cloth and a mild, non-toxic disinfectant. Ensure all components are completely dry before reassembly or storage. Do not use abrasive cleaners or harsh chemicals.
- Water Channels: Periodically clean the water channels and tubes to prevent algae or mineral buildup.
- Storage: When not in use, store the incubator in a clean, dry, and cool place, away from direct sunlight and extreme temperatures.
Troubleshooting
Refer to this section for common issues and their solutions:
| Problem | Possible Cause | Solution |
|---|---|---|
| Incubator does not power on | Loose power connection, faulty outlet, discharged backup battery. | Check all power connections. Test the outlet with another device. Ensure 12V backup battery is charged if in use. |
| Temperature is too high/low | Incorrect temperature setting, incubator placed in a drafty or hot area. | Verify temperature setting. Relocate incubator to a stable environment. Allow time for temperature to stabilize. |
| Humidity is too high/low | Water bottles empty, improper connection of humidity tubes, excessive ventilation. | Refill water bottles. Check all humidity tube connections for leaks or blockages. Ensure incubator lid is properly sealed. |
| Eggs are not turning | Egg turning motor obstructed, eggs improperly placed. | Ensure no debris is blocking the turning mechanism. Reposition eggs correctly on the rollers. |
| Poor hatch rate | Inconsistent temperature/humidity, infertile eggs, improper egg storage before incubation. | Review and maintain stable incubation parameters. Ensure eggs are fertile and stored correctly (e.g., 10-15°C, 70-75% humidity, turned daily). |
Specifications
| Brand | Fudajo |
| Model Number | 65584 |
| Capacity | Up to 15 eggs (chicken, duck, goose, quail, pigeon) |
| Power | 40 W |
| Input Voltage | DC12V |
| Dimensions (L x W x H) | 33 cm x 26.5 cm x 18.5 cm |
| Item Weight | 1.36 kg |
| Material | Polypropylene |
| Protection Rating | IPX8 (Water resistance) |
| Power Cable Length | 1.5 m |
| Country of Origin | China |

Image: Product dimensions and maximum capacity.
Warranty and Support
The Fudajo 15-Egg Automatic Incubator comes with a manufacturer's warranty against defects in materials and workmanship. Please refer to the warranty card included in your package for specific terms and conditions.
For technical support, troubleshooting assistance, or warranty claims, please contact your retailer or the manufacturer directly. Keep your purchase receipt as proof of purchase.


