
Mars Gaming MCCURVW
Mars Gaming MC-CURV ATX Gaming Case User Manual
Model: MCCURVW
1. Introduction
This manual provides detailed instructions for the installation, operation, and maintenance of your Mars Gaming MC-CURV ATX Gaming Case. The MC-CURV is a compact ATX case designed with a generous interior, combining a modern aesthetic with high thermal performance. It features continuous curved tempered glass panels for a panoramic view of internal components, a dual-chamber system, and advanced connectivity options including USB-C and USB 3.0. It supports water cooling systems up to 240 mm.

Figure 1: Mars Gaming MC-CURV ATX Gaming Case with installed components.
2. Key Features
- Full Curved Tempered Glass: Features a frameless, continuous design with curved tempered glass on the front and side, offering an unobstructed view of your PC's interior.
- Maximum Cooling Support: Accommodates up to 7x 120mm fans and supports water cooling systems up to 240mm (maximum dimensions: 305x120x52mm). CPU coolers up to 165mm high are supported, ensuring efficient thermal management.
- Dual Chamber Structure: An internal dual-chamber system separates the power supply and storage drives from the main components, improving cable management, simplifying installation, and optimizing airflow.
- Optimized Interior: Compatible with ATX, MicroATX, and Mini-ITX motherboards. Supports GPUs up to 334mm in length and 155mm in width. Includes 7 expansion slots, a cable management system, and a magnetic dust filter on the top panel.
- Comprehensive Connectivity: Features front panel USB-C (USB 3.0 transfer speed), USB 3.0, USB 2.0, and HD audio/microphone ports for convenient peripheral access.
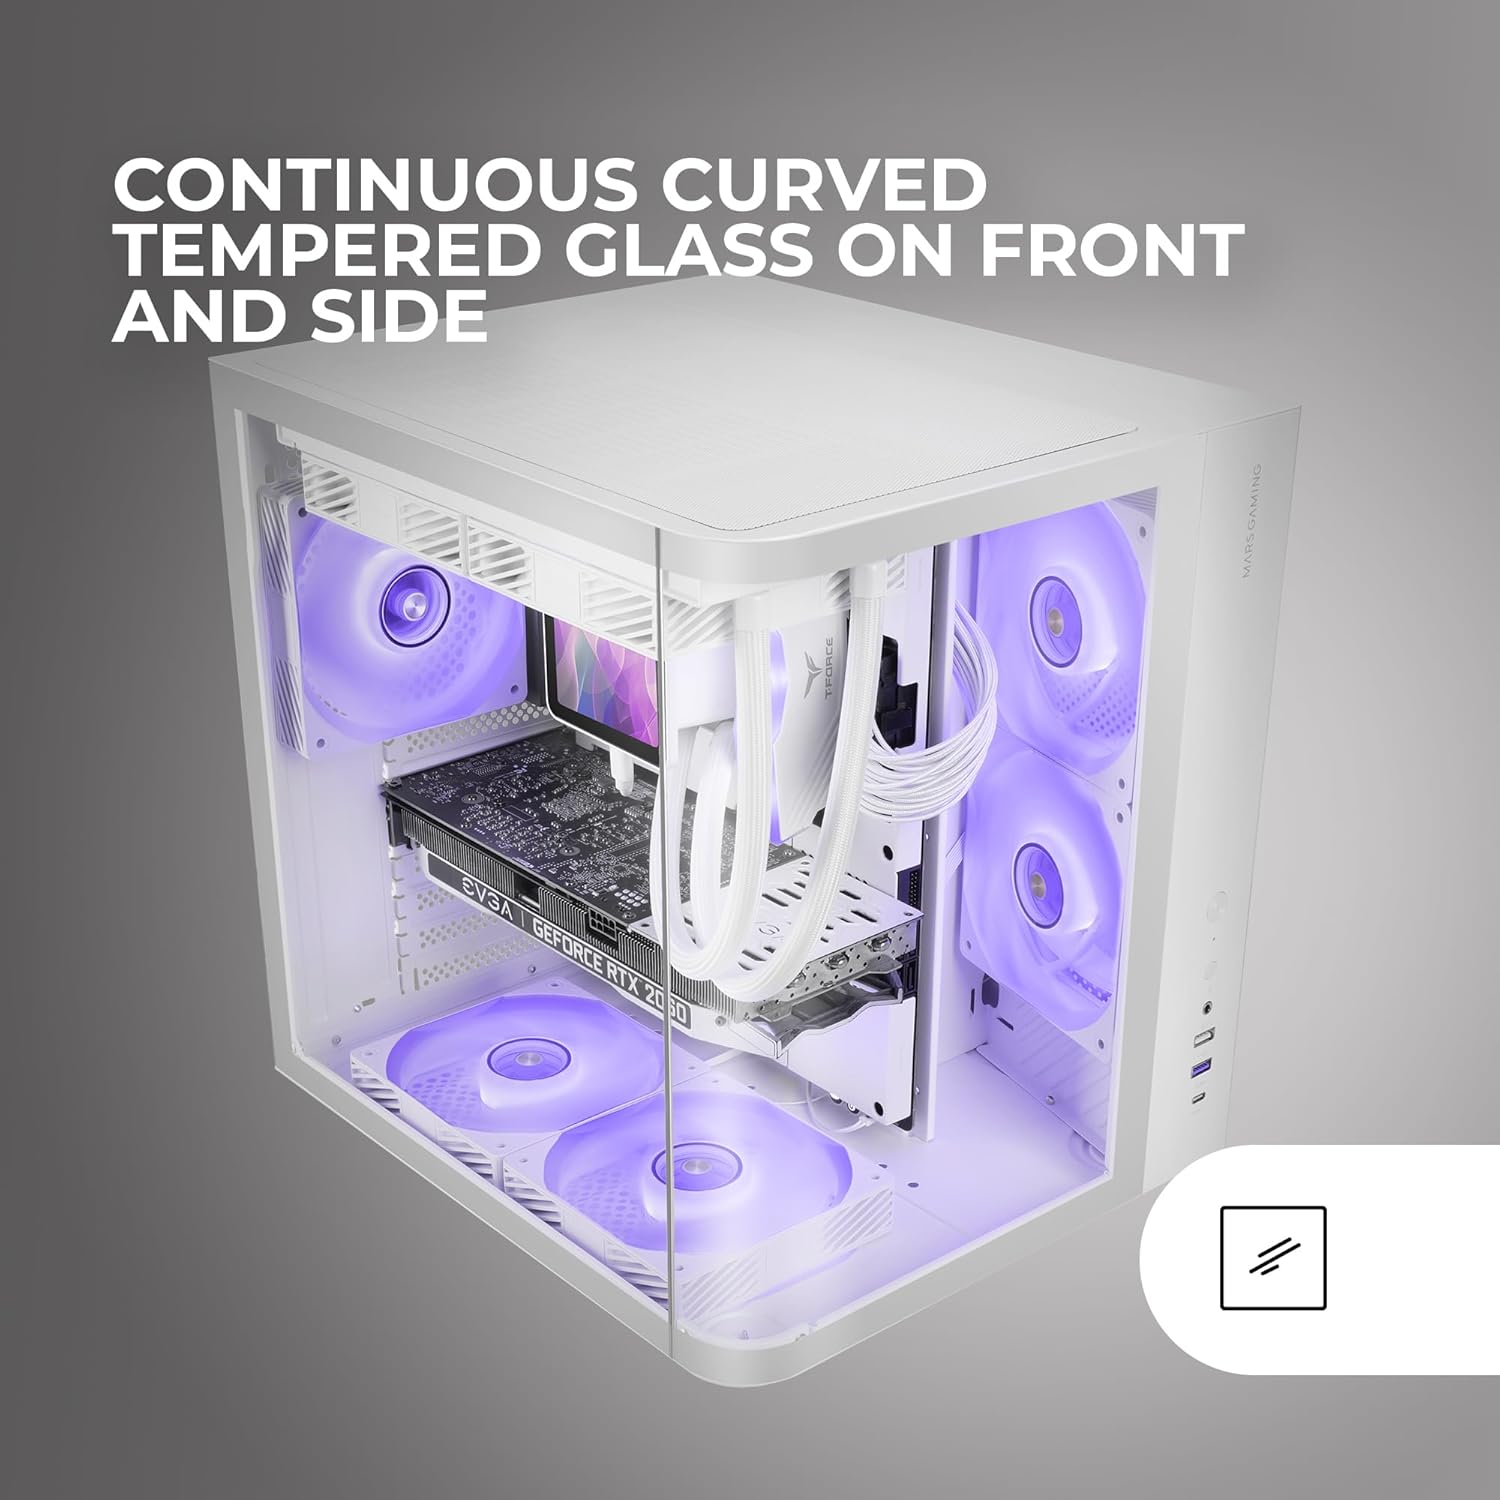
Figure 2: Continuous curved tempered glass design.

Figure 3: Dual-chamber structure for optimized component separation.

Figure 4: Compact ATX format for versatile builds.

Figure 5: Advanced USB-C and USB 3.0 connectivity ports.
3. Case Components Overview
The Mars Gaming MC-CURV case includes the following primary components:
- Main Chassis (Mid Tower)
- Curved Tempered Glass Front Panel
- Curved Tempered Glass Side Panel
- Top Panel with Magnetic Dust Filter
- Front I/O Panel (USB-C, USB 3.0, USB 2.0, HD Audio, Microphone, Power, Reset)
- Accessory Box (screws, standoffs, cable ties)

Figure 6: Empty MC-CURV case, illustrating its internal layout.
4. Setup and Installation
Before beginning installation, ensure your workspace is clean and static-free. Refer to your motherboard and component manuals for specific installation details.
4.1. Preparing the Case
- Carefully remove the case from its packaging.
- Place the case on a stable, flat surface.
- Remove the tempered glass side panel by unscrewing the thumb screws (if applicable) or releasing the latch mechanism.
4.2. Motherboard Installation
- Install the I/O shield into the motherboard tray opening from the inside of the case.
- Align the motherboard with the pre-installed standoffs. Ensure all screw holes on the motherboard match the standoffs.
- Secure the motherboard using the provided screws. Do not overtighten.
4.3. Power Supply Unit (PSU) Installation
- Locate the PSU mounting area in the dual chamber (typically at the bottom rear).
- Slide the PSU into position, ensuring the fan faces the designated intake (usually downwards).
- Secure the PSU to the case using the provided screws from the rear.
4.4. Storage Drive Installation
The MC-CURV case provides dedicated mounting points for 2.5" SSDs and 3.5" HDDs. Refer to the case's internal structure for specific drive cage locations and mounting methods.
4.5. Graphics Card (GPU) and Expansion Card Installation
- Remove the necessary expansion slot covers from the rear of the case.
- Carefully insert the GPU or expansion card into the appropriate PCIe slot on the motherboard.
- Secure the card with the provided screw or latch mechanism.
4.6. Cooling System Installation (Fans/Water Cooling)
The case supports up to 7x 120mm fans and water cooling radiators up to 240mm. Install fans and radiators in designated mounting points (top, rear, bottom, side) according to your cooling configuration.
4.7. Cable Management
Utilize the dual-chamber design and cable routing cutouts to neatly organize cables behind the motherboard tray. This improves airflow and aesthetics.
5. Operating the Case
5.1. Front Panel Connectivity
The front I/O panel provides convenient access to:
- Power Button: To turn the system on/off.
- Reset Button: To restart the system.
- USB-C Port: For high-speed data transfer (USB 3.0 speeds) with compatible devices.
- USB 3.0 Port: For high-speed data transfer.
- USB 2.0 Port: For standard data transfer and peripheral connection.
- HD Audio Jacks: For headphone and microphone connections.
5.2. Airflow and Cooling
Ensure proper fan configuration for optimal airflow. Typically, front and bottom fans act as intake, while rear and top fans act as exhaust. The magnetic dust filter on the top panel helps prevent dust accumulation.
6. Maintenance
Regular maintenance helps ensure the longevity and performance of your PC components.
6.1. Dust Cleaning
- Periodically remove the magnetic dust filter from the top panel and clean it with compressed air or water. Ensure it is completely dry before reattaching.
- Use compressed air to clean dust from internal components, paying attention to fan blades, heatsinks, and radiator fins.
6.2. Glass Panel Cleaning
Clean the tempered glass panels with a soft, lint-free cloth and a non-abrasive glass cleaner. Avoid harsh chemicals that could damage the glass or coatings.
7. Troubleshooting
If you encounter issues, consider the following common solutions:
- System Not Powering On:
- Check all power connections, including the PSU to the wall outlet, PSU to motherboard (24-pin and CPU 8-pin), and front panel power switch header to the motherboard.
- Ensure the PSU switch is in the 'ON' position.
- Front Panel USB/Audio Not Working:
- Verify that the USB 3.0, USB 2.0, USB-C, and HD Audio headers are correctly connected to the motherboard.
- Overheating Components:
- Ensure all case fans are spinning and correctly oriented for optimal airflow.
- Clean any dust accumulation from fans and filters.
8. Specifications
| Feature | Specification |
|---|---|
| Model Name | MCCURVW |
| Case Type | Mid Tower |
| Motherboard Compatibility | ATX, MicroATX, Mini-ITX |
| Material | Tempered Glass, Steel |
| Color | White |
| Product Dimensions (LxWxH) | 13.5 x 11.26 x 13.9 inches (34.3 x 28.6 x 35.3 cm) |
| Item Weight | 10.14 pounds (4.61 kg) |
| GPU Length Clearance | Up to 334 mm |
| GPU Width Clearance | Up to 155 mm |
| CPU Cooler Height Clearance | Up to 165 mm |
| Expansion Slots | 7 |
| Fan Support | Up to 7x 120mm |
| Radiator Support | Up to 240mm (Max. 305x120x52mm) |
| Front I/O Ports | 1x USB-C (USB 3.0 speed), 1x USB 3.0, 1x USB 2.0, HD Audio, Mic |
| Power Supply Mounting Type | Bottom Mount |
9. Warranty and Support
Mars Gaming products are manufactured to high-quality standards. For warranty information, please refer to the warranty card included with your product or visit the official Mars Gaming website. For technical support, product registration, or to download the latest drivers and software, please visit the Mars Gaming official support page or contact their customer service directly.
Mars Gaming Official Website: www.marsgaming.eu
Related documentsMCCURVW


Ask a question about this manual
Ask about setup, troubleshooting, compatibility, parts, safety, or missing instructions. Manuals+ will review the question and use this page’s manual context to help answer it.