
1. Introduction
This manual provides essential information for the safe and effective operation of your YESWELDER CUT-60DS PRO 4-In-1 Plasma Cutter. This multifunctional unit is designed for various metal cutting tasks, including plate cutting, grid cutting, gouging, and marking. Please read this manual thoroughly before use and retain it for future reference.

Figure 1.1: YESWELDER CUT-60DS PRO Plasma Cutter and included accessories.
2. Safety Instructions
Operating plasma cutting equipment can be hazardous. Always follow safety precautions to prevent injury or damage. This machine features IP21 water rating protection and safeguards against overload and overheating.
2.1 General Safety
- Ensure the work area is well-ventilated and free from flammable materials.
- Keep children and unauthorized personnel away from the operating area.
- Always disconnect power before performing maintenance or changing consumables.
2.2 Personal Protective Equipment (PPE)
- Wear a welding helmet with appropriate shade for plasma cutting to protect eyes and face.
- Use flame-resistant clothing, gloves, and safety shoes.
- Protect bystanders with welding screens or non-flammable barriers.
2.3 Electrical Safety
- Ensure the power supply matches the machine's requirements (110V/220V).
- Use properly grounded outlets and avoid using damaged cables.
- Do not operate in wet conditions or with wet hands.

Figure 2.1: Safety features including overheating, water rating (IP21), overload protection, and electrostatic shock prevention.
3. Product Overview
3.1 Machine Components

Figure 3.1: Overview of the plasma cutter's main components.
- Digital Panel: Displays operational parameters.
- Central Connector: For connecting the cutting torch.
- Ground Clamp Connector: For connecting the ground clamp.
- Power Cable: Connects to the power supply.
- Power Switch: Turns the unit on/off.
- Air Compressor Filter: Filters incoming air supply.
- Air Pressure Adjustment Button: Adjusts air pressure (rotate '+' to augment, '-' to diminish).
- Cooling Fan: Provides cooling for the internal components.
3.2 Digital Control Panel
The digital display provides real-time information on air pressure, voltage, and current, and indicates error codes if issues arise.

Figure 3.2: Detailed view of the digital control panel.
- Cut Mode Button: Selects different cutting modes.
- Steps Mode Button: Toggles between 2T and 4T operation.
- Unit Button: Changes units for displayed parameters (e.g., PSI/BAR).
- Post Flow Button: Adjusts post-flow time for cooling.
- Center Knob: Used for adjusting current and other parameters.
- Digital Panel: Displays all operational values.
4. Setup
Before operating, ensure all components are correctly connected.
4.1 Included Accessories

Figure 4.1: Standard accessories included with the CUT-60DS PRO.
- CUT-60DS PRO Welder
- Ground Clamp
- Air Compressor Filter
- PC10-02 Air Connector
- Cutting Torch Consumables
- 220V to 110V Adapter
- Gas Hose
- IPT40 Plasma Cutting Torch
4.2 Connecting Air Supply
The unit features a built-in air pressure regulator, requiring no additional installation.
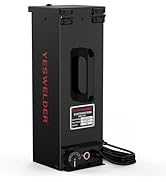
Figure 4.2: Connecting the air supply to the built-in regulator.
- Connect the PC10-02 Air Connector to the designated port on the machine.
- Attach your 1/4" NPT air line to the PC10-02 connector.
- Ensure a clean, dry air supply is connected to the unit.
4.3 Connecting Torch and Ground Clamp
- Connect the IPT40 Plasma Cutting Torch to the central connector on the front panel.
- Connect the ground clamp cable to the ground clamp connector.
- Securely attach the ground clamp to the workpiece, ensuring good electrical contact.
5. Operation
The CUT-60DS PRO offers 4-in-1 functionality and a non-touch pilot arc for efficient cutting.
5.1 4-In-1 Multifunctionality
This plasma cutter supports Plate Cutting, Grid Cutting, Gouging, and Marking.

Figure 5.1: Examples of the 4-in-1 multifunctional capabilities.
- Plate Cutting: Standard cutting of flat metal sheets.
- Grid Cutting: Cutting through expanded metal or grates.
- Gouging: Removing metal from a surface.
- Marking: Creating surface marks on metal.
5.2 Non-Touch Pilot Arc
The IPT40 torch utilizes non-touch pilot arc technology, allowing cutting without direct contact between the torch tip and the workpiece. This improves cutting quality and extends consumable life, especially on rough, painted, or rusty surfaces.

Figure 5.2: The IPT40 Plasma Cutting Torch with non-touch pilot arc.
5.3 2T/4T Function
The 2T/4T function allows for different trigger control methods.
Figure 5.3: Explanation of 2T and 4T trigger modes.
- 2T (Two-Touch): Press and hold the trigger to start cutting; release to stop. Suitable for short, precise cuts.
- 4T (Four-Touch): Press and release the trigger to start cutting; press and release again to stop. Ideal for long, continuous cuts to reduce operator fatigue.
5.4 Adjusting Cutting Parameters
Use the digital panel and center knob to adjust current, air pressure, and post-flow time according to the material thickness and type.

Figure 5.4: Recommended post-flow times for consumable durability.
- Current: Adjust based on material thickness. Higher current for thicker materials.
- Air Pressure: Adjust for optimal cut quality. Refer to the digital display for real-time PSI/BAR readings.
- Post-Flow Time: Customize the cooling time from 10 to 90 seconds to maximize consumable durability.
6. Maintenance
Regular maintenance ensures optimal performance and longevity of your plasma cutter.
6.1 General Cleaning
- Keep the machine clean and free from dust and metal particles. Use compressed air to blow out internal components periodically.
- Clean the exterior with a dry cloth. Avoid using solvents.
6.2 Consumable Replacement
Regularly inspect and replace worn-out torch consumables (nozzles, electrodes, shield cups) to maintain cut quality and prevent damage to the torch.
6.3 Air Filter Maintenance
Check the air compressor filter regularly and drain any accumulated moisture. Replace the filter element if it becomes clogged or damaged.
7. Troubleshooting
This section addresses common issues you might encounter. The digital display will show error codes if a problem is detected.
| Problem | Possible Cause | Solution |
|---|---|---|
| No arc, only air flow | Worn consumables; insufficient air pressure; poor ground connection; power issue. | Check and replace consumables; verify air pressure (52 PSI recommended); ensure ground clamp is secure; check power supply. |
| Poor cut quality | Incorrect cutting speed; incorrect current/air pressure settings; worn consumables. | Adjust cutting speed; optimize current and air pressure settings; replace consumables. |
| Machine shuts down (Overload/Overheat) | Exceeded duty cycle; insufficient ventilation; high ambient temperature. | Allow machine to cool down; ensure proper ventilation; reduce cutting time. |
| Digital display shows error code | Internal fault detected. | Refer to the specific error code in the full user manual (if available) or contact customer support. |
8. Specifications
Technical specifications for the YESWELDER CUT-60DS PRO Plasma Cutter.

Figure 8.1: Detailed technical specifications.
| Feature | Detail |
|---|---|
| Model | CUT-60DS PRO |
| Input Voltage (U1) | 110V / 220V (Auto-sensing) |
| Max Input Current (I1max) | 45A @ 110V, 42A @ 220V |
| Output Current (I2) | 60A Max |
| Duty Cycle (60%) | 40A @ 110V, 46A @ 220V |
| Ideal Clean Cut | 5/16" (8mm) @ 110V, 3/4" (20mm) @ 220V |
| Maximum Cut | 1/2" (12mm) @ 110V, 1" (25mm) @ 220V |
| Cooling Mode | Fan Cooling |
| Insulation Grade | F |
| Protection Class | IP21S |
| Package Dimensions | 19 x 13.75 x 11 inches |
| Item Weight | 21.75 Pounds |
9. Warranty and Support
YESWELDER provides a 1-year warranty for this product. For technical assistance, troubleshooting, or warranty claims, please contact YESWELDER customer support.
- Warranty Period: 1 Year
- Customer Support: Available 24/7
- Contact Information: Refer to the YESWELDER official website or your purchase documentation for current contact details.