
maXpeedingrods Air Suspension & Compressor Kit for Dodge Ram 2500/3500 4WD
User Manual: maXpeedingrods Rear Air Suspension Bags Kit & On Board Air Compressor Kit
Brand: maXpeedingrods | Model: Air Suspension & Compressor Kit for Dodge Ram 2500/3500 4WD
1. Introduction
This manual provides essential information for the installation, operation, and maintenance of your maXpeedingrods 5000 lbs Rear Air Suspension Bags Kit and On Board Air Compressor Kit. This system is designed to enhance your vehicle's stability and comfort when hauling heavy loads or towing a trailer, eliminating squat and reducing trailer sway. Please read this manual thoroughly before installation and use to ensure proper function and safety.

Image 1.1: Overview of the maXpeedingrods Air Suspension and Compressor Kit, showing all included components.
2. Product Components
The maXpeedingrods Air Suspension and Compressor Kit includes the following main components:
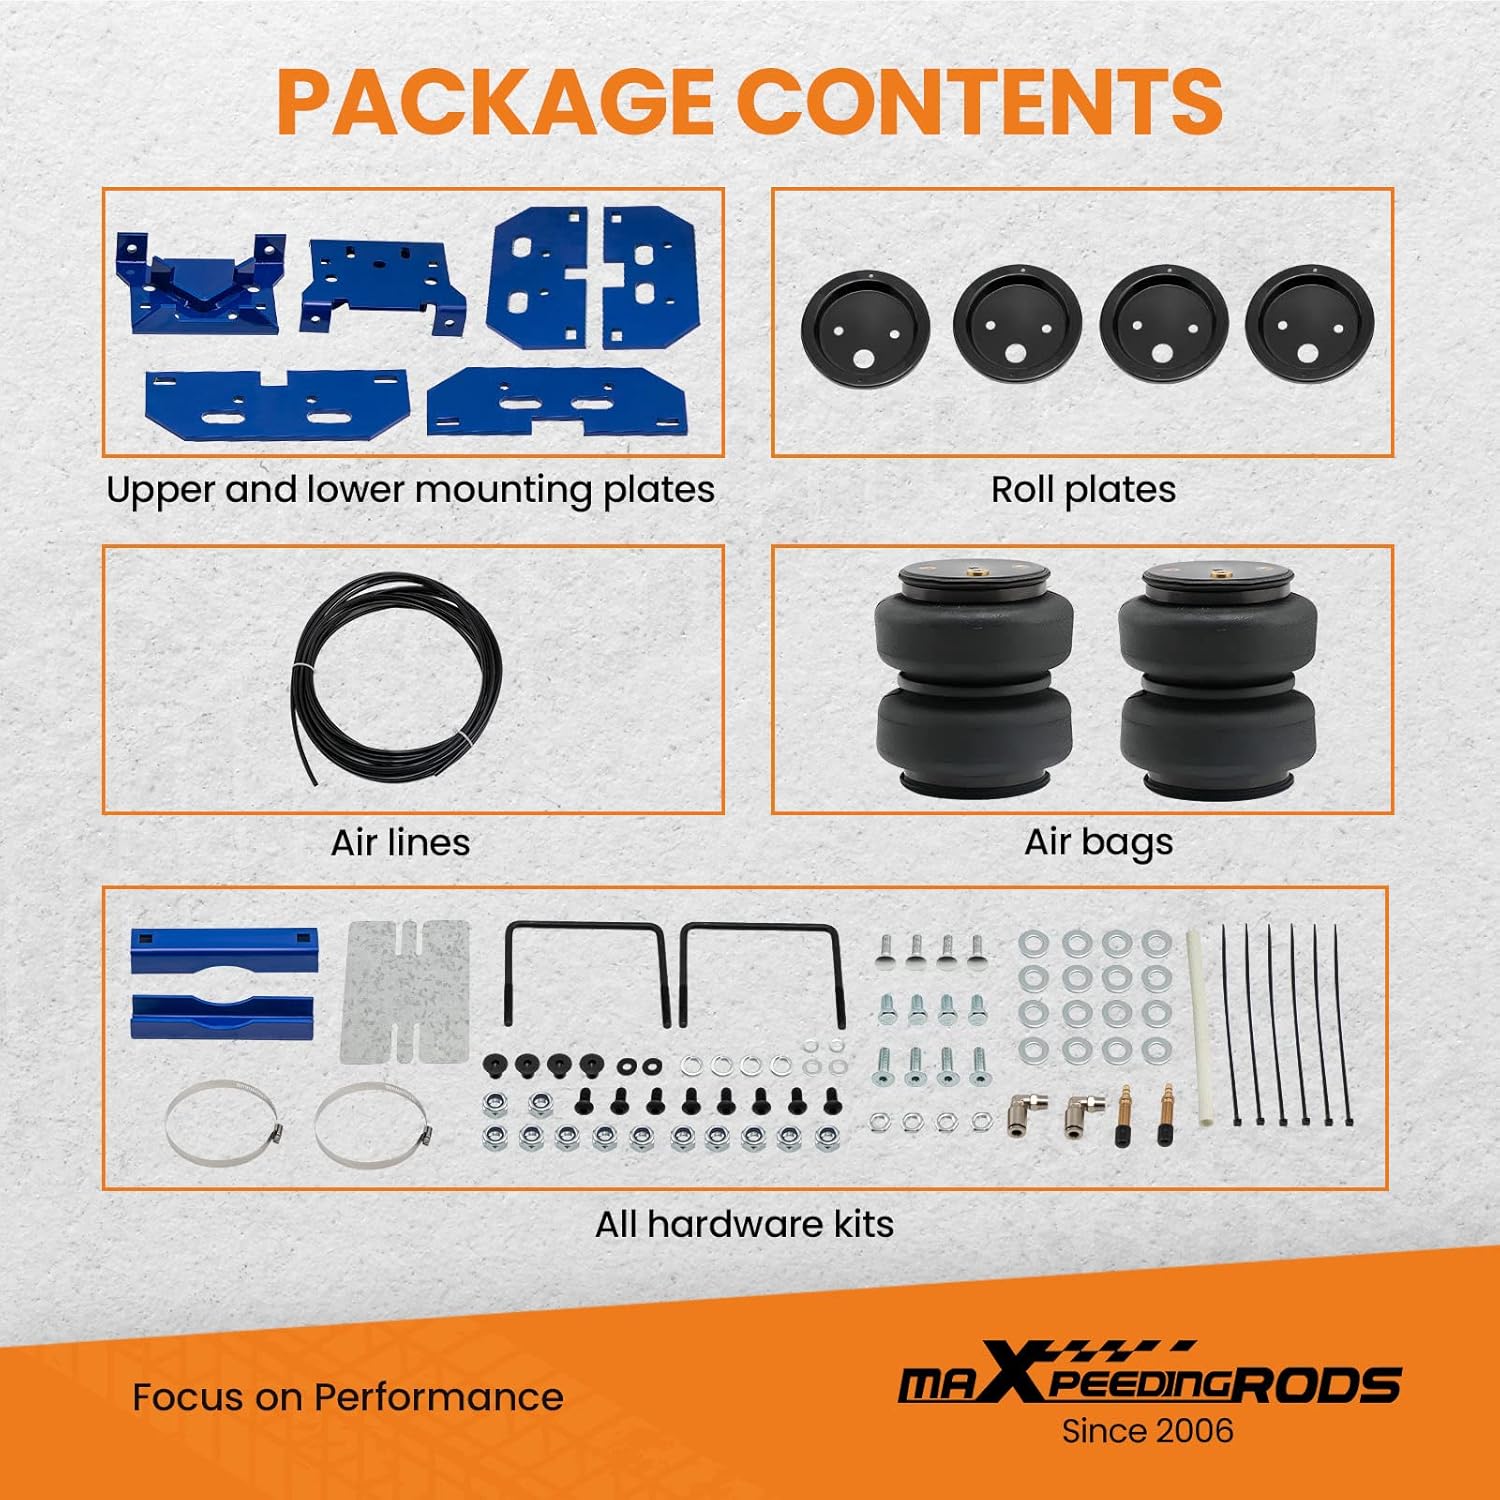
Image 2.1: Detailed view of the kit's package contents.
Air Suspension Bag Components:
- Air Bags (2)
- Upper and Lower Mounting Plates
- Roll Plates
- Air Lines
- All necessary Hardware Kits (bolts, nuts, washers, fittings, zip ties, etc.)
On-Board Air Compressor Kit Components:
- 12V MXR Air Compressor (Black)
- Gauge Panel (with push buttons for inflation/deflation)
- Air Line (6M, ̘6*1)
- Wire Harness (2.5 M, black)
- Wire Harness (8.5 M, red)
- Relay Harness (1 M)
- T Connectors (3)
- Mounting Hardware Kit
3. Specifications
Air Spring Specifications:
| Condition | Brand New |
| Drilling Required | NO |
| Minimum PSI | 5 PSI |
| Maximum PSI | 100 PSI |
| Internal Jounce Bumper | Included |
| Placement on Vehicle | Rear left and right |
| Load Capacity | Up to 5000 LBS |
| Design Height | 180 mm |
| Stroke | 100 mm |
| Max. Extended | 200 mm |
| Min. Compressed | 100 mm |

Image 3.1: Air spring dimensions and specifications.

Image 3.2: The internal jounce bumper prevents abrupt bottoming-out of the suspension at full compression.
Air Compressor Specifications:
- Type: 12V MXR Air Compressor
- Max Air Pressure: 100 PSI
- Recommended Working Pressure: 5-70 PSI
- Design: Compact with waterproof case

Image 3.3: The onboard air compressor features a compact design and waterproof casing for durability.
4. Applications and Compatibility
This kit is designed for the following vehicle applications:
- For Dodge RAM 2500 4WD (2011-2013)
- For Dodge RAM 2500 Pickup 4WD (2003-2010)
- For Dodge RAM 3500 4WD (2011-2018)
- For Dodge RAM 3500 Pickup 4WD (2003-2010)
- For RAM 2500 4WD (2011-2013)
- For RAM 3500 4WD (2011-2018)
Important Compatibility Notes:
- Fits single rear wheel (SRW) and dual rear wheel (DRW) models.
- Fits all models without a fifth-wheel hitch.
- Fits most side mount fifth wheel hitch applications.
- Does not fit cab & chassis applications.
- Fits 4WD models only.
5. Safety Information
Always observe the following safety precautions during installation and operation:
- Professional Installation Recommended: Due to the complexity of vehicle suspension systems, professional installation by a qualified mechanic is highly recommended.
- Vehicle Support: Always ensure the vehicle is properly supported on jack stands or a lift before working underneath it. Never rely solely on a jack.
- Personal Protective Equipment: Wear appropriate safety glasses, gloves, and other personal protective equipment (PPE) during installation.
- Air Pressure: Never exceed the maximum recommended air pressure of 100 PSI for the air springs. Maintain a minimum of 5 PSI at all times to prevent damage.
- Electrical Connections: Ensure all electrical connections are secure and properly insulated to prevent short circuits and electrical hazards. Disconnect the vehicle's battery before working on electrical components.
- Air Line Routing: Route air lines away from sharp edges, hot exhaust components, and moving parts to prevent damage and leaks.
- Load Capacity: Do not exceed the vehicle's Gross Vehicle Weight Rating (GVWR) or Gross Axle Weight Rating (GAWR), even with the air suspension installed. The air suspension assists with leveling and ride quality, but does not increase the vehicle's load-carrying capacity beyond its factory ratings.
6. Setup and Installation
This kit is designed for a straightforward installation process with no drilling required for the air springs. However, proper routing of air lines and electrical wiring for the compressor is crucial.

Image 6.1: Simplified installation diagram and approximate inflation times for reference.
General Installation Steps (Consult a professional if unsure):
- Prepare Vehicle: Park the vehicle on a level surface, engage the parking brake, and block the wheels. Lift the rear of the vehicle and support it securely with jack stands. Remove the rear wheels if necessary for access.
- Remove Existing Components: Follow vehicle-specific instructions to remove any existing bump stops or components that interfere with air bag installation.
- Install Air Springs: Position the air springs with their mounting plates according to the vehicle-specific instructions. Secure them using the provided hardware. Ensure the air bags are properly seated and aligned.
- Route Air Lines: Connect the air lines to the air springs. Route the air lines away from hot exhaust, sharp edges, and moving suspension components. Secure them with zip ties.
- Mount Compressor and Gauge Panel: Choose a suitable location for the 12V MXR Air Compressor, ideally protected from road debris and moisture (e.g., under the truck bed, inside the frame rail). Mount the gauge panel inside the vehicle's cabin in an accessible location.
- Wire Compressor: Connect the compressor to the vehicle's electrical system according to the wiring diagram provided with the kit. Ensure proper fusing and relay connections. Connect the gauge panel wiring to the compressor.
- Connect Air Lines to Compressor: Connect the routed air lines from the air springs to the compressor's manifold or T-connectors, and then to the gauge panel. Ensure all connections are tight and leak-free.
- Test System: Once all components are installed, lower the vehicle. Inflate the air springs to the recommended operating pressure (5-70 PSI) and check for any air leaks using a soapy water solution. Verify the compressor and gauge panel function correctly.
7. Operating Instructions
The on-board air compressor system allows for convenient adjustment of air pressure from the driver's seat.

Image 7.1: Control the air pressure conveniently from the driver's seat using the gauge panel.

Image 7.2: The single path system ensures even pressure distribution, raising both springs simultaneously.

Image 7.3: The system provides load-leveling capacity up to 5000 lbs, improving stability when hauling.
Adjusting Air Pressure:
- Inflation: To increase air pressure, press the 'Up' button on the gauge panel. The compressor will activate and inflate the air springs. Monitor the gauge to reach the desired PSI.
- Deflation: To decrease air pressure, press the 'Down' button on the gauge panel. Air will be released from the springs.
- Recommended Pressure: Maintain a minimum of 5 PSI in the air springs at all times, even when unloaded. For loaded conditions, adjust the pressure between 5 PSI and 70 PSI to achieve a level ride and optimal comfort. Never exceed 100 PSI.
- Single Path System: This system inflates both air springs simultaneously, ensuring even pressure distribution and a balanced ride.
8. Maintenance
Regular maintenance helps ensure the longevity and optimal performance of your air suspension system:
- Inspect Air Lines: Periodically check all air lines for kinks, chafing, or signs of wear. Ensure they are securely fastened and away from heat sources or moving parts.
- Check for Leaks: At least once a month, or before long trips, check the entire system for air leaks using a soapy water solution. Spray connections, air bags, and fittings. Bubbles indicate a leak.
- Clean Compressor: Keep the air compressor free of dirt and debris. While it has a waterproof case, excessive buildup can affect performance.
- Maintain Minimum Pressure: Always maintain at least 5 PSI in the air springs to prevent damage to the internal components and rubber.
- Inspect Air Bags: Visually inspect the air bags for any signs of cracking, dry rot, or physical damage.
9. Troubleshooting
If you encounter issues with your air suspension system, refer to the following common problems and solutions:
| Problem | Possible Cause | Solution |
|---|---|---|
| Air springs do not inflate or deflate | No power to compressor; Blown fuse; Loose electrical connection; Compressor malfunction; Air line blockage. | Check vehicle's fuse box; Verify all electrical connections are secure; Test compressor for power; Inspect air lines for kinks or blockages. |
| Air springs lose pressure over time | Air leak in system (fittings, air lines, air bag); Damaged air bag. | Spray soapy water on all connections and air bags to locate leaks. Tighten fittings or replace damaged components. |
| Compressor runs but air springs do not inflate | Air line disconnected or severely kinked; Compressor not producing sufficient pressure. | Check all air line connections; Inspect air lines for severe kinks; Consult a professional if compressor output is low. |
| Vehicle remains unlevel after inflation | Uneven load distribution; One air spring under-inflated or leaking. | Adjust load distribution; Check individual air spring pressures and inspect for leaks on the lower side. |
If you are unable to resolve an issue using this guide, please contact maXpeedingrods customer support or a qualified automotive technician.
10. Warranty and Support
For specific warranty information regarding your maXpeedingrods Air Suspension Bags Kit and On Board Air Compressor Kit, please refer to the warranty card included with your product or visit the official maXpeedingrods website. Warranty terms typically cover manufacturing defects.
For technical support, installation assistance, or parts inquiries, please contact maXpeedingrods customer service through their official channels. Have your product model and purchase information ready when contacting support.
Online Support: Visit the maXpeedingrods Store on Amazon
Ask a question about this manual
Ask about setup, troubleshooting, compatibility, parts, safety, or missing instructions. Manuals+ will review the question and use this page’s manual context to help answer it.