
1. Introduction
This manual provides essential information for the safe and efficient operation of your Anjfylque 12000W-48-WIFI Hybrid Solar Inverter. Please read this manual thoroughly before installation and use, and retain it for future reference.
The Anjfylque 12000W-48-WIFI is a 12KW DC 48V Pure Sine Wave Hybrid Inverter designed for both off-grid and grid-tie solar systems. It integrates a 160A battery charger and dual MPPT controllers with a maximum input of 500VDC. The inverter supports 120V/240V split-phase and 120V single-phase output. It includes built-in WiFi for real-time monitoring via a mobile application.
Key Features:
- Integrated System: Combines inverter, 160A battery charger, and dual MPPT solar charge controllers (Max 500VDC).
- Flexible Output: Supports 120V/240V split-phase and 120V single-phase configurations.
- Parallel Capability: Expandable up to 72KW with 6-unit parallel connection for single-phase, split-phase, or 3-phase systems.
- Advanced Protection: Features multi-layer protection including PV input over-voltage/current, AC input over-voltage, battery over-voltage, overload, and short-circuit safeguards.
- Multiple Operating Modes: Four charging modes (Hybrid, Utility Priority, Solar Priority, Only Solar) and four output modes (Utility Priority, Solar-Utility Hybrid, Solar Priority, Inverter Priority).
- Time Slot Management: Allows scheduled charging and discharging based on electricity tariffs.
- Battery Compatibility: Compatible with 48V AGM, Gel, Flooded, and Lithium batteries. Supports battery-free operation and lithium activation.
- Remote Monitoring: Built-in WiFi for real-time system monitoring via a dedicated mobile application.
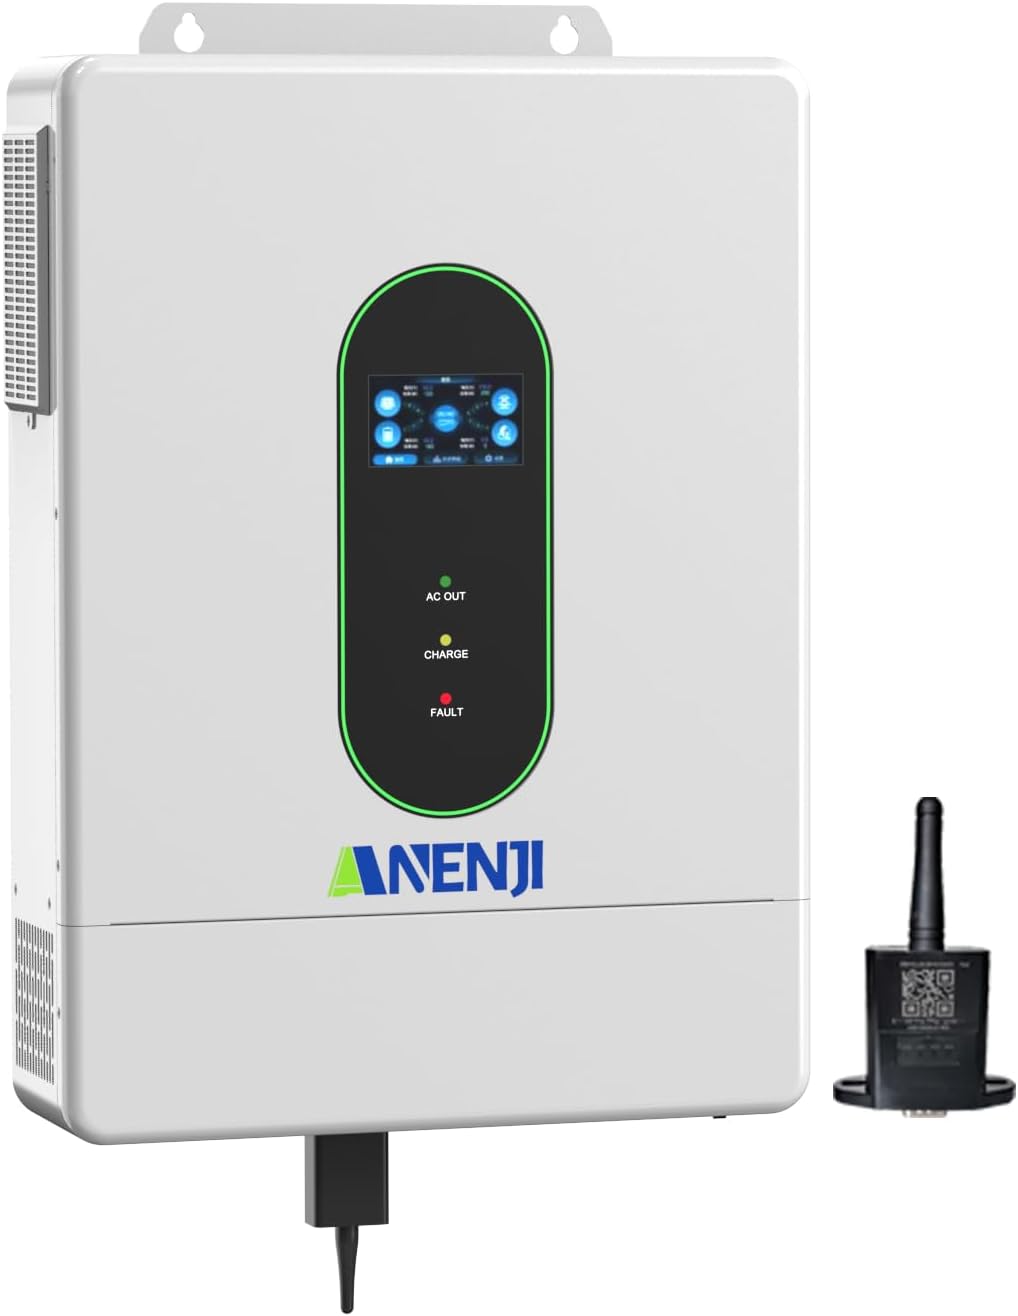
Figure 1: Anjfylque 12000W-48-WIFI Hybrid Solar Inverter with included WiFi module.

Figure 2: Overview of the inverter's comprehensive protection features, including output short circuit, overload, PV reverse polarity, grid overvoltage, battery over/under voltage, over-temperature, anti-feed-in, isolation, and surge protection.
2. Setup and Installation
2.1 Unpacking and Inspection
Upon receiving the inverter, carefully unpack the unit and inspect it for any damage that may have occurred during transit. Ensure all components listed in the packing list are present.

Figure 3: Included product accessories: Instruction manual, installation toolkit, parallel cable, anti-reverse current CTs, and WiFi module.
2.2 Mounting the Inverter
Mount the inverter in a well-ventilated area, away from direct sunlight, heat sources, and flammable materials. Ensure adequate clearance around the unit for proper airflow. The inverter should be mounted vertically on a sturdy surface.

Figure 4: Illustration of the inverter's compact design facilitating easy wall installation with proper ventilation space.
2.3 Wiring Connections
All wiring should be performed by a qualified electrician in accordance with local and national electrical codes. Ensure the inverter is disconnected from all power sources before making any connections.

Figure 5: Product interface overview showing: 1. Display screen, 2. Pilot lamp, 3. AC output port, 4. AC input port, 5. WiFi port (optional), 6. USB communication port, 7. RS485-1 communication port, 8. RS485-2/CAN communication port, 9. Dry contact port, 10. CT sensing for self-consumption (optional), 11. ON/OFF rocker switch, 12. Photovoltaic (PV) parameters, 13. Battery parameters, 14. Parallel communication port (parallel module only), 15. AC input breaker, 16. Grounding screw hold.

Figure 6: Professional interface guide with precise connections for optimal performance, including AC Output, AC Input, WiFi, USB, RS485-1, RS485-2/CAN, Dry Contact, CT Sampling, Battery Terminals, PV Input Terminals, ON/OFF Switch, Grounding Terminal, AC Input Breaker, and Parallel Communication Port.
2.3.1 Battery Connection
Connect the 48V battery bank to the designated battery terminals. Ensure correct polarity. The inverter is compatible with AGM, Gel, Flooded, and Lithium batteries. For lithium batteries, ensure proper communication setup via CAN/USB/RS485 if using ANENJI batteries.
2.3.2 PV Input Connection
Connect the solar panel array to the PV input terminals. Observe the maximum open-circuit voltage (500VDC) and current ratings for the dual MPPT controllers. Ensure proper grounding of the PV array.
2.3.3 AC Input/Output Connection
Connect the utility grid (if applicable) to the AC input port and your home loads to the AC output port. The inverter supports 120V/240V split-phase and 120V single-phase configurations. Ensure appropriate circuit breakers are installed.
2.4 Parallel Operation
The inverter supports parallel operation of up to 6 units for a maximum output of 72KW. This allows for single-phase, 120V/240V split-phase, or 208V 3-phase configurations (with 3 or more units). Refer to the detailed wiring diagrams for parallel connections.

Figure 7: Versatile design showing single-phase (max 6 units for 72KW 120V systems) and split-phase (series and parallel connection for 240V and 120V systems) configurations. Examples include one inverter per phase, two inverters per phase, and up to six inverters in two groups of three parallel.
3. Operating Instructions
3.1 Initial Power-Up
- Ensure all wiring connections are secure and correct.
- Turn on the battery breaker.
- Turn on the PV input breaker.
- Turn on the AC input breaker (if connected to grid).
- Switch the inverter's ON/OFF rocker switch to the "ON" position.
- Observe the display screen for system status and any error messages.
3.2 Display and Control Panel
The inverter features an intuitive LCD display for monitoring and controlling your power system. The display provides real-time data, status alerts, and allows for parameter settings.

Figure 8: Intuitive LCD display showing real-time data (voltage, power, mode), status alerts (fault codes, warnings), easy parameter setting, and operation mode display.
3.3 Operating Modes
The inverter offers flexible charging and output modes to optimize energy management.
3.3.1 Charging Priority Modes
- Hybrid: Utilizes both solar and utility/generator power for charging.
- Utility Priority: Prioritizes utility/generator power for charging.
- Solar Priority: Prioritizes solar power for charging. Utility/generator power is used only when solar is insufficient.
- Only Solar: Charges exclusively from solar power.
3.3.2 Output Priority Modes
- Utility Priority: Prioritizes utility/generator power to supply loads.
- Solar-Utility Hybrid: Uses solar power first, then utility/generator power if solar is insufficient.
- Solar Priority: Prioritizes solar power to supply loads. Battery power is used if solar is insufficient, then utility/generator power.
- Inverter Priority: Prioritizes battery power to supply loads, then solar, then utility/generator.

Figure 9: Setup preferences for Charging Priority (Solar Priority, Solar and AC input, Solar Only) and Load Priority (Solar Priority, AC Priority, DC Priority).
3.4 WiFi Monitoring
The integrated WiFi module allows for remote monitoring and control of the inverter via a mobile application. Registration is required to access this feature. The app provides real-time data, historical reports, and fault notifications.

Figure 10: Wi-Fi monitoring setup, showing the inverter connected to a WiFi module and a user interacting with the mobile application for real-time data and remote customization.

Figure 11: Smart App Management interface, providing real-time monitoring, remote customization, historical data & reports, and fault & alert notifications.
4. Maintenance
Regular maintenance ensures the longevity and optimal performance of your inverter. Always disconnect all power sources before performing any maintenance.
4.1 Routine Checks
- Visual Inspection: Periodically check the inverter for any visible damage, loose connections, or signs of overheating.
- Ventilation: Ensure the ventilation openings are clear of dust and debris to prevent overheating.
- Cable Connections: Verify that all cable connections are tight and free from corrosion.
- Battery Health: Monitor battery voltage and temperature, especially for lead-acid batteries.
4.2 Cleaning
Clean the exterior of the inverter with a dry, soft cloth. Do not use liquid cleaners or solvents. Ensure no moisture enters the unit.
5. Troubleshooting
This section provides solutions for common issues. For problems not listed here, contact technical support.
| Problem | Possible Cause | Solution |
|---|---|---|
| Inverter not powering on | Battery disconnected or low voltage; AC input not present; ON/OFF switch off. | Check battery connections and voltage; verify AC input; ensure ON/OFF switch is on. |
| No AC output | Overload; short circuit; inverter fault; output breaker tripped. | Reduce load; check for short circuits; check inverter display for fault codes; reset output breaker. |
| No solar charging | PV panels not connected; insufficient sunlight; PV input voltage too low/high; MPPT fault. | Check PV connections; ensure adequate sunlight; verify PV voltage within range; check inverter display. |
| WiFi monitoring not working | WiFi module not connected; incorrect network settings; app not registered. | Ensure WiFi module is properly connected; verify network configuration; complete app registration. |
6. Specifications
Technical specifications for the Anjfylque 12000W-48-WIFI Hybrid Solar Inverter.
| Feature | Detail |
|---|---|
| Model Name | 12000W-48-WIFI |
| Rated Power | 12000W |
| System Voltage | 48V DC |
| Output Waveform | Pure Sine Wave |
| MPPT Voltage Range | Up to 500VDC |
| Max MPPT Charger Current | 160A |
| AC Output Voltage | 120V/240V Split-Phase, 120V Single-Phase |
| Parallel Capability | Up to 6 units (72KW total) |
| Battery Compatibility | 48V AGM/Gel/Flooded/Lithium |
| Communication | WiFi, CAN/USB/RS485 |
| Product Dimensions | 12 x 13 x 4.5 inches |
| Item Weight | 26.4 pounds |
| Manufacturer | Anjfylque |
7. Warranty and Support
7.1 Warranty Information
Specific warranty details are typically provided with the product packaging or available from the point of purchase. Please refer to your purchase documentation for the applicable warranty period and terms.
7.2 Technical Support
For technical assistance, troubleshooting beyond this manual, or inquiries regarding parts and service, please contact Anjfylque customer support. Contact information can usually be found on the manufacturer's website or your product documentation.