1. Introduction
This manual provides detailed instructions for the assembly, operation, and maintenance of your Hlivelood 63-inch Farmhouse Coffee Bar Cabinet with LED Light. Please read all instructions carefully before beginning assembly and retain this manual for future reference.
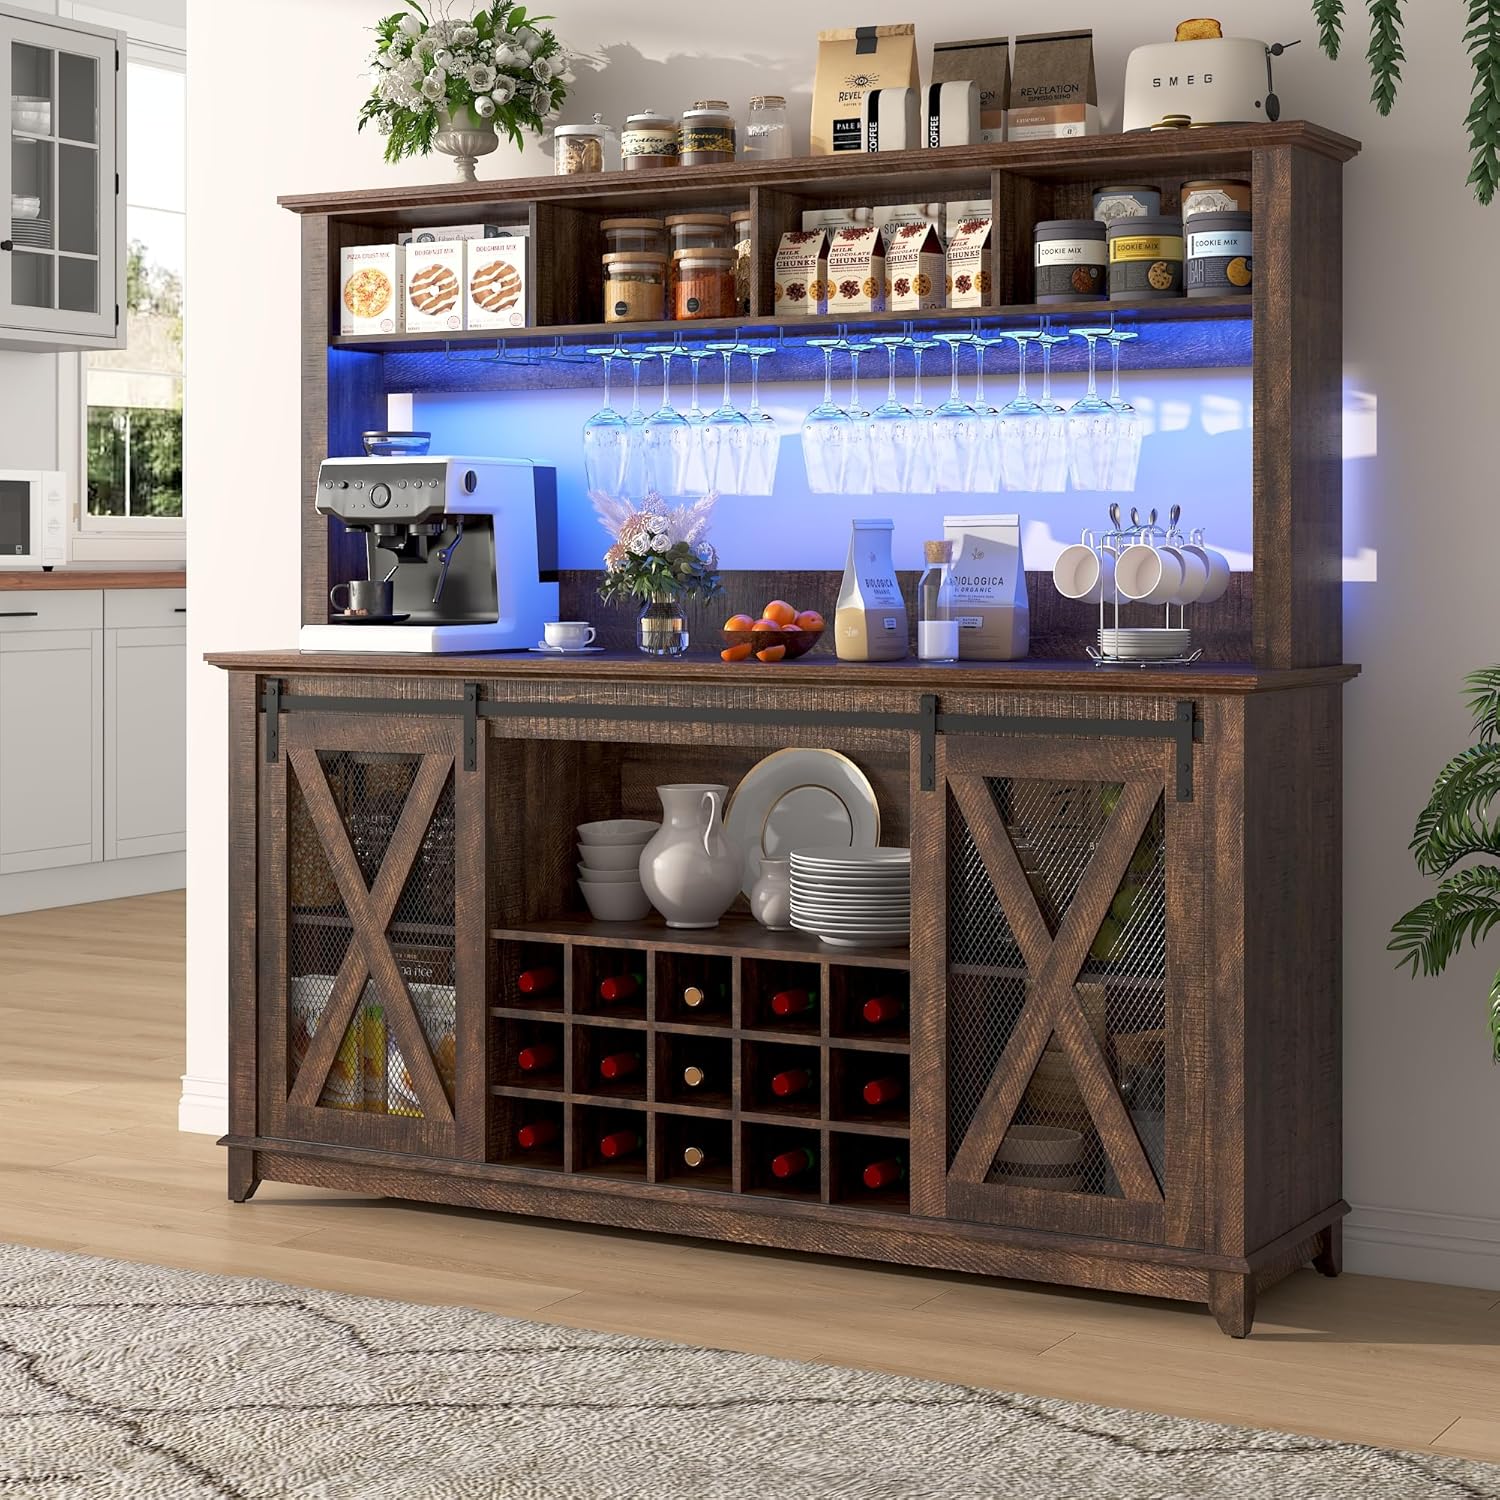
Image 1: Fully assembled Hlivelood Farmhouse Coffee Bar Cabinet with LED lighting activated.
2. Safety Information
- Proper assembly is required. Ensure all connections are secure before use.
- Do not exceed the weight capacity of 143 pounds.
- Be cautious of pinch points and sharp edges during installation and use.
- Always follow manufacturer's instructions for safe handling.
- An anti-tilt device is included; ensure it is properly installed to prevent tipping.
3. Package Contents
Verify that all components and hardware are present before beginning assembly. Refer to the included parts list in your packaging for a complete inventory. If any parts are missing or damaged, contact customer support.
4. Assembly Instructions
Assembly requires two adults. Lay out all parts on a clean, soft surface to prevent scratches. Do not overtighten screws.
Assembly Video Guide
Video 1: Detailed assembly guide for the 63-inch Farmhouse Coffee Bar Cabinet.
Step-by-Step Assembly Overview
- Prepare Base Panels: Attach the cam bolts (C) to panels 2, 3, and 4. Secure panels 3 to panel 2 and panel 4 using cam locks (B).
- Assemble Base Structure: Connect panels 6 and 7 to form the base frame. Use screws (D) to secure these connections.
- Attach Top Base Panel: Place panel 8 onto the assembled base and secure it with screws (D).
- Install LED Strip: Carefully attach the LED light strip (T) to the designated area on the upper hutch section using clips and screws (I).
- Mount Glass Racks: Secure the metal glass racks (E) to the underside of the upper hutch section using screws.
- Assemble Wine Rack: Insert dowels (A) into panel 23. Attach the vertical dividers (24) and then the top panel (25) to create the wine rack structure. Secure with screws (D).
- Assemble Sliding Door Frame: Attach cam bolts (C) and screws (F) to panel 18.
- Attach Legs: Secure the cabinet legs (19) to the bottom panel (11) using screws (D).
- Assemble Side Panels: Attach panels 12 and 14 to the wine rack assembly (16, 17, 25) using dowels (A) and cam locks (B).
- Attach Back Panel: Secure the back panel (15) to the main cabinet structure using screws (K).
- Assemble Top Panel: Attach cam bolts (C) to panel 10.
- Install Adjustable Shelves: Insert shelf pins (J) into the desired holes for adjustable shelves (22).
- Install Anti-Tilt Device: Secure the anti-tilt device (Q) to the back of the cabinet and to the wall.
- Assemble Sliding Doors: Attach the sliding door hardware (H, S) to the doors (20, 21).
- Mount Upper Hutch: Carefully lift and place the upper hutch onto the main cabinet base. Secure it using dowels (A) and cam locks (C).
- Final Adjustments: Apply felt pads (O) to the bottom of the legs. Install corner protectors (M) as needed.

Image 2: Overview of the cabinet's storage features including open cubbies, glass holders, and wine racks.
5. Operating Instructions
LED Lighting System
Your coffee bar cabinet is equipped with an RGB LED light strip. The lighting system can be controlled via a mobile application or the included remote control.
- Mobile App Control: Download the designated mobile application (refer to the LED light kit instructions for app name and QR code). Connect the app to the LED strip via Bluetooth. The app allows for adjustment of 60,000 RGB colors, brightness, various dynamic modes, music synchronization, and a timing function.
- Remote Control: Use the provided remote control to power the lights on/off, change colors, adjust brightness, and select pre-set modes. Ensure the remote has fresh batteries and is pointed towards the LED receiver.

Image 3: Illustration of the two-way control for the LED lighting system, showing both remote and mobile app interfaces.
Sliding Barn Doors
The cabinet features smooth-gliding barn doors. To open or close, gently slide the door along its track. Avoid forcing the doors, as this may damage the mechanism.
6. Maintenance
- Cleaning: Wipe surfaces with a soft, damp cloth. Avoid harsh chemicals or abrasive cleaners that may damage the finish.
- Spills: Clean up spills immediately to prevent staining or damage to the engineered wood.
- Hardware: Periodically check all screws and fasteners to ensure they remain tight. Retighten as necessary.
- LED Lights: If the LED lights malfunction, first check the power connection and remote control batteries. If issues persist, refer to the LED light kit's specific troubleshooting guide or contact customer support.
7. Troubleshooting
- Lights Not Working: Ensure the power adapter is securely plugged into both the LED strip and a working power outlet. Check remote control batteries. If using the app, ensure Bluetooth is enabled and the device is paired correctly.
- Cabinet Wobbles: Verify that all assembly screws are tightened. Ensure the cabinet is placed on a level surface. Adjust the anti-tilt device if necessary.
- Sliding Doors Stick: Check the sliding tracks for any obstructions or debris. Ensure the doors are properly aligned on the tracks.
8. Specifications
| Feature | Specification |
|---|---|
| Brand | Hlivelood |
| Model Name | DJ0699 |
| Color | Brown |
| Product Dimensions | 15.75"D x 63"W x 58.2"H |
| Special Feature | Adjustable Shelf, LED Lighting |
| Mounting Type | Floor Mount |
| Room Type | Dining Room, Kitchen |
| Door Style | Flat Panel, Sliding Barn Door |
| Included Components | Shelves, LED Light Strip, Glass Racks, Wine Racks |
| Finish Type | Rustic |
| Number of Shelves | 6 |
| Base Type | Legs |
| Installation Type | Freestanding |
| Top Material Type | Engineered Wood |
| Assembly Required | Yes |
| Frame Material | Engineered Wood |
| Number of Compartments | 4 (upper hutch) + 15 (wine rack) + 2 (lower cabinets) |
| Item Weight | 143 pounds |

Image 4: Detailed dimensions of the coffee bar cabinet.
9. Warranty and Support
For warranty information, missing parts, or technical support, please contact Hlivelood customer service directly. Refer to your purchase documentation for specific contact details or visit the official Hlivelood store on Amazon.


