1. Introduction
Thank you for choosing the Willsenton R-11 Pre-Amplifier. This high-fidelity tube pre-amplifier is designed to enhance your audio experience with its advanced features, including a phono stage with MM/MC balance, multiple input options, and precise tone controls. This manual provides essential information for the safe and optimal operation of your R-11 unit.

Image 1.1: The Willsenton R-11 Pre-Amplifier in silver, showcasing its elegant design and front panel controls.
2. Safety Instructions
Please read and follow these safety instructions carefully to prevent damage to the unit and ensure personal safety.
- Power Supply: Ensure the power supply voltage matches the requirements specified on the unit (115V~230V+5%, 50Hz). Use only the provided power cord.
- Ventilation: Place the unit in a well-ventilated area. Do not block ventilation openings. Maintain adequate space around the unit for heat dissipation.
- Moisture: Do not expose the unit to rain, moisture, or excessive humidity. Avoid placing liquid-filled objects on or near the unit.
- Heat: Keep the unit away from direct sunlight, radiators, heat registers, stoves, or other heat-producing appliances.
- Servicing: Do not attempt to service the unit yourself. Refer all servicing to qualified service personnel. Opening the unit may expose you to dangerous voltages.
- Tube Handling: Vacuum tubes operate at high temperatures. Allow tubes to cool before handling. Avoid touching hot tubes during operation.
- Grounding: Ensure proper grounding of the unit and connected components to prevent electrical shock.
3. Package Contents
Verify that all items are present in the package:
- Willsenton R-11 Pre-Amplifier Unit
- Remote Controller
- Power Cord
4. Product Overview
4.1 Front Panel Controls
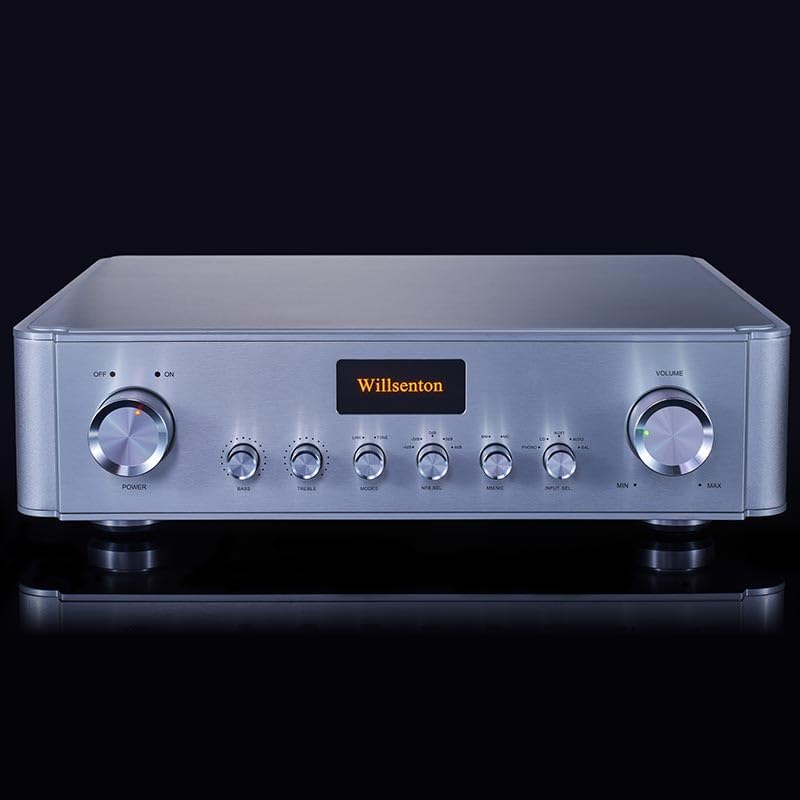
Image 4.1: Front panel of the Willsenton R-11, showing all controls and display.
- Power Switch: Toggles the unit ON/OFF. The 'ON' indicator light illuminates when powered.
- Bass Control: Adjusts the low-frequency response.
- Treble Control: Adjusts the high-frequency response.
- Mode Switch: Selects between different audio processing modes.
- Feedback Control: Adjusts the feedback level, offering diverse sound effects.
- PHONO MM/MC Switch: Selects between Moving Magnet (MM) and Moving Coil (MC) phono input types.
- Input Selector: Cycles through the available input sources (PHONO, CD, AUX1, AUX2, BALANG).
- Volume Control: Adjusts the overall output volume.
4.2 Rear Panel Connections

Image 4.2: Rear panel of the Willsenton R-11, detailing input and output connections.
- GND (Ground) Terminal: For connecting the ground wire from a turntable.
- Input RCA (PHONO, CD, AUX1, AUX2): Standard RCA inputs for various audio sources.
- Input BALANG (Balanced): Balanced XLR input for compatible audio sources.
- Output RCA (OUT1, OUT2): Two sets of standard RCA outputs to connect to a power amplifier.
- Output BALANCE: Balanced XLR output to connect to a power amplifier.
- AC Input: Power cord connection.
- Fuse Holder: Contains the main power fuse.
4.3 Internal Components

Image 4.3: Internal view of the Willsenton R-11, showing the vacuum tubes and circuit board layout.
The R-11 features a robust internal design, including a specially developed square power transformer and a circuit utilizing 4x EH6922 vacuum tubes for signal amplification and 2x 6Z4 vacuum tubes for high voltage power supply rectification. This configuration contributes to the unit's audio performance.
5. Setup
5.1 Unpacking and Placement
- Carefully remove the R-11 from its packaging.
- Place the unit on a stable, level surface with adequate ventilation. Avoid placing it near heat sources or in enclosed spaces.
5.2 Tube Installation (if required)
The R-11 typically comes with tubes pre-installed. If tubes are separate, carefully insert each tube into its corresponding socket, aligning the pins with the socket holes. Apply gentle, even pressure until the tube is fully seated. Refer to the internal diagram (Image 4.3) for tube locations.
5.3 Connecting Audio Components
- Source Components (CD Player, Streamer, Turntable):
- Connect your CD player or streamer to the CD, AUX1, or AUX2 RCA inputs.
- For a turntable, connect its RCA cables to the PHONO input. If your turntable has a ground wire, connect it to the GND terminal.
- If using a balanced source, connect it to the BALANG XLR input.
- Power Amplifier:
- Connect the OUT1 or OUT2 RCA outputs of the R-11 to the RCA inputs of your power amplifier.
- Alternatively, if your power amplifier supports balanced input, connect the BALANCE XLR output of the R-11 to your power amplifier's balanced input.
5.4 Power Connection
- Ensure all audio connections are secure before connecting power.
- Connect the provided power cord to the AC Input on the rear panel of the R-11 and then to a suitable wall outlet.
6. Operating Instructions
6.1 Powering On/Off
- Press the Power Switch on the front panel to turn the unit ON. The 'ON' indicator will illuminate.
- The unit has a power-on delay function (approximately 30 seconds) to protect the tubes and circuitry. Wait for the delay to complete before expecting sound.
- To turn OFF, press the Power Switch again.
6.2 Input Selection
- Rotate the Input Selector knob on the front panel to choose your desired audio source (PHONO, CD, AUX1, AUX2, BALANG).
6.3 Volume Control
- Adjust the Volume Control knob on the front panel to set the desired listening level.
- The included remote control can also adjust the volume.
6.4 Tone Controls
- Use the Bass Control and Treble Control knobs to adjust the low and high frequencies according to your preference.
- The unit includes a direct selection switch (often integrated with the tone controls or a separate 'Mode' button) to bypass the tone control circuit for a purer signal path.
6.5 Feedback Adjustment
- The Feedback Control knob allows you to select from five feedback adjustment levels. Experiment with these settings to achieve different sonic characteristics.
6.6 PHONO MM/MC Selection
- If using the PHONO input, ensure the PHONO MM/MC Switch is set correctly for your turntable's cartridge type (Moving Magnet or Moving Coil). Incorrect selection can result in low volume or distorted sound.
6.7 Remote Control Usage
- The infrared remote control operates the volume and mute functions. Ensure a clear line of sight to the pre-amplifier's front panel sensor.
7. Maintenance
7.1 Cleaning
- Always disconnect the power cord before cleaning.
- Use a soft, dry cloth to wipe the exterior of the unit. Do not use liquid cleaners or abrasive materials.
7.2 Tube Care and Replacement
- Vacuum tubes have a finite lifespan. Over time, their performance may degrade.
- If you notice a significant change in sound quality or a tube fails, replacement may be necessary.
- When replacing tubes, ensure the unit is powered off and unplugged. Allow tubes to cool completely. Carefully remove the old tube by gently wiggling and pulling it straight up. Insert the new tube, aligning the pins correctly, and push it firmly into the socket.
- Use only compatible replacement tubes (e.g., EH6922 for signal tubes, 6Z4 for rectifier tubes).
7.3 Storage
- If storing the unit for an extended period, disconnect it from power and store it in a dry, dust-free environment.
8. Troubleshooting
If you encounter issues with your R-11, refer to the following common problems and solutions:
| Problem | Possible Cause | Solution |
|---|---|---|
| No power | Power cord disconnected; Power switch off; Blown fuse | Check power cord connection; Ensure power switch is ON; Check and replace fuse if necessary (refer to qualified personnel). |
| No sound | Incorrect input selected; Volume too low; Connections loose; Power amplifier off; Tubes not seated correctly or faulty | Select correct input; Increase volume; Check all audio cables; Ensure power amplifier is ON; Check tube seating or consider tube replacement. |
| Distorted sound | Input overload; Faulty cables; Incorrect PHONO MM/MC setting; Damaged tubes | Reduce source volume; Replace cables; Verify PHONO MM/MC switch position; Inspect or replace tubes. |
| Remote control not working | Batteries depleted; Obstruction; Remote sensor blocked | Replace batteries; Remove any obstructions between remote and unit; Ensure clear line of sight to the front panel sensor. |
If the problem persists after attempting these solutions, please contact customer support.
9. Specifications
Detailed technical specifications for the Willsenton R-11 Pre-Amplifier:
| Feature | Specification |
|---|---|
| Gain | 18dB |
| Frequency Response | 15Hz-35KHz (-3DB) |
| Harmonic Distortion | 0.9% (1KHz, weighted by A) |
| Signal to Noise Ratio | 93DB A weighted |
| Input Sensitivity | 360mV |
| Input Impedance RCA | 100KΩ |
| Input Impedance Balance | 47KΩ |
| Output Impedance RCA | 5KΩ |
| Output Impedance Balance | 1KΩ |
| Vacuum Tubes | 6922EH x 4, 6Z4 x 2 |
| Net Weight | 17 kg (37.4 lbs) |
| Dimensions (WxDxH) | 431 x 410 x 130 mm (16 x 17 x 5 inches) |
| Power Supply Voltage | 115V~230V+5% (50Hz) |
| Power Consumption | 45W |
PHONO Specifications:
| Feature | Specification |
|---|---|
| Gain MM | 48dB |
| Gain MC | 72dB |
| Harmonic Distortion | 0.06% (1KHz, weighted by A) |
| RIAA Bandwidth | ±0.5dB (20Hz-20KHz) |
| Input Sensitivity MM | 6mV |
| Input Sensitivity MC | 0.5mV |
| Input Impedance MM | 47KΩ (approximately) |
| Input Impedance MC | 120Ω (approximately) |
| Signal to Noise Ratio MM | 85dB A weighted |
| Signal to Noise Ratio MC | 75dB A weighted |
10. Warranty and Support
Willsenton products are manufactured to high-quality standards. This product is covered by a manufacturer's warranty against defects in materials and workmanship. Please retain your proof of purchase for warranty claims.
For technical support, service, or warranty inquiries, please contact your authorized Willsenton dealer or the point of purchase. Do not attempt to repair the unit yourself, as this will void the warranty and may result in electrical shock.


