
Introduction
Welcome to your new ASUS TUF Gaming VG259QL5A monitor. This manual provides essential information for setting up, operating, and maintaining your monitor to ensure optimal performance and longevity. Please read this manual thoroughly before using the product.

Image: Overview of ASUS TUF Gaming Series 5 upgrades, highlighting Fast IPS, 0.3ms response time, 200Hz refresh rate, AMD FreeSync Premium, NVIDIA G-SYNC, ELMB, Gaming AI, 99% sRGB, DisplayPort, HDMI, and DisplayWidget Center.
What's in the Box
Please check the contents of your package for the following items. If any item is missing or damaged, contact your retailer.
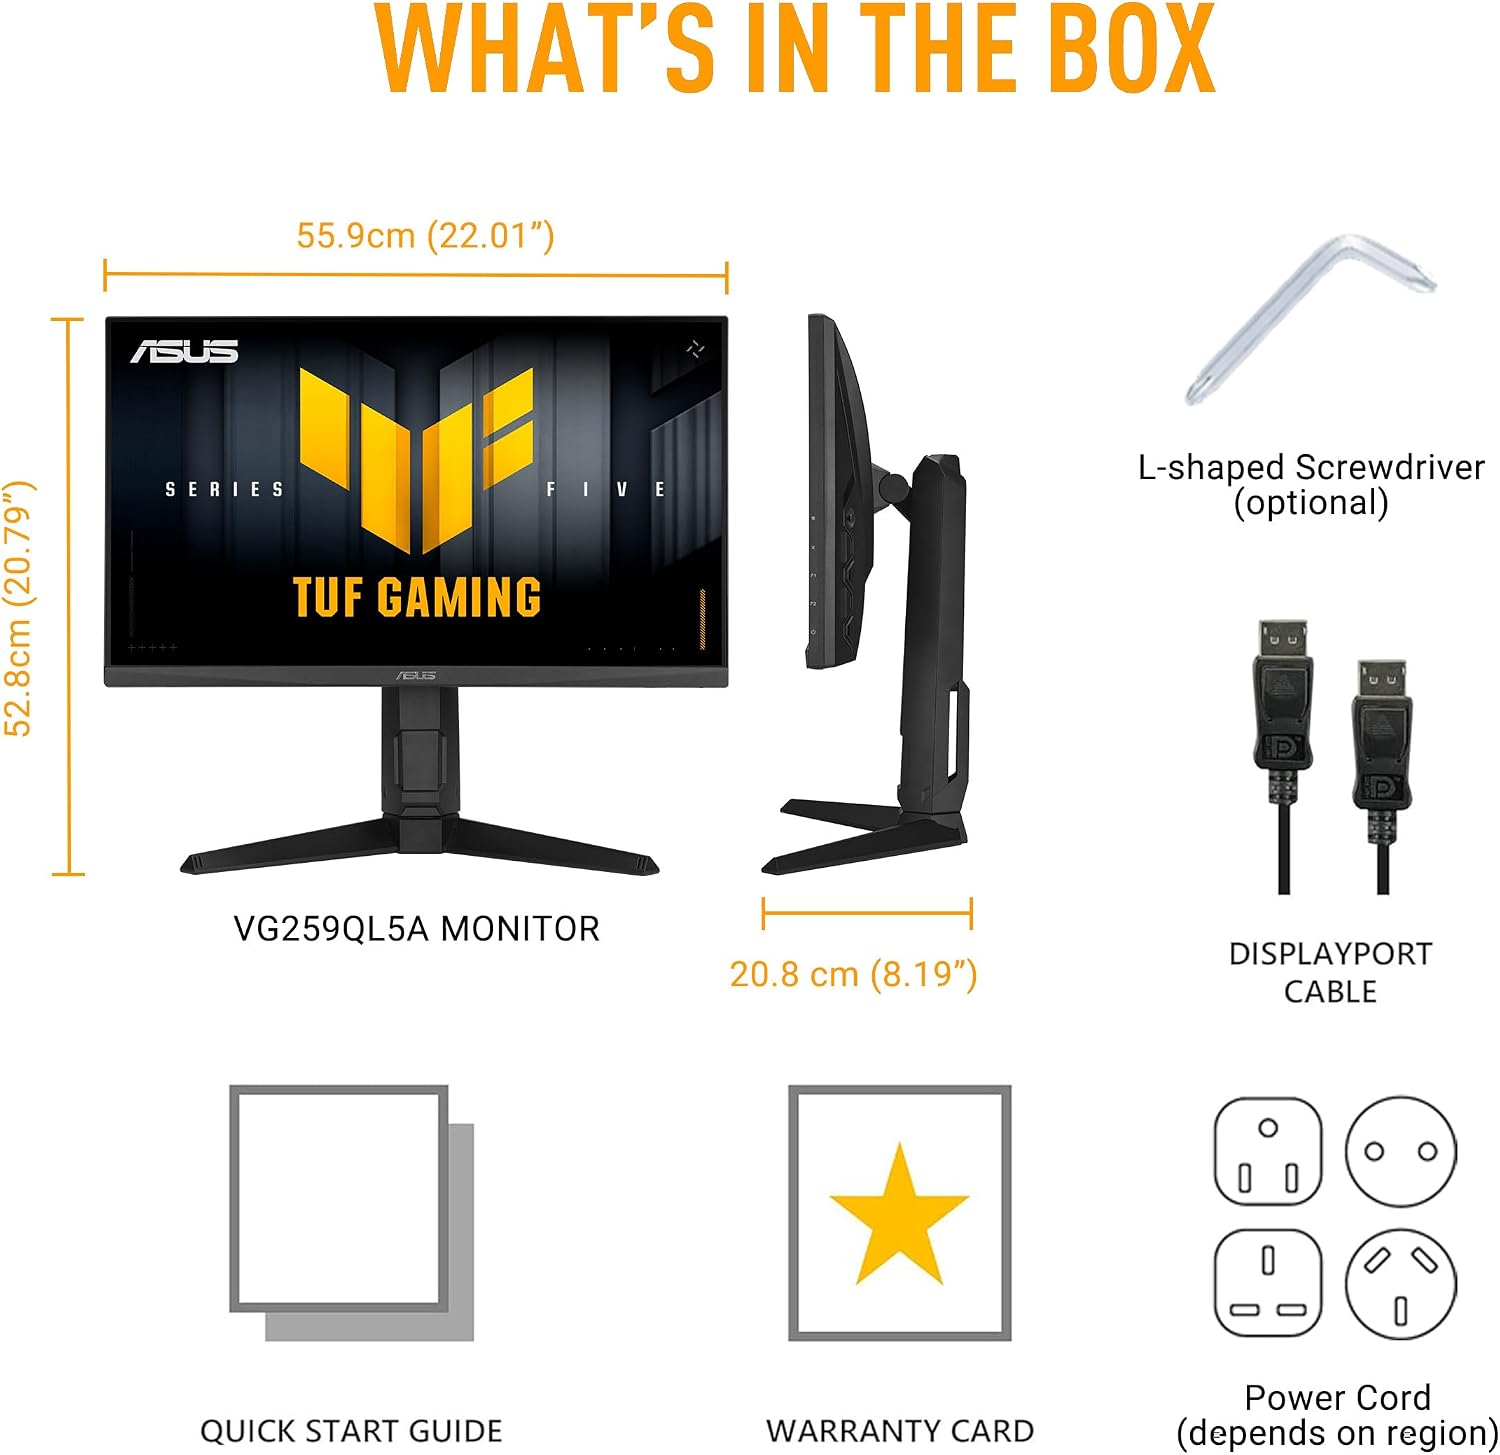
Image: Diagram showing the contents of the monitor box, including the VG259QL5A monitor, L-shaped screwdriver (optional), DisplayPort cable, Quick Start Guide, Warranty Card, and Power Cord (region dependent).
- ASUS TUF Gaming VG259QL5A Monitor
- Monitor Stand (Base and Neck)
- DisplayPort Cable
- Power Cord (Type varies by region)
- Quick Start Guide
- Warranty Card
- L-shaped Screwdriver (Optional)
Setup
Assembling the Stand
- Place the monitor panel face down on a soft, clean surface to prevent scratches.
- Attach the stand neck to the back of the monitor panel. Ensure it clicks securely into place.
- Attach the stand base to the neck and tighten the captive screw from the bottom of the base.
Connecting the Monitor
Connect the necessary cables to the monitor's ports as described below.

Image: Rear view of the monitor showing available ports: Earphone Jack, two HDMI 2.1 ports, and one DisplayPort.
- Power Connection: Connect the power cord to the monitor's power input and then to a power outlet.
- Video Connection: Connect one end of the DisplayPort cable (included) or an HDMI cable (purchased separately) to your computer's graphics card and the other end to the corresponding port on the monitor.
- Audio Connection: If desired, connect headphones or external speakers to the Earphone Jack.
Operating Instructions
Power On/Off
Press the power button located on the monitor to turn it on or off. The power indicator light will illuminate when the monitor is on.
On-Screen Display (OSD) Navigation
The OSD menu allows you to adjust various monitor settings. Use the joystick and buttons on the back or bottom of the monitor to navigate the menu:
- Press the joystick to open the OSD menu.
- Move the joystick up/down to scroll through menu options.
- Move the joystick left/right to adjust values or enter sub-menus.
- Press the joystick again to confirm a selection.
DisplayWidget Center
The DisplayWidget Center software provides an intuitive interface for adjusting monitor settings directly from your desktop using a mouse. This includes customizable settings, firmware update notifications, and multi-screen control.

Image: Screenshot of the DisplayWidget Center software interface, showing options for GameVisual modes (RTS/RPG, FPS, Cinema, Scenery, Racing, MOBA), image adjustments (Brightness, Contrast, Variable OD, Blue Light Filter, Shadow Boost), and color settings (Saturation, Hue, Color Temp).
Key Features
Upgraded Speed
Experience smooth and responsive gameplay with a 200Hz refresh rate and an ultra-fast 0.3ms Gray-to-Gray (GTG) response time, minimizing motion blur and ghosting.

Image: Monitor displaying a fast-paced game scene, highlighting Fast IPS technology, Full HD resolution, 0.3ms response time, and 200Hz refresh rate for unstoppable gaming performance.
Enhanced Fluidity
The monitor supports AMD FreeSync Premium and is NVIDIA G-SYNC compatible, ensuring tear-free and stutter-free gaming by synchronizing the display's refresh rate with your GPU's frame rate. ASUS Extreme Low Motion Blur (ELMB) further reduces motion blur.

Image: Comparison of game scenes with VRR (Variable Refresh Rate) off and on, demonstrating smoother gameplay with VRR enabled, alongside logos for NVIDIA G-SYNC, AMD FreeSync Premium, and ELMB.
Gaming AI
Integrated AI features, such as Dynamic Crosshair, enhance your gaming experience by providing visual aids for improved accuracy and situational awareness.

Image: Demonstrates AI Visual features, including a dynamic crosshair comparison (before and after) and an AI Visual mode comparison for a racing game, showing enhanced visual clarity and information.
Color Performance
The monitor delivers vibrant and accurate colors with 99% sRGB color gamut coverage, ensuring a rich visual experience for both gaming and content consumption.
Ergonomic Design
The stand offers extensive ergonomic adjustments, including tilt (+23° to -5°), swivel (+15° to -15°), height adjustment (0-120mm), and pivot (±90°), allowing you to find the most comfortable viewing position.
Image: Illustrates the ergonomic design features of the monitor stand, showing tilt, swivel, height adjustment, and pivot capabilities.
Technical Specifications
| Feature | Specification |
|---|---|
| Brand | ASUS |
| Model Name | VG259QL5A |
| Screen Size | 24.5 inches |
| Resolution | Full HD (1920x1080) |
| Aspect Ratio | 16:9 |
| Panel Type | Fast IPS |
| Refresh Rate | 200 Hz |
| Response Time | 0.3 ms (GTG) |
| Contrast Ratio | 1000:1 |
| Viewing Angle | 170 degrees |
| Color Gamut | 99% sRGB |
| Adaptive Sync Technology | AMD FreeSync Premium, G-Sync Compatible |
| Video Enhancement Technology | ELMB, Adaptive Sync |
| Connectivity | HDMI, DisplayPort |
| HDMI Ports | 2 |
| DisplayPort | 1 |
| Audio Output | Earphone Jack |
| Built-in Speakers | Yes |
| Ergonomics | Tilt, Swivel, Height Adjustment, Pivot |
| Dimensions (D x W x H) | 55.9 x 20.8 x 52.8 cm |
| Weight | 4.9 kg |
Maintenance
Cleaning the Monitor
- Always power off the monitor and unplug the power cord before cleaning.
- Use a soft, lint-free cloth slightly dampened with water or a mild, non-abrasive cleaner specifically designed for displays.
- Do not spray cleaner directly onto the screen.
- Avoid using alcohol, ammonia, or abrasive cleaners, as they can damage the screen surface.
General Care
- Keep the monitor away from direct sunlight, excessive heat, or cold.
- Ensure proper ventilation around the monitor to prevent overheating.
- Avoid placing heavy objects on the monitor or its cables.
Troubleshooting
No Image on Screen
- Ensure the power cord is securely connected to both the monitor and the power outlet.
- Verify that the video cable (DisplayPort or HDMI) is properly connected to both the monitor and your computer.
- Check if the computer is powered on and not in sleep mode.
- Press the monitor's input selection button to ensure the correct input source is selected.
Image Flickering or Distortion
- Check the video cable for any damage or loose connections. Try a different cable if available.
- Ensure your graphics card drivers are up to date.
- Adjust the refresh rate in your computer's display settings.
- Disable or enable Adaptive Sync (FreeSync/G-SYNC) in the OSD menu or graphics card settings to see if it resolves the issue.
No Sound from Speakers/Headphones
- Ensure the audio cable (if used) is connected correctly.
- Check the volume settings on both the monitor (via OSD) and your computer.
- Verify that the correct audio output device is selected in your computer's sound settings.
Warranty and Support
Your ASUS TUF Gaming VG259QL5A monitor comes with a limited warranty. Please refer to the included Warranty Card for detailed terms and conditions, including coverage period and service procedures.
For technical support, driver downloads, or further assistance, please visit the official ASUS support website or contact your local ASUS customer service center. You can find contact information on the ASUS website or in your warranty documentation.
ASUS Support Website: www.asus.com/support/


