
ooni Karu 2 Pro
Ooni Karu 2 Pro Pizza Oven User Manual
Model: Karu 2 Pro
Brand: Ooni
1. Introduction
The Ooni Karu 2 Pro is a versatile multi-fuel outdoor pizza oven designed to deliver authentic, restaurant-quality pizzas in your backyard. Capable of reaching extreme temperatures, it cooks pizzas in as little as 60 seconds. This manual provides essential information for the safe and efficient operation, setup, and maintenance of your Ooni Karu 2 Pro.

Image: The Ooni Karu 2 Pro Pizza Oven shown with its included accessories: a thermometer, gas burner, turning peel, and pizza peel.
2. Safety Information
- Outdoor Use Only: This appliance is designed for outdoor use only. Do not operate indoors or in enclosed spaces.
- Clearance: Maintain adequate clearance from combustible materials. Refer to the product's safety labels for specific distances.
- Hot Surfaces: The oven and its components become extremely hot during operation. Always use heat-resistant gloves and appropriate tools.
- Fuel Handling: When using wood or charcoal, ensure proper ventilation and never use lighter fluid or gasoline. When using gas, check for leaks before each use.
- Children and Pets: Keep children and pets away from the oven during operation and while it is cooling down.
- Stable Surface: Always place the oven on a stable, level, non-combustible surface.
3. What's in the Box
Your Ooni Karu 2 Pro Pizza Oven Bundle includes the following components:
- Ooni Karu 2 Pro Pizza Oven Unit
- Ooni Thermometer
- Ooni Gas Burner
- Ooni Turning Peel
- Ooni 14" Pizza Peel
- Cordierite Pizza Stone
- Chimney and Chimney Cap
- Fuel Tray and Grate
- Instruction Manual
4. Setup
- Unpack Components: Carefully remove all items from the packaging.
- Assemble Oven:
- Unfold the legs of the oven and ensure they are securely locked into place.
- Insert the cordierite pizza stone into the oven base.
- Attach the chimney to the top of the oven and secure it. Place the chimney cap on top.

Image: An exploded view demonstrating the assembly of the Ooni Karu 2 Pro, showing the main body, chimney, and base components.
- Install Fuel Tray (for wood/charcoal): If using wood or charcoal, slide the fuel tray into the rear of the oven.
- Install Gas Burner (optional):
- Remove the fuel tray if it's installed.
- Attach the Ooni Gas Burner to the rear port of the oven according to the gas burner's specific instructions. Ensure a secure connection.
- Connect the gas hose to a propane tank. Perform a leak test before first use and periodically thereafter.

Image: A person connecting the Ooni Gas Burner to the rear of the pizza oven, illustrating the setup process for gas operation.
- Placement: Position the oven on a sturdy, heat-resistant outdoor surface, away from any flammable structures or materials.
5. Operating Instructions
5.1 Fueling Your Oven
The Ooni Karu 2 Pro is a multi-fuel oven, capable of running on wood, charcoal, or propane gas (with the included gas burner).
Wood/Charcoal Operation:
- Use Ooni-approved wood or high-quality hardwood charcoal.
- Place a small amount of kindling and firelighters in the fuel tray. Light them and gradually add small pieces of wood or charcoal as the fire establishes.
- Maintain a consistent flame by adding fuel as needed. The oven's design promotes efficient airflow for optimal burning.
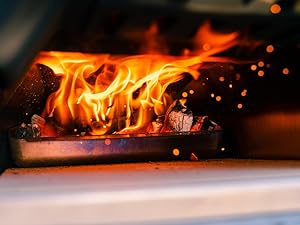
Image: Wood and charcoal burning inside the fuel tray of the Ooni Karu 2 Pro, illustrating the solid fuel setup.
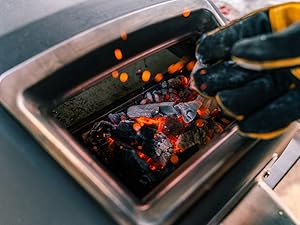
Image: A gloved hand adding a piece of wood to the burning fuel in the Ooni Karu 2 Pro, demonstrating how to replenish solid fuel.
Gas Operation:
- Ensure the gas burner is securely attached and connected to a propane tank.
- Slowly open the valve on the propane tank.
- Turn the control knob on the gas burner to the ignition position and press to ignite. Adjust the flame to your desired intensity.

Image: A hand turning the control knob on the Ooni Karu 2 Pro gas burner, indicating the method for adjusting flame intensity.
5.2 Preheating
The Ooni Karu 2 Pro reaches optimal cooking temperatures of up to 932°F (500°C) in approximately 15 minutes. Use the Ooni Thermometer or the integrated Ooni Connect digital temperature hub to monitor the stone temperature.

Image: Close-up of the Ooni Connect digital temperature hub display, showing the current oven temperature reading.

Image: A hand holding the Ooni Thermometer, pointing it towards the oven to measure the internal temperature.
5.3 Cooking
Once the oven reaches the desired temperature, you are ready to cook. The large cooking area accommodates 16-inch pizzas and other dishes.
- Pizza: Launch your pizza onto the hot stone using the pizza peel. Cook for approximately 60 seconds, rotating the pizza frequently with the turning peel for even cooking.
- Viewflame Technology: The extra-large glass oven door with Viewflame Technology allows you to monitor your food without opening the door, helping to maintain consistent oven temperatures.
- Other Dishes: The Karu 2 Pro is also suitable for cooking other items like roasted meats, vegetables, and bread. Adjust temperature and cooking times as needed.

Image: A pizza being launched into the Ooni Karu 2 Pro oven using a pizza peel, demonstrating the cooking process.

Image: A pizza cooking inside the Ooni Karu 2 Pro, visible through the glass door, showcasing the oven's interior.

Image: Vegetables cooking in a pan inside the Ooni Karu 2 Pro, demonstrating the oven's versatility beyond just pizza.
6. Maintenance & Cleaning
- Cool Down: Always allow the oven to cool completely before cleaning.
- Pizza Stone: Scrape off any burnt food residue from the pizza stone. The high heat of the oven will naturally clean the stone over time (pyrolysis). Do not use soap or water on the stone.
- Exterior: Wipe down the powder-coated carbon steel exterior with a damp cloth. Avoid abrasive cleaners.
- Chimney: Periodically clean the inside of the chimney to remove soot buildup.
- Gas Burner: Ensure the gas burner is clean and free of debris. Refer to the gas burner's specific cleaning instructions.
- Storage: Store the oven in a dry place, ideally covered with an Ooni cover, when not in use for extended periods.

Image: A close-up view of the Ooni Karu 2 Pro's powder-coated carbon steel outer shell, highlighting its durable finish.
7. Troubleshooting
| Problem | Possible Cause | Solution |
|---|---|---|
| Oven not reaching target temperature (wood/charcoal) | Insufficient fuel, damp fuel, poor airflow. | Add more dry, seasoned wood/charcoal. Ensure chimney is clear and vents are open. |
| Oven not reaching target temperature (gas) | Low gas pressure, gas tank empty, burner clogged, faulty igniter. | Check gas tank level. Ensure gas line is not kinked. Clean burner ports. Refer to gas burner manual for ignition issues. |
| Pizza burning on top, undercooked on bottom | Stone not hot enough, oven too hot, pizza too close to flame. | Allow more preheating time for the stone. Reduce flame/fuel slightly. Rotate pizza more frequently. |
| Excessive smoke (wood/charcoal) | Damp wood, too much fuel added at once. | Use dry wood. Add smaller pieces of fuel more frequently rather than large amounts at once. |
8. Specifications
| Feature | Detail |
|---|---|
| Brand | Ooni |
| Model | Karu 2 Pro |
| Color | Black |
| Heating Method | Radiant (Multi-fuel: Wood, Charcoal, Gas) |
| Max Temperature | 932°F (500°C) |
| Preheat Time | 15 minutes (to 950°F / 500°C) |
| Pizza Size | Up to 16 inches |
| Special Features | Portable, Viewflame Technology, Ooni Connect Digital Temperature Hub |
| Finish Type | Polished |
9. Warranty & Support
For warranty information and customer support, please refer to the official Ooni website or contact Ooni customer service directly. Keep your proof of purchase for any warranty claims. The product typically includes a return policy of 30 days for refund or replacement.
Online Resources:
Related documentsKaru 2 Pro


Ask a question about this manual
Ask about setup, troubleshooting, compatibility, parts, safety, or missing instructions. Manuals+ will review the question and use this page’s manual context to help answer it.