Introduction
Thank you for choosing the Karinear 36L 6-in-1 Touchscreen Air Fryer Oven. This appliance is designed to provide a versatile and efficient cooking experience, combining the functions of an air fryer, oven, roaster, baker, dehydrator, and more. Please read this manual thoroughly before first use to ensure safe operation and optimal performance. Keep this manual for future reference.
Important Safety Instructions
When using electrical appliances, basic safety precautions should always be followed to reduce the risk of fire, electric shock, and injury to persons.
- Read all instructions before operating the appliance.
- Do not touch hot surfaces. Use handles or knobs.
- To protect against electrical shock, do not immerse cord, plugs, or the main unit in water or other liquid.
- Close supervision is necessary when any appliance is used by or near children.
- Unplug from outlet when not in use and before cleaning. Allow to cool before putting on or taking off parts.
- Do not operate any appliance with a damaged cord or plug, or after the appliance malfunctions or has been damaged in any manner.
- The appliance features a double-insulated glass door and a safety micro-switch that cuts power when the door is opened, reducing the risk of accidental burns.
- Ensure the appliance is placed on a stable, heat-resistant surface, away from walls and other appliances to allow for proper ventilation.
- Do not place anything on top of the appliance while it is operating.
- The exterior temperature remains between 50-60 degrees Celsius during operation.
- All food-contact materials are food-grade quality.
Product Components and Accessories
The Karinear Air Fryer Oven comes with a complete set of accessories to enhance your cooking versatility.

Included Accessories:
- Rotisserie Fork: For roasting whole chickens or larger cuts of meat.
- Baking Tray Handle: For safely inserting and removing hot trays.
- Stainless Steel Rack: For grilling, toasting, or dehydrating.
- Non-stick Baking Pan: For baking, roasting, or catching drips.
- Frying Basket: Specifically designed for air frying foods like fries and chicken wings.
All accessories are dishwasher-safe for easy cleaning.
Setup and First Use
Unpacking:
- Carefully remove the appliance and all accessories from the packaging.
- Remove any protective films or stickers.
- Inspect the appliance for any damage. Do not use if damaged.
Initial Cleaning:
- Wipe the exterior of the appliance with a damp cloth.
- Wash all accessories (rotisserie fork, handle, rack, pan, basket) with warm, soapy water. Rinse thoroughly and dry completely.
- Wipe the interior of the oven with a damp cloth.
Placement:
- Place the appliance on a flat, stable, heat-resistant surface.
- Ensure there is at least 10-15 cm (4-6 inches) of clear space on all sides and above the appliance for proper air circulation.
- Do not place the appliance near flammable materials or heat sources.
First Use (Burn-in):
It is recommended to run the appliance empty for about 15-20 minutes before cooking food for the first time. This helps to burn off any manufacturing residues and odors.
- Plug the appliance into a grounded electrical outlet.
- Set the temperature to 200°C (390°F) and the timer to 15 minutes.
- A slight odor or smoke may be present; this is normal. Ensure the area is well-ventilated.
- After the cycle, unplug the appliance and let it cool down completely.
Operating Instructions
Control Panel Overview:

- LED Display: Shows current temperature, time, and selected preset.
- Menu Button: Press to cycle through the 16 preset cooking functions.
- Temperature/Timer Adjustment Buttons (+/-): Used to increase or decrease temperature and time.
- Set Button: Press to toggle between adjusting temperature and time.
- Start/Pause Button: Initiates or pauses the cooking cycle.
- Light Button: Turns the internal oven light on/off to monitor food.
- Convection Fan Buttons: Adjusts convection fan speed (Low/High).
Basic Operation:
- Power On: Plug in the appliance. The display will illuminate.
- Select Function: Use the Menu button to choose one of the 16 preset functions. The default time and temperature for the selected preset will be displayed.
- Adjust Settings (Optional): If you wish to manually adjust the time or temperature, press the 'Set' button. The corresponding value (time or temperature) will blink. Use the '+' and '-' buttons to adjust. Press 'Set' again to switch between time and temperature.
- Start Cooking: Once settings are confirmed, press the 'Start/Pause' button to begin cooking.
- Monitor Food: Use the internal light button to check on your food without opening the door.
- Pause/Resume: Press 'Start/Pause' to temporarily stop cooking. Press again to resume.
- End of Cycle: The appliance will beep when the cooking cycle is complete. Unplug and allow to cool before removing food.
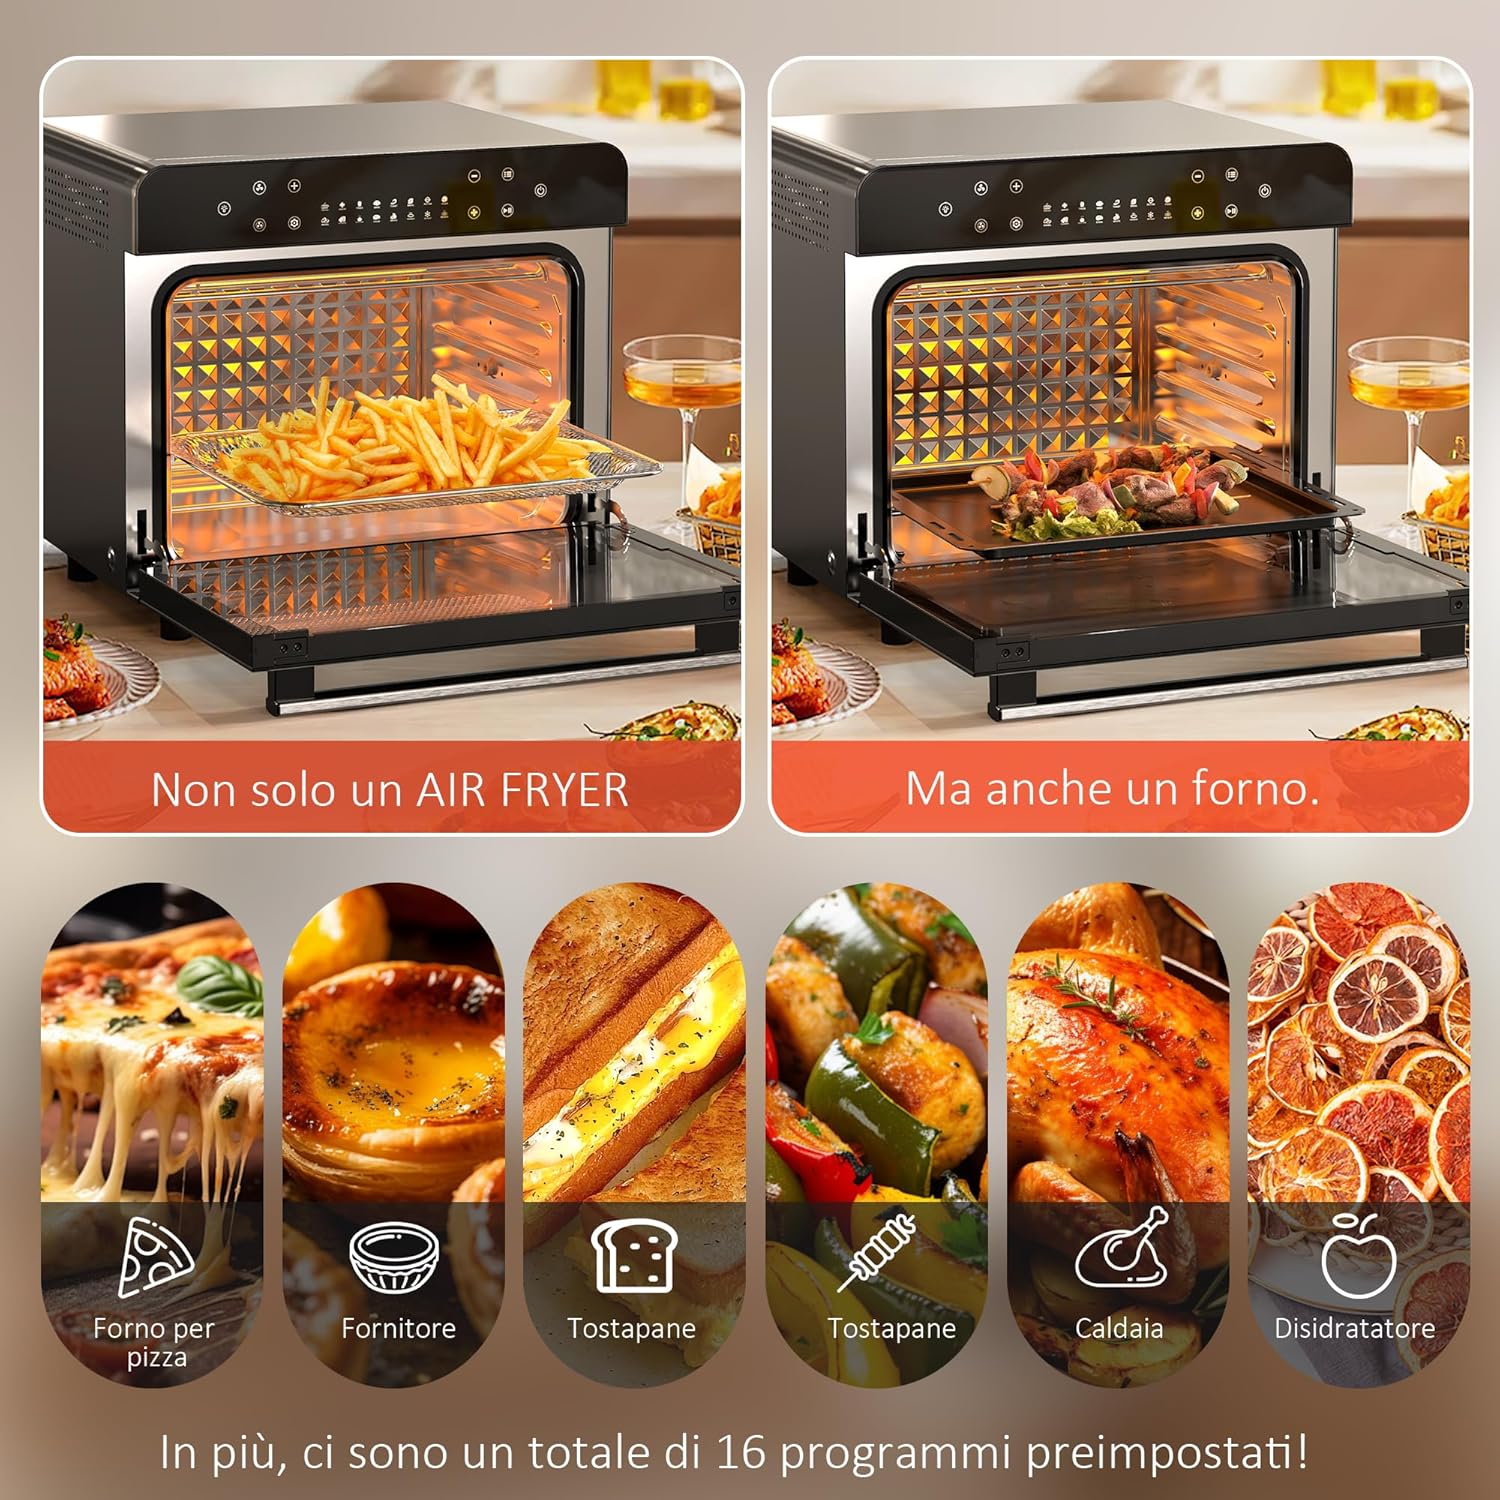
Preset Functions:
The appliance offers 16 preset functions for common dishes, including:
- Fries
- Roasted Meat
- Fish
- Shrimp
- Chicken
- Roasted Chicken
- Pizza
- Bagel
- Bake
- Toast
- Grill
- Dehydrate
- Reheat
- Warm
- Yogurt
- And more...
These presets are designed to simplify cooking by providing optimized time and temperature settings. You can always adjust these settings manually if needed.
Capacity and Versatility:

With a generous 36-liter capacity, this air fryer oven can easily accommodate a 4kg (8.8 lb) whole chicken or a 14-inch pizza. The three-level design allows for cooking multiple dishes simultaneously, making it ideal for larger meals or family gatherings.


Cleaning and Maintenance
Regular cleaning will ensure the longevity and optimal performance of your Karinear Air Fryer Oven.
Before Cleaning:
- Always unplug the appliance from the power outlet and allow it to cool down completely before cleaning.
Cleaning the Interior:
- The interior is made of 430 stainless steel, which is durable and easy to clean.
- Wipe the interior walls, heating elements, and bottom tray with a damp cloth and mild detergent.
- For stubborn food residues, use a non-abrasive sponge or brush.
- Ensure no water enters the fan or electrical components.
- Dry thoroughly before next use.
Cleaning the Exterior:
- Wipe the exterior surface with a soft, damp cloth.
- Do not use abrasive cleaners or scouring pads, as they may damage the finish.
Cleaning Accessories:
- All included accessories (rotisserie fork, handle, rack, pan, basket) are dishwasher-safe.
- Alternatively, wash them by hand with warm, soapy water and a non-abrasive sponge.
- Rinse and dry thoroughly.
Troubleshooting Guide
If you encounter any issues with your Karinear Air Fryer Oven, please refer to the following common problems and solutions:
| Problem | Possible Cause | Solution |
|---|---|---|
| Appliance does not turn on. | Not plugged in; power outlet malfunction; main unit not properly closed. | Ensure the power cord is securely plugged into a working outlet. Check the circuit breaker. Ensure the oven door is fully closed. |
| Food is not cooking evenly. | Overcrowding the basket/tray; incorrect temperature/time settings. | Do not overcrowd the cooking area. Cook in smaller batches if necessary. Ensure correct temperature and time are set for the food type. Flip or shake food halfway through cooking. |
| White smoke coming from the appliance. | Excess oil/grease from food; food residues on heating elements. | Ensure the drip tray is clean. Remove excess oil from food before cooking. Clean the interior and heating elements after each use. |
| Appliance emits a burning smell. | Food residue burning; new appliance odor. | Perform initial burn-in as described in 'Setup'. Clean the interior thoroughly. If the smell persists after multiple uses, contact customer support. |
| Temperature does not reach 230°C. | Maximum temperature varies by function. | Note that the maximum temperature of 230°C is typically reached with specific functions like 'Toast'. Other functions may have a maximum of 210°C. Refer to the specific preset settings. |
If the problem persists after trying these solutions, please contact Karinear customer support for assistance.
Technical Specifications
| Feature | Specification |
|---|---|
| Model Number | KNI-GD36BRAL-K-DE |
| Brand | Karinear |
| Capacity | 36 Liters |
| Power | 1800 Watts |
| Voltage | 240 Volts |
| Temperature Range | 0-230°C (0-446°F) |
| Timer Range | 0-120 Minutes |
| External Dimensions (L x W x H) | 48.6 x 42.9 x 42.3 cm (19.1 x 16.9 x 16.7 inches) |
| Internal Dimensions (L x W x H) | 39 x 34 x 25 cm (15.4 x 13.4 x 9.8 inches) |
| Usable Internal Dimensions (L x W x H) | 34 x 39 x 19 cm (13.4 x 15.4 x 7.5 inches) |
| Weight | 15.65 kg (34.5 lbs) |
| Material | Glass (door), Stainless Steel 430 (interior) |
| Special Features | Temperature Control, Timer, LED Display, Touch Buttons, Internal Light, Double Insulated Glass, Safety Micro-switch |
Warranty and Support
Karinear products are manufactured to high-quality standards. For any questions, concerns, or warranty claims, please contact Karinear customer support. Please have your model number (KNI-GD36BRAL-K-DE) and purchase information ready when contacting support.
For further assistance, you may visit the official Karinear store on Amazon: Karinear Appliances Store


