
1. Introduction
This manual provides detailed instructions for the installation, operation, and maintenance of your FOIFKIN M9 ATX Mid-Tower PC Case. The M9 case features a unique design with genuine walnut wood elements, a 270° panoramic tempered glass panel, and pre-installed ARGB PWM fans for optimal cooling and aesthetics. Please read this manual thoroughly before beginning assembly to ensure proper setup and safe operation.

Image 1.1: The FOIFKIN M9 PC Case, showcasing its panoramic glass and internal components with ARGB lighting.
2. Safety Information
Always observe the following safety precautions during installation and operation:
- Ensure the power supply is disconnected from the wall outlet before installing or removing any components.
- Wear an anti-static wrist strap to prevent electrostatic discharge (ESD) damage to sensitive electronic components.
- Handle tempered glass panels with care. They are durable but can shatter if dropped or subjected to sharp impacts.
- Keep small parts and screws away from children.
- Refer to the manuals of your individual PC components for specific installation instructions and safety warnings.
3. Package Contents
Verify that all items are present in your package:
- FOIFKIN M9 ATX Mid-Tower PC Case (with 7 pre-installed ARGB PWM fans)
- Accessory Box (containing screws, standoffs, cable ties, etc.)
- User Manual (this document)
If any items are missing or damaged, please contact FOIFKIN customer support.
4. Product Specifications
| Feature | Specification |
|---|---|
| Model Name | M9 |
| Case Type | Mid Tower |
| Dimensions (L x W x H) | 416mm x 300mm x 385mm (16.4 x 11.8 x 15.2 inches) |
| Material | Metal, Plastic, Tempered Glass, Walnut Wood |
| Motherboard Compatibility | ATX, M-ATX, ITX |
| Pre-installed Fans | 7x 120mm ARGB PWM Fans (6 reverse, 1 rear forward) |
| Maximum Fan Support | Up to 10x 120mm fans |
| Radiator Support | Up to 360mm (top), 280mm (side) |
| CPU Cooler Height Limit | 170mm |
| GPU Length Limit | 400mm |
| PSU Type & Length | ATX, up to 220mm |
| Drive Bays | 1x 3.5" HDD + 1x 2.5" SSD or 2x 3.5" HDD |
| Expansion Slots | 7 + 3 (vertical GPU support) |
| Front I/O Ports | 1x Type-C 3.0, 1x USB 3.0, 1x USB 2.0, Microphone & Audio, Power Button, Restart Button, LED Switch Button |
| Weight | 9.14 kg (20.1 pounds) |

Image 4.1: Internal layout and component clearance specifications for the M9 case, including CPU cooler height, GPU length, and motherboard form factors (ITX, M-ATX, ATX).
5. Setup and Installation
5.1 Accessing the Interior
The FOIFKIN M9 features hinged tempered glass side panels for easy access. Gently pull the panel open from the rear to swing it outwards. The panels can be completely removed by lifting them off their hinges if required for extensive building.
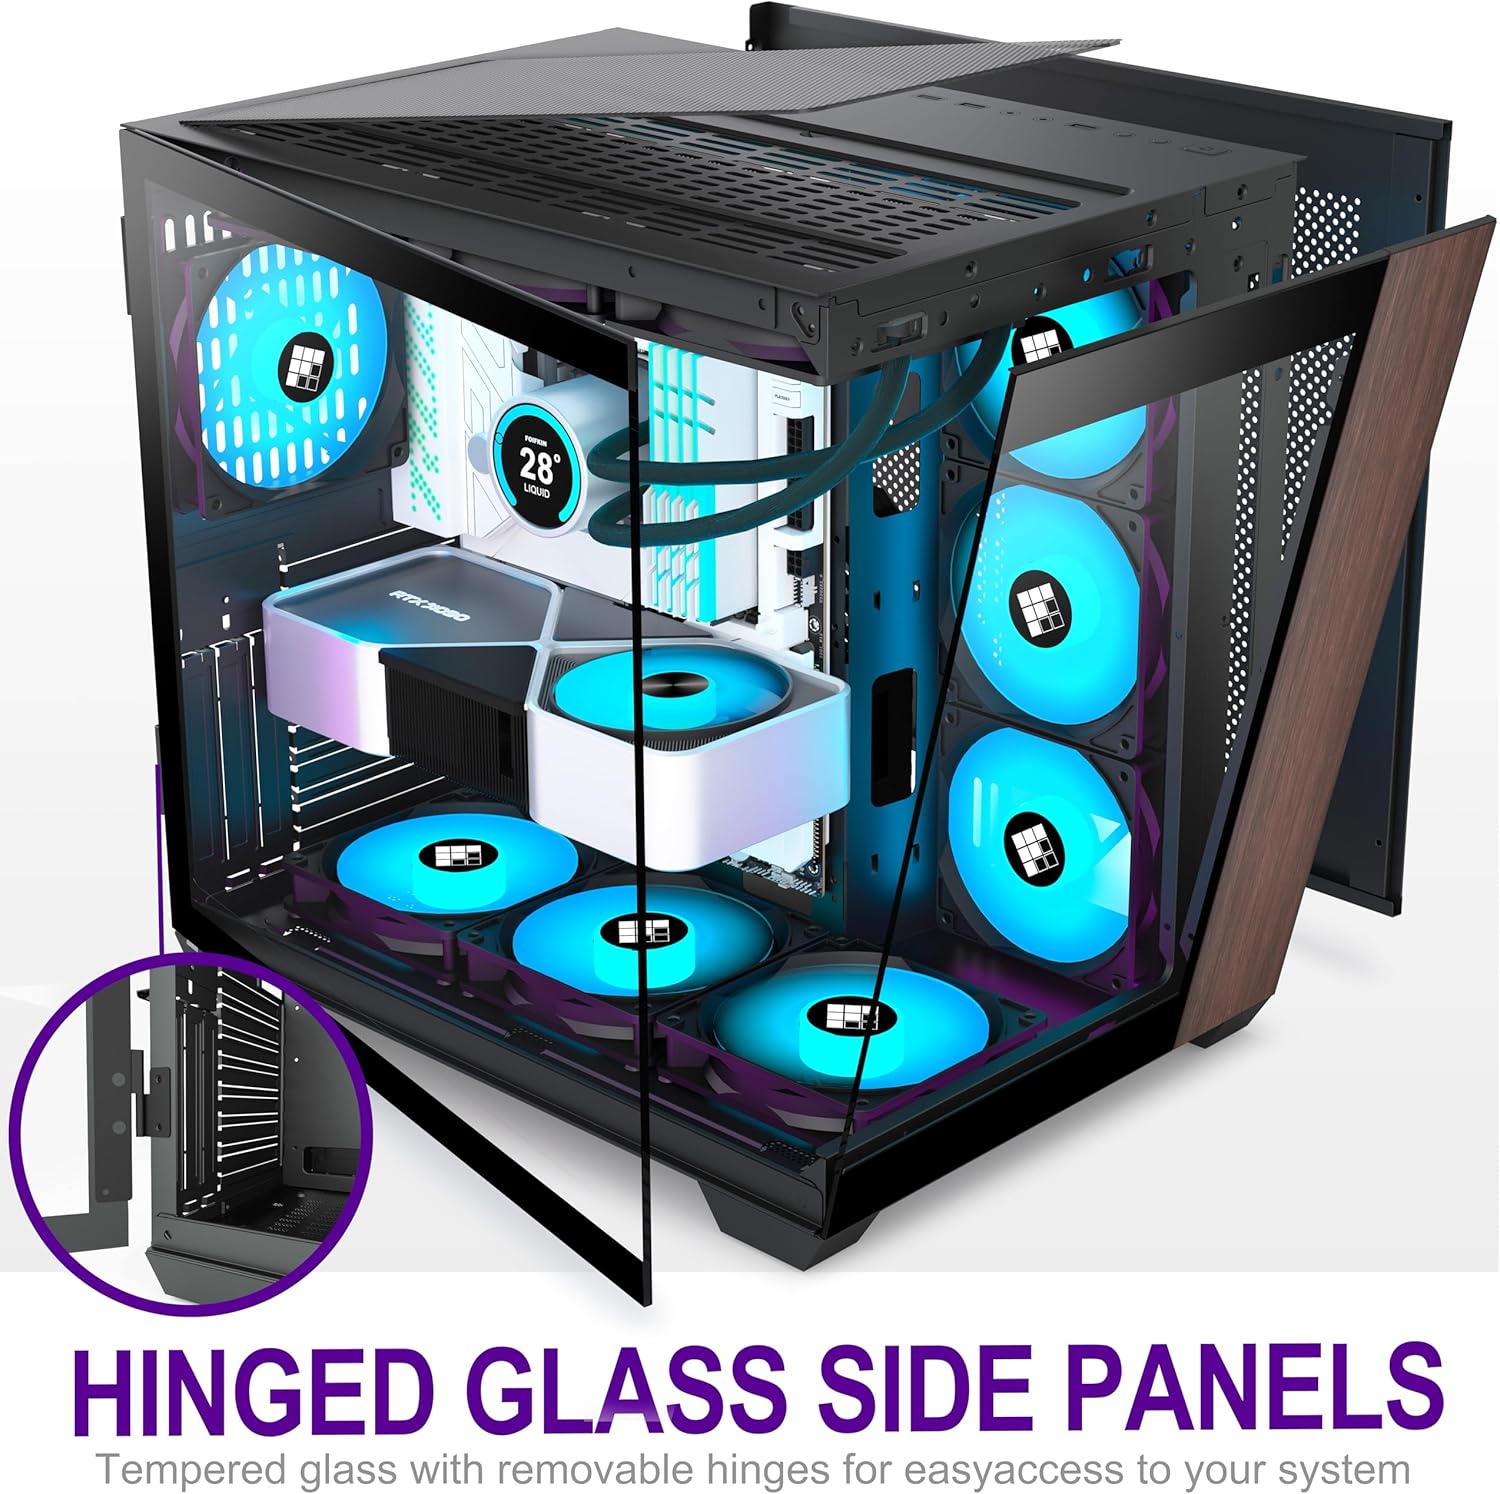
Image 5.1: The hinged tempered glass side panel of the M9 case, shown in an open position for easy component access.
5.2 Motherboard Installation
- Install the CPU, CPU cooler (if air cooler), and RAM onto your motherboard before placing it into the case.
- Align the motherboard with the pre-installed standoffs in the case. Ensure the I/O shield (if separate) is installed in the rear opening.
- Secure the motherboard using the provided screws.
5.3 Power Supply Unit (PSU) Installation
The M9 case supports ATX power supplies up to 220mm in length. The PSU is installed in the rear chamber of the dual-chamber design.
- Mount your PSU to the PSU bracket (if applicable) or directly into the PSU bay from the rear of the case.
- Secure the PSU with screws.

Image 5.2: The dual-chamber design of the M9 case, separating the main components from the power supply and cable management area.
5.4 Storage Drive Installation
The M9 case supports 1x 3.5" HDD + 1x 2.5" SSD or 2x 3.5" HDDs.
- Locate the drive bays in the rear chamber of the case.
- Mount your 3.5" HDDs or 2.5" SSDs using the provided screws.
5.5 Graphics Card (GPU) Installation
The case supports GPUs up to 400mm in length and offers 7 horizontal and 3 vertical expansion slots.
- Remove the necessary expansion slot covers from the rear of the case.
- Insert your GPU into the appropriate PCIe slot on the motherboard.
- Secure the GPU with screws. For vertical mounting, a PCIe riser cable (not included) is required.
5.6 Cable Management
The M9 case features a dedicated cable management system with reserved holes and ample space in the rear chamber to keep your build tidy and improve airflow.
- Route all power cables from the PSU to their respective components.
- Connect the front I/O cables (USB, audio, power, reset, LED switch) to the corresponding headers on your motherboard.
- Utilize the cable tie points and included cable ties to secure cables neatly behind the motherboard tray.

Image 5.3: The cable management system of the M9 case, illustrating routing options and storage drive locations in the rear chamber.
5.7 Fan and ARGB Connections
The 7 pre-installed ARGB PWM fans are typically pre-wired to a fan controller or daisy-chained. Connect the main fan power and ARGB cables to your motherboard or a dedicated controller. Ensure your motherboard has a 5V 3-pin ARGB header for lighting control.

Image 5.4: Diagram illustrating the high-performance airflow optimization within the M9 case, with intake from the front and bottom, and exhaust through the top and rear.
6. Operation
6.1 Front Panel Controls
- Power Button: Press to turn the PC on or off.
- Restart Button: Press to restart the PC.
- LED Switch Button: Cycles through various ARGB lighting modes for the pre-installed fans. Hold to turn off/on ARGB lighting.
6.2 Front Panel Ports
- 1x Type-C 3.0 Port: For high-speed data transfer with compatible devices.
- 1x USB 3.0 Port: For high-speed data transfer with compatible devices.
- 1x USB 2.0 Port: For connecting peripherals.
- Microphone & Audio Jacks: For connecting headphones, speakers, and microphones.

Image 6.1: The front I/O panel of the M9 case, detailing the location of USB ports, audio jacks, and control buttons.
7. Maintenance
Regular maintenance helps ensure optimal performance and longevity of your PC components.
- Dust Filters: The M9 case includes dust filters on the top and bottom. Regularly remove and clean these filters to prevent dust buildup and maintain good airflow.
- Interior Cleaning: Periodically use compressed air to remove dust from inside the case, especially from fan blades and heatsinks. Ensure the PC is powered off and unplugged before cleaning.
- Exterior Cleaning: Wipe the exterior surfaces, including the glass panels and walnut wood elements, with a soft, damp cloth. Avoid abrasive cleaners.
8. Troubleshooting
If you encounter issues with your FOIFKIN M9 PC case, refer to the following common problems and solutions:
| Problem | Possible Solution |
|---|---|
| PC does not power on. |
|
| Fans are not spinning or ARGB lighting is not working. |
|
| USB ports or audio jacks on the front panel are not working. |
|
| High internal temperatures. |
|
9. Warranty and Support
FOIFKIN products are manufactured to high-quality standards. For warranty information or technical support, please contact FOIFKIN customer service through the retailer where the product was purchased or visit the official FOIFKIN website for support resources.
When contacting support, please have your product model (M9) and purchase details ready.