1. Introduction
Thank you for choosing the RELIDOL X62 Drone. This foldable remote control quadcopter is equipped with a 1080P HD camera, offering an immersive flying experience with features like voice and gesture control, 3D flips, and one-key operations. This manual provides detailed instructions for safe operation, setup, maintenance, and troubleshooting to ensure you get the most out of your drone.
Safety Precautions
- Always operate the drone in open, clear areas, away from people, animals, and obstacles.
- Do not fly near airports, restricted airspace, or sensitive facilities.
- Ensure the drone's battery and remote control are fully charged before each flight.
- Avoid flying in strong winds or adverse weather conditions.
- Keep fingers and loose clothing away from rotating propellers.
- Adult supervision is recommended for users under 14 years of age.
2. Package Contents
Please verify that all items are present in your package:
- RELIDOL X62 Drone x 1
- Remote Control x 1
- USB Charging Cable x 2
- Spare Propellers x 4
- Drone Battery x 2
- Protective Frame x 4
- Screwdriver x 1
- Carrying Bag x 1
- User Manual x 1

Image: RELIDOL X62 Drone with its remote control, two batteries, two USB charging cables, four spare propellers, and four protective frames, all neatly laid out.
3. Setup Guide
3.1 Battery Installation and Charging
The drone comes with two enhanced batteries, providing up to 25 minutes of flight time. The controller has a built-in battery.
- Drone Battery: Insert the fully charged battery into the battery compartment at the rear of the drone until it clicks into place. To remove, press the release clip and pull the battery out.
- Charging: Use the provided USB charging cables to charge both the drone batteries and the remote control. Connect the USB cable to a 5V/2A adapter (not included) or a computer USB port. The charging indicator will show charging status and turn off when fully charged.

Image: Close-up of the drone's battery compartment with a battery being inserted, alongside two drone batteries and a USB charging cable, illustrating the charging process and long flight time.
3.2 Propeller Installation (if needed)
The drone's propellers are typically pre-installed. If replacement is necessary, ensure you match the propellers to the correct motor arms (indicated by markings on the propellers and drone). Use the provided screwdriver to secure them.
3.3 App Download and Connection
To utilize the full features of your drone, download the dedicated app. Search for "X62DRONE" in your mobile app store (iOS/Android).
- Power on the drone.
- Go to your phone's Wi-Fi settings and connect to the Wi-Fi network named "X62DRONE_xxxxxx".
- Open the "X62DRONE" app. The app interface should display the drone's camera feed.
3.4 Quick Start Guide
Remote Control Quick Start:
- Place the drone on a flat, level surface. Turn on the drone's power switch. The drone lights will flash, indicating standby mode. Ensure the tail of the drone is facing towards you.
- Power on the remote control. The drone and remote control will automatically synchronize frequencies. The drone lights will flash and then turn solid when connected.
- Move both the left and right control sticks of the remote controller simultaneously to the lower left or lower right 45-degree angle. The drone lights will flash and then turn solid, indicating horizontal calibration is complete.
- Press the one-key takeoff button on the remote control for successful takeoff.

Image: Step-by-step visual guide for quick start using the remote control, showing drone placement, power-on, synchronization, calibration, and one-key takeoff.
APP Control Quick Start:
- Place the drone on a flat, level surface. Turn on the drone's power switch. The drone lights will flash, indicating standby mode. Ensure the tail of the drone is facing towards you.
- Power on the remote control. The drone and remote control will automatically synchronize frequencies. The drone lights will flash and then turn solid when connected.
- Download and log in to the "X62DRONE" APP. Connect to the drone's Wi-Fi network "X62DRONE_xxxxxx" on your phone.
- Move both the left and right joysticks of the remote control simultaneously to the lower left or lower right 45-degree angle. The drone light flashes and then turns on, indicating that the horizontal calibration is complete.
- Turn off the remote control (if desired for app-only control). Enter the app control interface, click the icon of "Control Switch", then click the "Take Off" button for successful takeoff.

Image: Step-by-step visual guide for quick start using the mobile application, showing drone placement, power-on, app connection, calibration, and app-based takeoff.
4. Operating Instructions
4.1 Basic Flight Controls
Familiarize yourself with the remote control and app interfaces:
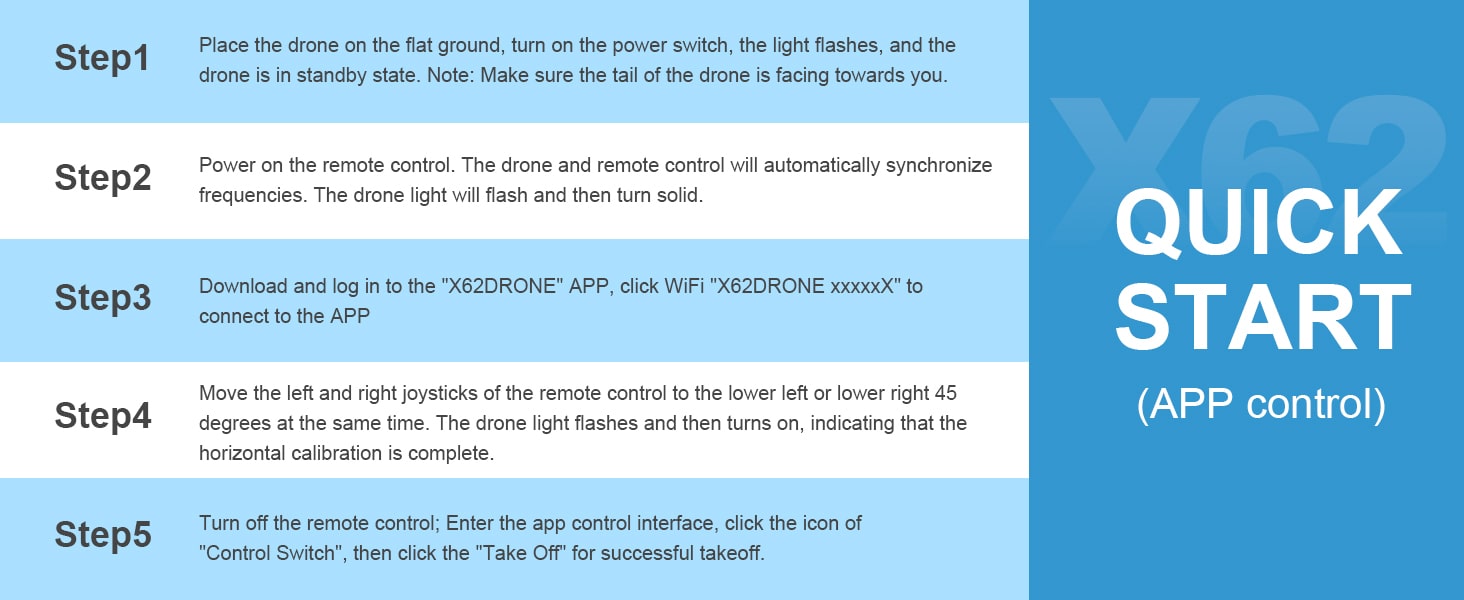
Image: Diagram illustrating the functions of the remote control, including joysticks, photo/video buttons, speed switch, 3D flip, headless mode, and camera adjustments.

Image: Diagram illustrating the functions of the mobile application interface, including virtual joysticks, photo/video, speed switch, tap fly, 360-degree flip, headless mode, gravity control, and gesture selfie.
- Take-off/Landing: Press the One-Key Start button on the remote or in the app. The drone will automatically take off and hover at a certain altitude. Press again to land.
- Altitude Hold: The upgraded hover system ensures stable flight at a certain height, making it easier for beginners to control.
- Directional Control: Use the left joystick for altitude and rotation (yaw), and the right joystick for forward/backward and left/right movement.
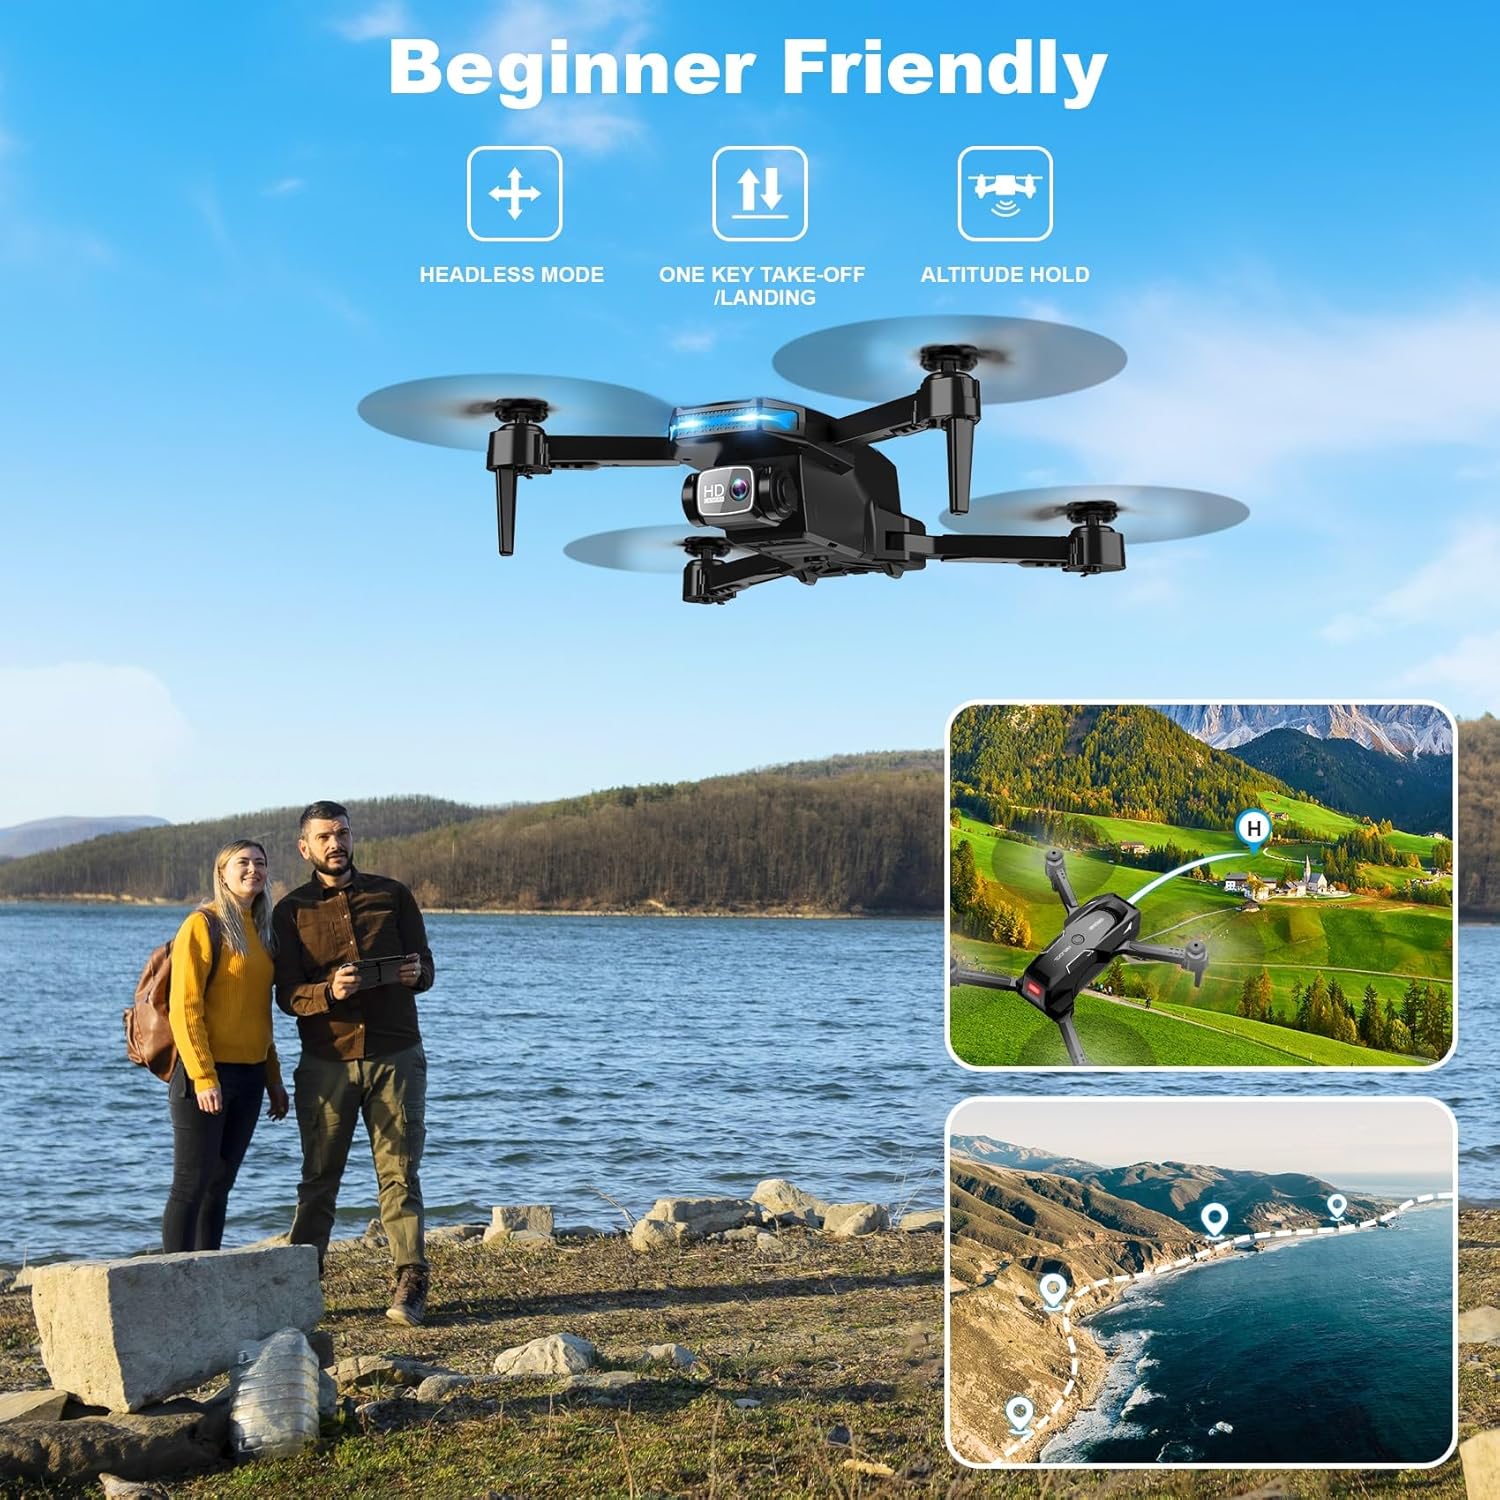
Image: Visual representation of beginner-friendly features including Headless Mode, One Key Take-off/Landing, and Altitude Hold, with a drone flying over a lake and examples of flight paths.
4.2 Advanced Flight Features
- Headless Mode: Press and hold the Take-off/Land button for 4 seconds to activate. In this mode, the drone's orientation is relative to the pilot, eliminating the need to adjust its position before flying. Press again for 4 seconds to cancel.

Image: Drone flying with a circular graphic indicating Headless Mode, emphasizing that it ends the fear of losing direction for beginners.
- 3D Flip: Short press the Speed Switch button on the remote control to perform a 3D flip. Ensure sufficient altitude and clear surroundings before attempting.
- Speed Adjustment: The drone has 3 speed gears (low, medium, high). Short press the Speed Switch button on the remote control to cycle through speeds.

Image: Three drones flying at different speeds, illustrating the 3-Gear Speed feature for progressing from easy to challenging flights.
- Voice Control: Command the drone with simple voice instructions via the app, such as "Take off", "Fly", "Forward", "Backward", "Left", "Right", "Photo", and "Record".

Image: A person using a smartphone to control the drone via gravity sensing, and another person giving voice commands like "Fly", "Forward", and "Photo/Record" to the drone.

Image: A group of people on a boat waving at a drone, with speech bubbles indicating voice commands like "Right", "Record", "Forward", "Left", and "Photo", demonstrating the Sound Control feature.
- Gesture Control (Gesture Photography): Automatically take photos or videos with specific hand gestures. Simply post a "V" sign or a "palm" gesture, and the drone will capture a photo or video within 3 seconds.

Image: The drone's 1080P HD camera with 80-degree adjustable lens, showing real-time transmission to a smartphone, and icons for recording videos and taking photos with gestures.

Image: A group of people on a beach making hand gestures towards a drone, with blue boxes indicating gesture recognition, demonstrating the Gesture Photography feature.
- Gravity Control: Enables the drone to mimic the movement of your mobile phone. Tilt your phone to control the drone's direction.

Image: A person holding a smartphone and tilting it, with an arrow indicating the drone's corresponding movement, illustrating the Gravity Control feature.
- Tap Fly (Waypoint Flyflight): Draw a flight path on your smartphone screen within the app, and the drone will automatically follow the designated route.
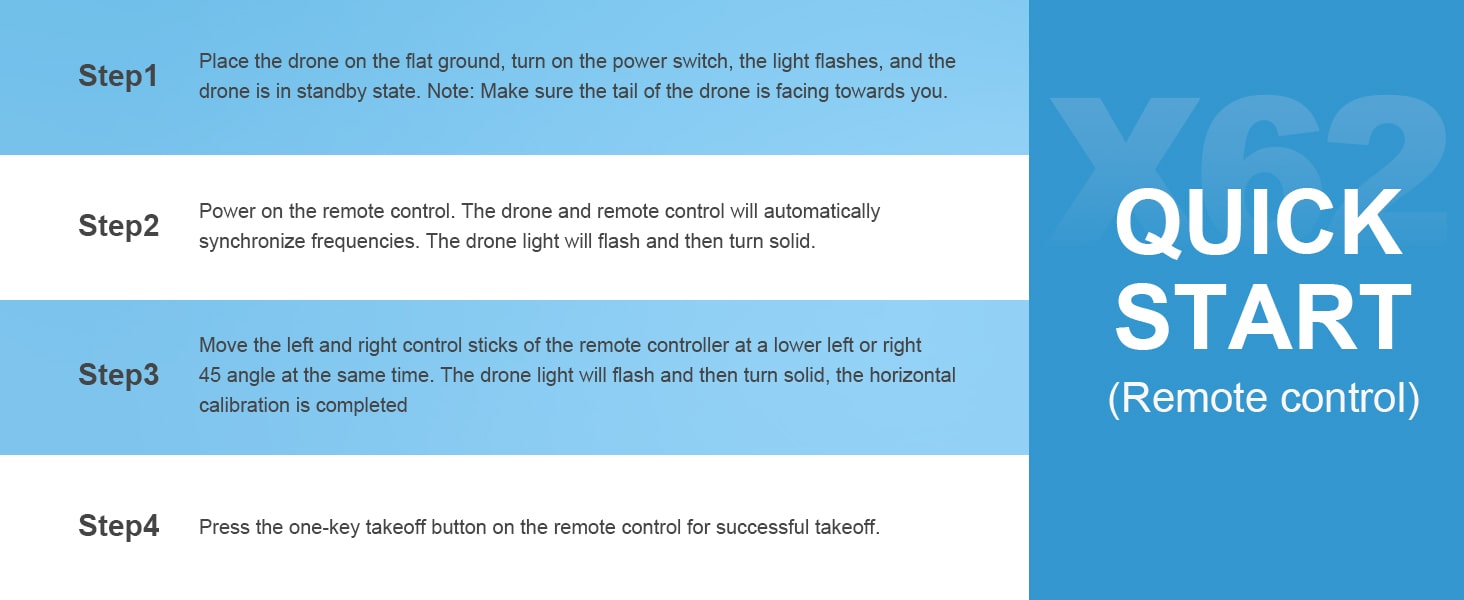
Image: A hand drawing a path on a smartphone screen, with the drone flying along a similar path over a landscape, demonstrating the Tap Fly feature for creating stunning sky trails.
4.3 Camera Operation (Photo/Video) and FPV Mode
The drone is equipped with a 1080P HD 80-degree adjustable lens for capturing high-quality photos and videos.

Image: Close-up of the drone's camera, highlighting its 110-degree wide-angle and 80-degree adjustable features, along with icons for taking photos and videos.
- Taking Photos: Press the Photo/Video button on the remote control or tap the camera icon in the app.
- Recording Videos: Press the Photo/Video button again on the remote control or tap the video icon in the app to start/stop recording.
- FPV Mode: Connect to your drone via Wi-Fi to experience First-Person View (FPV) directly on your smartphone. Enjoy real-time HD video streaming from the drone's perspective. The control range is up to 328 feet, with a transmission range of 164 feet.
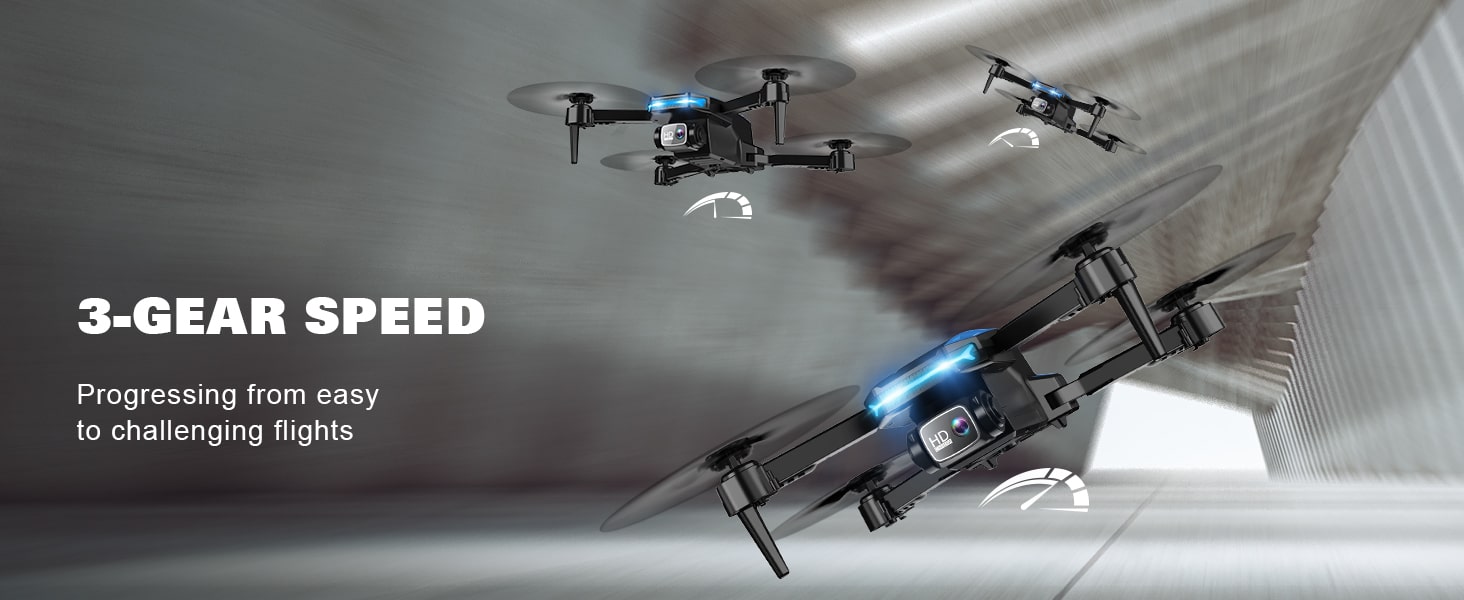
Image: A drone flying with a smartphone displaying its FPV feed, showing the control range of 328 feet and transmission range of 164 feet.
5. Maintenance
5.1 Cleaning the Drone
Regularly clean your drone to ensure optimal performance.
- Use a soft, dry cloth to wipe down the drone's body.
- Gently remove any dust or debris from the motors and propellers.
- Ensure the camera lens is clean for clear footage.
5.2 Propeller Replacement
If a propeller is damaged, replace it with a spare from the package.
- Identify the damaged propeller.
- Use the provided screwdriver to carefully remove the screw holding the propeller.
- Replace with a new propeller, ensuring it matches the original (A or B type).
- Secure the new propeller with the screw.

Image: A drone with propeller guards, indicating full protection for the propellers during flight.
5.3 Battery Care and Storage
- Do not overcharge or over-discharge batteries.
- Store batteries in a cool, dry place away from direct sunlight and extreme temperatures.
- If storing for extended periods, charge batteries to about 50% capacity.
6. Troubleshooting
| Problem | Possible Cause | Solution |
|---|---|---|
| Drone does not respond to remote control. | Low battery on drone or remote; Not paired correctly. | Charge batteries; Re-pair drone and remote control following setup steps. |
| Drone flies erratically or drifts. | Not calibrated; Damaged propeller; Strong wind. | Perform horizontal calibration; Replace damaged propellers; Fly in calm conditions. |
| No FPV video feed in app. | Not connected to drone's Wi-Fi; App issue. | Ensure phone is connected to "X62DRONE_xxxxxx" Wi-Fi; Restart app and drone. |
| Drone does not take off. | Low battery; Not calibrated; Obstruction. | Charge battery; Calibrate drone; Ensure propellers are clear. |
7. Specifications
| Feature | Specification |
|---|---|
| Model Name | X62 |
| Brand | RELIDOL |
| Color | Black |
| Camera Resolution | 1080P HD |
| Adjustable Camera Angle | 80° |
| Connectivity Technology | Wi-Fi |
| Battery Capacity | 1000 Amp Hours |
| Flight Time | Up to 25 minutes (with 2 batteries) |
| Control Modes | Remote Control, APP, Voice Control |
| Special Features | Headless Mode, Altitude Hold, 3D Flip, Gesture Control, Gravity Control, Tap Fly, 3 Speed Gear, Emergency Stop |
| Material | Plastic, Metal |
| Item Weight | 1.15 pounds |
| Package Dimensions | 8.5 x 7.91 x 2.83 inches |
| Recommended Age | Over 14 years |
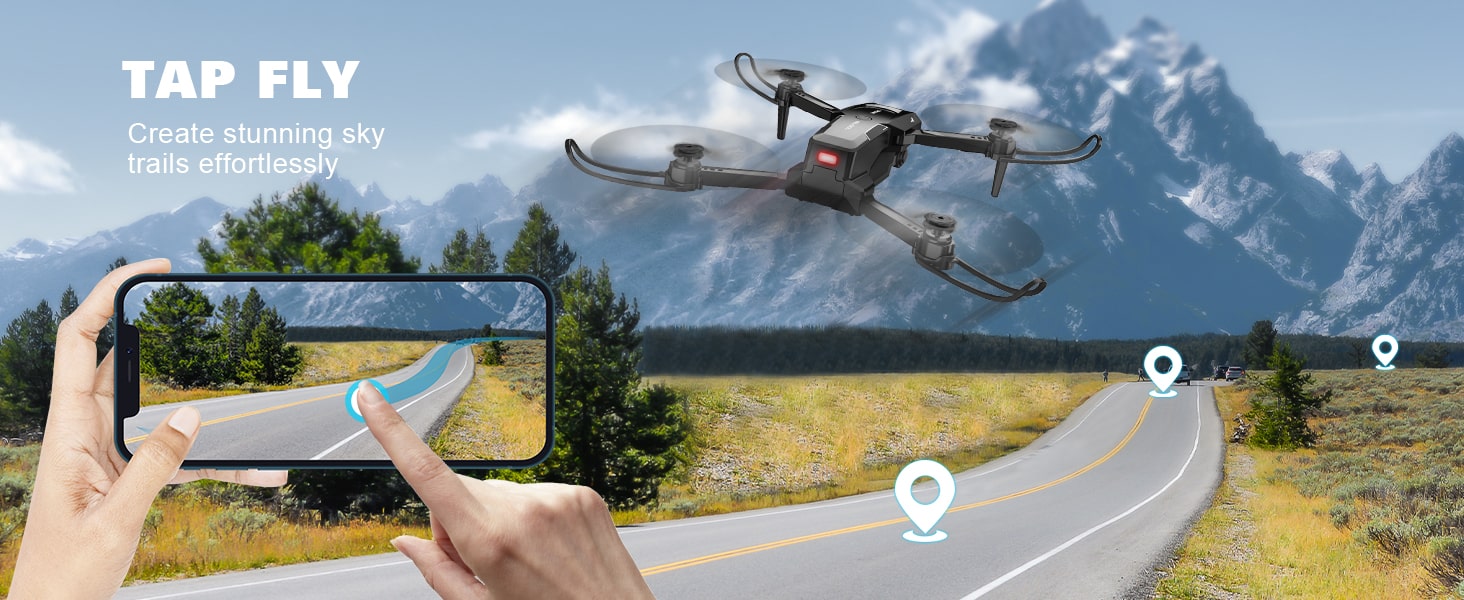
Image: Detailed diagram showing the dimensions of the RELIDOL X62 drone in both unfolded and folded states, alongside a comprehensive list of all included accessories.
8. Warranty and Support
8.1 Warranty Information
RELIDOL offers the following warranty for your X62 drone:
- 45-Day Replacement: If your X62 drone fails within 45 days from the date of arrival during normal usage, we will replace it at no cost to you.
- 6-Month Guarantee: The main components of the RELIDOL drone are guaranteed for 6 months from the date of purchase.
8.2 Customer Support
If you have any questions about the product, require assistance, or need to claim warranty service, please do not hesitate to contact us. We are committed to providing friendly and sincere service.
Email: support@relidol.com
We aim to answer all inquiries within 12 hours. We also provide refund and exchange services for quality-related issues.

Image: A customer service representative wearing a headset, with text indicating friendly and sincere service and the support email address: support@relidol.com.


