1. Introduction
Thank you for choosing the GarveeHome 3-Drawer Lateral File Cabinet. This manual provides essential information for the safe assembly, operation, and maintenance of your new filing cabinet. Please read these instructions thoroughly before beginning assembly and retain them for future reference.
This durable metal filing cabinet is designed to organize Letter, Legal, and A4 size documents efficiently. It features three spacious drawers with a single locking mechanism for security, making it suitable for home offices and various workspaces.

Image 1.1: Front view of the GarveeHome 3-Drawer Lateral File Cabinet in black.
2. Safety Information
Please observe the following safety precautions during assembly and use:
- Read All Instructions: Ensure you understand all assembly steps before proceeding.
- Two-Person Assembly: Due to the weight and size of the cabinet, assembly by two adults is recommended to prevent injury.
- Use Proper Tools: Ensure you have the correct tools for assembly. Some screws may be in tight spaces, requiring specific tools like a magnetic screwdriver or a small ratchet.
- Weight Capacity: Do not exceed the maximum weight capacity of 55 lbs (25 kg) per drawer. The total weight limit for the cabinet is 165 lbs (75 kg). Overloading can cause instability and damage.
- Stability: Place the cabinet on a level, stable surface. Ensure all drawers are closed before moving the cabinet.
- Pinch Points: Be aware of pinch points during assembly and when opening/closing drawers.
- Children and Pets: Keep children and pets away from the assembly area. Do not allow children to climb on or play with the cabinet.
- Secure Packaging: Dispose of packaging materials responsibly. Be aware that some packaging (e.g., Styrofoam) can create small, static-charged particles that are difficult to clean.
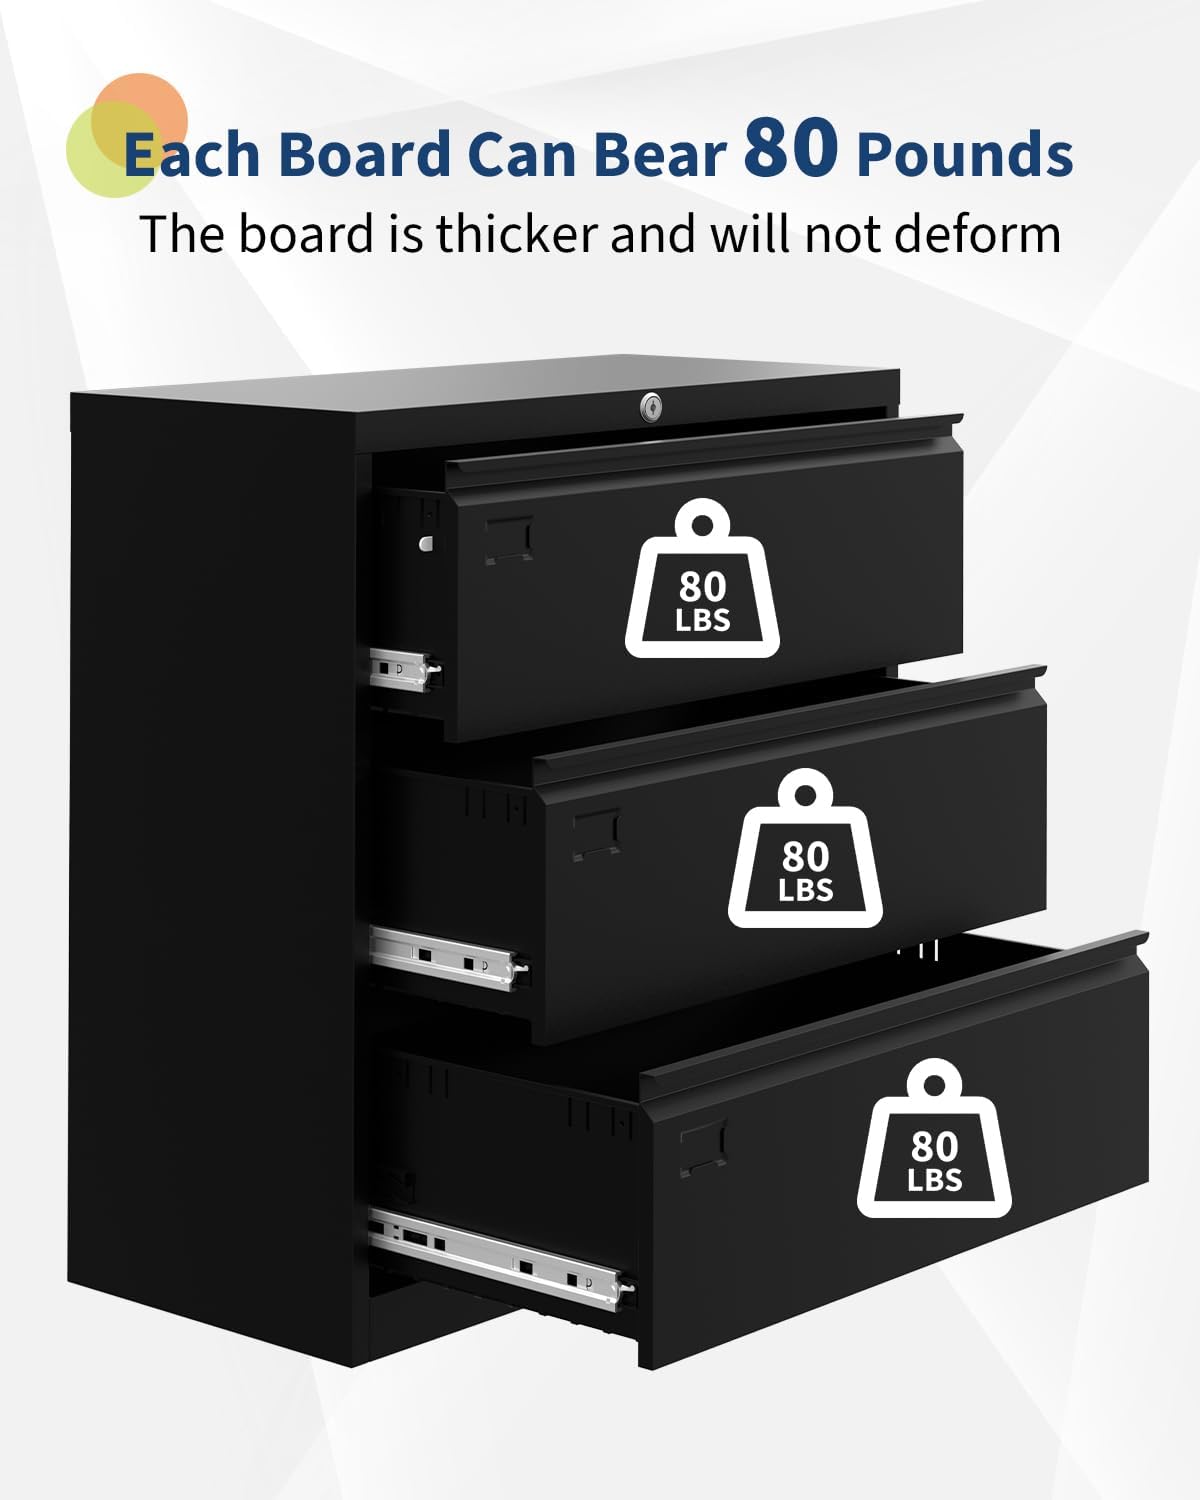
Image 2.1: Illustration demonstrating the robust capacity of each drawer for stored items.
3. Package Contents
Before assembly, verify that all components are present and undamaged. If any parts are missing or damaged, please contact customer support.
- Top Panel (x1)
- Bottom Panel (x1)
- Side Panels (x2)
- Back Panel (x1)
- Drawer Fronts (x3)
- Drawer Sides & Backs (x6 each)
- Drawer Bottoms (x3)
- Drawer Slides (x6 pairs)
- Lock Mechanism (x1)
- Keys (x2)
- Hanging File Bars (x6)
- Assembly Hardware (screws, bolts, nuts, etc.)
- Instruction Manual (x1)
4. Assembly Instructions
Follow these steps carefully for proper assembly. It is recommended to assemble the cabinet on a soft, clean surface to prevent scratches.
- Prepare Components: Unpack all parts and lay them out. Identify each component using the parts list. Keep hardware organized.
- Assemble the Frame: Attach the side panels to the bottom panel using the provided screws. Ensure they are securely fastened. Then, attach the back panel.
- Install Drawer Slides: Secure the cabinet-side drawer slides to the inner walls of the cabinet frame. Pay close attention to the orientation (left/right, top/bottom).
- Assemble Drawers: For each drawer, attach the side and back panels to the drawer front. Slide the drawer bottom into the grooves. Secure the drawer-side slides to the assembled drawer box.
- Install Drawers: Carefully align the drawer slides on the assembled drawers with the cabinet-side slides and push the drawers into the cabinet until they click into place.
- Attach Top Panel: Place the top panel onto the assembled frame and secure it with the remaining screws.
- Install Lock Mechanism: Insert the lock cylinder into the designated hole on the top drawer front or top panel, depending on the design. Connect the locking rod(s) to ensure all drawers can be secured simultaneously. Test the lock with the provided keys.
- Insert Hanging File Bars: Place the adjustable hanging file bars into the designated slots within each drawer to accommodate Letter, Legal, or A4 size files.
Tip: Some assembly points may have limited space for tools. A magnetic screwdriver or a small ratchet set can be helpful for tightening screws in tight corners.

Image 4.1: The cabinet's dimensions are approximately 34.6 inches wide, 15.7 inches deep, and 40.2 inches high, providing ample storage space.
5. Operating Instructions
5.1 Opening and Closing Drawers
The drawers are designed for smooth, full-extension operation. To open, gently pull the drawer handle. To close, push the drawer firmly until it is fully seated within the cabinet. Avoid slamming drawers to ensure longevity of the slides.

Image 5.1: Detail of the stainless steel ball-bearing drawer slides, designed for silent and smooth operation.
5.2 Using the Locking Mechanism
Your GarveeHome file cabinet features a single lock that secures all three drawers simultaneously. To lock the cabinet:
- Ensure all three drawers are fully closed and flush with the cabinet frame.
- Insert one of the provided keys into the lock cylinder located on the top drawer.
- Turn the key clockwise to engage the locking mechanism.
- Remove the key. The drawers are now secured.
To unlock, insert the key and turn it counter-clockwise. Always remove the key after locking or unlocking.

Image 5.2: The integrated lock mechanism with keys provides security for confidential documents.

Image 5.3: The linkage lock system ensures all drawers are secured with a single key turn.
5.3 Adjusting Hanging File Bars
Each drawer is equipped with adjustable hanging file bars to accommodate different document sizes (Letter, Legal, A4). Simply lift and reposition the bars within the designated slots to fit your file folders.
6. Maintenance
Proper care will extend the life and appearance of your filing cabinet.
- Cleaning: Wipe the cabinet surfaces with a soft, damp cloth. For stubborn marks, a mild soap solution can be used, followed by drying with a clean cloth. Avoid abrasive cleaners or harsh chemicals.
- Rust Prevention: The cabinet features a powder-coated finish designed for durability and rust resistance. Avoid prolonged exposure to moisture.
- Drawer Slides: Periodically check drawer slides for smooth operation. If they become stiff, a small amount of silicone-based lubricant can be applied.
- Hardware: Occasionally check all screws and fasteners to ensure they remain tight. Retighten if necessary.

Image 6.1: The cabinet's surface is designed for easy cleaning and resistance to rust.
7. Troubleshooting
If you encounter issues with your GarveeHome file cabinet, refer to the following common problems and solutions:
- Drawers do not close smoothly or fully:
- Check for obstructions inside the drawer or along the slides.
- Ensure the drawer is not overloaded, exceeding the 55 lbs (25 kg) capacity.
- Verify that the drawer slides are correctly installed and aligned.
- Confirm all assembly screws are tightened, especially those securing the frame and slides.
- Lock mechanism is difficult to engage or disengage:
- Ensure all three drawers are completely closed and flush with the cabinet frame before attempting to lock. The lock requires all drawers to be fully seated.
- Check if the key is fully inserted and turned correctly.
- Inspect the locking rods for any bends or obstructions that might prevent proper movement.
- Cabinet feels unstable or wobbly:
- Ensure the cabinet is placed on a flat, level surface.
- Verify that all assembly screws and fasteners are securely tightened.
- Avoid placing excessively heavy items on top of the cabinet.
If these steps do not resolve the issue, please contact customer support for further assistance.
8. Specifications
| Brand | GarveeHome |
| Model Name | 19vskL37yvq5AL-q_D7zTw5K7L |
| Color | Black |
| Product Dimensions (W x D x H) | 34.6"W x 15.7"D x 40.2"H (approx. 88cm W x 40cm D x 102cm H) |
| Material | Alloy Steel |
| Finish Type | Powder Coated |
| Special Feature | Lockable |
| Mounting Type | Floor Mount (Freestanding) |
| Weight Limit (per drawer) | 55 lbs (25 kg) |
| Total Weight Limit | 165 lbs (75 kg) |
| Item Weight | 91.8 pounds (approx. 41.6 kg) |
| Assembly Required | Yes |
| Compatible File Sizes | Letter, Legal, A4 |
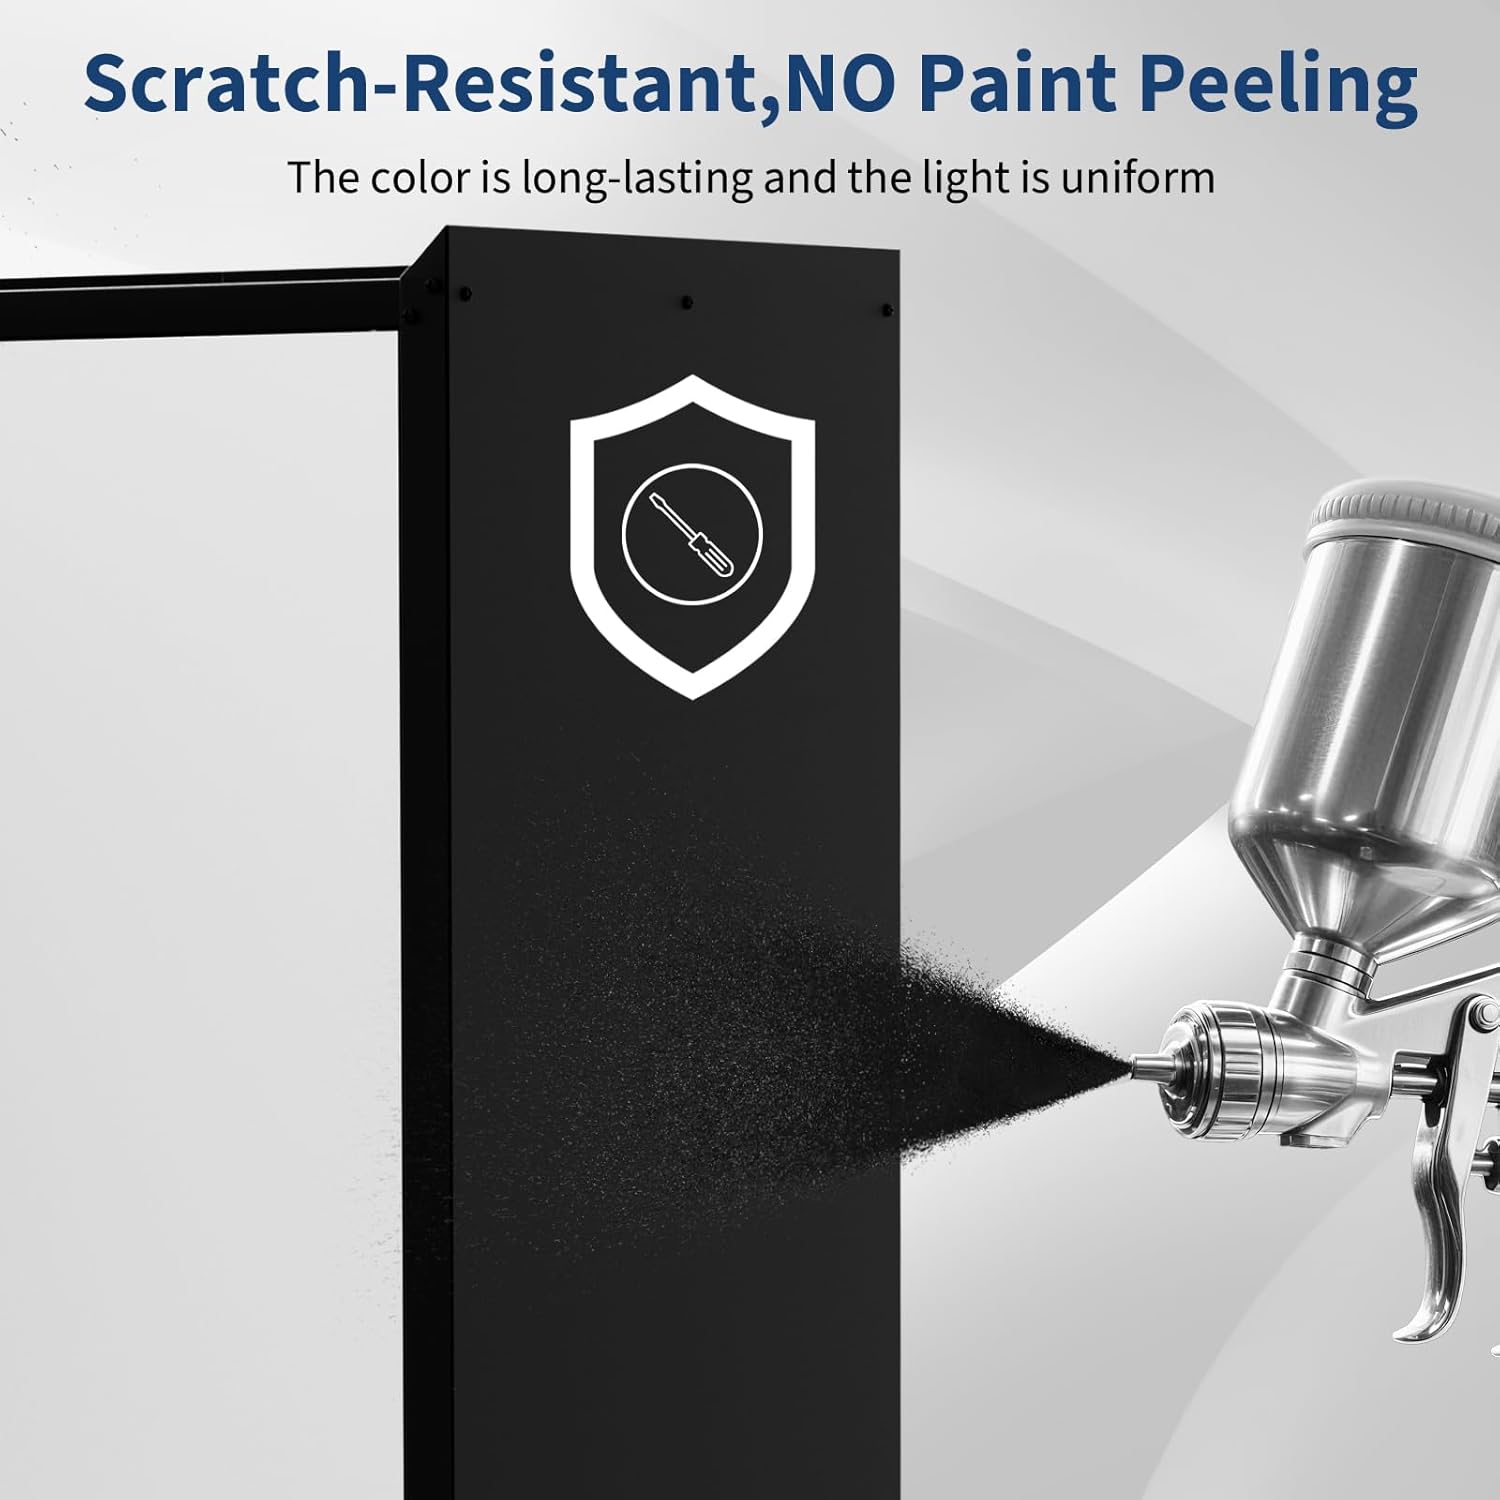
Image 8.1: The cabinet is constructed with SCPP thickened cold-rolled steel plate, featuring multiple protective layers for durability and scratch resistance.

Image 8.2: The materials used are designed to be recyclable and have zero VOC emissions, contributing to clean indoor air quality.
9. Warranty and Support
GarveeHome is committed to providing quality products. While specific warranty details are not provided in this manual, please retain your proof of purchase for any warranty claims.
For product support, missing parts, or troubleshooting assistance, please contact GarveeHome customer service through the retailer where the product was purchased or visit the official GarveeHome website for contact information.
Contact Information:
- Website: GarveeHome Store on Amazon
- Email: Refer to your purchase documentation or retailer's support page.
- Phone: Refer to your purchase documentation or retailer's support page.