1. Introduction
The AzarPixel VX1000 Pro is an advanced LED video wall controller designed for professional display applications. It functions as a video controller, fiber converter, and bypass mode processor, supporting seamless 4K LED display control with advanced scaling and low latency. This device features powerful 4K video processing with HDMI 2.0 and SDI inputs, 10 Gigabit Ethernet and optical fiber outputs, and advanced layer management for creative screen layouts. This manual provides essential information for the proper installation, operation, and maintenance of your VX1000 Pro.
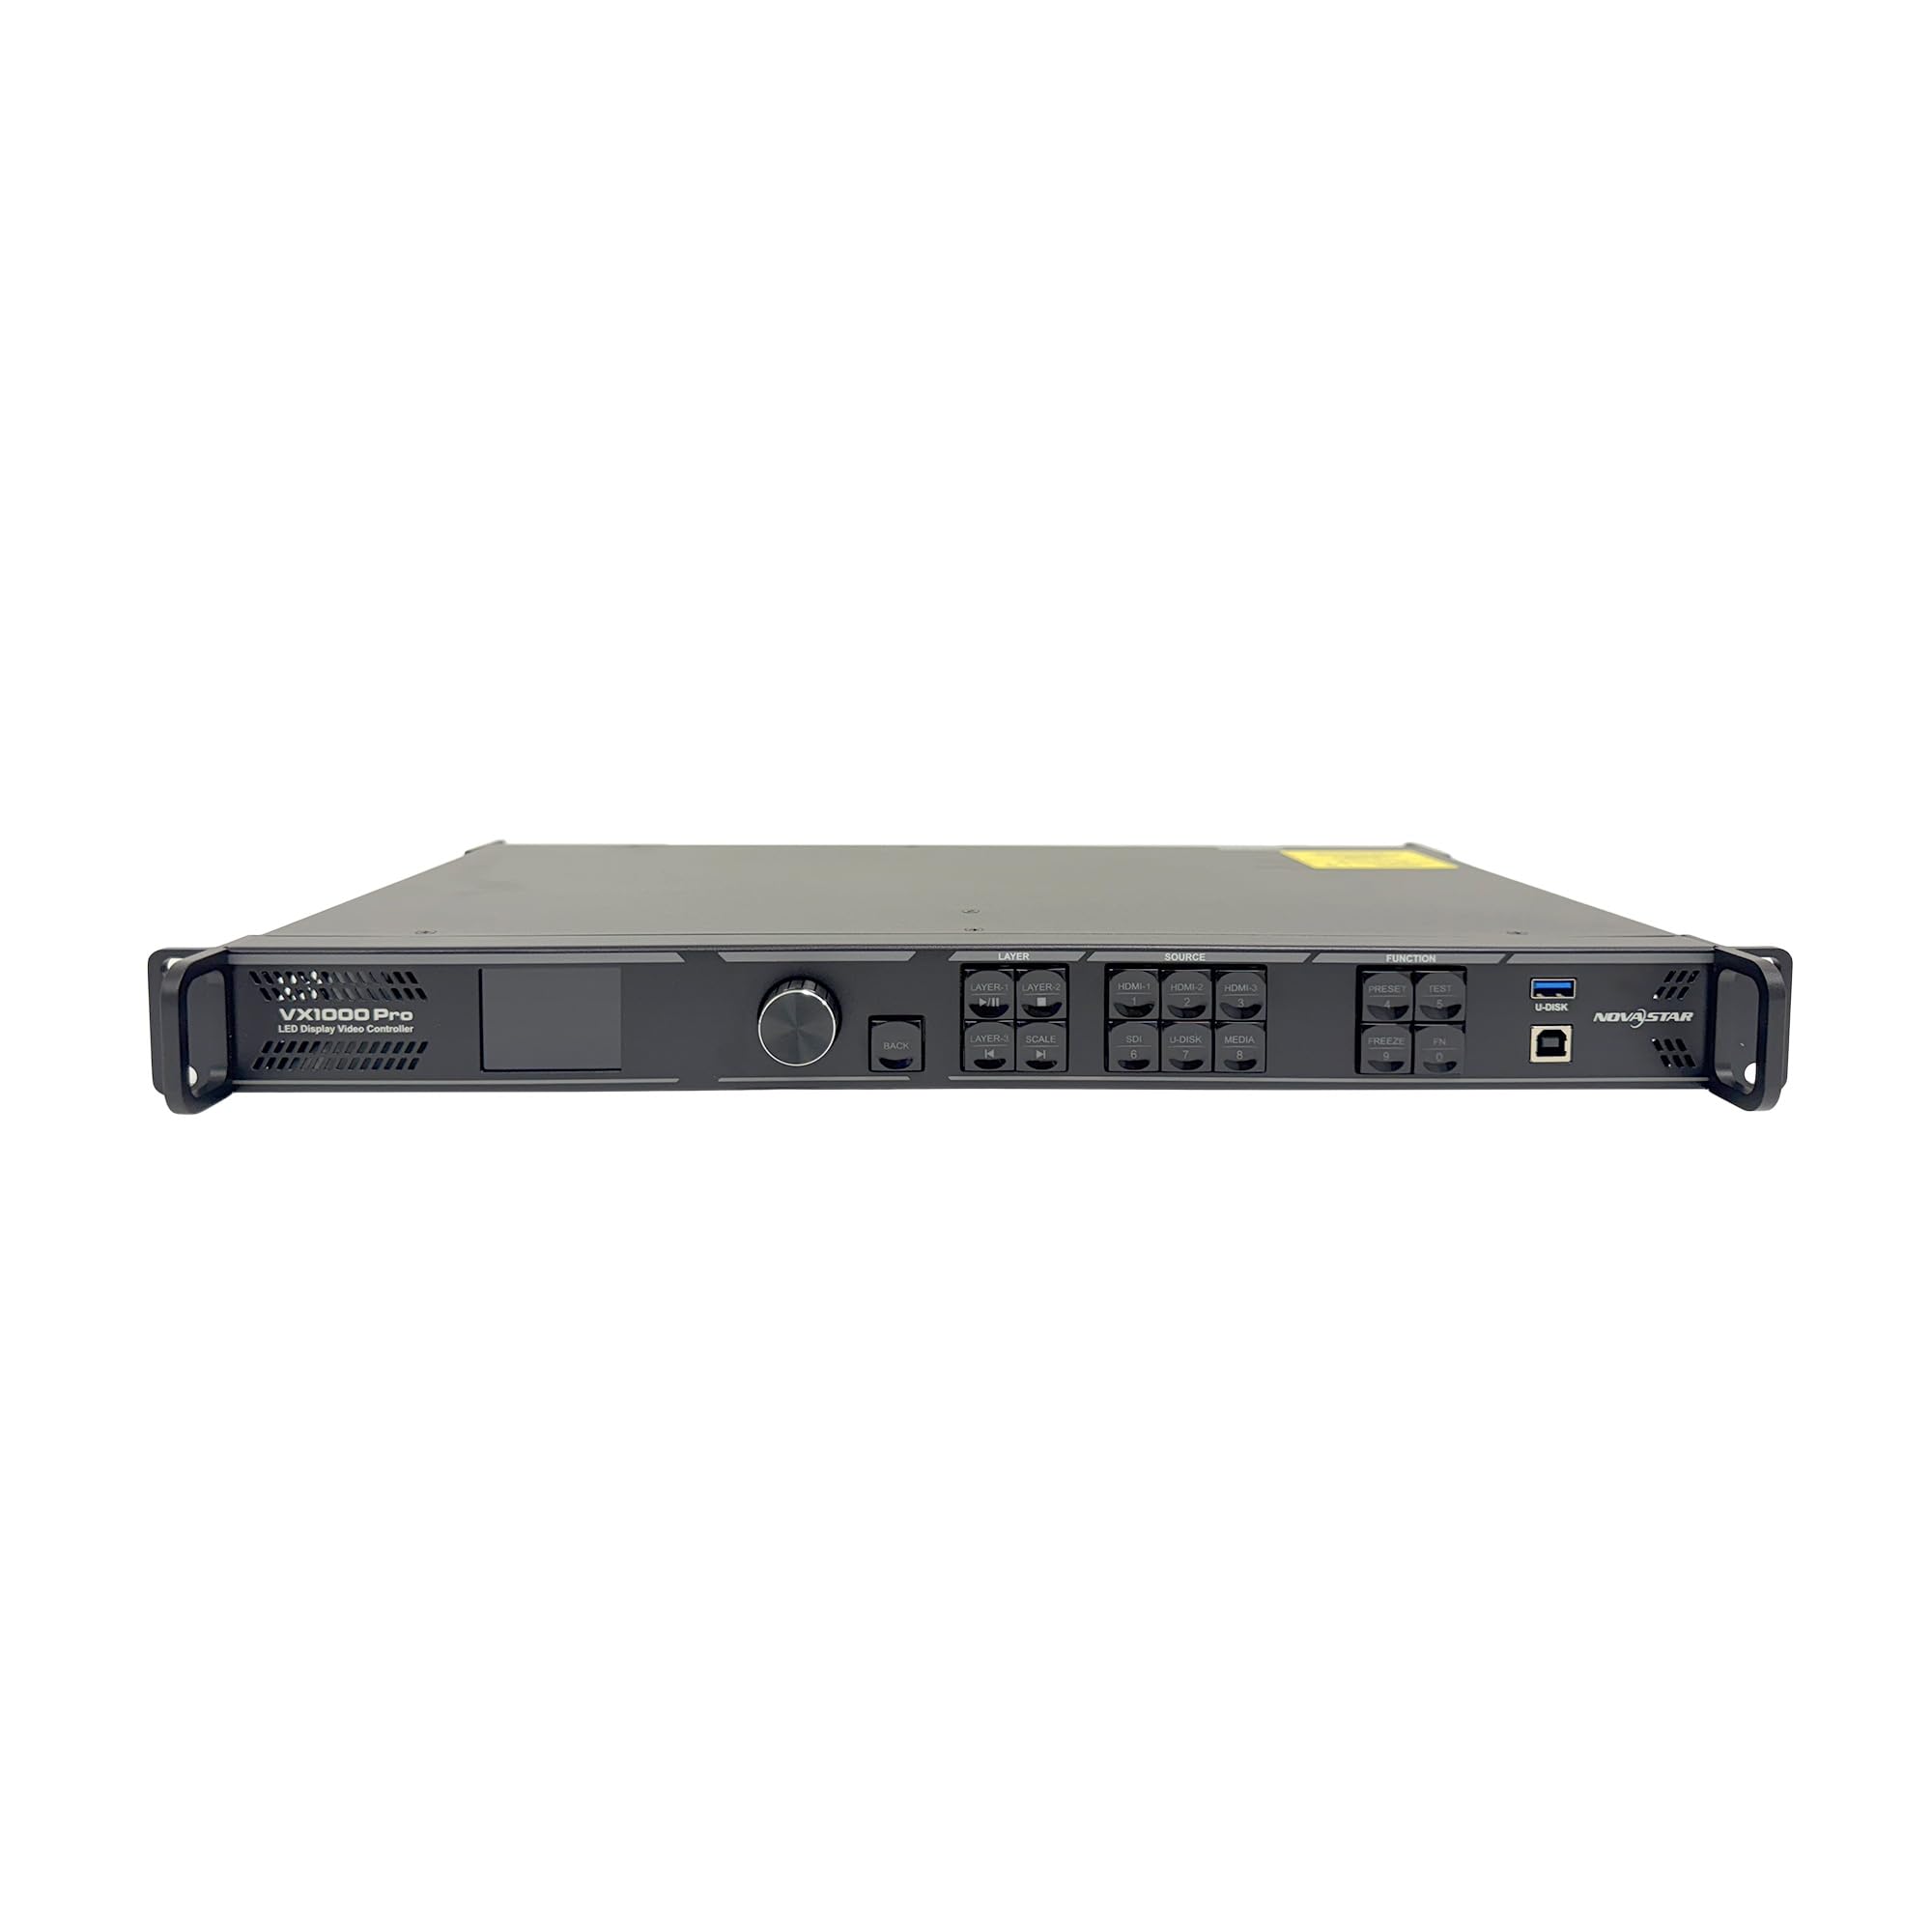
Figure 1: AzarPixel VX1000 Pro LED Video Wall Controller, front view.
2. Setup Instructions
Follow these steps to set up your AzarPixel VX1000 Pro LED Video Wall Controller:
- Unpacking and Inspection: Carefully remove the VX1000 Pro from its packaging. Inspect the device for any signs of damage during transit. Ensure all included components (Power Cable, Ethernet Cable, USB Cable, HDMI Cable, Silicone Dustproof Plug) are present.
- Mounting: The VX1000 Pro is designed for rack mounting. Secure the device in a standard 19-inch equipment rack using appropriate screws. Ensure adequate ventilation around the unit.
- Power Connection: Connect the provided power cable to the VX1000 Pro's power input and then to a suitable power outlet (100-240V AC, 50/60Hz). Do not power on the device yet.
- Input Connections:
- Connect your video sources (e.g., computers, media players) to the HDMI 2.0, HDMI 1.3, or 3G-SDI input ports using appropriate cables.
- For USB playback, insert a USB drive into the designated USB port.
- Output Connections:
- Connect the Ethernet output ports (1-10) to your LED receiving cards using Ethernet cables.
- For long-distance transmission, connect optical fiber cables to the 10Gb optical ports (OPT 1, OPT 2).
- Connect a monitor to the MONITOR output for previewing the output.
- Network Connection: Connect the Ethernet port to your local network for control via software.
- Initial Power On: Once all connections are secure, switch on the power button located on the rear panel. The device will initiate its startup sequence.

Figure 2: Rear panel connections of the VX1000 Pro.
3. Operating Instructions
The VX1000 Pro offers various functionalities for managing your LED video wall. Operation can be performed via the front panel controls or dedicated control software.
3.1 Front Panel Controls

Figure 3: Front panel controls of the VX1000 Pro.
- Display Screen: Shows current status, input/output resolutions, and menu options.
- Knob: Used for navigating menus and adjusting parameters. Press to confirm selections.
- Input Source Buttons: Select the desired video input source (HDMI, SDI, USB).
- Layer Buttons: Manage up to six adjustable layers for complex screen layouts.
- Function Buttons: Access various functions such as scaling, presets, and screen configuration.
3.2 Basic Operation Sequence
- Power On: Ensure the device is powered on.
- Input Selection: Press the corresponding input source button on the front panel or select via software.
- Screen Configuration: Configure your LED screen parameters (resolution, refresh rate, pixel mapping) using the control software. This is crucial for precise pixel calibration.
- Layer Management: Use the layer functions to arrange multiple video sources on your LED wall. Adjust position, size, and priority of each layer.
- Output Adjustment: Fine-tune output settings for optimal visual performance, including brightness, contrast, and color depth.
- Saving Presets: Save frequently used configurations as presets for quick recall. The device supports up to 256 presets.
4. Maintenance
Regular maintenance ensures the longevity and optimal performance of your VX1000 Pro.
- Cleaning:
- Periodically clean the exterior of the device with a soft, dry cloth.
- Ensure ventilation openings are free from dust and debris to prevent overheating. Do not use liquid cleaners directly on the device.
- Firmware Updates: Check the AzarPixel official website for available firmware updates. Keeping the firmware updated ensures access to the latest features and performance improvements. Follow the instructions provided with the firmware update package carefully.
- Environmental Conditions: Operate the device within the specified ambient temperature range of 0–50°C. Avoid exposure to excessive moisture, dust, or direct sunlight.
- Cable Management: Ensure all cables are securely connected and properly routed to prevent accidental disconnections or damage.
5. Troubleshooting
This section addresses common issues you might encounter with the VX1000 Pro.
| Problem | Possible Cause | Solution |
|---|---|---|
| No power | Power cable disconnected; Power switch off; Power supply failure | Check power cable connection; Ensure power switch is ON; Contact support if power supply is suspected faulty. |
| No video output on LED wall | Incorrect input selected; Output cables disconnected/damaged; LED screen not configured correctly; Resolution mismatch | Verify input source selection; Check Ethernet/optical cable connections; Ensure LED screen parameters are correctly set in software; Adjust output resolution to match LED wall. |
| Input signal not detected | Source device off; Input cable disconnected/damaged; Incorrect input port used | Ensure source device is on and outputting signal; Check HDMI/SDI cable connections; Confirm cable is connected to the correct input port. |
| Image distortion or flickering | Poor cable quality; Signal interference; Incorrect refresh rate | Use high-quality, shielded cables; Check for nearby sources of electromagnetic interference; Adjust refresh rate settings. |
| Control software cannot connect to device | Network cable disconnected; Incorrect IP settings; Firewall blocking connection | Check Ethernet cable connection to the network port; Verify IP address settings on both device and computer; Temporarily disable firewall for testing. |
6. Specifications
Key technical specifications for the AzarPixel VX1000 Pro LED Video Wall Controller:
- Model: VX1000 Pro
- Display Type: LED
- Max Pixel Load: 6.5 million pixels (e.g., 10240×8192)
- Input Ports: HDMI 2.0 (loop out), HDMI 1.3 (x2), 3G-SDI, USB
- Output Ports: 10x Ethernet, 2x 10Gb Optical Fiber (OPT 1, OPT 2), Monitor Output
- Video Processing: 4K, SuperView III, Advanced Layer Management (up to 6 layers)
- Latency: Near-zero
- Operating Temperature: 0°C to 50°C (32°F to 122°F)
- Power Supply: 100-240V AC, 50/60Hz
- Material: Metal
- Product Dimensions: 11.89"L x 1.97"W x 19.02"H (30.2cm x 5cm x 48.3cm)
- Item Weight: 8.6 pounds (3.9 kg)
- Included Components: Power Cable, Ethernet Cable, USB Cable, HDMI Cable, Silicone Dustproof Plug
7. Warranty and Support
For warranty information and technical support, please refer to the official AzarPixel website or contact their customer service directly. Keep your purchase receipt as proof of purchase for any warranty claims.
Contact Information: Please visit the AzarPixel Store on Amazon or their official website for the most current support resources and contact details.


