
1. Introduction
The Guiheng MX3 Pro is a versatile 2.4G wireless device combining a mini keyboard, air mouse, and infrared remote control. It is designed to enhance your control experience for various smart devices, including Android TV Boxes, Smart TVs, Projectors, HTPCs, All-in-one PCs, Xbox, Raspberry Pi, and Mini PCs.

Figure 1: The MX3 Pro combines the functions of a remote control, keyboard, and mouse.
2. Product Features
- 2.4G Wireless Connectivity: Provides a stable connection with an operating range of up to 10 meters.
- 6-Axis Somatosensory Air Mouse: Allows for intuitive cursor control by moving the remote in the air.
- Full QWERTY Keyboard: Located on the reverse side for easy text input.
- 7-Color Backlit Buttons: Enhances visibility in low-light conditions.
- Infrared (IR) Remote Control: Standard remote functions for basic device control.
- IR Learning Function: Capable of learning up to 5 keys from your existing TV remote.
- Plug and Play: No additional drivers required for most compatible devices.
- Ergonomic Design: Comfortable to hold and use.
3. Setup and Pairing
3.1 Battery Installation
The MX3 Pro requires two AAA batteries (not included). To install:
- Remove the battery cover on the back of the remote.
- Insert two AAA batteries, ensuring correct polarity (+/-).
- Replace the battery cover.
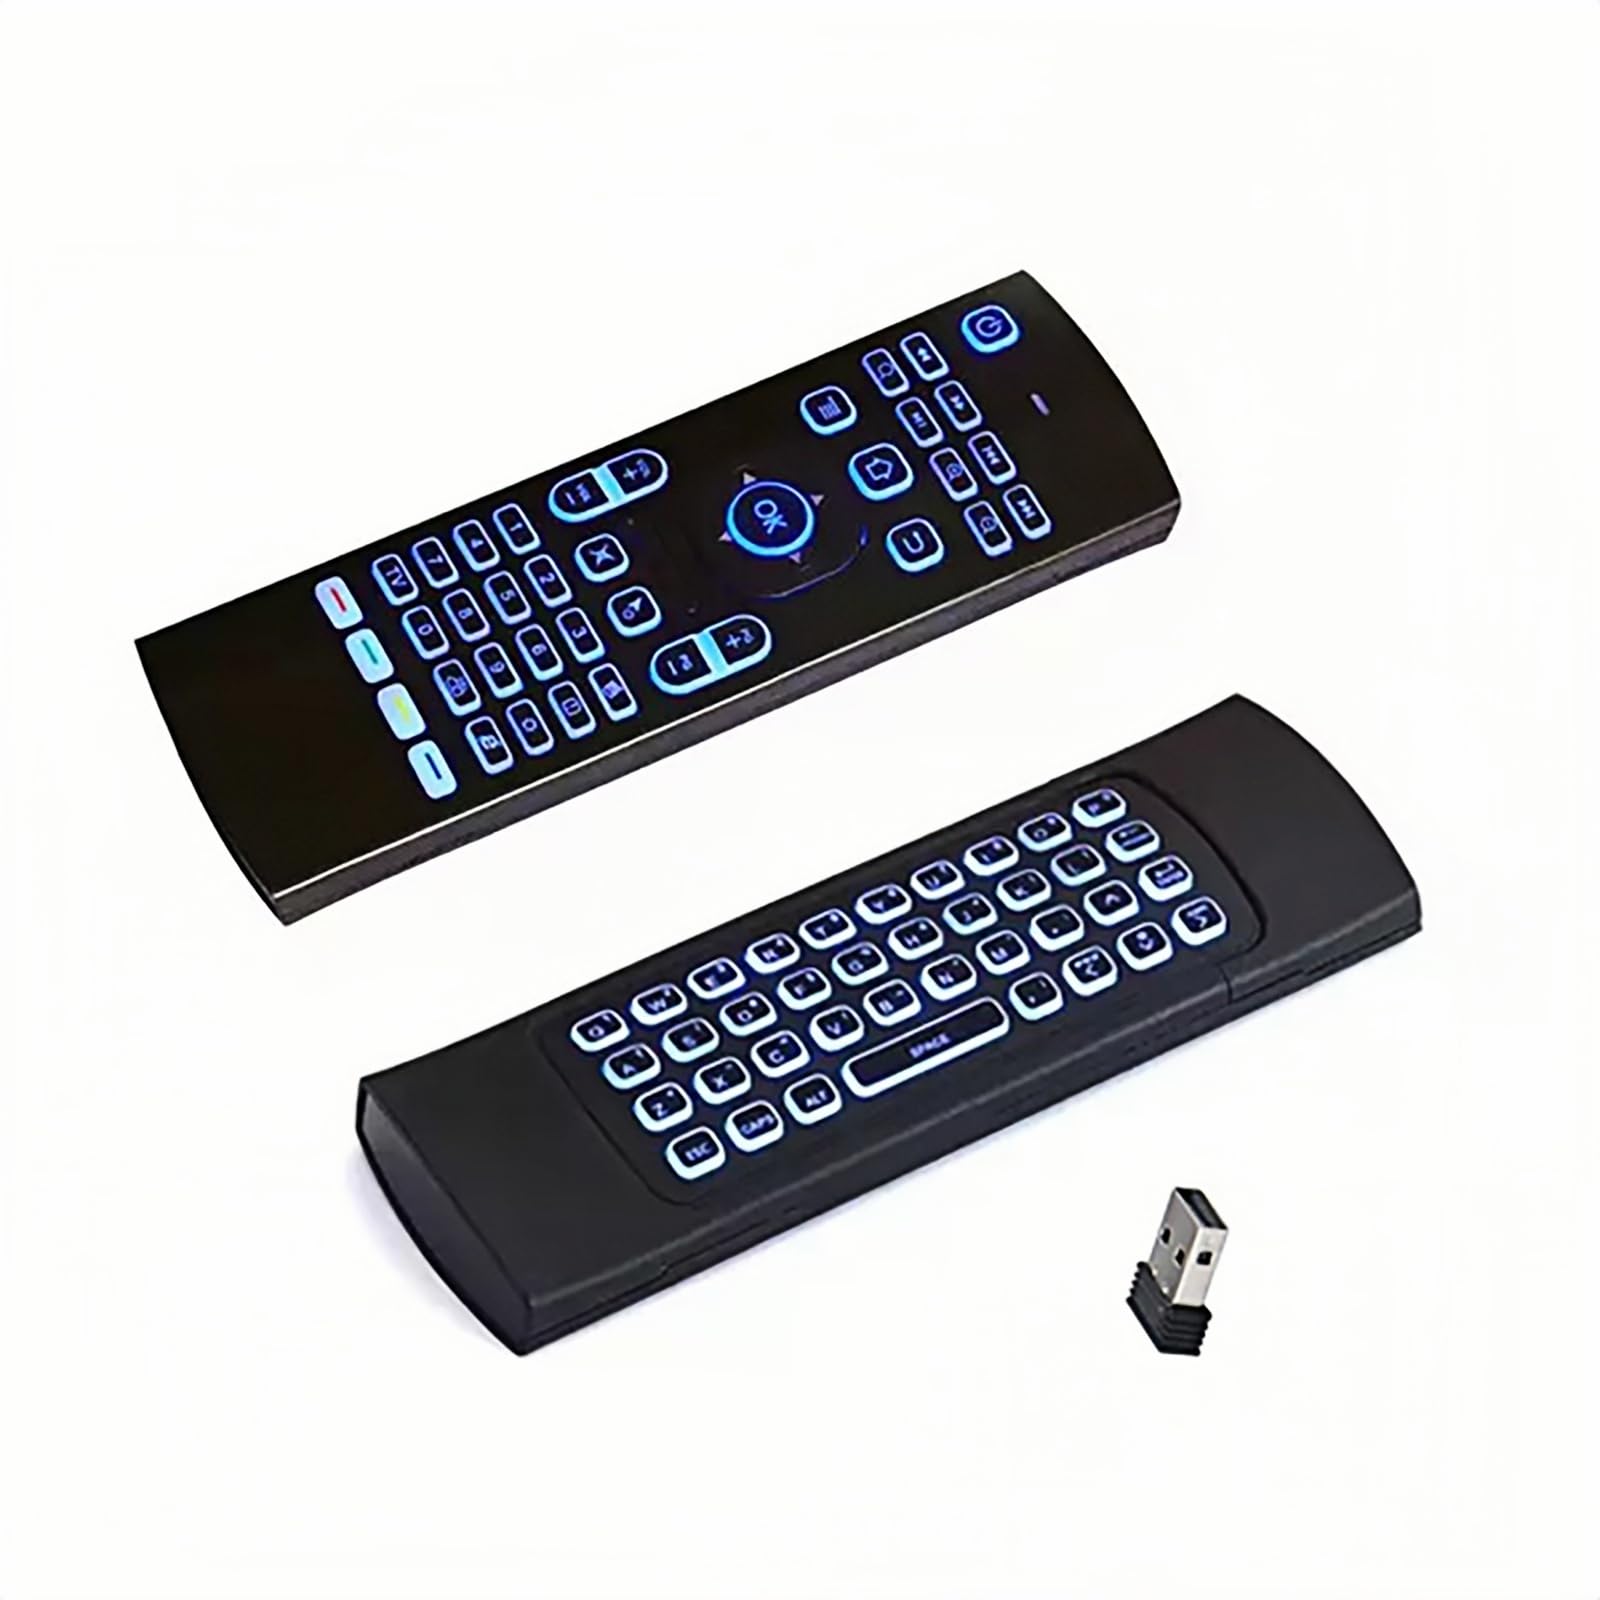
Figure 2: Battery compartment and USB dongle location.
3.2 Initial Pairing (2.4G Wireless)
The remote typically pairs automatically. If not, follow these steps:
- Ensure fresh batteries are properly installed in the remote.
- Press and hold the OK button and the TV button simultaneously for 3 seconds. The red LED indicator on the remote will flash rapidly.
- Insert the USB dongle into an available USB port on your device (e.g., Android TV Box, Mini PC).
- The red LED indicator on the remote will stop flashing, indicating successful pairing.
- Test by moving the remote to see if the cursor moves on your screen. If not, press the cursor lock button and try again. If still unsuccessful, try plugging the USB dongle into a different USB port on your device.

Figure 3: The MX3 Pro remote and its 2.4GHz USB dongle, compatible with various devices.
4. Operating Instructions
4.1 Remote Control Side
The front side of the MX3 Pro functions as a traditional remote control with dedicated media and navigation buttons.

Figure 4: MX3 Pro Remote Control Side Button Layout.
- Power Button: Turns the device on/off (IR learning required for TV power).
- Directional Pad (OK button in center): For navigation and selection.
- Volume Up/Down (VOL+ / VOL-): Adjusts audio volume.
- Home Button: Returns to the main screen/menu.
- Return Button: Goes back to the previous screen.
- Page Up/Down (PG+ / PG-): Scrolls through pages.
- 2.4G/IR Switch: Toggles between 2.4G wireless mode and IR mode.
- IR Study Keys (Colored buttons): Used for programming IR functions.
4.2 Keyboard Side
Flip the remote over to access the full QWERTY keyboard for typing. The remote automatically detects which side is facing up and activates the corresponding input mode.
4.3 Air Mouse Function
The MX3 Pro features a 6-axis gyroscope and G-sensor for air mouse functionality. Simply move the remote in the air to control the cursor on your screen. Press the cursor lock button to disable or enable the air mouse function as needed.
5. IR Learning Function
The MX3 Pro can learn up to 5 functions from your existing TV remote, typically for power and volume control.
- Press and hold the TV button on the MX3 Pro for 3 seconds. The red LED indicator will flash rapidly, then stay solid, indicating it's in learning mode.
- Point your original TV remote's IR emitter directly at the MX3 Pro's IR emitter (usually at the top) from a distance of 1-3 cm.
- Press the button on your original TV remote that you wish to learn (e.g., Power button). The MX3 Pro's red LED will flash three times and then remain solid, indicating successful learning.
- Repeat step 3 for up to 4 other buttons (e.g., Volume Up, Volume Down, Mute, Input).
- After learning all desired buttons, press the TV button again on the MX3 Pro to exit learning mode. The red LED will turn off.
Note: Some TV remote codes may not be compatible with the learning function.
6. Backlight Control
The MX3 Pro features 7-color LED backlighting for improved visibility in dark environments. The backlight automatically illuminates the side facing upwards when a button is pressed, conserving battery life.

Figure 5: The MX3 Pro features a seven-color dazzling backlight with arbitrary adjustment.
To cycle through the backlight colors or turn it off, locate the dedicated backlight button (often represented by a light bulb icon or similar) on the remote side and press it repeatedly.
7. Compatibility
The MX3 Pro is compatible with a wide range of operating systems and devices:
- Android TV Box
- Android Smart TV
- Projector
- HTPC
- All-in-one PC
- Xbox
- Raspberry Pi
- Mini PC
- Networked Set-top Box
- Laptop (Windows, Mac OS, Linux)
Important Compatibility Notes:
- This remote is generally not compatible with Amazon Fire TV and Fire TV Stick.
- Some Samsung and Sony Smart TVs may have limited compatibility.
- A few keys might not be applicable to your specific device due to different manufacturer codes.
- The keyboard function may not be fully compatible with older Nvidia Shield TV models (e.g., 2015).

Figure 6: The MX3 Pro is compatible with various operating systems and devices.
8. Troubleshooting
| Problem | Solution |
|---|---|
| Remote not pairing / Red LED not flashing during pairing. |
|
| Air mouse cursor is erratic or jumpy. |
|
| Some keys do not work on my device. |
|
| IR learning fails. |
|
| Backlight drains batteries quickly. |
|
9. Specifications
| Feature | Detail |
|---|---|
| Brand | Guiheng |
| Model Name | MX3 Pro |
| Connectivity Technology | 2.4G Wireless (USB Dongle) |
| Special Feature | Ergonomic, Backlit, Air Mouse, IR Learning |
| Color | 7 Color LED Backlight |
| Battery Type | 2 x AAA Batteries (not included) |
| Item Weight | 0.11 Kilograms |
| Operating Range | Up to 10 meters |

Figure 7: MX3 Pro Product Dimensions.
10. Maintenance
- Keep the remote clean by wiping it with a soft, dry cloth.
- Avoid exposing the remote to extreme temperatures, humidity, or direct sunlight.
- Do not drop or subject the remote to strong impacts.
- Remove batteries if the remote will not be used for an extended period to prevent leakage.
11. Warranty and Support
This product comes with a limited warranty. Please refer to the product packaging or contact your retailer for specific warranty terms and conditions. For technical support or further assistance, please contact the seller or manufacturer directly.